In this tutorial, How to Git Revert Commit is already pushed to a remote repository. Sometimes I recover wrong changes (commits) in a coding project.

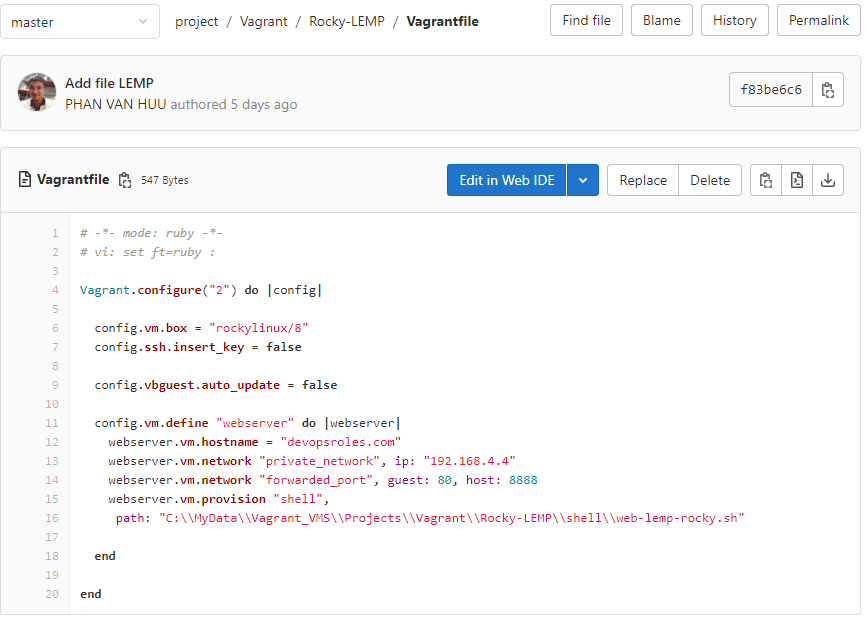
For example, File Vagrantfile on the remote repository with the content below

I have to change the content of this file as below

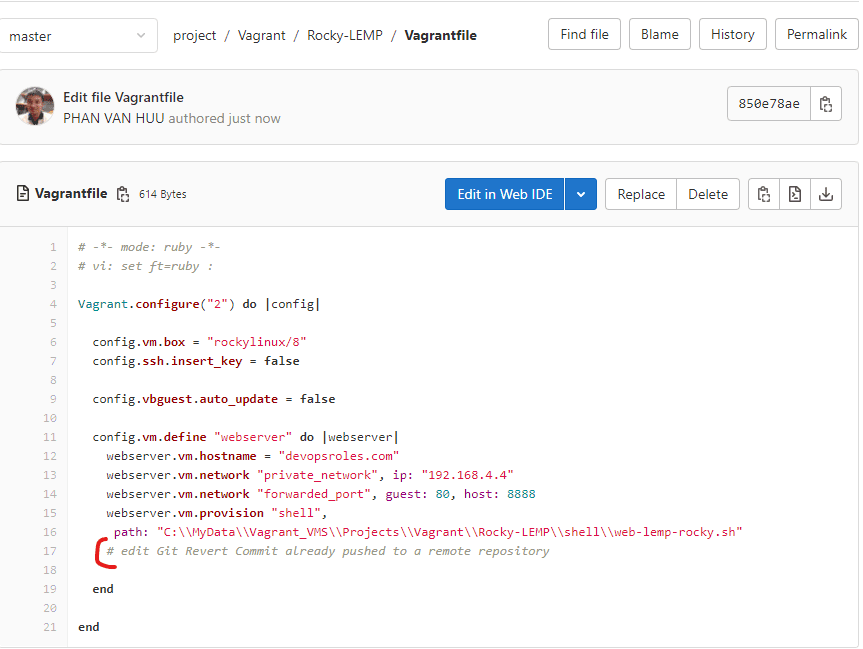
Table of Contents
How do you see the last commit?
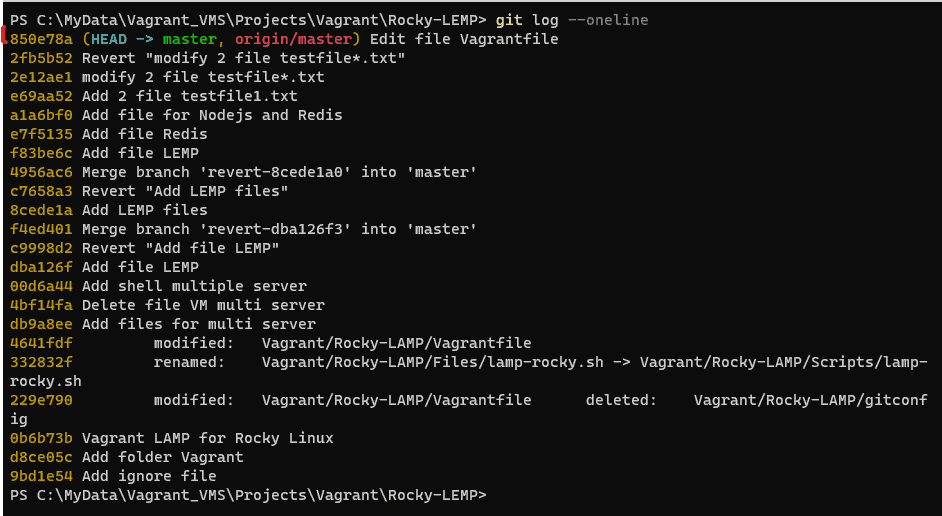
Use the git log command to see the hash of each Git commit, the message associated with each commit, and more metadata.
git logYou can see the last commit simplify the output terminal as command below
git log --oneline
How to undo this commit?
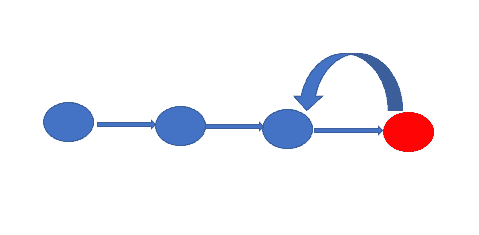
git revert <commit hash>- This command will create a new commit with the “Revert” word at the beginning of the message.
- Check your repository status
- After this, I will be pushed to the remote repository with the git push command
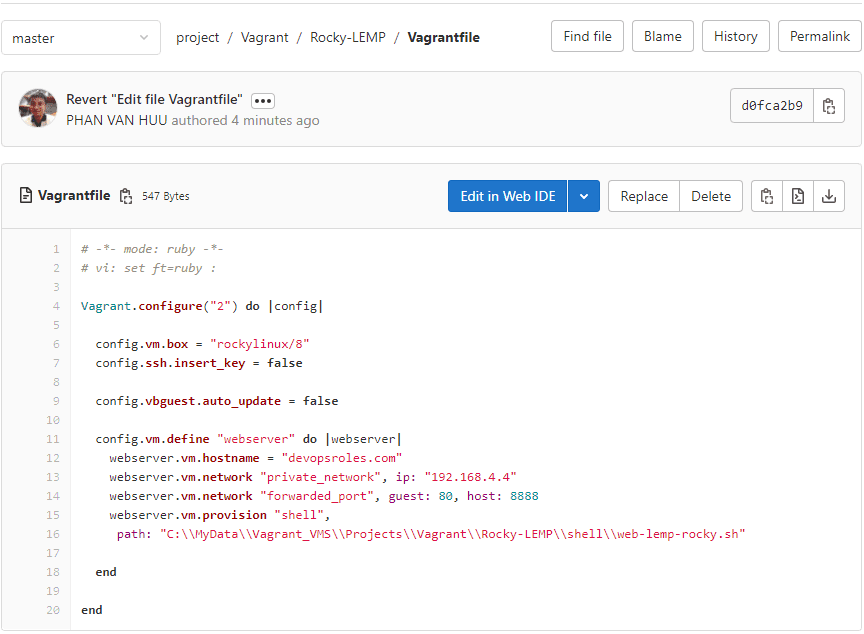
I will revert to with content not comment out in file Vagrantfile
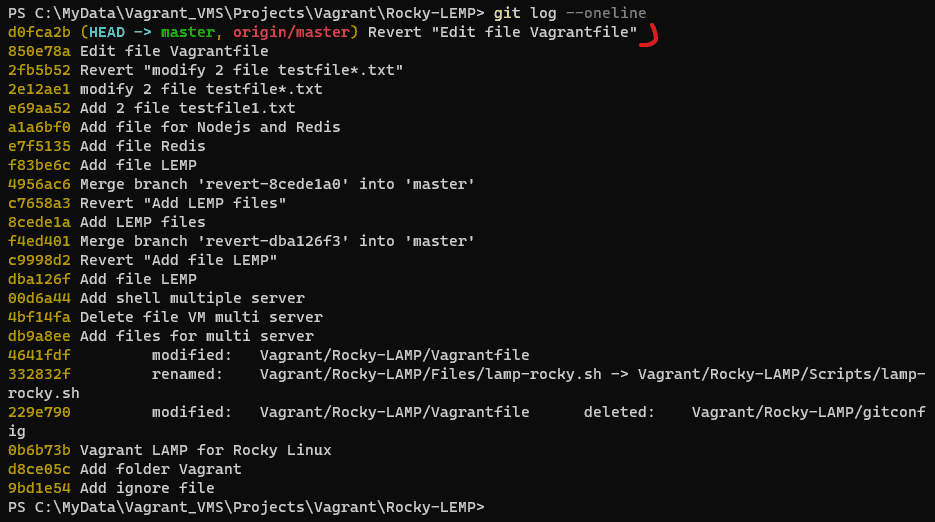
PS C:\MyData\Vagrant_VMS\Projects\Vagrant\Rocky-LEMP> git revert 850e78a
[master d0fca2b] Revert "Edit file Vagrantfile"
 1 file changed, 1 deletion(-)
PS C:\MyData\Vagrant_VMS\Projects\Vagrant\Rocky-LEMP> cat .\Vagrantfile
# -*- mode: ruby -*-
# vi: set ft=ruby :

Vagrant.configure("2") do |config|

  config.vm.box = "rockylinux/8"
  config.ssh.insert_key = false

  config.vbguest.auto_update = false

  config.vm.define "webserver" do |webserver|
    webserver.vm.hostname = "devopsroles.com"
    webserver.vm.network "private_network", ip: "192.168.4.4"
    webserver.vm.network "forwarded_port", guest: 80, host: 8888
    webserver.vm.provision "shell",
     path: "C:\\MyData\\Vagrant_VMS\\Projects\\Vagrant\\Rocky-LEMP\\shell\\web-lemp-rocky.sh"

  end

end
PS C:\MyData\Vagrant_VMS\Projects\Vagrant\Rocky-LEMP> git push
Enumerating objects: 9, done.
Counting objects: 100% (9/9), done.
Delta compression using up to 16 threads
Compressing objects: 100% (5/5), done.
Writing objects: 100% (5/5), 530 bytes | 530.00 KiB/s, done.
Total 5 (delta 2), reused 0 (delta 0), pack-reused 0
To gitlab.com:huupv/project.git
   850e78a..d0fca2b  master -> master
PS C:\MyData\Vagrant_VMS\Projects\Vagrant\Rocky-LEMP>
Final, Git Revert Commit already pushed to a remote repository

Show git log command to see message Revert it.

Conclusion
You have to Git Revert Commit already pushed to a remote repository. I hope will this your helpful. Thank you for reading the DevopsRoles page!