Tag Archives: Oracle Database

Oracle CRM in Docker: The Definitive Guide

Introduction

Oracle Customer Relationship Management (CRM) is widely used by businesses seeking robust tools for managing customer interactions, analyzing data, and enhancing customer satisfaction. Running Oracle CRM in Docker not only simplifies deployment but also enables consistent environments across development, testing, and production.

This deep guide covers the essential steps to set up Oracle CRM in Docker, from basic setup to advanced configurations and performance optimizations. It is structured for developers and IT professionals, providing both beginner-friendly instructions and expert tips to maximize Docker’s capabilities for Oracle CRM.

Why Run Oracle CRM in Docker?

Using Docker for Oracle CRM has several unique advantages:

  • Consistency Across Environments: Docker provides a consistent runtime environment, reducing discrepancies across different stages (development, testing, production).
  • Simplified Deployment: Docker enables easier deployments by encapsulating dependencies and configurations in containers.
  • Scalability: Docker Compose and Kubernetes make it easy to scale your Oracle CRM services horizontally to handle traffic surges.

Key Requirements

  1. Oracle CRM License: A valid Oracle CRM license is required.
  2. Docker Installed: Docker Desktop for Windows/macOS or Docker CLI for Linux.
  3. Basic Docker Knowledge: Familiarity with Docker commands and concepts.

For Docker installation instructions, see Docker’s official documentation.

Setting Up Your Environment

Step 1: Install Docker

Follow the installation instructions based on your operating system. Once Docker is installed, verify by running:


docker --version

Step 2: Create a Docker Network

Creating a custom network allows seamless communication between Oracle CRM and its database:

docker network create oracle_crm_network

Installing Oracle Database in Docker

Oracle CRM requires an Oracle Database. You can use an official Oracle Database image from Docker Hub.

Step 1: Download the Oracle Database Image

Oracle offers a version of its database for Docker. Pull the image by running:

docker pull store/oracle/database-enterprise:12.2.0.1

Step 2: Configure and Run the Database Container

Start a new container for Oracle Database and link it to the custom network:

docker run -d --name oracle-db \
  --network=oracle_crm_network \
  -p 1521:1521 \
  store/oracle/database-enterprise:12.2.0.1

Step 3: Initialize the Database

After the database container is up, configure it for Oracle CRM:

  1. Access the container’s SQL CLI:
    • docker exec -it oracle-db bash
    • sqlplus / as sysdba
  2. Create a new user for Oracle CRM:
    • CREATE USER crm_user IDENTIFIED BY 'password';
    • GRANT CONNECT, RESOURCE TO crm_user;
  3. Tip: Configure initialization parameters to meet Oracle CRM’s requirements, such as memory and storage allocation.

Installing and Configuring Oracle CRM

With the database set up, you can now focus on Oracle CRM itself. Oracle CRM may require custom setup if a Docker image is unavailable.

Step 1: Build an Oracle CRM Docker Image

If there is no pre-built Docker image, create a Dockerfile to set up Oracle CRM from scratch.

Sample Dockerfile: Dockerfile.oracle-crm

FROM oraclelinux:7-slim
COPY oracle-crm.zip /opt/
RUN unzip /opt/oracle-crm.zip -d /opt/oracle-crm && \
    /opt/oracle-crm/install.sh
EXPOSE 8080
  1. Build the Docker Image:
    • docker build -t oracle-crm -f Dockerfile.oracle-crm .
  2. Run the Oracle CRM Container:
docker run -d --name oracle-crm \
  --network=oracle_crm_network \
  -p 8080:8080 \
  oracle-crm

Step 2: Link Oracle CRM with the Oracle Database

Update the Oracle CRM configuration files to connect to the Oracle Database container.

Example Configuration Snippet

Edit the CRM’s config file (e.g., database.yml) to include:

database:
  host: oracle-db
  username: crm_user
  password: password
  port: 1521

Step 3: Start Oracle CRM Services

After configuring Oracle CRM to connect to the database, restart the container to apply changes:

docker restart oracle-crm

Advanced Docker Configurations for Oracle CRM

To enhance Oracle CRM performance and reliability in Docker, consider implementing these advanced configurations:

Volume Mounting for Data Persistence

Ensure CRM data is retained by mounting volumes to persist database and application data.

docker run -d --name oracle-crm \
  -p 8080:8080 \
  --network oracle_crm_network \
  -v crm_data:/opt/oracle-crm/data \
  oracle-crm

Configuring Docker Compose for Multi-Container Setup

Using Docker Compose simplifies managing multiple services, such as the Oracle Database and Oracle CRM.

Sample docker-compose.yml:

version: '3'
services:
  oracle-db:
    image: store/oracle/database-enterprise:12.2.0.1
    networks:
      - oracle_crm_network
    ports:
      - "1521:1521"
  oracle-crm:
    build:
      context: .
      dockerfile: Dockerfile.oracle-crm
    networks:
      - oracle_crm_network
    ports:
      - "8080:8080"
    depends_on:
      - oracle-db

networks:
  oracle_crm_network:
    driver: bridge

Running Containers with Docker Compose

Deploy the configuration using Docker Compose:

docker-compose up -d

Performance Optimization and Scaling

Optimizing Oracle CRM in Docker requires tuning container resources and monitoring usage.

Resource Allocation

Set CPU and memory limits to control container resource usage:

docker run -d --name oracle-crm \
  --cpus="2" --memory="4g" \
  oracle-crm

Scaling Oracle CRM

Use Docker Swarm or Kubernetes for automatic scaling, which is essential for high-availability and load balancing.

Security Best Practices

Security is paramount for any Oracle-based system. Here are essential Docker security tips:

  1. Run Containers as Non-Root Users: Modify the Dockerfile to create a non-root user for Oracle CRM:
    • RUN useradd -m crm_user
    • USER crm_user
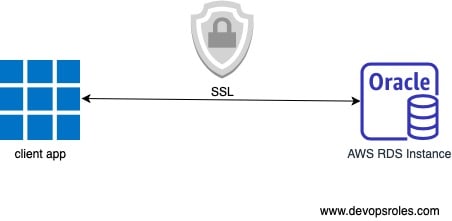
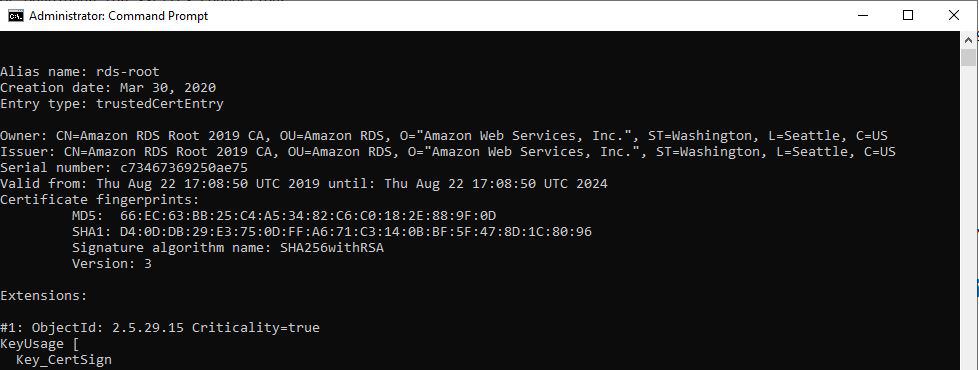
  2. Use SSL for Database Connections: Enable SSL/TLS for Oracle Database connections to encrypt data between Oracle CRM and the database.
  3. Network Isolation: Utilize Docker networks to restrict container communication only to necessary services.

FAQ

Can I deploy Oracle CRM on Docker without an Oracle Database?

No, Oracle CRM requires an Oracle Database to operate effectively. Both can, however, run in separate Docker containers.

How do I update Oracle CRM in Docker?

To update Oracle CRM, either rebuild the container with a new image version or apply updates directly inside the container.

Is it possible to back up Oracle CRM data in Docker?

Yes, you can mount volumes to persist data and set up regular backups by copying volume contents or using external backup services.

Can I run Oracle CRM on Docker for Windows?

Yes, Docker Desktop allows you to run Oracle CRM in containers on Windows. Ensure Docker is set to use Linux containers.

For additional details, refer to Oracle’s official documentation.

Conclusion

Running Oracle CRM in Docker is a powerful approach to managing CRM environments with flexibility and consistency. This guide covered essential steps, advanced configurations, performance tuning, and security practices to help you deploy Oracle CRM effectively in Docker.

Whether you’re managing a single instance or scaling Oracle CRM across multiple containers, Docker offers tools to streamline your workflow, optimize resource use, and simplify updates.

To expand your knowledge, visit Docker’s official documentation and Oracle’s resources on Docker support. Thank you for reading the DevopsRoles page!

How to setup SSL/TLS connection for AWS RDS Oracle Database using SQL*PLUS, SQL Developer, JDBC

Introduction

Hi everyone, today I am going to show everyone how to set up an SSL / TLS connection from the client to the AWS RDS Oracle Database.

Prepare AWS RDS Oracle Database

  • An EC2 instance with Windows Server 2019.
  • An RDS Oracle instance (12.1.0.2.v19)
  • Connect normal to RDS Oracle instance with TCP protocol

Check the current connection with the following command

sqlplus admin/admin12345@(DESCRIPTION=(ADDRESS=(PROTOCOL=TCP)(HOST=orcl12.xxxxxxx.ap-northeast-1.rds.amazonaws.com)(PORT=1521))(CONNECT_DATA=(SID=SSLLAB)))

sqlplus > SELECT SYS_CONTEXT('USERENV', 'network_protocol') FROM DUAL;

Task today

  1. Modify the DB instance to change the CA from rds-ca-2015 to rds-ca-2019.
  2. Adding the SSL Option
  3. Using SQL*Plus for SSL/TLS connections(with Oracle Wallets).
  4. Using SQL Developer for SSL/TLS connections(with JKS).
  5. Using JDBC to establish SSL/TLS connections(with JKS).

Modify the DB instance to change the CA from rds-ca-2015 to rds-ca-2019

1. Sign in to the AWS Management Console and open the Amazon RDS console at https://console.aws.amazon.com/rds/.

2. In the navigation pane, choose Databases, and then choose the DB instance that you want to modify.

3. Choose Modify. The Modify DB Instance page appears.

4. In the Network & Security section, choose rds-ca-2019.

5. Choose Continue and check the summary of modifications.

6. To apply the changes immediately, choose Apply immediately. Choosing this option restarts your database immediately.

Adding the SSL Option

1. Create or Modify an existing option group to which you can add the SSL option for your RDS intance.

Add the SSL option to the option group.

Setting the option

SQLNET.CIPHER_SUITE:SSL_RSA_WITH_AES_256_CBC_SHA

SQLNET.SSL_VERSION:1.0 or 1.2

FIPS.SSLFIPS_140:TRUE

2. Setting Security Group using for your RDS Oracle instance with allow inbound PORT 2484, Source Range is your IPv4 CIDR VPC or EC2 instance client.

Using SQL*Plus for SSL/TLS connections

1. Download middleware

  • Oracle Database Client (12.1.0.2.0) for Microsoft Windows (x64) require for orapki Utility(download link).

Install Folder path: C:\app\client\Administrator\product\12.1.0\client_1

2. Download the 2019 root certificate that works for all AWS Regions and put the file in the ssl_wallet directory.

https://s3.amazonaws.com/rds-downloads/rds-ca-2019-root.pem

Folder path: C:\app\client\Administrator\product\12.1.0\client_1\ssl_wallet

3. Run the following command to create the Oracle wallet.

C:\app\client\Administrator\product\12.1.0\client_1\BIN\orapki wallet create -wallet C:\app\client\Administrator\product\12.1.0\client_1\ssl_wallet -auto_login_only

4. Run the following command to add a cert to the Oracle wallet.

C:\app\client\Administrator\product\12.1.0\client_1\BIN\orapki wallet add -wallet C:\app\client\Administrator\product\12.1.0\client_1\ssl_wallet -trusted_cert -cert C:\app\client\Administrator\product\12.1.0\client_1\ssl_wallet\rds-ca-2019-root.pem -auto_login_only

5. Run the following command to confirm that the wallet was updated successfully.

C:\app\client\Administrator\product\12.1.0\client_1\BIN\orapki wallet display -wallet C:\app\client\Administrator\product\12.1.0\client_1\ssl_wallet

6. Create the net service name to log in with SQL*PLUS.

  • Create a file name C:\app\client\Administrator\product\12.1.0\client_1\network\admin\tnsnames.ora with content.
ORCL12 =
(DESCRIPTION =
 (ADDRESS = (PROTOCOL = TCPS)(HOST = orcl12.xxxxxxx.ap-northeast-1.rds.amazonaws.com)(PORT = 2484))
 (CONNECT_DATA=
  (SERVER = DEDICATED)
  (SERVICE_NAME = SSLLAB))
 )
)
  • Edit C:\app\client\Administrator\product\12.1.0\client_1\network\admin\sqlnet.ora file with content.
WALLET_LOCATION=  
  (SOURCE=
      (METHOD=file)
      (METHOD_DATA=  
         (DIRECTORY=C:\app\client\Administrator\product\12.1.0\client_1\ssl_wallet)))
SSL_CLIENT_AUTHENTICATION = FALSE    
SSL_VERSION = 1.2    
SSL_CIPHER_SUITES = (SSL_RSA_WITH_AES_256_CBC_SHA)    
SSL_SERVER_DN_MATCH = NO   
SQLNET.AUTHENTICATION_SERVICES = (TCPS,TNS)    
NAMES.DIRECTORY_PATH= (TNSNAMES, EZCONNECT) 
  • Setting TNS_ADMIN user environment
TNS_ADMIN = C:\app\client\Administrator\product\12.1.0\client_1\network\admin\

7. Test connect with SQL*PLUS

sqlplus admin/admin12345@(DESCRIPTION=(ADDRESS=(PROTOCOL=TCPS)(HOST=orcl12.xxxxxxxxx.ap-northeast-1.rds.amazonaws.com)(PORT=2484))(CONNECT_DATA=(SID=SSLLAB)))
or with TNS name service
sqlplus admin/admin12345@ORCL12
SELECT SYS_CONTEXT('USERENV', 'network_protocol') FROM DUAL;
tcps

Using SQL Developer for SSL/TLS connections

1. Download middleware

2. Convert the certificate to .der format using the following command.

openssl x509 -outform der -in C:\app\client\Administrator\product\12.1.0\client_1\ssl_wallet\rds-ca-2019-root.pem -out rds-ca-2019-root.der

Copy the output file to C:\app\client\Administrator\product\12.1.0\client_1\ssl_wallet\rds-ca-2019-root.der

3. Create the Keystore using the following command.

C:\app\client\Administrator\product\12.1.0\client_1\jdk\bin\keytool -keystore clientkeystore -genkey -alias client

Copy the output file to C:\app\client\Administrator\product\12.1.0\client_1\jdk\jre\lib\security\clientkeystore

4. Import the certificate into the key store using the following command.

C:\app\client\Administrator\product\12.1.0\client_1\jdk\bin\keytool -import -alias rds-root -keystore C:\app\client\Administrator\product\12.1.0\client_1\jdk\jre\lib\security\clientkeystore -file C:\app\client\Administrator\product\12.1.0\client_1\ssl_wallet\rds-ca-2019-root.der
Input pass of clientkeystore and confirm yes at below question , to import cert.

Trust this certificate? [no]:  yes
 Certificate was added to keystore

5. Confirm that the key store was updated successfully.

C:\app\client\Administrator\product\12.1.0\client_1\jdk\bin\keytool -list -v -keystore C:\app\client\Administrator\product\12.1.0\client_1\jdk\jre\lib\security\clientkeystore

6. Down the new version of JCE for JDK6, and remove the old jar file, copy the new jar file to under directory C:\app\client\Administrator\product\12.1.0\client_1\jdk\jre\lib\security\

Note: If you using other versions of jdk, please refer to the following link and download the correct version of JCE.

https://blogs.oracle.com/java-platform-group/diagnosing-tls,-ssl,-and-https

7. Config C:¥app¥client¥sqldeveloper¥sqldeveloper¥bin¥sqldeveloper.conf file, add the following line.

SetJavaHome C:\app\client\Administrator\product\12.1.0\client_1\jdk
#Configure some JDBC settings
AddVMOption -Djavax.net.ssl.trustStore=C:\app\client\Administrator\product\12.1.0\client_1\jdk\jre\lib\security\clientkeystore	
AddVMOption -Djavax.net.ssl.trustStoreType=JKS	
AddVMOption -Djavax.net.ssl.trustStorePassword=admin12345	
AddVMOption -Doracle.net.ssl_cipher_suites=TLS_RSA_WITH_AES_256_CBC_SHA

8. Test connect to AWS RDS Oracle instance with SQL developer tool with the connection string.

jdbc:oracle:thin:@(DESCRIPTION=(ADDRESS=(PROTOCOL=TCPS)(HOST=orcl12.cgl7xlmapx2h.ap-northeast-1.rds.amazonaws.com)(PORT=2484))(CONNECT_DATA=(SID=SSLLAB)))

Using JDBC to establish SSL/TLS connections

1. Source code sample.

The following code example shows how to set up the SSL connection using JDBC.

import java.sql.Connection;
import java.sql.DriverManager;
import java.sql.SQLException;
import java.util.Properties;

public class OracleSslConnectionTest {
	private static final String DB_SERVER_NAME = "orcl12.xxxxxx.ap-northeast-1.rds.amazonaws.com";
    private static final String SSL_PORT = "2484";
    private static final String DB_SID = "SSLLAB";
    private static final String DB_USER = " admin";
    private static final String DB_PASSWORD = "admin12345";

    private static final String KEY_STORE_FILE_PATH = "C:\\app\\client\\Administrator\\product\\12.1.0\\client_1\\jdk\\jre\\lib\\security\\clientkeystore";
    private static final String KEY_STORE_PASS = "admin12345";
    private static final String SSL_CIPHER_SUITES = "TLS_RSA_WITH_AES_256_CBC_SHA";
    
	public static void main(String args[])  throws SQLException {  
		final Properties properties = new Properties();
        final String connectionString = String.format(
                "jdbc:oracle:thin:@(DESCRIPTION=(ADDRESS=(PROTOCOL=TCPS)(HOST=%s)(PORT=%s))(CONNECT_DATA=(SID=%s))(SECURITY = (SSL_SERVER_CERT_DN = \"CN=Amazon RDS Root 2019 CA,OU=Amazon RDS,O=Amazon Web Services, Inc.,ST=Washington,L=Seattle,C=US\")))",
                DB_SERVER_NAME, SSL_PORT, DB_SID);
        properties.put("user", DB_USER);
        properties.put("password", DB_PASSWORD);
        
        properties.put("javax.net.ssl.trustStore", KEY_STORE_FILE_PATH);
        properties.put("javax.net.ssl.trustStoreType", "JKS");
        properties.put("javax.net.ssl.trustStorePassword", KEY_STORE_PASS);
        
        properties.put("oracle.net.ssl_cipher_suites", SSL_CIPHER_SUITES);
        
        final Connection connection = DriverManager.getConnection(connectionString, properties);
        // If no exception, that means handshake has passed, and an SSL connection can be opened
        System.out.println("connected..");
	}
	
}

2. Test connect to AWS RDS Oracle instance with JDBC thin driver.

java -Djavax.net.debug=all -cp .;C:\app\client\Administrator\product\12.1.0\client_1\jdbc\lib\ojdbc7.jar OracleSslConnectionTest

The end.Good luck to you and happy with AWS cloud.

Thank you for reading the DevopsRoles page!

Oracle notes for beginners: Your Essential Guide to Getting Started

Introduction

In this tutorial, Oracle notes for beginners. How to query commands useful in Oracle database. Diving into the world of Oracle databases can be both exciting and overwhelming for beginners. With its robust features and capabilities, Oracle is a powerful tool for managing data effectively.

Oracle notes for beginners

Oracle Database commands

Changing passwords in Oracle

ALTER USER user_name IDENTIFIED BY new_password;

Create a table

CREATE TABLE my_table (
    what   VARCHAR2(10),
    who    VARCHAR2(10),
    mark   VARCHAR2(10)
);

Insert values as the same with 3 commands below

INSERT INTO my_table (
    what,
    who,
    mark
) VALUES (
    'Devops',
    'Roles',
    '.com'
);

INSERT INTO my_table VALUES (
    'huu',
    'phan',
    '.com'
);

INSERT INTO my_table ( what ) VALUES ( 'Yeah!' );

Get the list of all tables in Oracle

SELECT
    owner,
    table_name
FROM
    all_tables

Query your permission in Oracle

select * from USER_ROLE_PRIVS where USERNAME= USER;
select * from USER_TAB_PRIVS where Grantee = USER;
select * from USER_SYS_PRIVS where USERNAME = USER;

Oracle check version

SELECT
    *
FROM
    v$version

Find Users logged into Oracle / PLSQL

SELECT
    username,
    program,
    machine,
    status,
    TO_CHAR(
        logon_time,
        'HH:MM:SS'
    )
FROM
    v$session
WHERE
    username = 'huupv' -- Username

The query for active users SQL Executed

SELECT
    a.sid,
    a.serial#,
    b.sql_text
FROM
    v$session a,
    v$sqlarea b
WHERE
        a.sql_address = b.address
    AND
        a.username = 'huupv';

Kill session in Oracle

Step 1: Identify the Session to be killed

SELECT
    s.inst_id,
    s.sid,
    s.serial#,
       --s.sql_id,
    p.spid,
    s.username,
    s.program
FROM
    gv$session s
    JOIN gv$process p ON
        p.addr = s.paddr
    AND
        p.inst_id = s.inst_id
WHERE
    s.type != 'BACKGROUND' and s.username ='huupv';

Note: The SID and SERIAL# values the relevant session.

Step 2: Kill Session

SQL> ALTER SYSTEM DISCONNECT SESSION 'sid,serial#' POST_TRANSACTION; -- The POST_TRANSACTION clause waits for ongoing transactions to complete before disconnecting the session
SQL> ALTER SYSTEM DISCONNECT SESSION 'sid,serial#' IMMEDIATE; -- ALTER SYSTEM DISCONNECT SESSION

Conclusion

Embarking on your journey with Oracle databases doesn’t have to be daunting. By understanding the basics and following the tips provided in this guide, you will gain the confidence and knowledge needed to effectively manage and manipulate data using Oracle.

Remember, practice and continuous learning are key to becoming proficient in any technology. Keep exploring, experimenting, and expanding your skills to unlock the full potential of Oracle in your projects. I will be updated later! Have a nice day! Oracle notes for beginners. Thank you for reading DevOpsRoles.com page

Setting Up Oracle Automatic Startup on Linux: A Comprehensive Guide

Introduction

In this tutorial, How to confirm Oracle automatic startup on Linux. How to make Oracle start automatically in Linux.

Ensuring that your Oracle database starts automatically when your Linux system boots up can save time and reduce manual intervention, enhancing the reliability of your database operations.

This guide will walk you through the process of configuring automatic startup for Oracle on a Linux system. By following these steps, you can ensure that your Oracle database is always ready to handle your data needs, even after a system reboot.

By default, Oracle software installation does not deploy automatic startup and shutdown init scripts on the platform.

How to confirm Oracle automatic startup on Linux.

The dbstart utility reads the oratab file. Confirm it in the example below

[HuuPV@DevopsRoles ~]$ sudo su - oracle
[oracle@DevopsRoles ~]$ cat /etc/oratab

 DEVOPSROLES_SID:/opt/oracle/product/11.2.0/dbhome_1:Y 
 DEVOPSROLES_SID02:/opt/oracle/product/10.2.03/dbhome_2:N

We see there are two instances on this server. Oracle 10.2.03 is marked “N” and will not restart when the Linux OS reboots. Oracle 11.2.0 is marked “Y” and will restart when the Linux OS reboots.

Auto Start Oracle on Linux

1. In the /etc/oratab file with the autostart column to “Y”

[oracle@DevopsRoles ~]$ cat /etc/oratab
DEVOPSROLES_SID:/opt/oracle/product/11.2.0/dbhome_1:Y

2. Create the file named “oracle” in /etc/init.d folder.

[root@DevopsRoles ~]# cd /etc/init.d
[root@DevopsRoles init.d]# vi oracle

#!/bin/sh
ORACLE_HOME=/opt/oracle/product/11.2.0/dbhome_1
ORACLE_OWNER=oracle
case "$1" in
'start') # Start the Oracle databases and listeners
su - $ORACLE_OWNER -c "$ORACLE_HOME/bin/dbstart $ORACLE_HOME"
;;
'stop') # Stop the Oracle databases and listeners
su - $ORACLE_OWNER -c "$ORACLE_HOME/bin/dbshut $ORACLE_HOME"
;;
esac

3. Create a symbolic link

[root@DevopsRoles ~]# ln -s /etc/init.d/oracle /etc/rc0.d/K10oracle
[root@DevopsRoles ~]# ln -s /etc/init.d/oracle /etc/rc3.d/S99oracle

4. Change permissions

[root@DevopsRoles ~]# chmod 750 /etc/init.d/oracle

5. use chkconfig the command to associate the dbora service

[root@DevopsRoles ~]# chkconfig --level 2345 oracle on

Test

restart the Oracle server. Then check the instance status

[oracle@DevopsRoles ~]$ ps -ef | grep smon | grep -v grep

Check the listener status

[oracle@DevopsRoles ~]$ lsnrctl status

Conclusion

Configuring Oracle for automatic startup on Linux significantly improves the efficiency and reliability of your database management. By following the steps outlined in this guide, you have learned how to set up your Oracle database to start automatically with your Linux system, ensuring minimal downtime and maximum productivity. Regular maintenance and monitoring will further ensure the smooth operation of your database. Keep exploring and optimizing your setup to make the most out of your Oracle database. Thank you for reading DevOpsRoles.com page

TKPROF using trace analyzer to trace SQL

Introduction

In this tutorial, we will explore how to use TKPROF with a trace analyzer to trace SQL in an Oracle Database Server. Optimizing SQL performance is crucial for the efficiency and responsiveness of your database applications. One of the powerful tools available for this purpose is TKPROF, a trace file analyzer provided by Oracle.

This guide will introduce you to TKPROF and show you how to use it effectively to trace and analyze SQL performance. By understanding and utilizing TKPROF, you can gain deep insights into your SQL execution, identify performance bottlenecks, and make informed optimizations to enhance your database’s performance.

Syntax of the TKPROF Command

The TKPROF command has several options that allow you to customize its behavior. Here is the syntax:

tkprof tracefile outputfile [explain= ] [table= ]
              [print= ] [insert= ] [sys= ] [sort= ]

Options of TKPROF command

table=schema.tablename: Use 'schema.tablename' with 'explain=' option.
explain=user/password: Connect to ORACLE and issue EXPLAIN PLAN.
print=integer: List only the first 'integer' SQL statements.
aggregate=yes|no: Aggregate multiple trace files.
insert=filename: List SQL statements and data inside INSERT statements.
sys=no: TKPROF does not list SQL statements run as user SYS.
record=filename: Record non-recursive statements found in the trace file.
waits=yes|no: Record summary for any wait events found in the trace file.
sort=option: Set of zero or more of the following sort options:
  prscnt: number of times parse was called
  prscpu: CPU time parsing
  prsela: elapsed time parsing
  prsdsk: number of disk reads during parse
  prsqry: number of buffers for consistent read during parse
  prscu: number of buffers for current read during parse
  prsmis: number of misses in library cache during parse
  execnt: number of times execute was called
  execpu: CPU time spent executing
  exeela: elapsed time executing
  exedsk: number of disk reads during execute
  exeqry: number of buffers for consistent read during execute
  execu: number of buffers for current read during execute
  exerow: number of rows processed during execute
  exemis: number of library cache misses during execute
  fchcnt: number of times fetch was called
  fchcpu: CPU time spent fetching
  fchela: elapsed time fetching
  fchdsk: number of disk reads during fetch
  fchqry: number of buffers for consistent read during fetch
  fchcu: number of buffers for current read during fetch
  fchrow: number of rows fetched
  userid: user ID of the user that parsed the cursor

How to Use Trace Analyzer to Trace SQL

Connect to the Database

[oracle11g@DBdevopsroles ~]$ sqlplus DBUSER/DBUSER@ORACLE_SID
SQL> set termout off
SQL> alter session set timed_statistics = true;
SQL> alter session set sql_trace = true;
SQL> SELECT COUNT(*) from tablename01;
SQL> alter session set sql_trace = false;

Use Trace with TKPROF Command

[oracle11g@DBdevopsroles ~]$ tkprof /app/oracle11g/diag/rdbms/ORACLE_SID/trace/ORACLE_SID_ora_4196.trc ORACLE_SID_ora_4196.txt explain=DBUSER/DBUSER@ORACLE_SID width=200

Confirm Output Destination

SQL> show parameter user_dump_dest

Conclusion

In this tutorial, we covered how to use the TKPROF command with a trace analyzer to trace SQL in an Oracle Database. Using TKPROF to analyze SQL performance is an invaluable skill for any database administrator or developer. By following the steps outlined in this guide, you should now be able to trace and analyze SQL execution efficiently, uncover performance issues, and implement necessary optimizations.

Continuous monitoring and analysis with TKPROF will ensure that your SQL queries run smoothly and efficiently, contributing to the overall health and performance of your database systems. Keep exploring and mastering TKPROF to become proficient in SQL performance tuning. Thank you for reading the DevopsRoles page!

Mastering Oracle query tablespace: A Comprehensive Guide for DBAs

Introduction

In this guide, you’ll learn how to efficiently query Oracle tablespaces using SQL commands. This guide covers essential techniques for monitoring tablespace size, available space, and differentiating between various types of tablespaces. This practical approach aims to enhance database management skills for Oracle administrators.

  1. What is Oracle SQL Tablespace?
    An overview of tablespaces in Oracle databases, explaining their purpose and types.
  2. How to Query Oracle Tablespace?
    Basic SQL queries to retrieve information about tablespaces, including size and contents.
  3. Check Tablespace Usage Percentage in Oracle
    Methods to calculate the usage percentage of tablespaces to monitor efficiency and plan for scaling.
  4. Oracle Query Tablespace Usage
    Advanced querying techniques to analyze tablespaces’ performance and optimize storage management.

Step-by-Step: Guide to Oracle Query Tablespace

How does a query check tablespace size, free space, and Big file vs small file SYSTEM tablespace? The following statement is below

SELECT tablespace_name,
  SUM(bytes)/1024/1024 AS mb
FROM
  ( SELECT tablespace_name, bytes FROM dba_data_files
  UNION ALL
  SELECT tablespace_name,bytes FROM dba_temp_files
  )
WHERE tablespace_name='SYSTEM'
GROUP BY tablespace_name;

Sample Output

TABLESPACE_NAME                    MB
-------------------- ----------------
SYSTEM                          2,048

To query tablespace “SIZE EXTEND, BIG_SMALL_FILE, BLOCK_SIZE” in Oracle.

SELECT dt.tablespace_name tablespace_name,
  SUBSTR(ddf.file_name,0, instr(ddf.file_name, '/', -1, 1) - 1) AS placement_directory,
  SUBSTR(ddf.file_name, instr(ddf.file_name, '/',   -1, 1) + 1) AS file_name,
  ddf.bytes                                         /1024/1024  AS mb,
  ddf.autoextensible,
  DECODE (dt.bigfile,'NO','SMALL','YES','BIG') AS BIG_SMALL_FILE,
  dt.block_size block_size
FROM
  (SELECT tablespace_name, file_name, bytes,autoextensible FROM dba_data_files
  UNION
  SELECT tablespace_name, file_name, bytes,autoextensible FROM dba_temp_files
  ) ddf,
  (SELECT tablespace_name, block_size,bigfile FROM dba_tablespaces
  ) dt
WHERE dt.tablespace_name = ddf.tablespace_name
AND dt.tablespace_name   = 'SYSTEM';

Sample Output

TABLESPACE_NAME
--------------------
PLACEMENT_DIRECTORY
------------------------------------------------------------------------------------------------------------------------------------
FILE_NAME                                                                            MB AUTOEXTEN BIG_SMALL_FILE  BLOCK_SIZE
---------------------------------------------------------------------- ---------------- --------- --------------- ----------
SYSTEM
/mnt_nfs/dbdata/mydata
system02.dbf                                                                      2,048 NO        SMALL                 9192

Conclusion

This article provides a comprehensive guide to Oracle query tablespaces for size, auto-extension, file types, and block sizes. By mastering these queries, you can effectively monitor and optimize your Oracle database storage. Continuous monitoring and analysis will ensure that your database runs efficiently and remains scalable. I hope will this your helpful. Thank you for reading the DevopsRoles page!

How to check the Oracle database character set

Introduction

Character sets are a crucial aspect of Oracle databases, influencing data storage, retrieval, and integrity. Properly setting and verifying your Oracle database’s character set ensures compatibility across different systems and prevents data corruption. This guide will walk you through various methods how to Oracle database character set, including using the NLS_CHARACTERSET and NLS_NCHAR_CHARACTERSET parameters.

Basic Methods to Check Oracle Database Character Set

Using SQL*Plus

One of the simplest ways to check your Oracle database character set is through SQL*Plus. Follow these steps:

Log in to SQL*Plus:

sqlplus username/password@database

Execute the following query:

SELECT parameter, value 
FROM nls_database_parameters 
WHERE parameter = 'NLS_CHARACTERSET';

Using Data Dictionary Views

Oracle provides several data dictionary views that store character set information. The NLS_DATABASE_PARAMETERS view is one such view.

  1. Log in to SQL*Plus or any other SQL interface.
  2. Run the following query:
    • SELECT * FROM v$nls_parameters WHERE parameter = 'NLS_CHARACTERSET';

Intermediate Methods to Check Oracle Database Character Set

Using DBMS_SESSION Package

The DBMS_SESSION package allows you to access various session-level settings, including character set information.

Run the following PL/SQL block:

DECLARE
l_nls_characterset VARCHAR2(30);
BEGIN
DBMS_SESSION.GET_NLS('NLS_CHARACTERSET', l_nls_characterset);
DBMS_OUTPUT.PUT_LINE('Database Character Set: ' || l_nls_characterset);
END;
/

Checking Character Set in a Multitenant Environment

In a multi-tenant environment, it’s essential to check the character set of each pluggable database (PDB).

  1. Connect to the container database (CDB).
    • sqlplus username/password@CDB
  2. Query the character set for each PDB:
    • SELECT name, value FROM v$pdbs, v$nls_parameters WHERE parameter = 'NLS_CHARACTERSET' AND con_id = pdb.con_id;

Advanced Methods to Check Oracle Database Character Set

Using Oracle Enterprise Manager

Oracle Enterprise Manager provides a graphical interface to check and manage database settings, including character sets.

  1. Log in to Oracle Enterprise Manager.
  2. Navigate to the database you want to check.
  3. Go to the “Administration” tab and select “NLS Database Parameters.”
  4. Check the “NLS_CHARACTERSET” parameter.

Using SQL Developer

Oracle SQL Developer is a powerful tool that allows you to manage database settings graphically.

  1. Open Oracle SQL Developer and connect to your database.
  2. Navigate to “View” > “DBA.”
  3. Expand the “Database” node and select “NLS.”
  4. Find the “NLS_CHARACTERSET” parameter.

Checking Both NLS_CHARACTERSET and NLS_NCHAR_CHARACTERSET

To get a complete picture of your Oracle database character settings, you should check both the NLS_CHARACTERSET and NLS_NCHAR_CHARACTERSET parameters. Here’s how you can do it:

Log in to SQL*Plus:

sqlplus username/password@database

Execute the following query to check the NLS_CHARACTERSET:

SELECT PROPERTY_NAME, PROPERTY_VALUE
FROM database_properties
WHERE PROPERTY_NAME = 'NLS_CHARACTERSET';

Screen output:

PROPERTY_NAME                  PROPERTY_VALUE
------------------------------ --------------
NLS_CHARACTERSET               AL32UTF8

Execute the following query to check the NLS_NCHAR_CHARACTERSET:

SELECT PROPERTY_NAME, PROPERTY_VALUE 
FROM database_properties 
WHERE PROPERTY_NAME = 'NLS_NCHAR_CHARACTERSET'; 

Screen output:

PROPERTY_NAME PROPERTY_VALUE


NLS_NCHAR_CHARACTERSET AL16UTF16

Frequently Asked Questions (FAQs)

What is a character set in Oracle?

A character set in Oracle defines the set of characters that can be used in the database, determining how data is stored and retrieved. It includes encoding rules for characters.

Why is it important to check the Oracle database character set?

Checking the Oracle database character set ensures data integrity and compatibility, especially when dealing with multiple languages and diverse systems. It prevents data corruption and ensures seamless data exchange.

How can I change the character set of my Oracle database?

Changing the character set of an Oracle database is a complex process that involves exporting the database, creating a new database with the desired character set, and importing the data. It is recommended to consult Oracle documentation and perform thorough testing.

Can I check the character set using PL/SQL Developer?

Yes, you can use PL/SQL Developer to check the character set. Connect to your database, navigate to “View” > “NLS Parameters,” and find the “NLS_CHARACTERSET” parameter.

What are the common character sets used in Oracle databases?

Common character sets include AL32UTF8, UTF8, WE8ISO8859P1, and WE8MSWIN1252. The choice depends on the languages and data types you need to support.

Conclusion

Through this article, you have learned how to check the Oracle database character set using various methods, including NLS_CHARACTERSET and NLS_NCHAR_CHARACTERSET. Properly identifying and managing your Oracle database character set is essential for maintaining data integrity and compatibility.

By following these steps, you can confidently manage your database settings, ensuring smooth operations and data handling across different systems and languages. I hope this guide is helpful. Thank you for reading the DevopsRoles page!

How to Oracle query Database name: A Step-by-Step Guide

Introduction

In this tutorial, How do I use the Oracle query Database name? Using “v$parameter” for the database name. This tutorial guides you on how to query the “v$system_parameter” to determine the database name in Oracle. By connecting as SYSDBA and executing a specific SQL query, users can retrieve the database name from the system parameters, a crucial skill for database administrators managing multiple Oracle environments.

To query the database name in Oracle, start by connecting to the database using the SYSDBA role. This role grants you the necessary privileges to perform administrative tasks, including querying system parameters to find out detailed configuration information such as the database name. This process involves executing specific SQL commands that access Oracle’s system views, which contain data about the database instance.

[huupv@localhost ~]$ sudo su - oracle
[oracle@localhost ~]$ sqlplus "/as sysdba"

Oracle query Database name

SQL> SELECT name, value from v$parameter WHERE name = 'db_name' order by name;

The screen output terminal

NAME                         VALUE
--------------------------- -----------
db_name                  DRDB1

Conclusion

Successfully querying the “v$system_parameter” for the database name provides valuable insights into your Oracle database configuration. This method, though straightforward, requires careful execution of the SQL command provided to ensure accurate data retrieval and system management I hope will this your helpful. Thank you for reading the DevopsRoles page!

Oracle create schema: A Step-by-Step Guide

Introduction

A schema is defined as a user that owns data such as tables, indexes, and so forth. In this tutorial, How to use Oracle create schema.

Dive into the world of Oracle with this practical guide on creating schemas. This tutorial walks you through the essential steps to establish a schema in Oracle Database, starting with creating a tablespace, defining a new user, and culminating in setting up a test table. Ideal for database administrators and developers who want to streamline their database structure and enhance data management.

Oracle create schema

Access the Oracle database with permission privileges for creating a tablespace, creating a user, and creating a table on the Oracle Database.

[oracle@DBOracle ~]$ sqlplus / as sysdba

Step 1: Create tablespace on Oracle Database

Before creating a schema you need to create a file ( one or more files) for the schema to place its data into. This file schema writes data is called a tablespace. One tablespace has one or more datafile.

SQL> create tablespace datafile_test datafile '/U02/datafile_test_01.dbf' size 1000M extent management local autoallocate segment space management auto;

Step 2: Oracle Create a new user

The explain use command creates a user in Oracle

User: HuuPV
Password: pwd4HuuPV
Default Tablespace: datafile_test
Temporary Tablespace: TEMP

SQL> CREATE USER HuuPV IDENTIFIED BY pwd4HuuPV DEFAULT TABLESPACE datafile_test TEMPORARY TABLESPACE TEMP;

Oracle Privileges Granted to the APPDEV Role

SQL> GRANT CONNECT TO HuuPV;
SQL> GRANT UNLIMITED TABLESPACE TO HuuPV;
SQL> GRANT CREATE TABLE TO HuuPV;
SQL> GRANT CREATE PROCEDURE TO HuuPV;
SQL> GRANT CREATE VIEW TO HuuPV;
SQL> GRANT CREATE TRIGGER TO HuuPV;
SQL> GRANT CREATE SEQUENCE TO HuuPV;
SQL> GRANT CREATE SYNONYM TO HuuPV;

Step 3: Oracle creates a table for the test

SQL> create table test (NAME varchar2(32), AGE number);
SQL> insert into test (NAME, AGE) values ('HuuPV', 29);
SQL> insert into test (NAME, AGE) values ('Huu', 30);
SQL> commit;

Examine the content of the table test created above

SQL> select * from test;

The result created a table for the test

Oracle create schema another method uses the script oracle_create_user.sql  file

The content oracle_create_user.sql file

CREATE USER HuuPV IDENTIFIED BY pwd4HuuPV DEFAULT TABLESPACE datafile_test TEMPORARY TABLESPACE TEMP;
GRANT CONNECT TO HuuPV;
GRANT UNLIMITED TABLESPACE TO HuuPV;
GRANT CREATE TABLE TO HuuPV;
GRANT CREATE PROCEDURE TO HuuPV;
GRANT CREATE VIEW TO HuuPV;
GRANT CREATE TRIGGER TO HuuPV;
GRANT CREATE SEQUENCE TO HuuPV;
GRANT CREATE SYNONYM TO HuuPV;

Running script oracle_create_user.sql file

SQL>@/home/oracle/scripts/oracle_create_user.sql

Conclusion

By following the steps outlined in this guide, you’ve learned how to create an Oracle schema effectively. This foundation is crucial for managing and organizing data in Oracle databases efficiently, providing you with the skills to maintain a robust database environment.

My topic is “Install Oracle Database 12c on Centos 7“. I hope you find this helpful.