Table of Contents
- 1 Introduction
- 2 Why Simplifying K8s APIs Matters
- 3 Strategies for Simplifying Kubernetes APIs
- 3.1 1. Using Kubernetes Client Libraries
- 3.2 2. Leveraging Kubernetes Operators
- 3.3 3. Implementing Helm Charts
- 3.4 4. Using Kubernetes API Aggregation Layer
- 3.5 5. Adopting CRDs (Custom Resource Definitions)
- 3.6 6. Streamlining API Access with Service Meshes
- 3.7 7. Using API Gateways
- 3.8 8. Automating API Calls with Kubernetes Operators
- 4 Practical Examples
- 5 FAQs
- 6 External Resources
- 7 Conclusion
Introduction
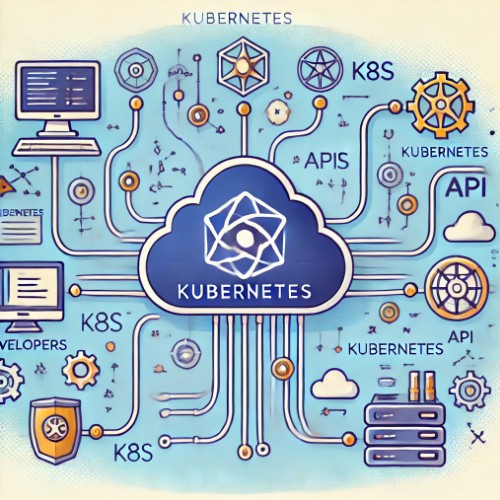
Kubernetes (K8s) has revolutionized container orchestration, but its API complexities often challenge users. As Kubernetes adoption grows, simplifying K8s APIs ensures greater accessibility and usability for developers, DevOps engineers, and IT administrators.
This article explores methods, tools, and best practices for making K8s APIs simpler for all Kubernetes users.
Why Simplifying K8s APIs Matters
Challenges with Kubernetes APIs
- Steep Learning Curve: New users find K8s API interactions overwhelming.
- Complex Configuration: YAML configurations and manifests require precision.
- Authentication & Authorization: Managing RBAC (Role-Based Access Control) adds complexity.
- API Versioning Issues: Deprecation and updates can break applications.
Strategies for Simplifying Kubernetes APIs
1. Using Kubernetes Client Libraries
Kubernetes provides client libraries for various programming languages, such as:
- kubernetes-client/python (Python)
- kubernetes-client/go (Go)
- kubernetes-client/java (Java)
These libraries abstract raw API calls, providing simplified methods for managing Kubernetes resources.
2. Leveraging Kubernetes Operators
Operators automate complex workflows, reducing the need for manual API interactions. Some popular operators include:
- Cert-Manager: Automates TLS certificate management.
- Prometheus Operator: Simplifies monitoring stack deployment.
- Istio Operator: Eases Istio service mesh management.
3. Implementing Helm Charts
Helm, the Kubernetes package manager, simplifies API interactions by allowing users to deploy applications using predefined templates. Benefits of Helm include:
- Reusable Templates: Reduce redundant YAML configurations.
- Version Control: Easily manage different application versions.
- Simple Deployment: One command (
helm install) instead of multiple API calls.
4. Using Kubernetes API Aggregation Layer
The API Aggregation Layer enables extending Kubernetes APIs with custom endpoints. Benefits include:
- Custom API Resources: Reduce reliance on default Kubernetes API.
- Enhanced Performance: Aggregated APIs optimize resource calls.
5. Adopting CRDs (Custom Resource Definitions)
CRDs simplify Kubernetes API interactions by allowing users to create custom resources tailored to specific applications. Examples include:
- Defining custom workload types
- Automating deployments with unique resource objects
- Managing application-specific settings
6. Streamlining API Access with Service Meshes
Service meshes like Istio, Linkerd, and Consul simplify Kubernetes API usage by:
- Automating Traffic Management: Reduce manual API configurations.
- Improving Security: Provide built-in encryption and authentication.
- Enhancing Observability: Offer tracing and monitoring features.
7. Using API Gateways
API gateways abstract Kubernetes API complexities by handling authentication, request routing, and response transformations. Examples:
- Kong for Kubernetes
- NGINX API Gateway
- Ambassador API Gateway
8. Automating API Calls with Kubernetes Operators
Kubernetes operators manage lifecycle tasks without manual API calls. Examples include:
- ArgoCD Operator: Automates GitOps deployments.
- Crossplane Operator: Extends Kubernetes API for cloud-native infrastructure provisioning.
Practical Examples
Example 1: Deploying an Application Using Helm
helm install myapp stable/nginxInstead of multiple kubectl apply commands, Helm simplifies the process with a single command.
Example 2: Accessing Kubernetes API Using Python Client
from kubernetes import client, config
config.load_kube_config()
v1 = client.CoreV1Api()
print(v1.list_pod_for_all_namespaces())
This Python script fetches all running pods using the Kubernetes API without requiring manual API calls.
Example 3: Creating a Custom Resource Definition (CRD)
apiVersion: apiextensions.k8s.io/v1
kind: CustomResourceDefinition
metadata:
  name: myresources.example.com
spec:
  group: example.com
  versions:
  - name: v1
    served: true
    storage: true
  scope: Namespaced
  names:
    plural: myresources
    singular: myresource
    kind: MyResource
    shortNames:
    - mr
CRDs allow users to define new resource types, making Kubernetes APIs more adaptable.
FAQs
1. Why is Kubernetes API complexity a challenge?
Kubernetes APIs involve intricate configurations, authentication mechanisms, and multiple versions, making them difficult to manage for beginners and experts alike.
2. How does Helm simplify Kubernetes API usage?
Helm provides predefined templates that reduce repetitive API calls, ensuring seamless application deployment.
3. What are Custom Resource Definitions (CRDs) in Kubernetes?
CRDs extend Kubernetes APIs, allowing users to define custom objects that suit their application needs.
4. How do service meshes help in API simplification?
Service meshes manage traffic routing, security, and observability without requiring manual API modifications.
5. Which tools help in abstracting Kubernetes API complexity?
Helm, Operators, CRDs, Service Meshes, API Gateways, and Kubernetes client libraries all contribute to simplifying Kubernetes API interactions.

External Resources
Conclusion
Making K8s APIs simpler for all Kubernetes users is crucial for enhancing adoption, usability, and efficiency. By leveraging tools like Helm, Operators, CRDs, and API Gateways, users can streamline interactions with Kubernetes, reducing complexity and boosting productivity.
Kubernetes will continue evolving, and simplifying API access remains key to fostering innovation and growth in cloud-native ecosystems.Thank you for reading the DevopsRoles page!