Table of Contents
- 1 Introduction
- 2 What is an Autonomous AI Agent?
- 3 How Autonomous AI Agents Work
- 4 Real-World Applications of Autonomous AI Agents
- 5 Examples of Autonomous AI Agents in Action
- 6 Benefits of Using Autonomous AI Agents
- 7 Challenges and Considerations
- 8 Frequently Asked Questions (FAQ)
- 9 Authoritative External Links
- 10 Conclusion
Introduction
In an era where automation, intelligence, and efficiency dictate success, the concept of the Autonomous AI Agent is rapidly emerging as a game-changer. These intelligent systems operate with minimal human input, performing tasks, learning from data, and adapting to new situations. Whether you’re in e-commerce, healthcare, finance, or software development, autonomous AI agents can streamline operations, reduce costs, and unlock new levels of productivity.
This comprehensive guide explores the fundamentals, applications, benefits, and challenges of using autonomous AI agents. Whether you’re an AI enthusiast, business owner, or tech developer, this guide offers valuable insights to help you harness the full power of autonomous AI systems.
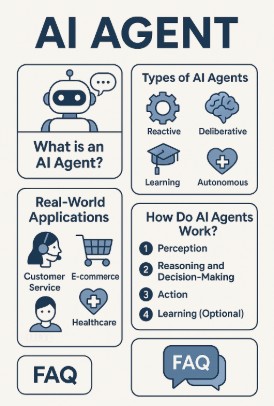
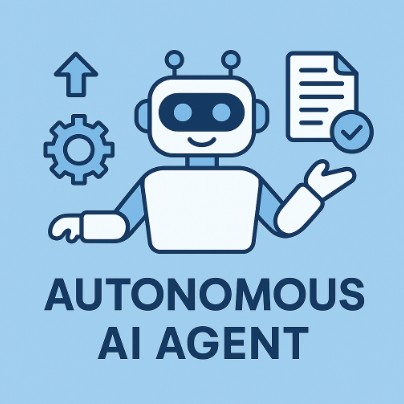
What is an Autonomous AI Agent?
An Autonomous AI Agent is a software system capable of perceiving its environment, making decisions, and acting independently to achieve defined objectives. Unlike traditional bots or rule-based systems, these agents can:
- Learn from experience (machine learning)
- Analyze environments and adapt
- Make decisions based on goals and priorities
- Interact with humans or other systems
Core Characteristics
- Autonomy: Operates without continuous human oversight.
- Proactivity: Acts based on predictive and goal-oriented reasoning.
- Reactivity: Responds dynamically to changes in its environment.
- Social Ability: Communicates and collaborates with other agents or users.
How Autonomous AI Agents Work
Architecture Overview
Most autonomous agents rely on a layered architecture that includes:
- Perception Module: Gathers data from the environment.
- Reasoning Engine: Processes information and identifies actions.
- Learning System: Incorporates feedback and adapts strategies.
- Action Executor: Carries out decisions autonomously.
Technologies Behind the Scene
- Machine Learning
- Natural Language Processing (NLP)
- Computer Vision
- Reinforcement Learning
- Large Language Models (LLMs)
Development Frameworks
Some popular platforms and frameworks include:
Real-World Applications of Autonomous AI Agents
E-Commerce and Customer Service
- Automated Product Recommendations
- 24/7 Customer Support Chatbots
- Inventory Management Systems
Healthcare
- Patient Monitoring Systems
- Clinical Diagnosis Assistance
- Medical Research Agents
Finance and Banking
- Fraud Detection and Prevention
- Autonomous Portfolio Management
- Customer Onboarding Agents
Manufacturing
- Predictive Maintenance Bots
- Process Automation Agents
- Supply Chain Optimization Tools
Education and Training
- AI Tutors
- Interactive Learning Agents
- Autonomous Curriculum Planning
Examples of Autonomous AI Agents in Action
Basic Use Case
Customer Support Chatbot
- Tasked with handling FAQs.
- Learns from user interactions to improve responses.
- Escalates complex issues to human agents.
Intermediate Use Case
Email Assistant for Sales
- Automates email follow-ups based on client behavior.
- Adjusts tone and content using NLP.
- Tracks engagement metrics.
Advanced Use Case
Autonomous Research Assistant
- Collects data from scholarly sources.
- Summarizes findings.
- Recommends next research steps.
- Collaborates with other agents to refine hypotheses.
Benefits of Using Autonomous AI Agents
- ✅ Scalability: Handle millions of interactions simultaneously.
- ✅ Cost Efficiency: Reduce the need for large human teams.
- ✅ Consistency: Provide uniform service without fatigue.
- ✅ Data-Driven Decisions: Use real-time analytics.
- ✅ Speed: Rapid task execution and decision-making.
Challenges and Considerations
- ❌ Data Privacy Concerns
- ❌ Bias in Decision-Making
- ❌ Over-Reliance on Automation
- ❌ Security Risks
How to Mitigate Risks
- Regular audits and monitoring
- Transparent algorithms and explainability
- Data encryption and compliance (e.g., GDPR, HIPAA)
- Hybrid human-AI oversight models
Frequently Asked Questions (FAQ)
What is the difference between an AI agent and a chatbot?
While chatbots typically follow pre-set scripts, an Autonomous AI Agent can make decisions, learn from experience, and perform complex tasks without manual input.
Can small businesses benefit from autonomous agents?
Absolutely. Many SaaS platforms now offer plug-and-play autonomous agents tailored for small business needs such as customer service, inventory tracking, and sales.
Are autonomous AI agents safe to use?
They are generally safe when implemented with proper controls and oversight. Ensuring data security, transparency, and accountability is essential.
How much does it cost to build an autonomous AI agent?
Costs vary depending on complexity. Basic agents can be developed using open-source tools, while advanced systems may require significant investment.
Do I need coding skills to use an AI agent?
No. Many platforms now offer no-code or low-code solutions designed for non-technical users.
Authoritative External Links
- OpenAI’s Guide to Autonomous Agents
- Microsoft Research on Autonomous Systems
- Stanford Human-Centered AI
- Harvard Berkman Klein Center on AI

Conclusion
The rise of Autonomous AI Agents marks a new frontier in automation and intelligence. By delegating repetitive or complex tasks to these agents, businesses and individuals can save time, reduce errors, and focus on innovation. From customer support to research automation, these systems are reshaping industries and paving the way for smarter workflows.
To stay competitive in a tech-driven future, now is the time to explore, understand, and adopt autonomous AI agents tailored to your specific needs. Their potential is immense, and the journey has only just begun.Thank you for reading the DevopsRoles page!