Master Docker with DevOpsRoles.com. Discover comprehensive guides and tutorials to efficiently use Docker for containerization and streamline your DevOps processes.
In this tutorial, How to Deploy Services to a Docker Swarm Cluster. First, You need to install the Docker swarm cluster here. In today’s world of distributed systems, containerization has become a popular choice for deploying and managing applications.
Docker Swarm, a native clustering and orchestration solution for Docker, allows you to create a swarm of Docker nodes that work together as a cluster.
In this blog post, we will explore the steps to deploy a service to a Docker Swarm cluster and take advantage of its powerful features for managing containerized applications.
Deploying Services to a Docker Swarm Cluster
The simple, I will deploy the NGINX container service.
Log into Controller. Run the following command.
docker service create --name nginx_test nginx
To check the service status as command below
vagrant@controller:~$ docker service ls
ID             NAME         MODE         REPLICAS   IMAGE          PORTS
44sp9ig3k65o   nginx_test   replicated   1/1        nginx:latest
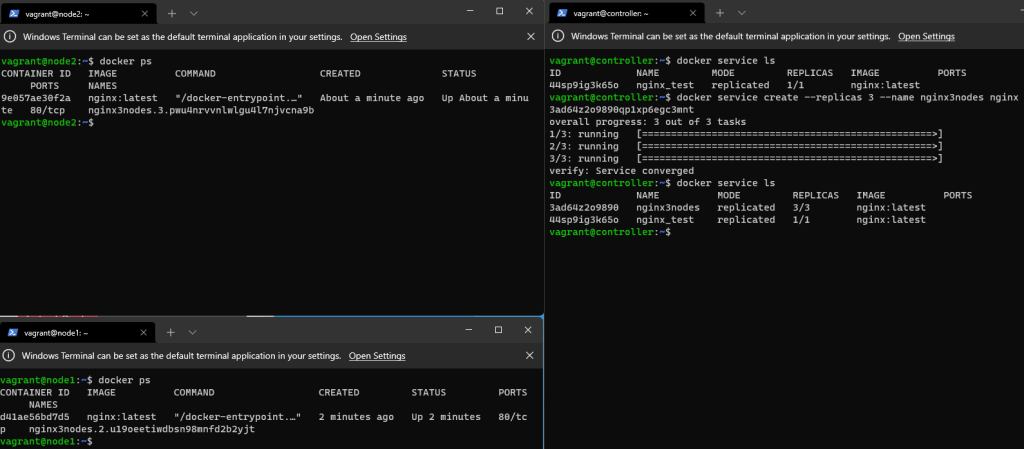
We will deploy that service to all three nodes as commanded below
docker service create --replicas 3 --name nginx3nodes nginx
The result is Deploy service to the swarm as the picture below
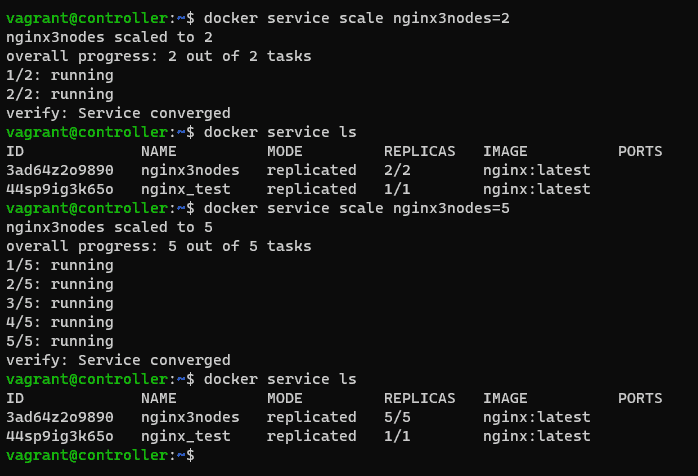
You want to scale the service to all five nodes.
docker service scale nginx3nodes=5
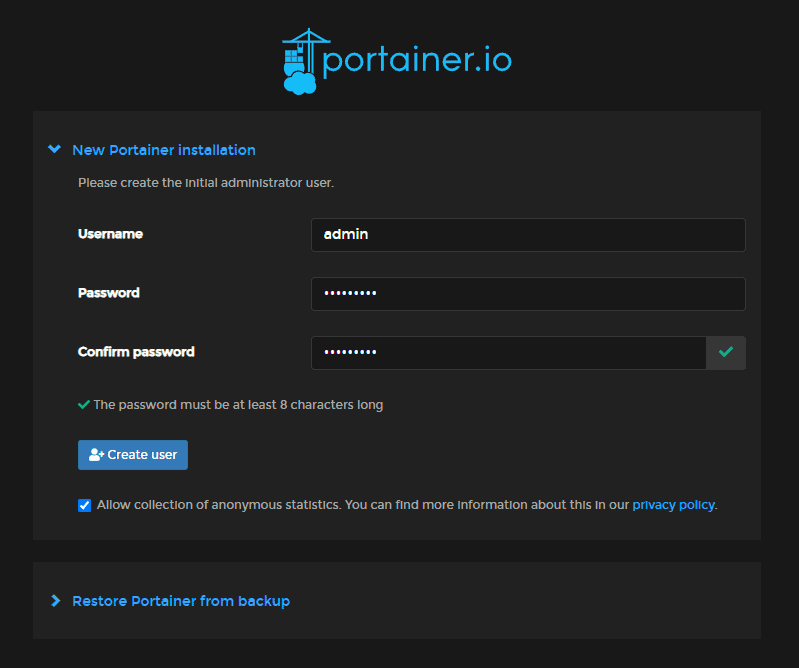
We deploy Portainer on the controller to easily manage the swarm.
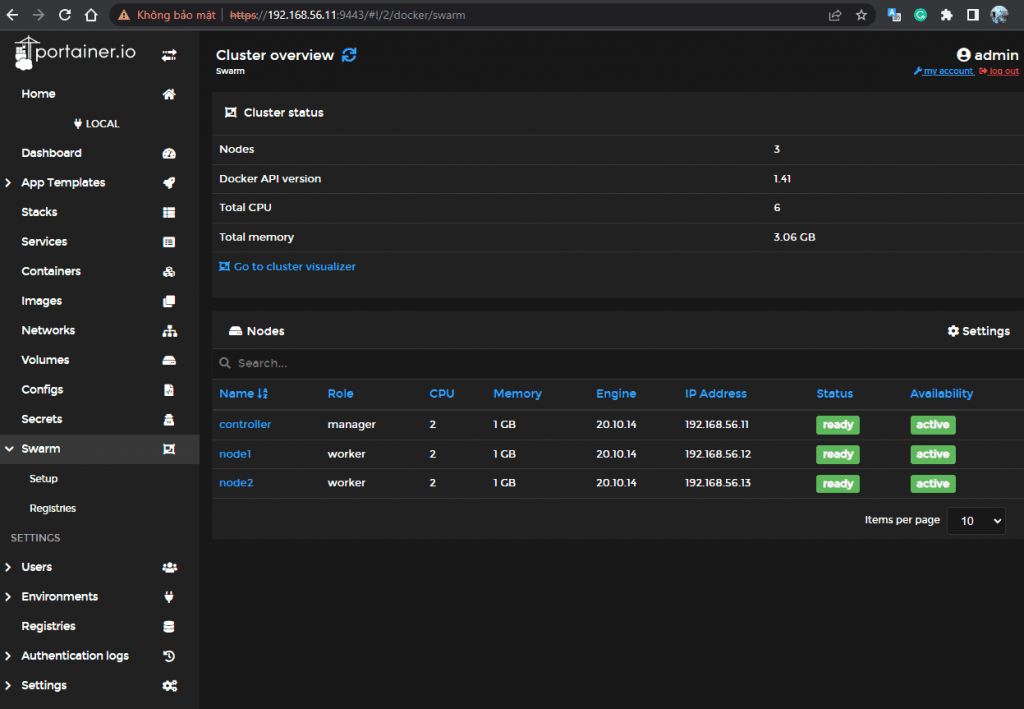
Open the browser, and go to http://SERVER:9443 (Where SERVER is the IP address of the server). you should see Swarm listed in the left navigation
Swarm on portainer
Conclusion
You have to Deploy the service to the swarm. Docker Swarm will take care of scheduling the service across the Swarm nodes and managing its lifecycle. Docker Swarm simplifies the management and scaling of containerized applications, providing fault tolerance and high availability. By following the steps outlined in this blog post, you can easily deploy your services to a Docker Swarm cluster and take advantage of its powerful orchestration capabilities. I hope will this your helpful. Thank you for reading the DevopsRoles page!
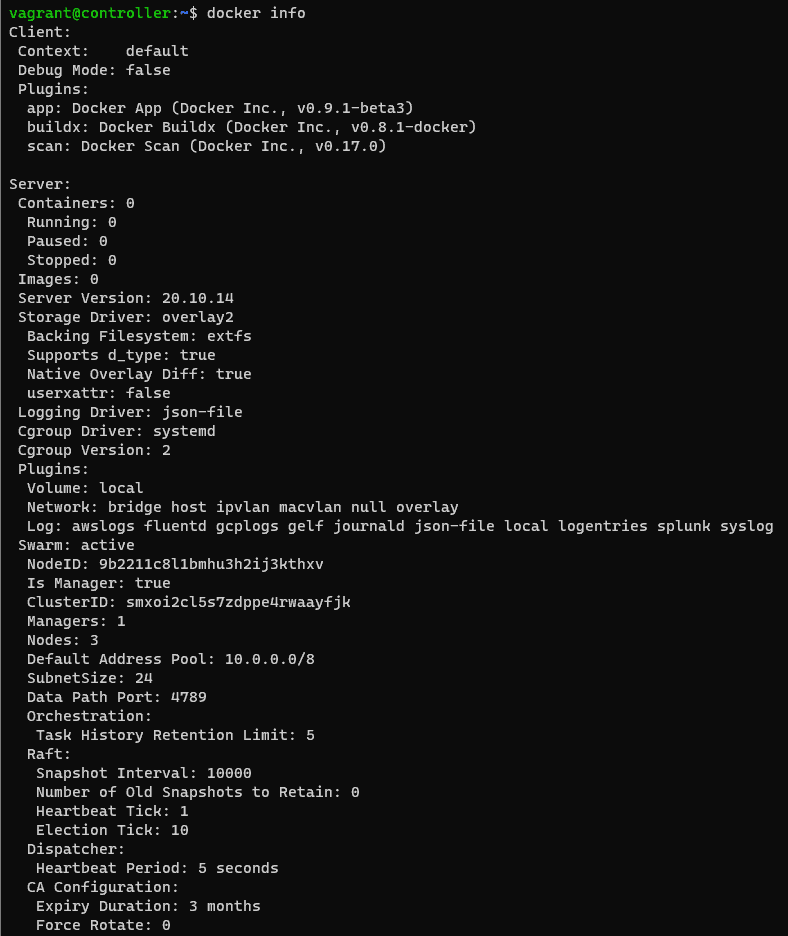
We will verify the result on the Server controller:
docker info
Conclusion
You have successfully installed a Docker Swarm cluster and deployed services to it. You can continue exploring Docker Swarm features to manage and scale your applications effectively. I hope will this your helpful. Thank you for reading the DevopsRoles page!
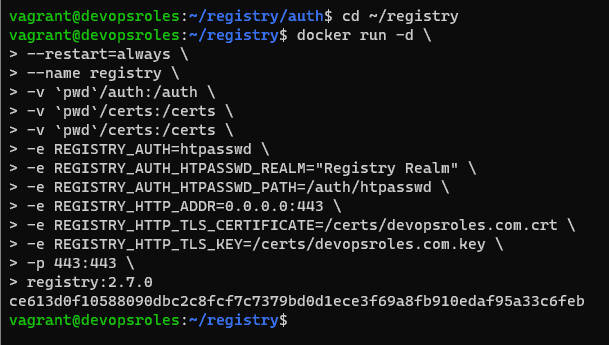
Now, you can access it from the local machine. however, you want to access it from a remote system. we need to add a ca.crt file. you need the copy the contents of the ~/registry/certs/devopsroles.com.crt file.
Login into your second machine
Create folder
sudo mkdir -p /etc/docker/certs.d/SERVER:443
where SERVER is the IP address of the machine hosting the registry.
Create the new file with:
sudo nano /etc/docker/certs.d/SERVER:443/ca.crt
paste the contents from devopsroles.com.crt ( from the hosting server) save and close the file.
How to do login into the new registry
From the second machine.
docker login -u USER -p https://SERVER:443
Where USER is the user you added when you generated the htpasswd file above.
Conclusion
You have successfully deployed a self-hosted Docker registry. You can now use it to store and share your Docker images within your network. I hope will this your helpful. Thank you for reading the DevopsRoles page!
This tutorial, How to Deploy Redash data visualization dashboard helps use Docker.
You can deploy the powerful data visualization tool Redash as a Docker container.
Redash is a powerful data visualization tool that is built for fast access to data collected from various sources. Redash helps you make sense of your data
Requirements
Running instance of Ubuntu Server.
A user with sudo privileges.
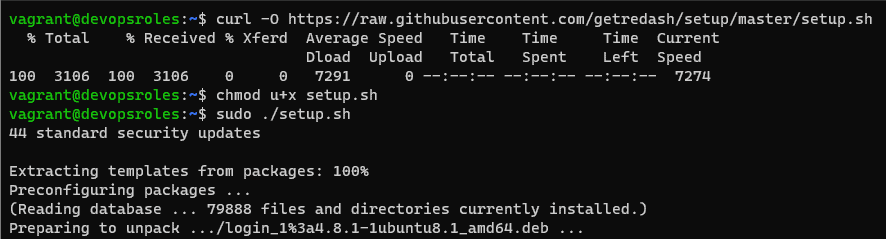
To deploy Redash, a data visualization dashboard, you can follow these steps:
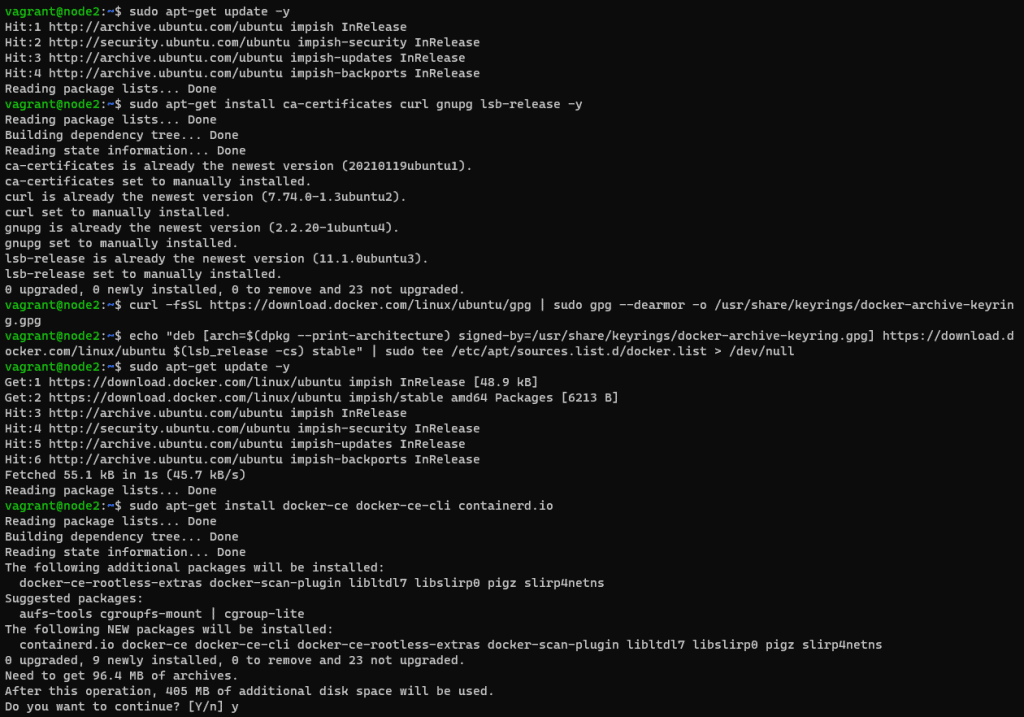
Install Docker
First, You need to install Docker on the Ubuntu server. Refer to How to install docker on Ubuntu Server. and Install Docker-compose on the Ubuntu Server. Refer to here.
The deployment will take anywhere from 2-10 minutes.
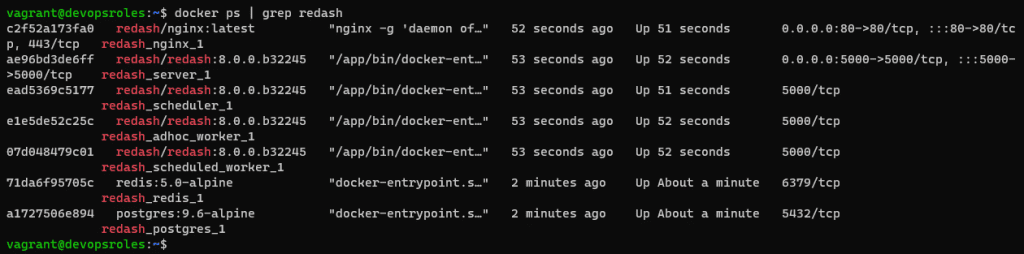
The output terminal is as below:
Docker containers running Redash data visualization dashboard
How to access Redash
Open a web browser, and type http://ipaddress as in the picture below:
The Redash main page
You now have to deploy a data visualization tool. Next time, How to connect a data source to Redash.
Conclusion
You have successfully deployed the Redash data visualization dashboard and can now start creating visualizations and dashboards for your data. Continue exploring the Redash documentation and features to leverage its full capabilities for data visualization and analysis.
I hope will this your helpful. Thank you for reading the DevopsRoles page!
In this quick-start tutorial, learn how to Docker install Oracle 12c. This guide provides straightforward steps for setting up Oracle 12c in a Docker container, allowing you to leverage the benefits of a virtualized environment for database management. Perfect for those seeking a practical approach to deploying Oracle 12c with Docker.
Requirements
You need an account on Docker. Create an account here.
Install or update Docker on your PC
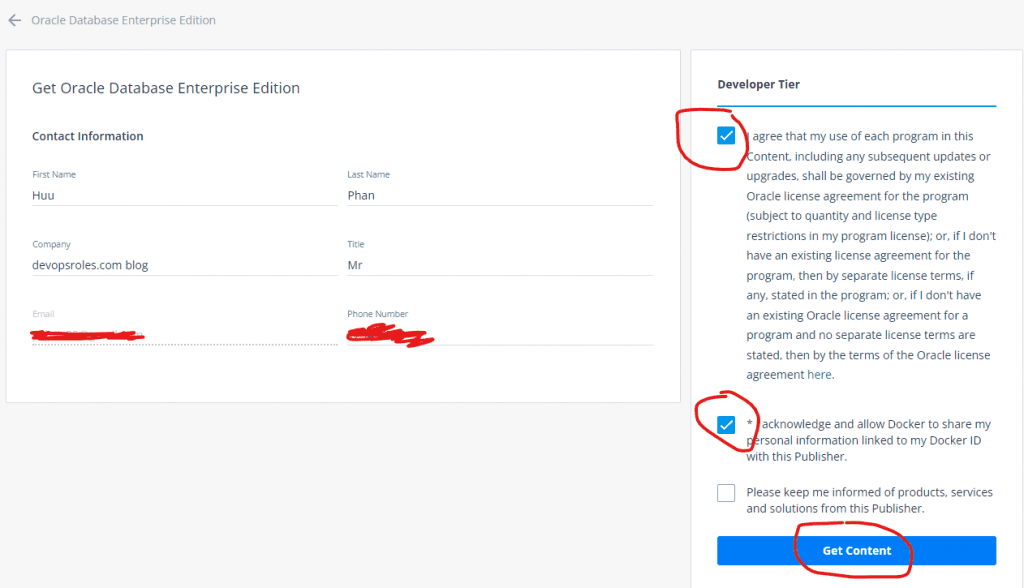
Oracle Database 12c Docker Image
Oracle Database Enterprise Edition 12c is available as an image in the Docker Store.
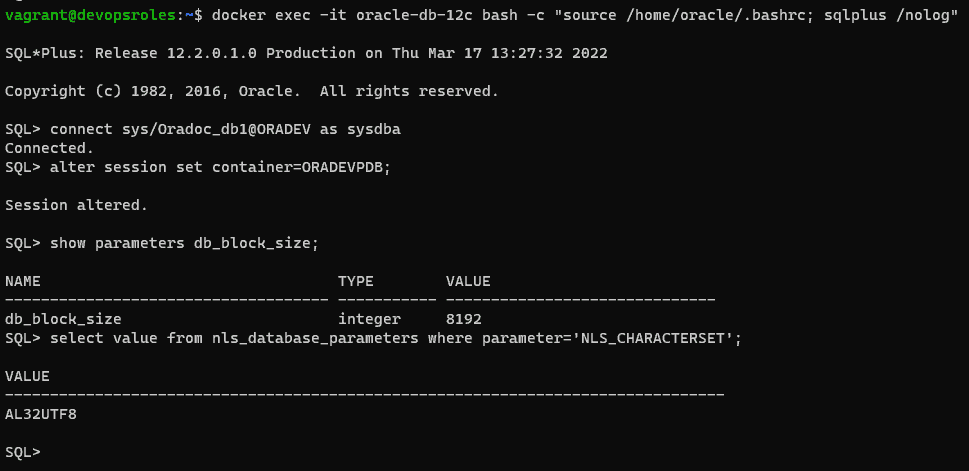
The default password to connect to the database with the sys user is Oradoc_db1. Check the character set which should be AL32UTF8
docker exec -it oracle-db-12c bash -c "source /home/oracle/.bashrc; sqlplus /nolog"

SQL> connect sys/Oradoc_db1@ORADEV as sysdba
SQL> alter session set container=ORADEVPDB;
SQL> show parameters db_block_size;
SQL> select value from nls_database_parameters where parameter='NLS_CHARACTERSET';
Create data and temp tablespace
SQL>
--Create tablespace for new devopsroles Project
CREATE TABLESPACE huupv_devopsroles_data DATAFILE '/u01/app/oracle/product/12.2.0/dbhome_1/data/huupv_devopsroles_data.db' SIZE 64M AUTOEXTEND ON NEXT 32M MAXSIZE 4096M EXTENT MANAGEMENT LOCAL;

--Create temp tablespace for new devopsroles Project
CREATE TEMPORARY TABLESPACE huupv_devopsroles_temp TEMPFILE '/u01/app/oracle/product/12.2.0/dbhome_1/data/huupv_devopsroles_temp.db' SIZE 64M  AUTOEXTEND ON NEXT 32M MAXSIZE 4096M EXTENT MANAGEMENT LOCAL;
Do not start with too large an initial size, because it can waste space.
Use a single block size (8K) for the whole DB
Do not allow individual data files to grow large (beyond 8-10Gb)
Create a user and assign a grant
SQL>
--Create user for devopsroles schema
CREATE USER huupv_devopsroles IDENTIFIED BY huupv_devopsroles DEFAULT TABLESPACE huupv_devopsroles_data TEMPORARY TABLESPACE huupv_devopsroles_temp PROFILE default ACCOUNT UNLOCK;

--Assign grant to user
GRANT CONNECT TO huupv_devopsroles;
GRANT RESOURCE TO huupv_devopsroles;
GRANT UNLIMITED TABLESPACE TO huupv_devopsroles;
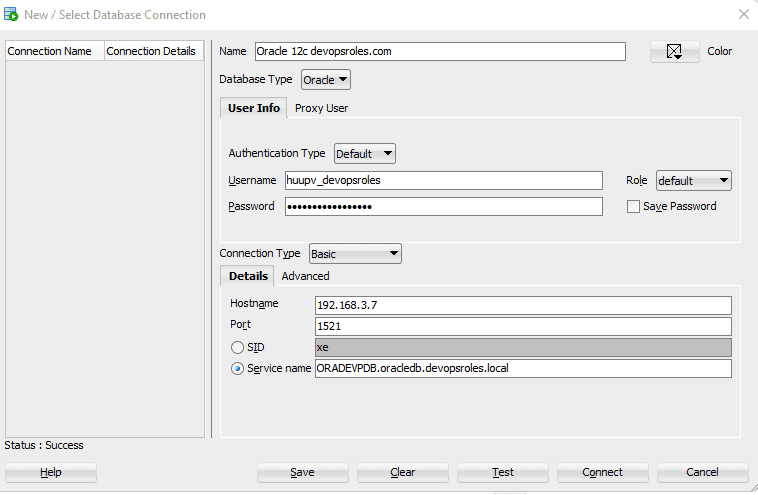
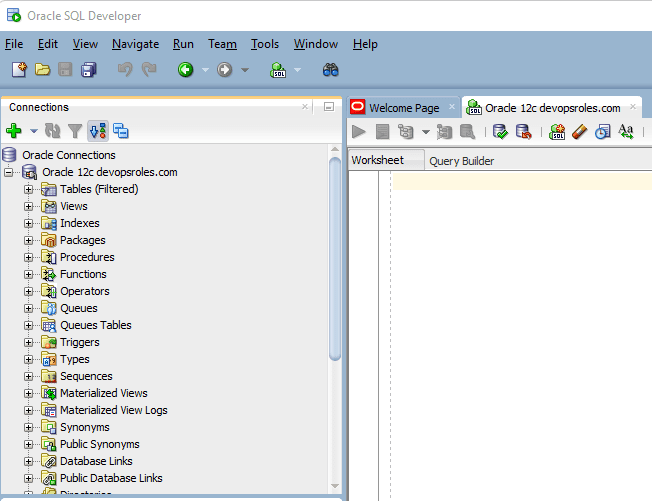
Test the new scheme using a tool such as Oracle SQLDeveloper
Service Name: ORADEVPDB.oracledb.devopsroles.local
Via youtube
Conclusions
While installing Oracle Database 12c on Docker is not officially supported by Oracle, which only offers Docker images for Database 18c and later, you can still proceed by following the outlined steps in this guide.
Keep in mind that these steps are unofficial and might present certain limitations or compatibility issues. For optimal results and support, consider using the officially provided Oracle Database versions on Docker. I hope will this your helpful. Thank you for reading the DevopsRoles page!
In this tutorial, How to use Docker deploy MySQL cluster and connect to the nodes from your local machine. We will be deploying the MySQL server with docker.
To deploy a MySQL cluster using Docker, you can use the MySQL official Docker images and Docker Compose. Here’s a step-by-step guide:
1 Management node
2 Data nodes
2 SQL nodes
The nodes in the cluster are running on separate hosts in a network.
The SQL nodes are created initially, with a random password. Get the default password.
docker logs mysql1 2>&1 | grep PASSWORD
To change the password, first, Input the password default at Step 7
docker exec -it mysql1 mysql -uroot -p
ALTER USER 'root'@'localhost' IDENTIFIED BY 'root';
FLUSH PRIVILEGES;
MySQL node 2:
The SQL nodes are created initially, with a random password. Get the default password.
docker logs mysql2 2>&1 | grep PASSWORD
To change the password, first, Input the password default at Step 7
docker exec -it mysql2 mysql -uroot -p
ALTER USER 'root'@'localhost' IDENTIFIED BY 'root';
FLUSH PRIVILEGES;
Step 8: Login and create a new database.
For example, I will create huupv an account on mysql1 and mysql2 containers and access any hosts.
# For mysql1
docker exec -it mysql1 mysql -uroot -p
CREATE USER 'huupv'@'%' IDENTIFIED BY '123456789';
GRANT ALL ON *.* TO 'huupv'@'%';
FLUSH PRIVILEGES;

# For mysql2
docker exec -it mysql2 mysql -uroot -p
CREATE USER 'huupv'@'%' IDENTIFIED BY '123456789';
GRANT ALL ON *.* TO 'huupv'@'%';
FLUSH PRIVILEGES;
Create new a database.
create schema test_db;
The output terminal is as below:
vagrant@devopsroles:~/mysql-docker$ docker exec -it mysql1 mysql -uroot -p
Enter password:
Welcome to the MySQL monitor.  Commands end with ; or \g.
Your MySQL connection id is 15
Server version: 8.0.28-cluster MySQL Cluster Community Server - GPL

Copyright (c) 2000, 2022, Oracle and/or its affiliates.

Oracle is a registered trademark of Oracle Corporation and/or its
affiliates. Other names may be trademarks of their respective
owners.

Type 'help;' or '\h' for help. Type '\c' to clear the current input statement.

mysql> CREATE USER 'huupv'@'%' IDENTIFIED BY '123456789';
Query OK, 0 rows affected (0.02 sec)

mysql> GRANT ALL ON *.* TO 'huupv'@'%';
Query OK, 0 rows affected (0.11 sec)

mysql> FLUSH PRIVILEGES;
Query OK, 0 rows affected (0.02 sec)

mysql> exit
Bye
vagrant@devopsroles:~/mysql-docker$ docker exec -it mysql2 mysql -uroot -p
Enter password:
Welcome to the MySQL monitor.  Commands end with ; or \g.
Your MySQL connection id is 16
Server version: 8.0.28-cluster MySQL Cluster Community Server - GPL

Copyright (c) 2000, 2022, Oracle and/or its affiliates.

Oracle is a registered trademark of Oracle Corporation and/or its
affiliates. Other names may be trademarks of their respective
owners.

Type 'help;' or '\h' for help. Type '\c' to clear the current input statement.

mysql> CREATE USER 'huupv'@'%' IDENTIFIED BY '123456789';
ERROR 1396 (HY000): Operation CREATE USER failed for 'huupv'@'%'
mysql> GRANT ALL ON *.* TO 'huupv'@'%';
Query OK, 0 rows affected (0.10 sec)

mysql> FLUSH PRIVILEGES;
Query OK, 0 rows affected (0.01 sec)

mysql> exit
Bye
vagrant@devopsroles:~/mysql-docker$
Login from my machine.
 mysql -h192.168.4.10 -uhuupv -p
 mysql -h192.168.4.11 -uhuupv -p
Via My Youtube
Conclusion
You have successfully deployed a MySQL cluster using Docker. You can now use the cluster for your applications or explore additional configuration options for MySQL clustering, such as replication and high availability. I hope will this your helpful. Thank you for reading the DevopsRoles page!
In this tutorial, I will use Docker to install an Nginx web server. How to set up an Nginx web server in a Docker container. Now, let go Docker install Nginx container.
Docker as a platform container. I will install Docker on Debian/Ubuntu and install the Nginx container from Docker Hub.
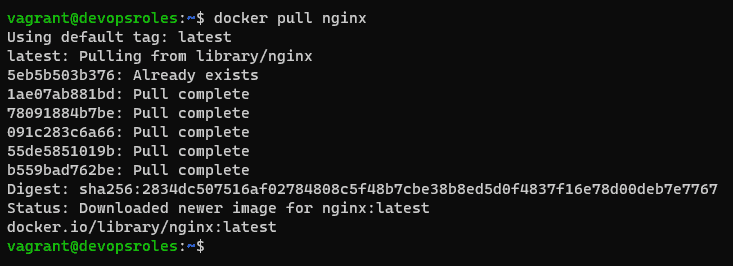
Run Nginx Container Using Docker. I will pull an Nginx image from the docker hub.
$ docker pull nginx
List the Docker images as command below
$ docker images
Create Docker Volume for Nginx
$ docker volume create nginx-data-persistent
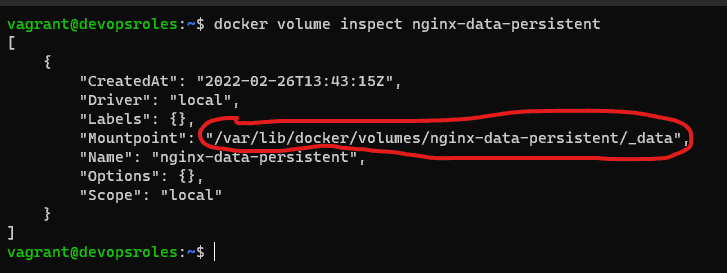
Get the docker volume information as command below
$ docker volume inspect nginx-data-persistent
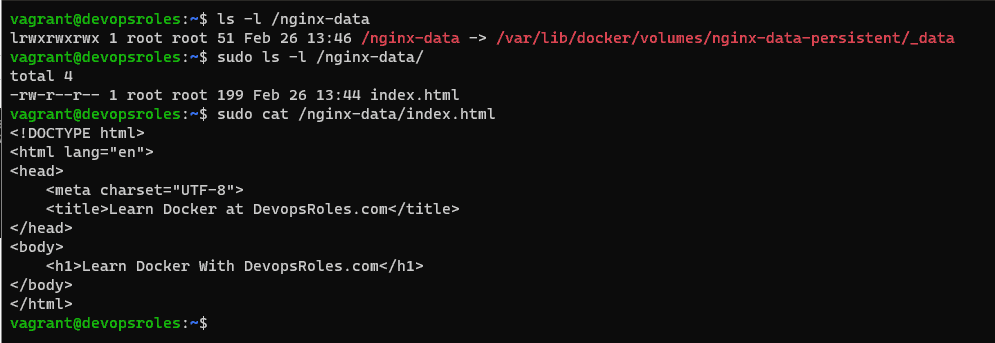
Building a Web Page to Serve on Nginx
Create an HTML file
$ sudo vi /var/lib/docker/volumes/nginx-data-persistent/_data/index.html
The content is as below:
<!DOCTYPE html>
<html lang="en">
<head>
    <meta charset="UTF-8">
    <title>Learn Docker at DevopsRoles.com</title>
</head>
<body>
    <h1>Learn Docker With DevopsRoles.com</h1>
</body>
</html>
Start the Nginx container with persistent data storage. Data storage location “/var/lib/docker/volumes/nginx-data-persistent/_data” on Host Ubuntu and the path in the container is “/usr/share/nginx/html” Run command as below:
Access into Nginx container with the command below
$ docker exec -it nginx-server /bin/bash
Now, you can stop docker container apache
docker stop nginx-server
and remove it:
docker rm nginx-server
You can clean up and delete the image that was used in the container.
docker image remove nginx
Youtube Docker install Nginx container
Conclusion
You have successfully installed and run an Nginx container using Docker. You can now customize the Nginx configuration, serve your own website, or explore additional Nginx features and settings. I hope will this your helpful. Thank you for reading the DevopsRoles page!
In this tutorial, I will use Docker to install an apache web server. How to set up Apache web server in a Docker container. Now, let go Docker install Apache Web Server.
Docker as a platform container. I will install Docker on Debian/Ubuntu and install Apache 2.4 container from Docker Hub.
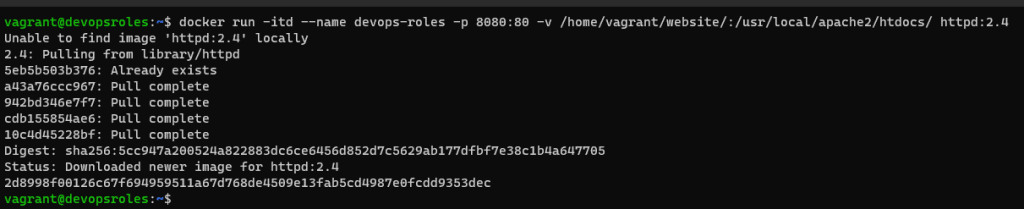
For example, I will install Apache 2.4 container named devops-roles. Use an image called httpd:2.4 from Docker Hub. and detached from the current terminal.
Host port is 8080 to be redirected to guest port 80 on the container. I will serve a simple web page form /home/vagrant/website.
Docker install Apache web server
docker run -itd --name devops-roles -p 8080:80 -v /home/vagrant/website/:/usr/local/apache2/htdocs/ httpd:2.4
Check Docker Apache container running as command below
docker ps
To created index.html file inside /home/vagrant/website directory.
sudo vi /home/vagrant/website/index.html
The content as below
<!DOCTYPE html>
<html lang="en">
<head>
    <meta charset="UTF-8">
    <title>Learn Docker at DevopsRoles.com</title>
</head>
<body>
    <h1>Learn Docker With DevopsRoles.com</h1>
</body>
</html>
Open web browser type server-ip:8080/index.html
The output terminal as below
Now, you can stop docker container apache
docker stop devops-roles
and remove it:
docker rm devops-roles
You can clean up and delete the image that was used in the container.
docker image remove httpd:2.4
Via Youtube
Conclusion
You have to Docker install Apache Web Server. I hope will this your helpful. Thank you for reading the DevopsRoles page!
In this blog, we will explore various methods of data sharing in Docker containers and how they can be effectively used in your projects. Now, let go Docker Containers Share Data.
Docker containers can share data using various mechanisms provided by Docker. Here are a few ways to share data between Docker containers.
I will deploy 2 containers using docker to share data between containers.
Volumes are a fundamental feature in Docker that enable data persistence and sharing between containers and the host system.
When you create a volume, it acts as a dedicated storage location that can be mounted into one or more containers. The data stored in a volume persists even if the container using it is removed.
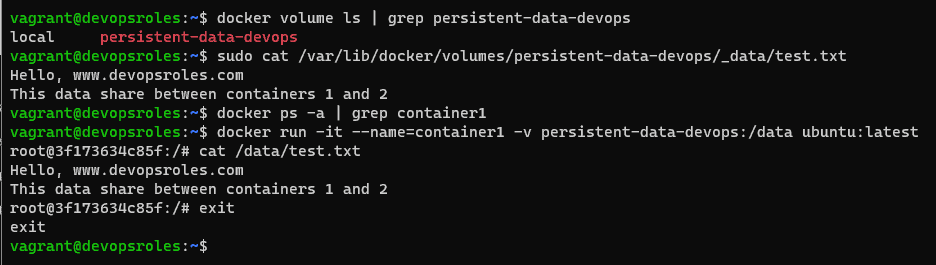
We will create a Volume to save our data as command below:
The volume is created in the /var/lib/docker/volumes directory.
vagrant@devopsroles:~$ sudo ls /var/lib/docker/volumes/persistent-data-devops/_data/test.txt
/var/lib/docker/volumes/persistent-data-devops/_data/test.txt
For example, We will deploy the first container which will use the persistent volume.
docker run -it --name=container1 -v persistent-data-devops:/data ubuntu:latest
The container named: container1
mount the persistent-data-devops volume into the /data directory within the new container
We’ll now deploy a second container as command below
docker run -it --name=container2 -v persistent-data-devops:/data ubuntu:latest
Login second container and display content
cat /data/test.txt
Edit /data/test.txt file. I use the vim commandline.
Add the following at the bottom of the file:
This data share between containers 1 and 2
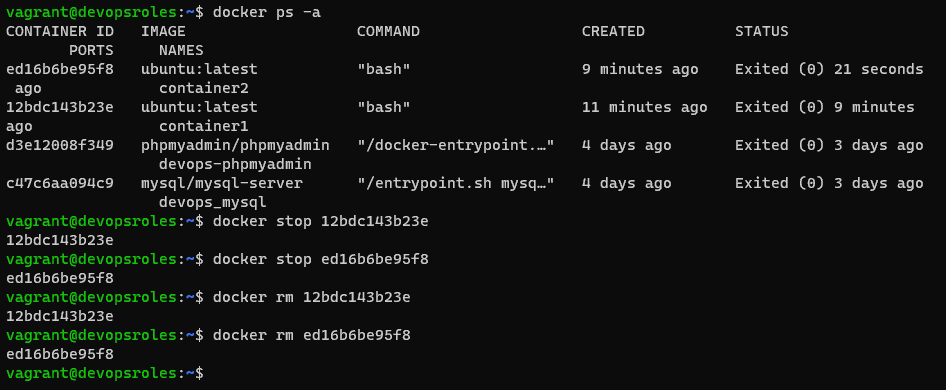
The output terminal as below
vagrant@devopsroles:~$ docker run -it --name=container2 -v persistent-data-devops:/data ubuntu:latest

root@ed16b6be95f8:/# cat /data/test.txt
Hello, www.devopsroles.com

root@ed16b6be95f8:/# vim /data/test.txt
root@ed16b6be95f8:/# cat /data/test.txt
Hello, www.devopsroles.com
This data share between containers 1 and 2
Exit the running container with the exit command. You can stop and remove them with the commands:
docker stop ID
docker rm ID
After stopping and removing docker container1, we will deploy again, But data will remain data.
Youtube: Docker Containers Share Data
Conclusion
You have to Docker Containers Share Data. These are some of the common methods to share data between Docker containers. Choose the one that best suits your requirements based on the nature of the data and the use case you have in mind.
Data sharing is a crucial aspect of Docker containerization. By utilizing volumes, bind mounts, named volumes, Docker Compose, and Docker networks, you can effectively share data between containers and the host system. I hope will this your helpful. Thank you for reading the DevopsRoles page!
First I will create a volume for MySQL to remain persistent. I will create a volume name is mysql-volume with the command below:
docker volume create mysql-volume
The output terminal is as below:
vagrant@devopsroles:~$ docker volume create mysql-volume
mysql-volume
vagrant@devopsroles:~$ docker volume ls
DRIVER    VOLUME NAME
local     1b944b2bc6253d6ef43a7fe8c0b57f7e070a219d495a69d89ee5e33ab3ffc48f
local     4f63522a2fe6eec851e2502fc56bbed0706a73df8e2a119ef1a9382c234f1b5b
local     8c2473be65a52c7a0a47e2d7b48b6781f29255f3ef6372b60e4c227644ff0844
local     c6e1ca4cc9617ca9031d974f4d19a5efbac96102850aa255d07c9dc53bd7f6e4
local     c509424aaaeda0374dc1d3d849bc245a183e865cddffa4bc1606d736ee3fb615
local     cb6583b8ad3d474f06e6c8fef30f5d4d11cb1a51e69ca0cc5d2df15a9deae1c3
local     ghost-blog_ghost
local     ghost-blog_mysql
local     my-postgres-db-db
local     mysql-volume
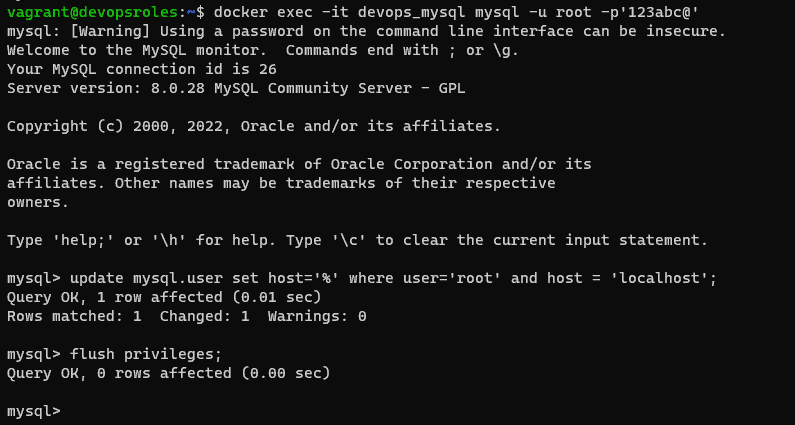
After our volume ready, we will deploy the MySQL container with named is devops_mysql and connect it to the volume with the command below:
docker run --name=devops_mysql -p3306:3306 -v mysql-volume:/var/lib/mysql -e MYSQL_ROOT_PASSWORD=123abc@ -d mysql/mysql-server
The output terminal as below
vagrant@devopsroles:~$ docker run --name=devops_mysql -p3306:3306 -v mysql-volume:/var/lib/mysql -e MYSQL_ROOT_PASSWORD=123abc@ -d mysql/mysql-server
Unable to find image 'mysql/mysql-server:latest' locally
latest: Pulling from mysql/mysql-server
221c7ea50c9e: Pull complete
d32a20f3a6af: Pull complete
28749a63c815: Pull complete
3cdab959ca41: Pull complete
30ceffa70af4: Pull complete
e4b028b699c1: Pull complete
3abed4e8adad: Pull complete
Digest: sha256:6fca505a0d41c7198b577628584e01d3841707c3292499baae87037f886c9fa2
Status: Downloaded newer image for mysql/mysql-server:latest
8b5a319d3cdaac3cd34046e6a32d8a6df25cbf17d28b3e83ac759389d2916e0c
vagrant@devopsroles:~$ docker ps
CONTAINER ID   IMAGE                COMMAND                  CREATED          STATUS                             PORTS                                                        NAMES
8b5a319d3cda   mysql/mysql-server   "/entrypoint.sh mysq…"   16 seconds ago   Up 14 seconds (health: starting)   0.0.0.0:3306->3306/tcp, :::3306->3306/tcp, 33060-33061/tcp   devops_mysql
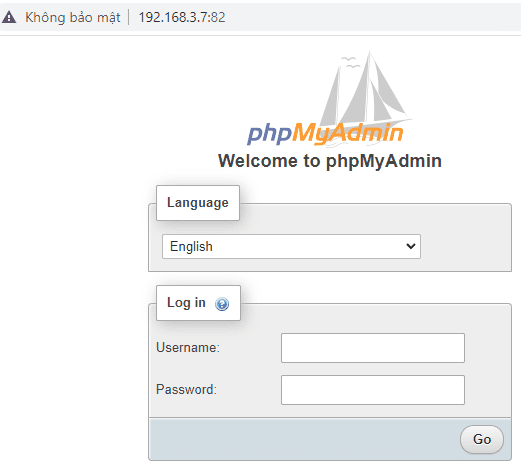
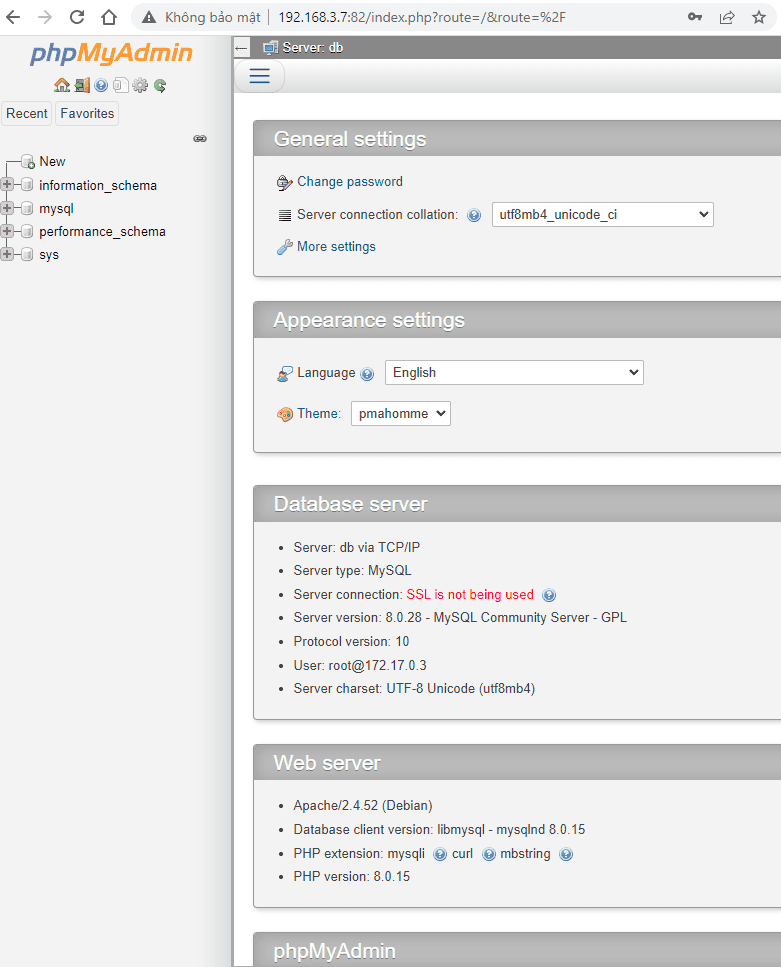
Deploy the phpMyAdmin Container
I will deploy the phpMyAdmin Container. Create a volume for phpMyAdmin with the command line as below
docker volume create phpmyadmin-volume
The output terminal is as below:
vagrant@devopsroles:~$ docker volume create phpmyadmin-volume
phpmyadmin-volume
vagrant@devopsroles:~$ docker volume ls | grep phpmyadmin-volume
local     phpmyadmin-volume