Introduction
In this tutorial, How to Deploy Ghost Blog with docker. cms Ghost is a popular content creation platform that’s written in JavaScript with Node.js. It’s open-source software.
Docker has become a popular choice for deploying applications due to its ease of use, scalability, and portability. If you’re looking to start a blog using Ghost, a powerful and flexible open-source blogging platform, using Docker can simplify the deployment process.
We will use Docker to quickly Ghost blog. First, we have installed Docker and Docker Compose on your host.

Prerequisites
Before we get started, make sure you have Docker and Docker Compose installed on your server or local machine.
- Host OS: Ubuntu 21.04
- Installed Docker
- Installed Docker compose
Deploy a Ghost Container
We will start a basic Ghost site with the docker command as below:
docker run -d -p 2368:2368 --name simple-ghost ghost:4

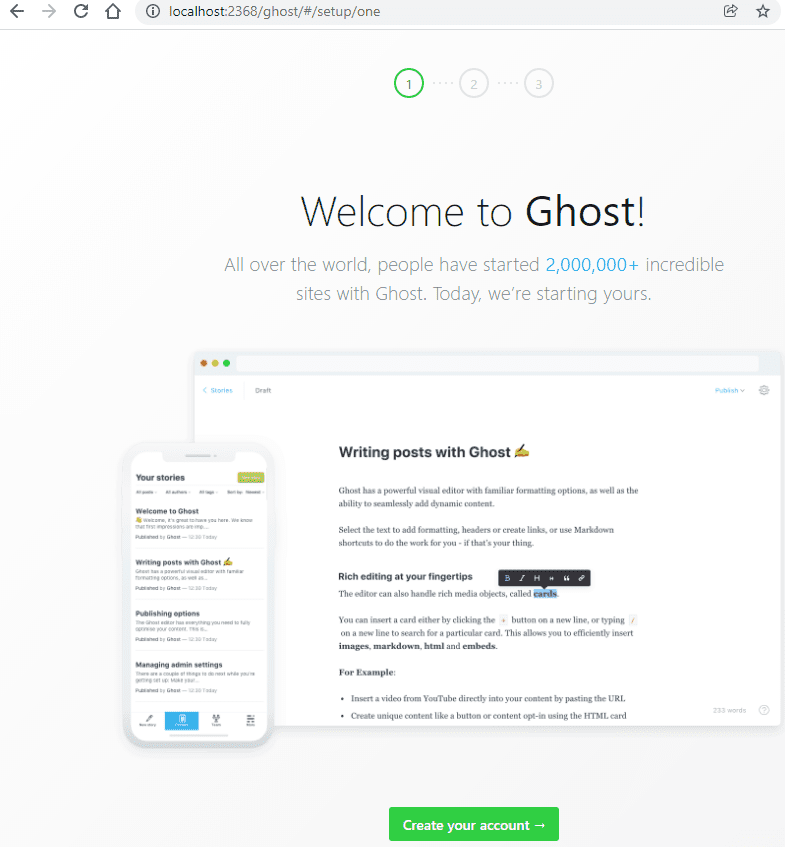
Ghost the default port is 2368. We will view the site via http://localhost:2368 or http://localhost:2368/ghost to access the Ghost admin panel.
We will first run settings to finalize your Ghost installation and create an initial user account.

This approach is if we just trying out Ghost. However, we have not set up persistent storage yet so your data will be lost when the container stops.
We will use uses Docker Compose to set up Ghost with a Docker volume. Mount a volume to the /var/lib/ghost/content directory to store Ghost’s data outside the container.
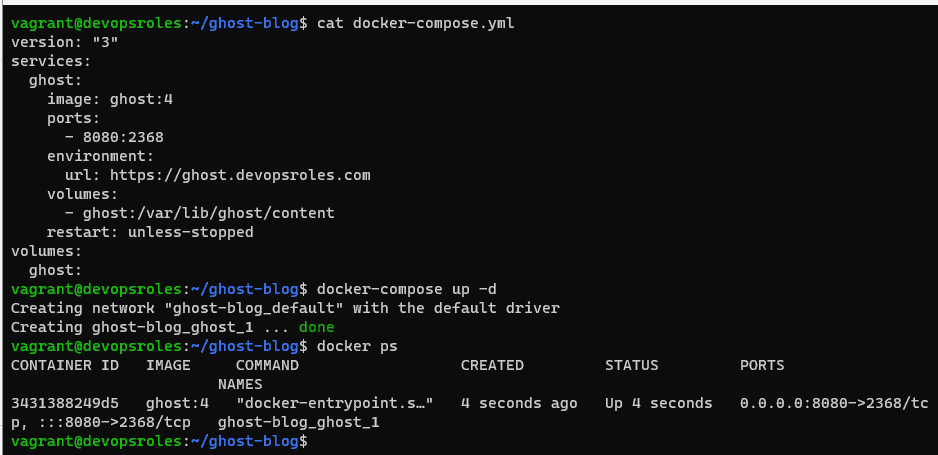
Example docker-compose.yml file
version: "3"
services:
  ghost:
    image: ghost:4
    ports:
      - 8080:2368
    environment:
      url: https://ghost.devopsroles.com
    volumes:
      - ghost:/var/lib/ghost/content
    restart: unless-stopped
volumes:
  ghost:
Now use Compose to bring up your site:
docker-compose up -d
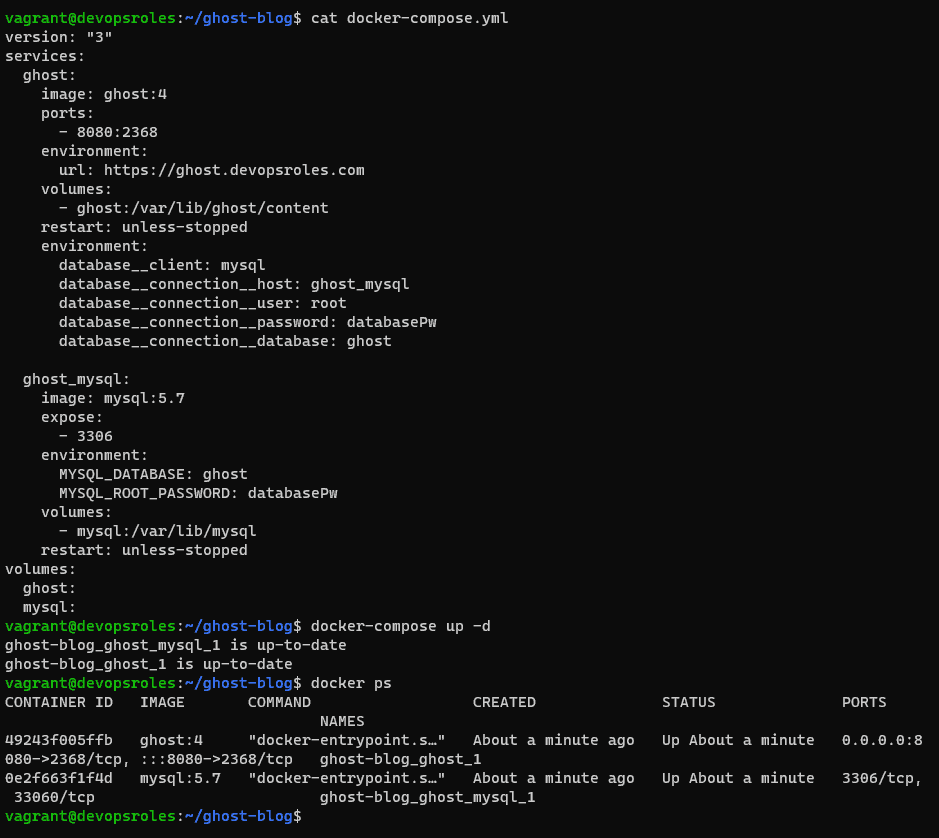
External Database
Ghost defaults to using an SQLite database that’s stored as a file in your site’s content directory.
services:
  ghost:
    # ...
    environment:
      database__client: mysql
      database__connection__host: ghost_mysql
      database__connection__user: root
      database__connection__password: databasePw
      database__connection__database: ghost

  ghost_mysql:
    image: mysql:5.7
    expose:
      - 3306
    environment:
      MYSQL_DATABASE: ghost
      MYSQL_ROOT_PASSWORD: databasePw
    volumes:
      - mysql:/var/lib/mysql
    restart: unless-stopped

volumes:
  mysql:
Summary Ghost blog docker-compose
version: "3"
services:
  ghost:
    image: ghost:4
    ports:
      - 8080:2368
    environment:
      url: https://ghost.devopsroles.com
    volumes:
      - ghost:/var/lib/ghost/content
    restart: unless-stopped
    environment:
      database__client: mysql
      database__connection__host: ghost_mysql
      database__connection__user: root
      database__connection__password: databasePw
      database__connection__database: ghost

  ghost_mysql:
    image: mysql:5.7
    expose:
      - 3306
    environment:
      MYSQL_DATABASE: ghost
      MYSQL_ROOT_PASSWORD: databasePw
    volumes:
      - mysql:/var/lib/mysql
    restart: unless-stopped
volumes:
  ghost:
  mysql:
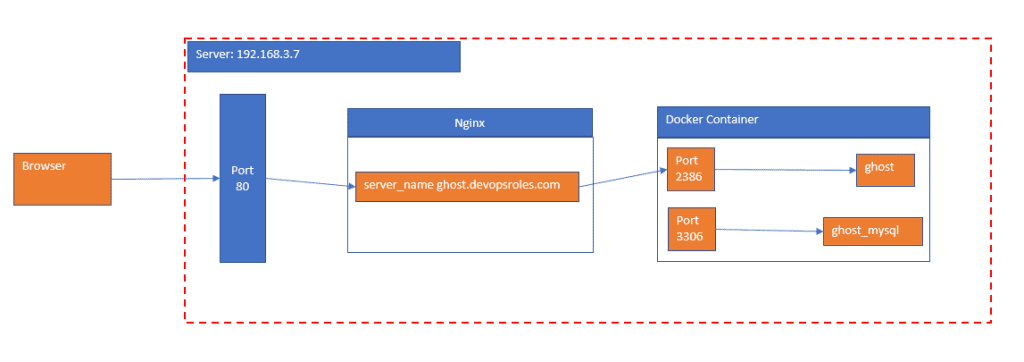
Proxying Traffic to Your Container
Add NGINX to your host:
sudo apt update
sudo apt install nginx

# Allow HTTP/HTTPS traffic through the firewall
sudo ufw allow 80
sudo ufw allow 443
Define an NGINX host for your site in /etc/nginx/sites-available/ghost.devopsroles.com
server {

    server_name ghost.devopsroles.com;
    index index.html;

    access_log /var/log/nginx/ghost_access.log;
    error_log /var/log/nginx/ghost_error.log error;

    location / {
        proxy_pass http://127.0.0.1:8080;
        proxy_redirect off;
        proxy_set_header Host $http_host;
        proxy_set_header X-Original-IP $remote_addr;
    }

}
Create symbolic link
sudo ln -s /etc/nginx/sites-available/ghost.devopsroles.com /etc/nginx/sites-enabled/ghost.devopsroles.comRestart Nginx service
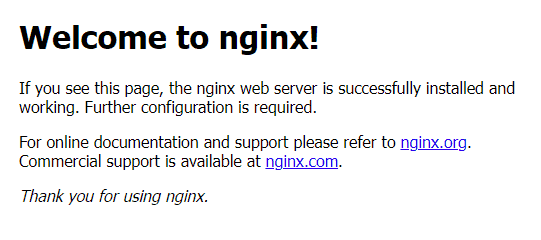
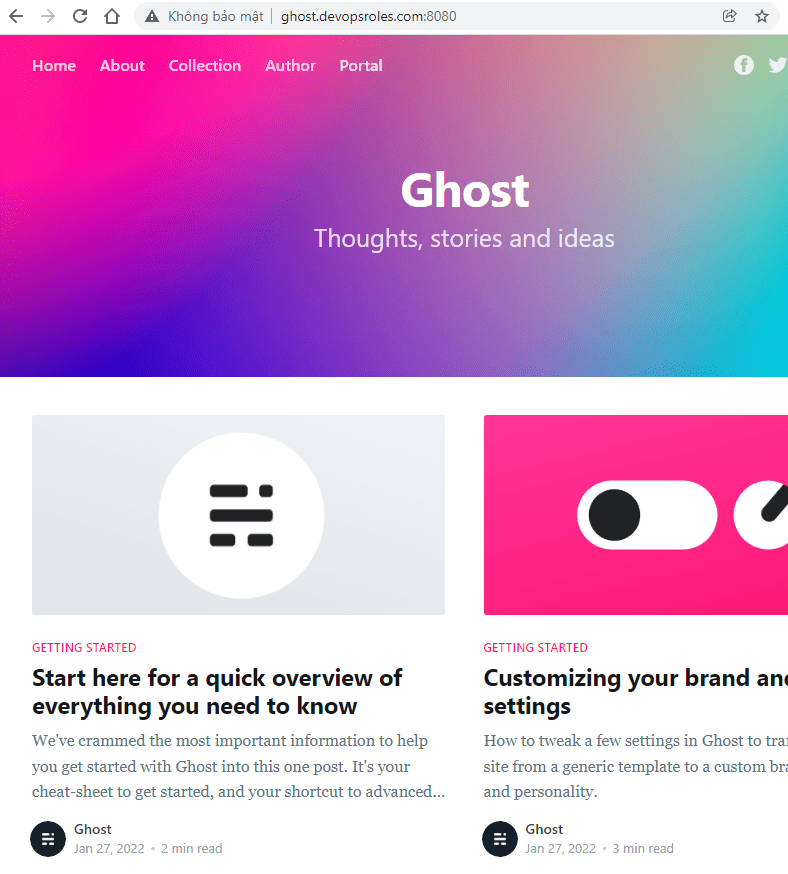
sudo systemctl restart nginxThe result is Deploy cms Ghost Blog with docker Nginx

How to Deploy Ghost Blog with Docker via Youtube

Conclusion
You’ve successfully deployed a Ghost blog using Docker, taking advantage of the benefits of containerization for managing your blog.
With your cms Ghost blog now live, you can explore additional Docker features to enhance your blog’s capabilities, such as using custom themes, adding plugins, and scaling your blog to handle increasing traffic.
I hope will this your helpful. Thank you for reading the DevopsRoles page!