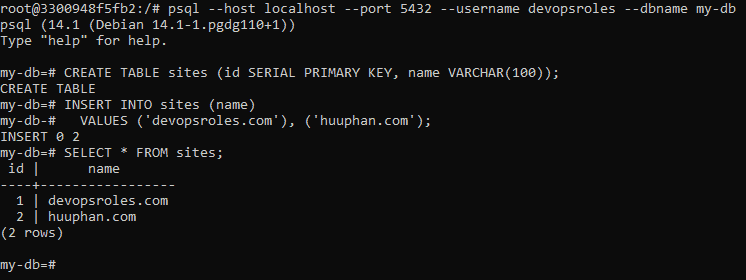
Tag Archives: Database Administration

Comprehensive Guide to Show Users in MySQL Database on Linux

Introduction

Managing users in a MySQL database is a fundamental task for database administrators. Whether you’re granting privileges, ensuring security, or auditing your database environment, knowing how to list users is essential. This article will guide you through the process of Show Users in MySQL Database on Linux system, providing examples ranging from basic to advanced.

Basic Command to Show Users

To show the users in a MySQL database, you can use the following basic command:

SELECT user FROM mysql.user;

This command retrieves a list of all users from the mysql.user table.

Step-by-Step Guide

Open MySQL Command Line: Access your MySQL database using the MySQL command line client:

mysql -u root -p

Enter your root password when prompted.

Run the Query

SELECT user FROM mysql.user;
This will display a list of all users in your MySQL database.

Advanced User Listing Techniques

Filtering User Lists

To filter the user list based on specific criteria, you can use the WHERE clause. For example, to list users with a specific host, you can use:

SELECT user, host 
FROM mysql.user 
WHERE host = 'localhost';

Using Information Schema

The INFORMATION_SCHEMA is another useful way to list users. This method is especially helpful for more detailed information about user privileges and roles.

SELECT user, host 
FROM INFORMATION_SCHEMA.USER_PRIVILEGES;

This query provides detailed information about user privileges.

Practical Examples

Listing Users with Specific Privileges

To find users with specific privileges, such as SELECT privileges, use the following query:

SELECT grantee, privilege_type 
FROM INFORMATION_SCHEMA.USER_PRIVILEGES 
WHERE privilege_type = 'SELECT';

Exporting User List to a File

To export the list of users to a file for auditing purposes, follow these steps:

Open MySQL Command Line:

mysql -u root -p

Run the Query and Export:

SELECT user, host 
INTO OUTFILE '/path/to/exported_users.csv' 
FIELDS TERMINATED BY ',' 
LINES TERMINATED BY '\n' 
FROM mysql.user;

Ensure the MySQL server has the appropriate permissions to write to the specified path.

Common Issues and Troubleshooting

When listing users, you might encounter some common issues:

Permissions Issues

Ensure you have the necessary permissions to view the mysql.user table:

SHOW GRANTS FOR 'your_username'@'your_host';

No Results Returned

If no results are returned, check the MySQL version and ensure the mysql.user table exists:

SELECT VERSION();
SHOW TABLES FROM mysql;

FAQs

How do I list all users in MySQL?

Use the query:

SELECT user 
FROM mysql.user;

How can I list users with specific privileges?

Use:

SELECT grantee, privilege_type 
FROM INFORMATION_SCHEMA.USER_PRIVILEGES 
WHERE privilege_type = 'SELECT';

Can I export the user list to a file?

Yes, use:

SELECT user, host 
INTO OUTFILE '/path/to/exported_users.csv' 
FIELDS TERMINATED BY ',' 
LINES TERMINATED BY '\n' 
FROM mysql.user;

What should I do if I encounter permissions issues?

Check your grants with:

SHOW GRANTS FOR 'your_username'@'your_host';

Conclusion

Managing and auditing users in a MySQL database is a critical task for database administrators. By following the steps and examples provided, you can effectively list users in a MySQL database on a Linux system, whether you’re performing basic queries or advanced filtering. Remember to ensure you have the necessary permissions and to handle any common issues promptly. This guide aims to provide you with a comprehensive understanding and practical approach to listing users in MySQL, enhancing your database management skills. Thank you for reading the DevopsRoles page!

Docker run PostgreSQL: A Step-by-Step Guide

Introduction

In today’s fast-paced development environments, the ability to quickly deploy and manage databases is crucial. Docker provides a powerful solution for running PostgreSQL databases in isolated containers, making it easier to develop, test, and deploy your applications. In this tutorial, you will learn how to use Docker run PostgreSQL databases and connect to them, enabling you to efficiently manage your database environments with minimal setup. Whether you’re new to Docker or looking to streamline your database management, this guide will equip you with the essential knowledge to get started.

  • PostgreSQL is a powerful, open-source object-relational database
  • Docker is an open platform that runs an application in an isolated environment called a container.

Prerequisites

Docker Run PostgreSQL container

You have to use Docker to run PostgreSQL databases. Below is an example command to run a PostgreSQL container:

docker run --name my-postgres-db -p 9000:5432 -e POSTGRES_PASSWORD=123456789  -e POSTGRES_USER=devopsroles  -e POSTGRES_DB=my-db -d postgres:14

Note:

  • -p 9000:5432: Host port 9000 and Container port 5432
  • Image: postgres version 14
  • Container name: my-postgres-db
  • Environment variables to configure our database: POSTGRES_USER, POSTGRES_PASSWORD, and POSTGRES_DB

The output terminal is below

Using psql command to connect the database

psql --host localhost --port 5432 --username devopsroles --dbname my-db

The output terminal is below

Your database is currently empty. I will create a table as an example

CREATE TABLE sites (id SERIAL PRIMARY KEY, name VARCHAR(100));
INSERT INTO sites (name)
  VALUES ('devopsroles.com'), ('huuphan.com');

I will run a command to query the table created.

SELECT * FROM sites;

The output terminal is below

Docker Manage data persistence

The problem is that we stop and start the container with the commands “docker stop my-postgres-db” and “docker start my-postgres-db” when creating a new container will not allow us to access the database that you are created, as it was isolated in your container.

Create a new volume with the following command. The solution stores the database outside of the container

docker volume create my-postgres-db-db

You will stop and remove your current container and create a new one.

docker stop my-postgres-db
docker rm my-postgres-db
docker run --name my-postgres-db -p 5432:5432  -e POSTGRES_PASSWORD=123456789  -e POSTGRES_USER=devopsroles  -e POSTGRES_DB=my-db -v my-postgres-db-db:/var/lib/postgresql/data -d postgres:14

How to know where the database is stored on your computer

docker inspect my-postgres-db-db

The output terminal is below

Conclusion

Using Docker to run PostgreSQL databases offers a streamlined approach to managing your database environments with ease and efficiency. I hope this tutorial has provided you with the necessary insights and steps to confidently set up and connect to PostgreSQL using Docker. Thank you for reading the  DevopsRoles page and I hope this guide proves helpful in your journey toward optimizing your development and deployment processes.

How to change MySQL Data Directory on Ubuntu: A Step-by-Step Guide

Introduction

In this tutorial, How To Move a MySQL Data Directory to a New Location on Ubuntu. I will change MySQL Data Directory on Ubuntu. Managing databases efficiently is crucial for any application, and sometimes this involves changing the data directory for MySQL. Whether you need to move your MySQL data to a different partition for better performance or to manage storage, this task can seem daunting.

This guide will walk you through the process of changing the MySQL data directory on an Ubuntu system, ensuring your database remains secure and operational. Let’s dive in and make this transition smooth and straightforward.

Change MySQL Data Directory on Ubuntu

Identify Current MySQL Data Directory

mysql -u username -p -e “SELECT @@datadir”

For example, the current data directory is ‘/var/lib/mysql

Stop MySQL service

service mysql stop

Backup existing MySQL data directory or copy recursively the contents of ‘/var/lib/mysql’ to ‘/data/mysql-data’

tar -cvf mysql.tar /var/lib/mysql
#or
cp -rap /var/lib/mysql/* /data/mysql-data

Create a new data directory with proper permissions

mkdir -p /data/mysql
chown mysql:mysql /data/mysql

Using the Rsync command Migrate existing data into the new location

nohup rsync -avp /var/lib/mysql/ /data/mysql

Configure the new MySQL Data Directory

Edit the MySQL default configuration file /etc/my.cnf

datadir = /data/mysql

Change the AppArmor data directory in file /etc/apparmor.d/usr.sbin.mysqld

# Replace the lines beginning with /var/lib/mysql into /data/mysql
:%s/\/var\/lib\/mysql/\/data\/mysql/g

Start MySQL service

service mysql start

Verify the location change of the new data directory as the command follows

mysql -u username -p -e “SELECT @@datadir”

Checking issue during MySQL startup check MySQL log file /var/log/mysqld.log for any errors.

Conclusion

You have change MySQL Data Directory on Ubuntu. By following this guide, you have learned how to safely relocate your MySQL data, ensuring your system’s efficiency and reliability. Regular maintenance and updates, along with proper data management, are key to sustaining the performance and security of your MySQL databases. Keep these practices in mind to maintain a robust and scalable database environment. I hope will this your helpful. Thank you for reading the DevopsRoles page!

Oracle notes for beginners: Your Essential Guide to Getting Started

Introduction

In this tutorial, Oracle notes for beginners. How to query commands useful in Oracle database. Diving into the world of Oracle databases can be both exciting and overwhelming for beginners. With its robust features and capabilities, Oracle is a powerful tool for managing data effectively.

Oracle notes for beginners

Oracle Database commands

Changing passwords in Oracle

ALTER USER user_name IDENTIFIED BY new_password;

Create a table

CREATE TABLE my_table (
    what   VARCHAR2(10),
    who    VARCHAR2(10),
    mark   VARCHAR2(10)
);

Insert values as the same with 3 commands below

INSERT INTO my_table (
    what,
    who,
    mark
) VALUES (
    'Devops',
    'Roles',
    '.com'
);

INSERT INTO my_table VALUES (
    'huu',
    'phan',
    '.com'
);

INSERT INTO my_table ( what ) VALUES ( 'Yeah!' );

Get the list of all tables in Oracle

SELECT
    owner,
    table_name
FROM
    all_tables

Query your permission in Oracle

select * from USER_ROLE_PRIVS where USERNAME= USER;
select * from USER_TAB_PRIVS where Grantee = USER;
select * from USER_SYS_PRIVS where USERNAME = USER;

Oracle check version

SELECT
    *
FROM
    v$version

Find Users logged into Oracle / PLSQL

SELECT
    username,
    program,
    machine,
    status,
    TO_CHAR(
        logon_time,
        'HH:MM:SS'
    )
FROM
    v$session
WHERE
    username = 'huupv' -- Username

The query for active users SQL Executed

SELECT
    a.sid,
    a.serial#,
    b.sql_text
FROM
    v$session a,
    v$sqlarea b
WHERE
        a.sql_address = b.address
    AND
        a.username = 'huupv';

Kill session in Oracle

Step 1: Identify the Session to be killed

SELECT
    s.inst_id,
    s.sid,
    s.serial#,
       --s.sql_id,
    p.spid,
    s.username,
    s.program
FROM
    gv$session s
    JOIN gv$process p ON
        p.addr = s.paddr
    AND
        p.inst_id = s.inst_id
WHERE
    s.type != 'BACKGROUND' and s.username ='huupv';

Note: The SID and SERIAL# values the relevant session.

Step 2: Kill Session

SQL> ALTER SYSTEM DISCONNECT SESSION 'sid,serial#' POST_TRANSACTION; -- The POST_TRANSACTION clause waits for ongoing transactions to complete before disconnecting the session
SQL> ALTER SYSTEM DISCONNECT SESSION 'sid,serial#' IMMEDIATE; -- ALTER SYSTEM DISCONNECT SESSION

Conclusion

Embarking on your journey with Oracle databases doesn’t have to be daunting. By understanding the basics and following the tips provided in this guide, you will gain the confidence and knowledge needed to effectively manage and manipulate data using Oracle.

Remember, practice and continuous learning are key to becoming proficient in any technology. Keep exploring, experimenting, and expanding your skills to unlock the full potential of Oracle in your projects. I will be updated later! Have a nice day! Oracle notes for beginners. Thank you for reading DevOpsRoles.com page

Setting Up Oracle Automatic Startup on Linux: A Comprehensive Guide

Introduction

In this tutorial, How to confirm Oracle automatic startup on Linux. How to make Oracle start automatically in Linux.

Ensuring that your Oracle database starts automatically when your Linux system boots up can save time and reduce manual intervention, enhancing the reliability of your database operations.

This guide will walk you through the process of configuring automatic startup for Oracle on a Linux system. By following these steps, you can ensure that your Oracle database is always ready to handle your data needs, even after a system reboot.

By default, Oracle software installation does not deploy automatic startup and shutdown init scripts on the platform.

How to confirm Oracle automatic startup on Linux.

The dbstart utility reads the oratab file. Confirm it in the example below

[HuuPV@DevopsRoles ~]$ sudo su - oracle
[oracle@DevopsRoles ~]$ cat /etc/oratab

 DEVOPSROLES_SID:/opt/oracle/product/11.2.0/dbhome_1:Y 
 DEVOPSROLES_SID02:/opt/oracle/product/10.2.03/dbhome_2:N

We see there are two instances on this server. Oracle 10.2.03 is marked “N” and will not restart when the Linux OS reboots. Oracle 11.2.0 is marked “Y” and will restart when the Linux OS reboots.

Auto Start Oracle on Linux

1. In the /etc/oratab file with the autostart column to “Y”

[oracle@DevopsRoles ~]$ cat /etc/oratab
DEVOPSROLES_SID:/opt/oracle/product/11.2.0/dbhome_1:Y

2. Create the file named “oracle” in /etc/init.d folder.

[root@DevopsRoles ~]# cd /etc/init.d
[root@DevopsRoles init.d]# vi oracle

#!/bin/sh
ORACLE_HOME=/opt/oracle/product/11.2.0/dbhome_1
ORACLE_OWNER=oracle
case "$1" in
'start') # Start the Oracle databases and listeners
su - $ORACLE_OWNER -c "$ORACLE_HOME/bin/dbstart $ORACLE_HOME"
;;
'stop') # Stop the Oracle databases and listeners
su - $ORACLE_OWNER -c "$ORACLE_HOME/bin/dbshut $ORACLE_HOME"
;;
esac

3. Create a symbolic link

[root@DevopsRoles ~]# ln -s /etc/init.d/oracle /etc/rc0.d/K10oracle
[root@DevopsRoles ~]# ln -s /etc/init.d/oracle /etc/rc3.d/S99oracle

4. Change permissions

[root@DevopsRoles ~]# chmod 750 /etc/init.d/oracle

5. use chkconfig the command to associate the dbora service

[root@DevopsRoles ~]# chkconfig --level 2345 oracle on

Test

restart the Oracle server. Then check the instance status

[oracle@DevopsRoles ~]$ ps -ef | grep smon | grep -v grep

Check the listener status

[oracle@DevopsRoles ~]$ lsnrctl status

Conclusion

Configuring Oracle for automatic startup on Linux significantly improves the efficiency and reliability of your database management. By following the steps outlined in this guide, you have learned how to set up your Oracle database to start automatically with your Linux system, ensuring minimal downtime and maximum productivity. Regular maintenance and monitoring will further ensure the smooth operation of your database. Keep exploring and optimizing your setup to make the most out of your Oracle database. Thank you for reading DevOpsRoles.com page

TKPROF using trace analyzer to trace SQL

Introduction

In this tutorial, we will explore how to use TKPROF with a trace analyzer to trace SQL in an Oracle Database Server. Optimizing SQL performance is crucial for the efficiency and responsiveness of your database applications. One of the powerful tools available for this purpose is TKPROF, a trace file analyzer provided by Oracle.

This guide will introduce you to TKPROF and show you how to use it effectively to trace and analyze SQL performance. By understanding and utilizing TKPROF, you can gain deep insights into your SQL execution, identify performance bottlenecks, and make informed optimizations to enhance your database’s performance.

Syntax of the TKPROF Command

The TKPROF command has several options that allow you to customize its behavior. Here is the syntax:

tkprof tracefile outputfile [explain= ] [table= ]
              [print= ] [insert= ] [sys= ] [sort= ]

Options of TKPROF command

table=schema.tablename: Use 'schema.tablename' with 'explain=' option.
explain=user/password: Connect to ORACLE and issue EXPLAIN PLAN.
print=integer: List only the first 'integer' SQL statements.
aggregate=yes|no: Aggregate multiple trace files.
insert=filename: List SQL statements and data inside INSERT statements.
sys=no: TKPROF does not list SQL statements run as user SYS.
record=filename: Record non-recursive statements found in the trace file.
waits=yes|no: Record summary for any wait events found in the trace file.
sort=option: Set of zero or more of the following sort options:
  prscnt: number of times parse was called
  prscpu: CPU time parsing
  prsela: elapsed time parsing
  prsdsk: number of disk reads during parse
  prsqry: number of buffers for consistent read during parse
  prscu: number of buffers for current read during parse
  prsmis: number of misses in library cache during parse
  execnt: number of times execute was called
  execpu: CPU time spent executing
  exeela: elapsed time executing
  exedsk: number of disk reads during execute
  exeqry: number of buffers for consistent read during execute
  execu: number of buffers for current read during execute
  exerow: number of rows processed during execute
  exemis: number of library cache misses during execute
  fchcnt: number of times fetch was called
  fchcpu: CPU time spent fetching
  fchela: elapsed time fetching
  fchdsk: number of disk reads during fetch
  fchqry: number of buffers for consistent read during fetch
  fchcu: number of buffers for current read during fetch
  fchrow: number of rows fetched
  userid: user ID of the user that parsed the cursor

How to Use Trace Analyzer to Trace SQL

Connect to the Database

[oracle11g@DBdevopsroles ~]$ sqlplus DBUSER/DBUSER@ORACLE_SID
SQL> set termout off
SQL> alter session set timed_statistics = true;
SQL> alter session set sql_trace = true;
SQL> SELECT COUNT(*) from tablename01;
SQL> alter session set sql_trace = false;

Use Trace with TKPROF Command

[oracle11g@DBdevopsroles ~]$ tkprof /app/oracle11g/diag/rdbms/ORACLE_SID/trace/ORACLE_SID_ora_4196.trc ORACLE_SID_ora_4196.txt explain=DBUSER/DBUSER@ORACLE_SID width=200

Confirm Output Destination

SQL> show parameter user_dump_dest

Conclusion

In this tutorial, we covered how to use the TKPROF command with a trace analyzer to trace SQL in an Oracle Database. Using TKPROF to analyze SQL performance is an invaluable skill for any database administrator or developer. By following the steps outlined in this guide, you should now be able to trace and analyze SQL execution efficiently, uncover performance issues, and implement necessary optimizations.

Continuous monitoring and analysis with TKPROF will ensure that your SQL queries run smoothly and efficiently, contributing to the overall health and performance of your database systems. Keep exploring and mastering TKPROF to become proficient in SQL performance tuning. Thank you for reading the DevopsRoles page!

Mastering Oracle query tablespace: A Comprehensive Guide for DBAs

Introduction

In this guide, you’ll learn how to efficiently query Oracle tablespaces using SQL commands. This guide covers essential techniques for monitoring tablespace size, available space, and differentiating between various types of tablespaces. This practical approach aims to enhance database management skills for Oracle administrators.

  1. What is Oracle SQL Tablespace?
    An overview of tablespaces in Oracle databases, explaining their purpose and types.
  2. How to Query Oracle Tablespace?
    Basic SQL queries to retrieve information about tablespaces, including size and contents.
  3. Check Tablespace Usage Percentage in Oracle
    Methods to calculate the usage percentage of tablespaces to monitor efficiency and plan for scaling.
  4. Oracle Query Tablespace Usage
    Advanced querying techniques to analyze tablespaces’ performance and optimize storage management.

Step-by-Step: Guide to Oracle Query Tablespace

How does a query check tablespace size, free space, and Big file vs small file SYSTEM tablespace? The following statement is below

SELECT tablespace_name,
  SUM(bytes)/1024/1024 AS mb
FROM
  ( SELECT tablespace_name, bytes FROM dba_data_files
  UNION ALL
  SELECT tablespace_name,bytes FROM dba_temp_files
  )
WHERE tablespace_name='SYSTEM'
GROUP BY tablespace_name;

Sample Output

TABLESPACE_NAME                    MB
-------------------- ----------------
SYSTEM                          2,048

To query tablespace “SIZE EXTEND, BIG_SMALL_FILE, BLOCK_SIZE” in Oracle.

SELECT dt.tablespace_name tablespace_name,
  SUBSTR(ddf.file_name,0, instr(ddf.file_name, '/', -1, 1) - 1) AS placement_directory,
  SUBSTR(ddf.file_name, instr(ddf.file_name, '/',   -1, 1) + 1) AS file_name,
  ddf.bytes                                         /1024/1024  AS mb,
  ddf.autoextensible,
  DECODE (dt.bigfile,'NO','SMALL','YES','BIG') AS BIG_SMALL_FILE,
  dt.block_size block_size
FROM
  (SELECT tablespace_name, file_name, bytes,autoextensible FROM dba_data_files
  UNION
  SELECT tablespace_name, file_name, bytes,autoextensible FROM dba_temp_files
  ) ddf,
  (SELECT tablespace_name, block_size,bigfile FROM dba_tablespaces
  ) dt
WHERE dt.tablespace_name = ddf.tablespace_name
AND dt.tablespace_name   = 'SYSTEM';

Sample Output

TABLESPACE_NAME
--------------------
PLACEMENT_DIRECTORY
------------------------------------------------------------------------------------------------------------------------------------
FILE_NAME                                                                            MB AUTOEXTEN BIG_SMALL_FILE  BLOCK_SIZE
---------------------------------------------------------------------- ---------------- --------- --------------- ----------
SYSTEM
/mnt_nfs/dbdata/mydata
system02.dbf                                                                      2,048 NO        SMALL                 9192

Conclusion

This article provides a comprehensive guide to Oracle query tablespaces for size, auto-extension, file types, and block sizes. By mastering these queries, you can effectively monitor and optimize your Oracle database storage. Continuous monitoring and analysis will ensure that your database runs efficiently and remains scalable. I hope will this your helpful. Thank you for reading the DevopsRoles page!

How to Oracle query Database name: A Step-by-Step Guide

Introduction

In this tutorial, How do I use the Oracle query Database name? Using “v$parameter” for the database name. This tutorial guides you on how to query the “v$system_parameter” to determine the database name in Oracle. By connecting as SYSDBA and executing a specific SQL query, users can retrieve the database name from the system parameters, a crucial skill for database administrators managing multiple Oracle environments.

To query the database name in Oracle, start by connecting to the database using the SYSDBA role. This role grants you the necessary privileges to perform administrative tasks, including querying system parameters to find out detailed configuration information such as the database name. This process involves executing specific SQL commands that access Oracle’s system views, which contain data about the database instance.

[huupv@localhost ~]$ sudo su - oracle
[oracle@localhost ~]$ sqlplus "/as sysdba"

Oracle query Database name

SQL> SELECT name, value from v$parameter WHERE name = 'db_name' order by name;

The screen output terminal

NAME                         VALUE
--------------------------- -----------
db_name                  DRDB1

Conclusion

Successfully querying the “v$system_parameter” for the database name provides valuable insights into your Oracle database configuration. This method, though straightforward, requires careful execution of the SQL command provided to ensure accurate data retrieval and system management I hope will this your helpful. Thank you for reading the DevopsRoles page!

How to Oracle create tablespace: A Comprehensive Guide

Introduction

In this tutorial, you will learn how to Oracle create tablespace, including creating permanent and temporary tablespaces, as well as creating multiple datafiles with a single tablespace creation command. Understanding how to manage tablespaces is crucial for effective database administration.

Creating a Permanent Tablespace

Permanent tablespaces store user data and schema objects. Here’s how to create a bigfile permanent tablespace:

SQL Command

CREATE BIGFILE TABLESPACE USERDATA 
LOGGING
DATAFILE '/mnt_nfs/oradata/oracle11g/DEVOPSROLES/USERDATA.dbf'
SIZE 2048MB
EXTENT MANAGEMENT LOCAL
SEGMENT SPACE MANAGEMENT AUTO;

Explanation

  • USERDATA: Name of the tablespace.
  • LOGGING: Enables logging for the tablespace.
  • DATAFILE: Specifies the location and name of the datafile.
  • SIZE 2048MB: Sets the size of the datafile.
  • EXTENT MANAGEMENT LOCAL: Manages extents locally.
  • SEGMENT SPACE MANAGEMENT AUTO: Automatically manages segment space.

Datafile Details

  • Named datafile: USERDATA
  • Size: 2048MB
  • Location: /mnt_nfs/oradata/oracle11g/DEVOPSROLES/USERDATA.dbf

Creating a Temporary Tablespace

Temporary tablespaces are used for sorting operations and temporary data storage.

SQL Command

CREATE TEMPORARY TABLESPACE TEMP_DATA 
TEMPFILE '/mnt_nfs/oradata/oracle11g/DEVOPSROLES/TEMP_DATA.dbf'
SIZE 32M
AUTOEXTEND ON
NEXT 32M
MAXSIZE 1048M
EXTENT MANAGEMENT LOCAL;

Explanation

  • TEMP_DATA: Name of the temporary tablespace.
  • TEMPFILE: Specifies the location and name of the tempfile.
  • SIZE 32M: Initial size of the tempfile.
  • AUTOEXTEND ON: Enables auto-extension of the tempfile.
  • NEXT 32M: Amount of space added on each extension.
  • MAXSIZE 1048M: Maximum size the tempfile can grow to.
  • EXTENT MANAGEMENT LOCAL: Manages extents locally.

Note

  • A temporary tablespace uses tempfiles, not datafiles.

Creating Multiple Datafiles with a Single Tablespace

You can create a tablespace with multiple datafiles in a single command.

SQL Command

CREATE TABLESPACE DATA 
DATAFILE '/mnt_nfs/oradata/oracle11g/DEVOPSROLES/DATA_01.dbf' SIZE 4M AUTOEXTEND OFF,
'/mnt_nfs/oradata/oracle11g/DEVOPSROLES/DATA_02.dbf' SIZE 4M AUTOEXTEND OFF,
'/mnt_nfs/oradata/oracle11g/DEVOPSROLES/DATA_03.dbf' SIZE 4M AUTOEXTEND OFF
LOGGING
EXTENT MANAGEMENT LOCAL;

Explanation

  • DATA: Name of the tablespace.
  • DATAFILE: Specifies multiple datafiles with their respective sizes.
  • AUTOEXTEND OFF: Disables auto-extension for these datafiles.
  • LOGGING: Enables logging for the tablespace.
  • EXTENT MANAGEMENT LOCAL: Manages extents locally.

Conclusion

In this tutorial, we covered how to create permanent and temporary tablespaces in Oracle, as well as how to create a tablespace with multiple datafiles. Understanding these processes is essential for effective database management and optimization. For further topics, such as “Install Oracle Database 12c on Centos 7,” keep following our page! Thank you for reading the DevopsRoles page!