Table of Contents
Introduction
How to master the curl command in Linux. In this article, we’ll explore the capabilities of curl and learn how to leverage its features to simplify your web-related operations.
The command line interface (CLI) is a powerful ally for Linux users, providing efficient ways to perform various tasks. Among the multitude of commands available, curl stands out as a versatile tool for making HTTP requests and interacting with different protocols.
What is the curl command?
curl is a command-line utility that allows you to transfer data to or from a server, supporting various protocols such as HTTP, HTTPS, FTP, SMTP, and more. With its extensive range of options, curl empowers users to send and receive data using different methods, customize headers, handle authentication, and automate web-related tasks.
Basic Usage
The syntax of curl is straightforward. It follows this general structure:
curl [options] [URL]You can simply run curl followed by a URL to send a GET request and retrieve the content of a web page. For example:
curl https://devopsroles.comHow to Use Curl Command in Linux
Saving a File using the curl command
If you prefer to save the downloaded file with a different name, you can use the -o option followed by the desired filename.
curl -o index.html https://devopsroles.comcurl command to download a file from FTP Server
curl -v -u demo:password -O ftp://test.devopsroles.com/readme.txtThe command you provided is using curl to download a file from an FTP server using basic authentication. Here’s an explanation of the options used in the command:
- -v: Enables verbose output, providing detailed information about the request and response.
- -u demo:password: Specifies the username and password for basic authentication. Replace the demo with the actual username and password with the corresponding password.
- -O: Saves the downloaded file with its original name.
- ftp://test.devopsroles.com/readme.txt: Specifies the FTP URL from which the file should be downloaded. Replace test.devopsroles.com with the actual FTP server address and readme.txt with the file name you want to download.
Testing If a Server Is Available or Not
curl -I https://test.devopsroles.com/
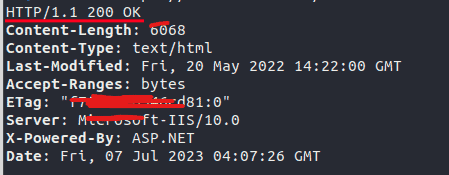
You can use it to send an HTTP HEAD request to the specified URL in order to retrieve the response headers.
- -I: Specifies that curl should send an HTTP HEAD request instead of the default GET request. This means that only the response headers will be retrieved, and not the entire content of the page.
- https://test.devopsroles.com/: Specifies the URL to which the request will be sent. Replace test.devopsroles.com with the actual domain or website you want to retrieve the headers from.
Check Server Response Time
How to measure the total time taken for the HTTP request to the specified website.
curl -w "%{time_total}\n" -o /dev/null devopsroles.comWhen you run this command, curl will initiate an HTTP request to the specified website and measure the total time taken for the request.
- -w “%{time_total}\n”: Specifies a custom output format using the -w option. In this case, %{time_total} is a placeholder that represents the total time taken for the request, and \n is a newline character that adds a line break after the output. The total time is measured in seconds.
- -o /dev/null: Redirects the response body to /dev/null, which is a special device file in Unix-like systems that discards any data written to it. By doing this, we discard the response body and only focus on measuring the time taken for the request.
- devopsroles.com: Specifies the URL of the website to which the HTTP request will be sent. Replace devopsroles.com with the actual domain or website you want to measure the time for.
Accessing Cookies with curl Command
curl --cookie-jar cookies.txt https://test.devopsroles.com/When you run this command, curl will establish an SSL/TLS-encrypted connection to the specified website and send an HTTP request. The response headers received from the server may include cookies, and curl will save these cookies to the specified “cookies.txt” file.
These cookies can be used for subsequent requests by providing the –cookie option and specifying the cookie file.
Setting User Agent Value with curl command
Uses curl to make an HTTP request to the specified website while setting a custom user-agent header.
curl --user-agent "Mozilla/4.73 [en] (X11; U; Linux 2.2.15 i686)" test.devopsroles.com- –user-agent “Mozilla/4.73 [en] (X11; U; Linux 2.2.15 i686)”: Sets the User-Agent header in the HTTP request. In this case, the specified user-agent string is “Mozilla/4.73 [en] (X11; U; Linux 2.2.15 i686)”. The User-Agent header provides information about the client or browser making the request. By setting a custom user-agent, you can emulate a specific browser or client behavior.
- test.devopsroles.com: Specifies the URL of the website to which the HTTP request will be sent. Replace test.devopsroles.com with the actual domain or website you want to access.
Conclusion
The curl command is a powerful ally for Linux users, providing extensive capabilities to interact with web services and protocols. With its simple syntax and rich set of options, curl empowers you to perform a wide range of tasks, from retrieving web pages to sending data and handling authentication. By mastering curl, you can streamline your web-related operations and enhance your command line prowess.
Whether you’re a developer, sysadmin, or simply an avid Linux user, curl is a tool worth exploring. Its versatility and flexibility make it an invaluable asset for interacting with web services from the command line. Thank you for reading the DevopsRoles page.