This guide provides a detailed walkthrough on how to install Surfshark on Linux, ensuring a seamless setup for beginners and advanced users alike. In an increasingly connected world, protecting your online privacy has become essential. Virtual Private Networks (VPNs) like Surfshark are indispensable tools for maintaining anonymity, accessing geo-restricted content, and enhancing security. Surfshark, known for its affordability and robust features, is a popular choice for Linux users.
Prerequisites
Before diving into the installation process, ensure you have the following:
A Linux-based operating system (Ubuntu, Debian, Fedora, etc.).
Administrative (root) privileges on your system.
An active Surfshark subscription.
Basic knowledge of terminal commands.
Step 1: Update Your System
First, update your system packages to ensure compatibility with Surfshark.
sudo apt update && sudo apt upgrade -y
This command updates the package list and upgrades outdated packages.
Step 2: Download Surfshark VPN
Visit the official Surfshark website to download the Linux installer.
After installation, log in using your Surfshark credentials.
surfshark-vpn login
Enter your email and password when prompted.
Step 5: Connect to a Server
To connect to the fastest available server, use:
surfshark-vpn connect
To connect to a specific server location:
surfshark-vpn connect --country US
Replace US with the country code of your desired location.
Advanced Configuration
Custom DNS Configuration
Enhance your browsing experience by setting custom DNS:
surfshark-vpn settings --dns 1.1.1.1 8.8.8.8
This command configures Cloudflare (1.1.1.1) and Google (8.8.8.8) DNS servers.
Kill Switch
Enable the kill switch to prevent data leaks if the VPN connection drops:
surfshark-vpn settings --killswitch on
FAQ
1. Can I use Surfshark on all Linux distributions?
Surfshark officially supports Debian and Red Hat-based distributions. However, it can be configured manually on other distributions using OpenVPN or WireGuard.
2. Is Surfshark CLI-only on Linux?
Yes, Surfshark on Linux operates via the command line. However, it’s straightforward and user-friendly for anyone familiar with terminal basics.
Installing Surfshark on Linux is a straightforward process that offers robust online privacy and security. By following this guide, you can protect your data, bypass geo-restrictions, and enjoy unrestricted internet access. Take control of your online experience and explore the web safely with Surfshark VPN on Linux. Thank you for reading the DevopsRoles page!
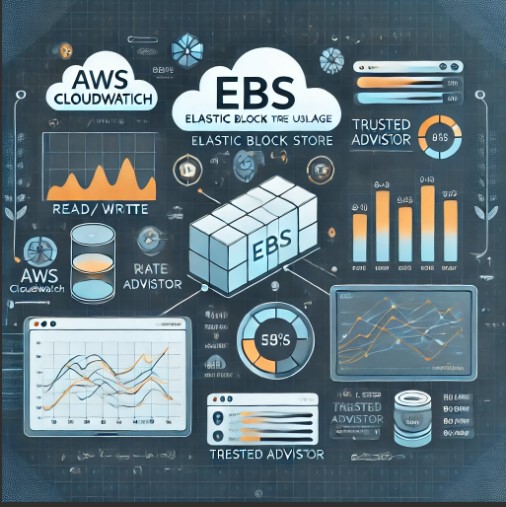
Amazon Elastic Block Store (EBS) is a scalable and high-performance storage service provided by AWS. While it offers unmatched flexibility, managing and optimizing EBS volume usage can significantly impact cost and performance. Understanding how to analyze actual EBS volume usage is critical for maintaining an efficient AWS environment. In this guide, we’ll explore the tools and methods you can use to monitor and optimize EBS volume usage, ensuring you get the best value for your investment.
Why Analyze EBS Volume Usage?
Efficient management of EBS volumes offers several benefits:
Cost Optimization: Avoid overpaying for unused or underutilized storage.
Performance Improvement: Identify bottlenecks and optimize for better I/O performance.
Resource Allocation: Ensure your workloads are adequately supported without overprovisioning.
Compliance and Reporting: Maintain compliance by documenting storage utilization metrics.
Tools to Analyze Actual EBS Volume Usage
1. AWS CloudWatch
Overview
AWS CloudWatch is a monitoring and observability service that provides metrics and logs for EBS volumes. It is a native tool within AWS and offers detailed insights into storage performance and utilization.
Key Metrics:
VolumeIdleTime: Measures the total time when no read/write operations are performed.
VolumeReadOps & VolumeWriteOps: Tracks the number of read and write operations.
VolumeThroughputPercentage: Monitors throughput as a percentage of the volume’s provisioned throughput.
BurstBalance: Indicates the balance of burst credits for burstable volumes.
Steps to Analyze EBS Volume Usage Using CloudWatch:
Navigate to the CloudWatch Console.
Select Metrics > EBS.
Choose the relevant metrics (e.g., VolumeIdleTime, VolumeReadBytes).
Visualize metrics on graphs for trend analysis.
Example: Setting up an Alarm
Go to CloudWatch Alarms.
Click on Create Alarm.
Select a metric such as VolumeIdleTime.
Set thresholds to trigger notifications.
2. AWS Trusted Advisor
Overview
AWS Trusted Advisor provides recommendations for optimizing AWS resources. It includes a Cost Optimization check that highlights underutilized EBS volumes.
Steps to Use Trusted Advisor:
Access Trusted Advisor from the AWS Management Console.
Review the Cost Optimization section.
Locate the Underutilized Amazon EBS Volumes report.
Take action based on the recommendations (e.g., resizing or deleting unused volumes).
3. Third-Party Tools
CloudHealth by VMware
Offers advanced analytics for storage optimization.
Provides insights into EBS volume costs and performance.
LogicMonitor
Delivers detailed monitoring for AWS services.
Includes customizable dashboards for EBS volume utilization.
Example Use Case:
Integrate LogicMonitor with your AWS account to automatically track idle EBS volumes and receive alerts for potential cost-saving opportunities.
describe-volumes: Fetches details about your EBS volumes.
–query: Filters the output to include only relevant details such as Volume ID, State, and Size.
Automating Alerts:
Use AWS Lambda combined with Amazon SNS to automate alerts for unused or underutilized volumes. Example:
Write a Lambda function to fetch idle volumes.
Trigger the function periodically using CloudWatch Events.
Configure SNS to send notifications.
Performance Tuning
RAID Configuration:
Combine multiple EBS volumes into a RAID array for improved performance. Use RAID 0 for increased IOPS and throughput.
Monitoring Burst Credits:
Track BurstBalance to ensure burstable volumes maintain sufficient performance during peak usage.
FAQs
What metrics should I focus on for cost optimization?
Focus on VolumeIdleTime, VolumeReadOps, and VolumeWriteOps to identify underutilized or idle volumes.
How can I resize an EBS volume?
Use the ModifyVolume API or the AWS Management Console to increase volume size. Ensure you extend the file system to utilize the additional space.
Are there additional costs for using CloudWatch?
CloudWatch offers a free tier for basic monitoring. However, advanced features like custom metrics and extended data retention may incur additional costs.
Analyzing EBS volume usage is a critical aspect of AWS resource management. By leveraging tools like AWS CloudWatch, Trusted Advisor, and third-party solutions, you can optimize costs, enhance performance, and ensure efficient resource utilization. Regular monitoring and proactive management will empower you to get the most out of your EBS investments. Start implementing these strategies today to streamline your AWS environment effectively. Thank you for reading the DevopsRoles page!
Docker and Kubernetes have revolutionized the world of containerized application deployment and management. While Docker simplifies the process of creating, deploying, and running applications in containers, Kubernetes orchestrates these containers at scale.
Using Docker and Kubernetes together unlocks a powerful combination that ensures efficiency, scalability, and resilience in modern application development. This article explores how these two technologies complement each other, practical use cases, and step-by-step guides to get started.
Why Use Docker and Kubernetes Together?
Key Benefits
Enhanced Scalability
Kubernetes’ orchestration capabilities allow you to scale containerized applications seamlessly, leveraging Docker’s efficient container runtime.
Simplified Management
Kubernetes automates the deployment, scaling, and management of Docker containers, reducing manual effort and errors.
Improved Resource Utilization
By using Docker containers with Kubernetes, you can ensure optimal resource utilization across your infrastructure.
A Node.js application in Docker deployed to Kubernetes for high availability.
Advanced Example: Microservices Architecture
Using multiple Docker containers managed by Kubernetes for services like authentication, billing, and notifications.
FAQ
Frequently Asked Questions
Q: Can I use Docker without Kubernetes?
A: Yes, Docker can run independently. However, Kubernetes adds orchestration, scalability, and management benefits for complex systems.
Q: Is Kubernetes replacing Docker?
A: No. Kubernetes and Docker serve different purposes and are complementary. Kubernetes orchestrates containers, which Docker creates and runs.
Q: What is the difference between Docker Compose and Kubernetes?
A: Docker Compose is suitable for local multi-container setups, while Kubernetes is designed for scaling and managing containers in production.
Q: How do I monitor Docker containers in Kubernetes?
A: Tools like Prometheus, Grafana, and Kubernetes’ built-in dashboards can help monitor containers and resources.
Conclusion
Docker and Kubernetes together form the backbone of modern containerized application management. Docker simplifies container creation, while Kubernetes ensures scalability and efficiency. By mastering both, you can build robust, scalable systems that meet the demands of today’s dynamic environments. Start small, experiment with deployments, and expand your expertise to harness the full potential of these powerful technologies. Thank you for reading the DevopsRoles page!
In today’s fast-paced software development environment, achieving continuous integration and continuous delivery (CI/CD) is essential. Jenkins, a powerful open-source automation server, lies at the heart of many DevOps workflows. But to truly unlock its potential, Jenkins plugins are indispensable. These plugins expand Jenkins’ capabilities, enabling teams to build, test, and deploy with greater efficiency. This article explores how Jenkins plugins can improve your CI/CD pipelines, from basic configurations to advanced integrations.
Why Use Jenkins Plugins for CI/CD Pipelines?
Jenkins plugins act as extensions that enhance its functionality. With over 1,800 plugins available, developers can:
Integrate with version control systems like Git and Subversion.
Automate testing with tools like Selenium.
Enable containerized builds with Docker.
Secure pipelines with credential management tools.
Optimize workflows with real-time monitoring and reporting.
Whether you’re building a simple pipeline or managing complex deployments, plugins provide the flexibility and scalability to meet diverse needs.
Top Jenkins Plugins for CI/CD Pipelines
1. Git Plugin
The Git Plugin is essential for integrating Git repositories with Jenkins. It allows:
Pulling code from GitHub, GitLab, or Bitbucket.
Supporting branch-specific builds.
Triggering builds based on changes.
2. Pipeline Plugin
This plugin enables users to define jobs using code. Key features include:
Writing pipelines as code using Jenkinsfile.
Supporting complex workflows with parallel stages.
Jenkins plugins are the cornerstone of efficient CI/CD pipelines. From version control integration to advanced container orchestration, they provide the tools necessary for modern DevOps workflows. By carefully selecting and configuring plugins, teams can achieve seamless automation, improved collaboration, and faster delivery cycles. Start exploring the vast ecosystem of Jenkins plugins today and elevate your CI/CD pipeline to new heights! Thank you for reading the DevopsRoles page!
Ansible Galaxy is one of the most powerful tools in the Ansible ecosystem, enabling users to share, download, and manage Ansible roles. For DevOps professionals, managing and reusing roles can significantly improve automation efficiency, reduce complexity, and save time. This article explores the core features of Ansible Galaxy for role management, from basic usage to advanced scenarios, and provides practical examples to help you get started.
What is Ansible Galaxy?
Ansible Galaxy is a community-driven platform where users can share pre-built Ansible roles. These roles are essentially reusable units of Ansible automation that encapsulate a specific function, such as installing software, configuring services, or managing users. By using roles from Ansible Galaxy, you can avoid the need to reinvent the wheel, speeding up your automation process and ensuring best practices are followed.
Why Use Ansible Galaxy for Role Management?
Reusability: Ansible roles in Galaxy are designed to be reusable, meaning you don’t have to write the same automation logic repeatedly.
Community Contributions: You can leverage thousands of roles shared by the community, which are often well-tested and updated.
Consistency: Galaxy roles provide a consistent structure, making it easier to maintain and scale automation across multiple environments.
Faster Automation: Pre-existing roles allow you to quickly implement and deploy automation, reducing the time spent on manual configuration.
How to Install Ansible Galaxy
Prerequisites
Before using Ansible Galaxy, you need to ensure that Ansible is installed on your system. If not, follow these steps to install Ansible:
sudo apt update
sudo apt install ansible
Once Ansible is installed, you can begin using Ansible Galaxy to manage roles.
Installing Roles from Galaxy
To install a role from Ansible Galaxy, you use the ansible-galaxy command. The basic syntax for installing a role is:
ansible-galaxy install <role_name>
For example, to install the geerlingguy.apache role from Ansible Galaxy, run:
ansible-galaxy install geerlingguy.apache
This command downloads the role to your local machine and places it in the default directory (~/.ansible/roles).
Installing a Role with Specific Version
If you need to install a specific version of a role, use the following syntax:
ansible-galaxy install <role_name>,<version>
For example:
ansible-galaxy install geerlingguy.apache,2.0.0
This installs version 2.0.0 of the geerlingguy.apache role.
Managing Roles with Ansible Galaxy
Searching for Roles
One of the key features of Ansible Galaxy is its ability to search for roles based on various criteria, such as tags, categories, or keywords. To search for roles, use the ansible-galaxy search command:
ansible-galaxy search <keyword>
For example, if you are looking for a role related to nginx, you would run:
ansible-galaxy search nginx
This command lists roles related to nginx, which can then be reviewed and installed.
Updating Installed Roles
Ansible Galaxy allows you to keep your roles up to date with the ansible-galaxy install command. If a role is already installed, running the command will automatically update it to the latest version:
ansible-galaxy install <role_name> --force
This ensures you are always using the most recent version of a role, with any bug fixes or improvements that may have been added.
Managing Dependencies
Some Ansible roles depend on other roles to function properly. Ansible Galaxy allows you to manage these dependencies automatically. When you install a role that has dependencies, Ansible Galaxy will automatically install the dependent roles as well. To view the dependencies of a role, you can use the ansible-galaxy command with the info option:
ansible-galaxy info <role_name>
This will display detailed information about the role, including any dependencies it may have.
Best Practices for Using Ansible Galaxy
Review Role Documentation
Before integrating a role into your playbooks, it’s crucial to review its documentation. Most roles on Ansible Galaxy come with detailed documentation that explains how to use the role, what variables are required, and any additional configuration steps.
Use Versioning
When managing roles in production environments, always specify the version of the role you are using to ensure consistency across different systems. This helps avoid potential issues with breaking changes introduced in newer versions of roles.
Create Custom Roles
While Ansible Galaxy provides a wide range of roles, sometimes your organization may require custom roles. Creating custom roles allows you to standardize your automation tasks and reuse code across different projects. To create a new role, run the following command:
ansible-galaxy init <role_name>
This creates a skeleton directory structure for your role, including subdirectories for tasks, handlers, templates, and variables.
Example: Using Ansible Galaxy for Role Management
Basic Example
Let’s say you want to set up an Apache server using an Ansible Galaxy role. Here’s how you can do it:
This simple playbook installs and configures Apache using the geerlingguy.apache role.
Advanced Example: Managing Multiple Roles
For more complex automation, you can manage multiple roles in a single playbook. Here’s an example where we use multiple roles to set up both Apache and MySQL:
This playbook installs and configures both Apache and MySQL on the webservers group.
FAQ: Using Ansible Galaxy for Role Management
1. What is the difference between an Ansible role and a playbook?
An Ansible role is a modular component that contains tasks, variables, and templates designed for a specific task or service. A playbook, on the other hand, is a YAML file that defines a set of tasks and roles to be executed on a target host or group of hosts.
2. Can I create my own Ansible roles and share them on Galaxy?
Yes! Ansible Galaxy allows users to share their custom roles with the community. To share a role, you’ll need to create an account on the Ansible Galaxy website, package your role, and upload it.
3. How can I contribute to existing Ansible Galaxy roles?
If you find an issue or have a suggestion for an existing role, you can fork the role repository on GitHub, make changes, and submit a pull request.
4. Are all roles on Ansible Galaxy free to use?
Most roles on Ansible Galaxy are free and open-source. However, some roles may be offered by commercial vendors or with specific licensing terms.
Conclusion
Ansible Galaxy is an invaluable tool for anyone working with Ansible, especially when managing roles. It provides access to a vast repository of reusable roles, simplifying the automation process and improving efficiency. Whether you’re a beginner looking for ready-made roles or an advanced user managing complex automation tasks, Ansible Galaxy offers everything you need to streamline your workflow.
By leveraging best practices such as role versioning, reviewing documentation, and creating custom roles, you can make the most out of Ansible Galaxy for your infrastructure management needs. Thank you for reading the DevopsRoles page!
In today’s world of DevOps and automation, managing sensitive information securely is more critical than ever. Ansible Vault is an essential tool for securely managing configurations, secrets, and other sensitive data in Ansible playbooks. It allows you to encrypt files, variables, and data, ensuring that they are only accessible to authorized users or systems. Whether you’re working on a small project or scaling up to enterprise-level applications, Ansible Vault is indispensable for maintaining security and integrity in your automation workflows.
In this article, we’ll dive into how to use Ansible Vault, from basic setup to more advanced use cases, and explore best practices to keep your configurations secure.
What is Ansible Vault?
Ansible Vault is a feature of Ansible that enables you to encrypt files and variables within your playbooks. It’s designed to protect sensitive data like passwords, API keys, and other confidential information from being exposed during automation tasks. With Vault, you can securely store and manage secrets, while still being able to use them in your Ansible playbooks.
Unlike other secret management tools, Ansible Vault integrates directly into your Ansible workflow, providing a seamless experience for encrypting and decrypting files as part of your automation process.
Benefits of Using Ansible Vault
Ansible Vault offers several advantages, especially in environments where security is a top priority. Some of the key benefits include:
Encryption of sensitive data: Store passwords, certificates, and API keys securely.
Seamless integration: Works directly with Ansible playbooks and variables.
No additional tools required: You don’t need a separate tool to manage encrypted data.
Fine-grained access control: Vault passwords and keys can be stored securely, ensuring that only authorized users can access them.
Support for multiple encryption methods: Choose from various encryption standards like AES.
How Does Ansible Vault Work?
Ansible Vault works by encrypting YAML files (such as playbooks, variables, or other configuration files) using a password or an encryption key. These encrypted files can then be safely committed to version control systems (VCS) like Git without exposing sensitive data.
The encryption and decryption process is straightforward, making it simple to integrate into your existing automation workflows. Ansible Vault provides commands to create, edit, view, and encrypt/decrypt files.
Basic Commands for Using Ansible Vault
Here are the basic commands you need to interact with Ansible Vault:
ansible-vault create
Use this command to create a new encrypted file.
ansible-vault create secrets.yml
You will be prompted to enter a password, which will be used to encrypt the file. Once created, you can edit the file as needed.
ansible-vault edit
This command allows you to edit an encrypted file.
ansible-vault edit secrets.yml
Once you provide the password, the file will be decrypted and opened in your default editor.
ansible-vault view
This command lets you view the contents of an encrypted file without editing it.
ansible-vault view secrets.yml
You’ll be prompted to enter the password to decrypt and view the file contents.
ansible-vault encrypt
If you have an unencrypted file that you want to encrypt, you can use the encrypt command:
ansible-vault encrypt plain_text.yml
ansible-vault decrypt
If you need to decrypt a file, use:
ansible-vault decrypt secrets.yml
ansible-playbook --vault-password-file
To run an Ansible playbook that includes encrypted files, you need to provide the vault password or the vault password file:
You can also encrypt individual variables in your Ansible playbooks. This is useful for securing sensitive information without needing to encrypt the entire file.
Example:
In your vars.yml file, you might store variables like:
db_password: mySuperSecretPassword
To encrypt this file:
ansible-vault encrypt vars.yml
Now, vars.yml is encrypted, and you can safely include it in your playbook.
In your playbook, reference the encrypted variables as usual:
- hosts: db_servers
  vars_files:
    - vars.yml
  tasks:
    - name: Ensure database is running
      service:
        name: mysql
        state: started
Encrypting Single Values in Playbooks
In some cases, you may only need to encrypt a single value, like a password. For this, Ansible Vault provides the ansible-vault encrypt_string command.
This command outputs the encrypted string, which you can then paste directly into your playbook or variable file.
Vault ID Support for Multiple Vault Passwords
Ansible Vault supports Vault IDs, allowing you to use multiple vault passwords for different use cases. This is helpful in scenarios where different teams or environments require different levels of access.
Example:
You can specify which vault password to use for a specific file:
Integrating Ansible Vault into your continuous integration/continuous deployment (CI/CD) pipelines ensures that sensitive data remains protected during the automation process. This can be done by securely storing vault passwords in CI/CD tools such as Jenkins, GitLab CI, or GitHub Actions.
Example in GitLab CI:
Store your vault password in a GitLab CI secret and pass it to your Ansible playbook run:
How do I store my Ansible Vault password securely?
There are several ways to store your Ansible Vault password securely:
Environment variables: Store the password in a secure environment variable.
Vault password file: Store the password in a separate file and ensure the file is protected.
External secret management tools: Use tools like HashiCorp Vault or AWS Secrets Manager.
Can I use Ansible Vault with external secrets managers?
Yes, Ansible Vault can be integrated with external secrets management solutions. By using an Ansible module like hashi_vault or aws_secret, you can retrieve secrets from a central manager during playbook execution.
What encryption algorithm does Ansible Vault use?
By default, Ansible Vault uses the AES-256 encryption algorithm for securing files. This provides a good balance between security and performance.
How do I handle vault password management in a team environment?
In team environments, it’s best to use a central location for storing vault passwords, such as a secure vault management system or CI/CD tool. You can also utilize Vault ID support to manage different vault passwords for different environments or teams.
Ansible Vault is a powerful tool for securing sensitive data in your Ansible automation workflows. From basic file encryption to advanced use cases like vault password management and integration with external systems, Vault ensures that your data remains secure throughout the automation lifecycle. By following best practices and understanding its advanced features, you can confidently manage configurations while keeping sensitive information protected.
By incorporating Ansible Vault into your DevOps practices, you ensure that your automated infrastructure is both efficient and secure, reducing the risks associated with exposure of sensitive data. Thank you for reading the DevopsRoles page!
In the fast-paced world of DevOps, where Continuous Integration (CI) and Continuous Delivery (CD) are vital for smooth and efficient software development, choosing the right platform for managing code and automating workflows can significantly impact your project’s success. GitLab and GitHub are two of the most popular Git repositories that cater to the needs of modern DevOps teams, but each platform comes with its unique features, strengths, and trade-offs.
In this article, we will dive deep into the GitLab vs GitHub debate, comparing both platforms from a DevOps perspective. Whether you’re just getting started with DevOps or looking to optimize your existing workflows, this guide will help you decide which platform best fits your needs.
GitLab vs GitHub: Key Differences for DevOps
1. Overview of GitLab and GitHub
GitHub is primarily known for its open-source community and widely-used version control hosting service. It started as a platform for developers to collaborate on open-source projects but has since evolved to cater to private repositories and teams. GitHub offers several powerful features, including GitHub Actions for CI/CD, GitHub Packages, and various integrations with third-party tools.
GitLab, on the other hand, is an integrated DevOps platform that provides version control, CI/CD pipelines, monitoring, and security all within a single interface. It’s designed to support the entire software development lifecycle (SDLC) and is often used by teams looking for a more comprehensive, all-in-one solution. GitLab’s built-in CI/CD and robust project management tools set it apart from GitHub, which requires third-party integrations to match some of those capabilities.
2. CI/CD Integration: GitLab vs GitHub
GitLab
GitLab’s most significant advantage in the DevOps space is its built-in CI/CD capabilities. It offers a seamless experience for automating your build, test, and deployment pipelines. GitLab CI/CD allows developers to create complex workflows using .gitlab-ci.yml files, which define the stages of the CI/CD pipeline, from compiling code to running tests and deploying the application.
Key features of GitLab CI/CD:
Built-in Continuous Integration: No need for third-party tools.
Auto DevOps: GitLab offers an Auto DevOps feature that automates the entire CI/CD pipeline.
Advanced security features: Integrated security scanning tools (SAST, DAST, Container Scanning, etc.) built directly into the CI/CD pipelines.
Real-time monitoring and reporting: Track the performance of your pipelines and deployments with detailed insights.
GitHub
GitHub also offers CI/CD capabilities, primarily through GitHub Actions, which allows you to define workflows to automate software development tasks, including CI/CD. While GitHub Actions is a powerful tool, it is a relatively new addition compared to GitLab’s long-established CI/CD pipeline. GitHub Actions offers flexibility but requires more configuration and setup.
Key features of GitHub Actions:
Customizable workflows: Define your own CI/CD pipelines using YAML files.
Extensive marketplace: GitHub Actions has a rich marketplace for pre-built actions that streamline the CI/CD process.
Cross-platform support: GitHub Actions works across multiple platforms, including Linux, macOS, and Windows.
Third-party integrations: While GitHub Actions is a great tool, it often requires additional integrations for full CI/CD functionality, like security scanning and deployment.
3. Ease of Use: GitLab vs GitHub
GitLab
GitLab is known for its user-friendly interface and highly integrated DevOps tools. The platform focuses on providing everything developers need in a single place. The UI is intuitive, with clearly defined areas for source code management, CI/CD pipelines, issue tracking, and project monitoring.
Integrated experience: Everything from version control to deployment and monitoring is handled within the same interface.
Robust documentation: GitLab’s documentation is comprehensive and user-friendly, making it easier for teams to adopt and use the platform effectively.
Single platform: You don’t need to juggle multiple tools or third-party integrations to manage your workflows.
GitHub
GitHub’s interface is also very user-friendly and is designed to be intuitive for developers familiar with Git version control. It is widely considered the best platform for open-source collaboration, with a simple and efficient interface for managing repositories and issues.
Third-party integrations: GitHub’s reliance on external tools and services for advanced DevOps features may make the setup process a bit more complex for teams looking to integrate CI/CD pipelines and other tools.
GitHub Actions UI: While it has improved over time, the UI for managing GitHub Actions workflows may still be considered more complex than GitLab’s built-in tools.
4. Project Management Features
Both GitLab and GitHub offer tools to help manage and organize software development projects, but there are key differences in how these tools are implemented.
GitLab
GitLab provides robust project management tools that allow teams to manage tasks, track issues, and organize work in a highly integrated way. Features include:
Issue tracking and Kanban boards: For organizing tasks and sprints.
Milestones and epics: Plan and track large features or project timelines.
Integrated Wiki and Documentation: GitLab allows you to maintain project documentation directly within the platform.
GitHub
While GitHub has made strides in adding project management features, it is still somewhat lacking compared to GitLab. GitHub offers:
GitHub Issues and Project Boards: Simple tools for task tracking and sprint management.
GitHub Projects: Allows you to use Kanban-style boards for task management, though it’s not as feature-rich as GitLab’s project management tools.
5. Security and Compliance
GitLab
GitLab has a comprehensive security-first approach that integrates security checks into the CI/CD pipeline. This includes:
Static Application Security Testing (SAST) and Dynamic Application Security Testing (DAST) to identify vulnerabilities early.
Container Scanning for Docker images to ensure they meet security standards.
Secret Detection to scan for sensitive data like API keys or passwords in the codebase.
Compliance Management: GitLab helps teams adhere to industry compliance standards such as HIPAA, SOC 2, and GDPR.
GitHub
GitHub also offers security features but generally requires third-party integrations for some of the advanced security checks.
GitHub Dependabot: Automatically alerts you to outdated dependencies and potential vulnerabilities.
Security Advisories: Allows teams to report and fix security vulnerabilities.
Code scanning: Available through GitHub Advanced Security, but this is a premium feature.
6. Pricing Comparison: GitLab vs GitHub
Both GitLab and GitHub offer free and paid tiers, but the specifics of each platform’s pricing structure vary.
GitLab
Free tier: Includes unlimited private repositories, basic CI/CD features, and 400 minutes of CI/CD pipeline usage per month.
Premium/Ultimate plans: Offer more advanced CI/CD features, security tools, and better support for larger teams.
GitHub
Free tier: Unlimited public and private repositories, with 2,000 CI/CD minutes per month.
GitHub Team/Enterprise: Includes more CI/CD minutes, advanced security features, and team management tools.
Examples of Using GitLab vs GitHub in DevOps
Scenario 1: Setting Up a Basic CI/CD Pipeline
In GitLab, you can set up a simple CI/CD pipeline in minutes. Here’s an example of a basic .gitlab-ci.yml file:
stages:
  - build
  - test
  - deploy

build:
  script:
    - echo "Building the project..."

test:
  script:
    - echo "Running tests..."

deploy:
  script:
    - echo "Deploying to production..."
In GitHub, this would require setting up GitHub Actions in the .github/workflows directory:
name: CI/CD Pipeline

on:
  push:
    branches:
      - main

jobs:
  build:
    runs-on: ubuntu-latest
    steps:
      - name: Checkout repository
        uses: actions/checkout@v2
      - name: Build
        run: echo "Building the project..."
  test:
    runs-on: ubuntu-latest
    steps:
      - name: Test
        run: echo "Running tests..."
  deploy:
    runs-on: ubuntu-latest
    steps:
      - name: Deploy
        run: echo "Deploying to production..."
Scenario 2: Security Scanning in CI/CD
GitLab provides integrated security scanning directly in the pipeline with features like SAST, DAST, and Container Scanning. To implement security scans, you simply enable these tools in your pipeline configuration.
GitHub users, on the other hand, may need to configure third-party security tools or use GitHub’s advanced security features, available in paid tiers.
FAQ: GitLab vs GitHub for DevOps
1. Which platform is better for Continuous Integration?
Both GitLab and GitHub offer solid CI/CD support, but GitLab’s built-in CI/CD tools provide a more streamlined and integrated experience, making it a better choice for teams focused on DevOps.
2. Does GitHub support DevOps?
Yes, GitHub supports DevOps through GitHub Actions, but it often requires additional integrations or third-party tools to match GitLab’s all-in-one DevOps features.
3. Which platform is more suitable for enterprise use?
GitLab’s comprehensive suite of features for security, monitoring, and project management makes it a better choice for enterprise-level DevOps workflows. GitHub is more commonly used for open-source projects but can be scaled for enterprise use with GitHub Enterprise.
Conclusion
When it comes to GitLab vs GitHub for DevOps, both platforms offer valuable tools for modern software development. However, the choice between GitLab and GitHub largely depends on your team’s needs.
GitLab is the ideal choice for teams that require an integrated DevOps platform with built-in CI/CD pipelines, security scanning, and project management features.
GitHub remains a solid choice for developers who prioritize ease of use and community-driven development but may need third-party tools for full DevOps functionality.
Ultimately, the best platform for your DevOps needs depends on the complexity of your workflows, your security requirements, and the tools your team already uses. Consider these factors carefully to make an informed decision that aligns with your development goals. Thank you for reading the DevopsRoles page!
Introduction: Understanding Terraform Infra and Its Applications
In today’s fast-paced technological world, managing and provisioning infrastructure efficiently is crucial for businesses to stay competitive. Terraform, an open-source tool created by HashiCorp, has emerged as a key player in this domain. By utilizing “terraform infra,” developers and system administrators can automate the process of setting up, managing, and scaling infrastructure on multiple cloud platforms.
Terraform Infra, short for “Terraform Infrastructure,” provides users with an easy way to codify and manage their infrastructure in a version-controlled environment, enhancing flexibility, efficiency, and consistency. In this article, we will explore what Terraform Infra is, its key features, how it can be implemented in real-world scenarios, and answer some common questions regarding its usage.
What is Terraform Infra?
The Basics of Terraform
Terraform is a tool that allows users to define and provision infrastructure using declarative configuration files. Instead of manually setting up resources like virtual machines, databases, and networks, you write code that specifies the desired state of the infrastructure. Terraform then interacts with your cloud provider’s APIs to ensure the resources match the desired state.
Providers: These are responsible for interacting with cloud services like AWS, Azure, GCP, and others.
Resources: Define what you are creating or managing (e.g., virtual machines, load balancers).
Modules: Reusable configurations that help you structure your infrastructure code in a more modular way.
State: Terraform keeps track of your infrastructure’s current state in a file, which is key to identifying what needs to be modified.
Benefits of Using Terraform for Infrastructure
Declarative Language: Terraform’s configuration files are written in HashiCorp Configuration Language (HCL), making them easy to read and understand.
Multi-Cloud Support: Terraform works with multiple cloud providers, giving you the flexibility to choose the best provider for your needs.
Version Control: Infrastructure code is version-controlled, making it easier to track changes and collaborate with teams.
Scalability: Terraform can manage large-scale infrastructure, enabling businesses to grow without worrying about manual provisioning.
Setting Up Terraform Infra
1. Installing Terraform
Before you start using Terraform, you’ll need to install it on your system. Terraform supports Windows, macOS, and Linux operating systems. You can download the latest version from the official Terraform website.
# On macOS
brew install terraform

# On Ubuntu
sudo apt-get update && sudo apt-get install -y terraform
2. Creating Your First Terraform Configuration
Once installed, you can start by writing a basic configuration file to manage infrastructure. Below is an example of a simple configuration file that provisions an AWS EC2 instance:
provider "aws" {
  region = "us-west-2"
}

resource "aws_instance" "example" {
  ami           = "ami-0c55b159cbfafe1f0"
  instance_type = "t2.micro"
}
3. Initializing Terraform
After creating your configuration file, you’ll need to initialize the Terraform environment by running:
terraform init
This command downloads the necessary provider plugins and prepares the environment.
4. Plan and Apply Changes
Terraform uses a two-step approach to manage infrastructure: terraform plan and terraform apply.
terraform plan: This command shows you what changes Terraform will make to your infrastructure.
terraform plan
terraform apply: This command applies the changes to the infrastructure.
terraform apply
5. Managing Infrastructure State
Terraform uses a state file to track your infrastructure’s current state. It’s important to keep the state file secure, as it contains sensitive information.
You can also use remote state backends like AWS S3 or Terraform Cloud to store the state file securely.
Terraform can be used to automate complex, multi-tier applications. Consider a scenario where you need to create a web application that uses a load balancer, EC2 instances, and an RDS database.
Modules are a powerful feature of Terraform that allows you to reuse and share infrastructure configurations. A typical module might contain resources for setting up a network, security group, or database cluster.
For example, the following module creates a reusable EC2 instance:
The state file is used by Terraform to track the current configuration of your infrastructure. It maps the configuration files to the actual resources in the cloud, ensuring that Terraform knows what needs to be added, modified, or removed.
How does Terraform handle multi-cloud deployments?
Terraform supports multiple cloud providers and allows you to manage resources across different clouds. You can specify different providers in the configuration and deploy infrastructure in a hybrid or multi-cloud environment.
Can Terraform manage non-cloud infrastructure?
Yes, Terraform can also manage on-premise resources, such as virtual machines, physical servers, and networking equipment, using compatible providers.
What is a Terraform provider?
A provider is a plugin that allows Terraform to interact with various cloud services, APIs, or platforms. Common providers include AWS, Azure, Google Cloud, and VMware.
Conclusion: Key Takeaways
Terraform Infra is an invaluable tool for modern infrastructure management. By codifying infrastructure and using Terraform’s rich set of features, businesses can automate, scale, and manage their cloud resources efficiently. Whether you are managing a small project or a complex multi-cloud setup, Terraform provides the flexibility and power you need.
From its ability to provision infrastructure automatically to its support for multi-cloud environments, Terraform is transforming how infrastructure is managed today. Whether you’re a beginner or an experienced professional, leveraging Terraform’s capabilities will help you streamline your operations, ensure consistency, and improve the scalability of your infrastructure.
By using Terraform Infra effectively, businesses can achieve greater agility and maintain a more reliable and predictable infrastructure environment. Thank you for reading the DevopsRoles page!
In the modern era of cloud computing, businesses are increasingly adopting a multi-cloud approach to maximize flexibility, improve performance, and optimize costs. Terraform, an open-source infrastructure-as-code (IaC) tool, has emerged as a powerful solution for managing resources across multiple cloud platforms. By utilizing Terraform Multi Cloud, users can easily define, provision, and manage infrastructure across various cloud providers like AWS, Azure, Google Cloud, and others in a unified manner.
In this guide, we will explore the concept of Terraform Multi Cloud, its advantages, use cases, and best practices for implementing it. Whether you’re managing workloads in multiple cloud environments or planning a hybrid infrastructure, Terraform provides a seamless way to automate and orchestrate your cloud resources.
Why Choose Terraform for Multi-Cloud Environments?
Terraform’s ability to integrate with a wide range of cloud platforms and services makes it an ideal tool for managing multi-cloud infrastructures. Below are some compelling reasons why Terraform is a popular choice for multi-cloud environments:
1. Vendor-Agnostic Infrastructure Management
Terraform enables users to work with multiple cloud providers (AWS, Azure, GCP, etc.) using a single configuration language.
This flexibility ensures that businesses are not locked into a single vendor, enabling better pricing and service selection.
2. Unified Automation
Terraform allows you to define infrastructure using configuration files (HCL – HashiCorp Configuration Language), making it easier to automate provisioning and configuration across various clouds.
You can create a multi-cloud deployment pipeline, simplifying operational overhead.
3. Cost Optimization
With Terraform, managing resources across multiple clouds helps you take advantage of the best pricing and resource allocation from each provider.
Terraform’s capabilities in managing resources at scale can result in reduced operational costs.
4. Disaster Recovery and Fault Tolerance
By spreading workloads across multiple clouds, you can enhance the fault tolerance of your infrastructure. If one provider experiences issues, you can ensure business continuity by failing over to another cloud.
Key Concepts of Terraform Multi Cloud
Before diving into Terraform’s multi-cloud capabilities, it’s essential to understand the foundational concepts that drive its functionality.
Providers and Provider Blocks
In Terraform, a provider is a plugin that allows Terraform to interact with a cloud service (e.g., AWS, Azure, Google Cloud). For a multi-cloud setup, you’ll define multiple provider blocks for each cloud provider you wish to interact with.
Example: Defining AWS and Azure Providers in Terraform
# AWS Provider
provider "aws" {
  region = "us-east-1"
}

# Azure Provider
provider "azurerm" {
  features {}
}
Resources
A resource in Terraform represents a component of your infrastructure (e.g., an EC2 instance, a storage bucket, or a virtual machine). You can define resources from multiple cloud providers within a single Terraform configuration.
Terraform uses state files to track the resources it manages. In a multi-cloud environment, it’s crucial to use remote backends (e.g., AWS S3, Azure Storage) for state management to ensure consistency and collaboration.
Terraform Multi Cloud Use Cases
Now that we understand the basics of Terraform multi-cloud setups, let’s explore some common use cases where it provides significant benefits.
1. Hybrid Cloud Deployment
Organizations that require both on-premise infrastructure and cloud services can use Terraform to define and manage resources across both environments. A hybrid cloud deployment allows businesses to maintain sensitive workloads on-premises while taking advantage of the cloud for scalability.
2. Disaster Recovery Strategy
By distributing workloads across multiple cloud providers, companies can ensure that their infrastructure remains highly available even in the event of a failure. For example, if AWS faces a downtime, workloads can be shifted to Azure or Google Cloud, minimizing the risk of outages.
3. Optimizing Cloud Spend
By utilizing multiple cloud platforms, you can select the best-priced services and optimize costs. For instance, you can run cost-heavy workloads on Google Cloud and lightweight tasks on AWS, based on pricing models and performance benchmarks.
4. Regulatory Compliance
Certain industries require that data be hosted in specific geographic locations or meet certain security standards. Terraform enables organizations to provision resources in various regions and across multiple clouds to comply with these regulations.
Example: Implementing Terraform Multi Cloud
Let’s walk through an example of using Terraform to provision resources in both AWS and Google Cloud.
Step 1: Set Up Terraform Providers
Define the providers for both AWS and Google Cloud in your Terraform configuration file.
Run Terraform commands to apply your configuration.
terraform init  # Initialize the configuration
terraform plan  # Preview the changes
terraform apply # Apply the configuration
This will create both the EC2 instance in AWS and the storage bucket in Google Cloud.
Terraform Multi Cloud Best Practices
To ensure success when managing resources across multiple clouds, it’s essential to follow best practices.
1. Use Modules for Reusability
Define reusable Terraform modules for common infrastructure components like networks, storage, or compute resources. This reduces duplication and promotes consistency across multiple cloud platforms.
2. Implement Infrastructure as Code (IaC)
By using Terraform, ensure that all infrastructure changes are tracked in version control systems (e.g., Git). This approach improves traceability and collaboration among teams.
3. Automate with CI/CD Pipelines
Integrate Terraform into your continuous integration/continuous deployment (CI/CD) pipeline. This allows you to automate provisioning, making your infrastructure deployments repeatable and consistent.
4. Use Remote State Backends
Store your Terraform state files remotely (e.g., in AWS S3 or Azure Blob Storage) to ensure state consistency and enable collaboration.
Frequently Asked Questions (FAQ)
1. What is Terraform Multi Cloud?
Terraform Multi Cloud refers to using Terraform to manage infrastructure across multiple cloud providers (e.g., AWS, Azure, Google Cloud) from a single configuration. It simplifies cloud management, increases flexibility, and reduces vendor lock-in.
2. Can I use Terraform with any cloud provider?
Yes, Terraform supports numerous cloud providers, including AWS, Azure, Google Cloud, Oracle Cloud, and more. The multi-cloud functionality comes from defining and managing resources across different providers in the same configuration.
3. What are the benefits of using Terraform for multi-cloud?
Terraform provides a unified interface for managing resources across various clouds, making it easier to automate infrastructure, improve flexibility, and optimize costs. It also reduces complexity and prevents vendor lock-in.
Conclusion
Terraform Multi Cloud enables businesses to manage infrastructure across different cloud platforms with ease. By using Terraform’s provider blocks, defining resources, and leveraging automation tools, you can create flexible, cost-effective, and resilient cloud architectures. Whether you’re building a hybrid cloud infrastructure, optimizing cloud costs, or ensuring business continuity, Terraform is a valuable tool in the multi-cloud world.
In the world of cloud infrastructure, managing Kubernetes clusters efficiently is crucial for smooth operations and scaling. One powerful tool that simplifies this process is Terraform, an open-source infrastructure as code software. When integrated with Amazon Elastic Kubernetes Service (EKS), Terraform helps automate the creation, configuration, and management of Kubernetes clusters, making it easier to deploy applications at scale.
In this guide, we’ll focus on one specific feature: Terraform EKS Automode. This feature allows for automatic management of certain aspects of an EKS cluster, optimizing workflows and reducing manual intervention. Whether you’re a beginner or an experienced user, this article will walk you through the benefits, setup process, and examples of using Terraform to manage your EKS clusters in automode.
What is Terraform EKS Automode?
Before diving into its usage, let’s define Terraform EKS Automode. Automode is a feature within the Terraform EKS module that allows you to automate various configurations within the EKS service, such as node group management, VPC configuration, and the integration of other AWS resources like IAM roles and security groups.
By leveraging this feature, users can reduce the complexity of managing EKS clusters manually. It helps you automate the creation of EKS clusters and ensures that node groups are automatically set up based on your defined requirements. Terraform automates these tasks, reducing errors and improving the efficiency of your deployment pipeline.
Benefits of Using Terraform EKS Automode
1. Simplified Cluster Management
Automating the management of your EKS clusters ensures that all the resources are properly configured without the need for manual intervention. Terraform’s EKS automode integrates directly with AWS APIs to handle tasks like VPC setup, node group creation, and IAM role assignments.
2. Scalability
Terraform’s automode feature helps with scaling your EKS clusters based on resource demand. You can easily define the node group sizes and other configurations to handle traffic spikes and scale down when demand decreases.
3. Version Control and Reusability
Terraform allows you to store your infrastructure code in version control systems like GitHub, making it easy to manage and reuse across different environments or teams.
4. Cost Efficiency
By automating cluster management and scaling, you ensure that you are using resources optimally, which helps reduce over-provisioning and unnecessary costs.
How to Set Up Terraform EKS Automode
To start using Terraform EKS Automode, you’ll first need to set up a few prerequisites:
Prerequisites:
Terraform: Installed and configured on your local machine or CI/CD pipeline.
AWS CLI: Configured with necessary permissions.
AWS Account: An active AWS account with appropriate IAM permissions for managing EKS, EC2, and other AWS resources.
Kubernetes CLI (kubectl): Installed to interact with the EKS cluster.
Step-by-Step Setup Guide
1. Define Terraform Provider
In your Terraform configuration file, begin by defining the AWS provider:
provider "aws" {
  region = "us-west-2"
}
2. Create EKS Cluster Resource
Next, define the eks_cluster resource in your Terraform configuration:
The enable_configure_automode argument enables Automode, which will help with the automatic setup of node groups, networking, and other essential configurations.
3. Define Node Groups
The next step is to define node groups that Terraform will automatically manage. A node group is a group of EC2 instances that run the Kubernetes workloads. You can use aws_eks_node_group to manage this.
Here, enable_auto_scaling enables the automatic scaling of node groups based on resource utilization, a key feature in EKS Automode.
4. Apply the Terraform Configuration
Once your Terraform configuration is set up, run the following commands to apply the changes:
terraform init
terraform apply
This will create the EKS cluster and automatically configure the node groups and other related resources.
Example 1: Basic Terraform EKS Automode Setup
To give you a better understanding, here’s a simple example of a full Terraform script that automates the creation of an EKS cluster, a node group, and required networking components:
This script automatically creates a basic EKS cluster along with the necessary networking setup.
Advanced Scenarios for Terraform EKS Automode
Automating Multi-Region Deployments
Terraform EKS Automode can also help automate cluster deployments across multiple regions. This involves setting up different configurations for each region and using Terraform modules to manage the complexity.
Integrating with CI/CD Pipelines
You can integrate Terraform EKS Automode into your CI/CD pipeline for continuous delivery. By automating the deployment of EKS clusters, you can reduce human error and ensure that every new environment follows the same configuration standards.
FAQs About Terraform EKS Automode
1. What is EKS Automode?
EKS Automode is a feature in Terraform that automates the creation and management of Amazon EKS clusters, including node group creation, VPC configuration, and scaling.
2. How do I enable Terraform EKS Automode?
To enable Automode, use the enable_configure_automode parameter in the aws_eks_cluster resource definition.
3. Can Terraform EKS Automode help with auto-scaling?
Yes, Automode enables automatic scaling of node groups based on defined criteria such as resource utilization, ensuring that your cluster adapts to workload changes without manual intervention.
4. Do I need to configure anything manually with Automode?
While Automode automates most of the tasks, you may need to define some basic configurations such as VPC setup, IAM roles, and node group parameters based on your specific requirements.
In this guide, we’ve explored how to use Terraform EKS Automode to simplify the creation and management of Amazon EKS clusters. By automating key components like node groups and VPC configurations, Terraform helps reduce complexity, scale resources efficiently, and optimize costs.
With Terraform’s EKS Automode, you can focus more on your application deployments and less on managing infrastructure, knowing that your Kubernetes clusters are being managed efficiently in the background. Thank you for reading the DevopsRoles page!