Table of Contents
Introduction
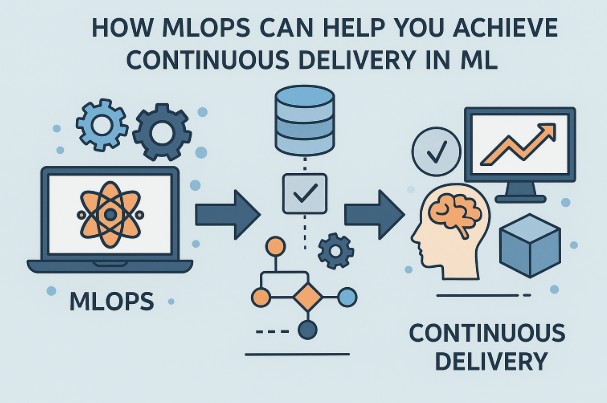
MLOps, a compound of “Machine Learning” and “Operations,” is rapidly becoming a crucial part of the AI lifecycle. As businesses increasingly deploy machine learning models in production environments, the need for robust MLOps platforms has grown. These platforms enable seamless collaboration between data scientists, ML engineers, and operations teams, ensuring that models are reliable, scalable, and maintainable. In 2024, mastering the right MLOps platform could be your ticket to a thriving career in AI. This article will guide you through the Top 9 MLOps Platforms to Learn in 2024, ranging from beginner-friendly to advanced tools.
1. Kubeflow
What is Kubeflow?
Kubeflow is an open-source platform designed to make deploying machine learning (ML) models on Kubernetes simple, portable, and scalable. It provides a comprehensive suite of tools that can manage the entire ML lifecycle, from training to deployment.
Key Features
- Scalability: Leverages Kubernetes for scaling.
- End-to-End Workflow: Supports the entire ML lifecycle.
- Flexibility: Works with popular frameworks like TensorFlow, PyTorch, and more.
Why Learn Kubeflow in 2024?
Kubeflow is ideal for those who already have experience with Kubernetes and want to extend their skills into MLOps. It’s a powerful platform that’s gaining traction in enterprises globally, making it a valuable tool to add to your skill set.
2. MLflow
What is MLflow?
MLflow is an open-source platform designed to manage the ML lifecycle, including experimentation, reproducibility, and deployment. It’s framework-agnostic, making it a versatile choice for any ML project.
Key Features
- Experiment Tracking: Logs parameters, code, and results.
- Model Management: Facilitates model packaging and deployment.
- Scalability: Works with large-scale models and datasets.
Why Learn MLflow in 2024?
MLflow’s ease of integration with existing ML pipelines makes it a popular choice for both beginners and experts. If you’re looking for a platform that offers simplicity without compromising on functionality, MLflow is a strong contender.
3. Azure Machine Learning
What is Azure Machine Learning?
Azure Machine Learning is a cloud-based platform provided by Microsoft, designed to help data scientists and ML engineers build, deploy, and manage high-quality models faster and with greater efficiency.
Key Features
- Automated ML: Speeds up model development.
- Integration with Azure Ecosystem: Seamless integration with other Azure services.
- Security: Enterprise-grade security and compliance.
Why Learn Azure Machine Learning in 2024?
For professionals working in cloud environments, Azure Machine Learning offers robust tools and integrations that streamline the MLOps process. Its strong focus on automation and collaboration makes it an excellent choice for enterprise applications.
4. Google Vertex AI
What is Google Vertex AI?
Vertex AI is Google Cloud’s unified platform for machine learning. It integrates the best of Google Cloud’s AI tools into a single environment, making it easier to build, deploy, and scale ML models.
Key Features
- AutoML: Automated machine learning model training.
- End-to-End ML Workflows: Manages data preparation, training, and deployment.
- Scalability: Built to scale with Google Cloud.
Why Learn Google Vertex AI in 2024?
Google Vertex AI is designed to simplify the MLOps process while maintaining the flexibility to handle complex ML tasks. It’s a powerful platform for those looking to leverage Google’s cutting-edge AI technology in their projects.
5. Amazon SageMaker
What is Amazon SageMaker?
Amazon SageMaker is a fully managed service that provides every developer and data scientist with the ability to build, train, and deploy machine learning models quickly.
Key Features
- Integrated Development Environment: Offers Jupyter notebooks for easy development.
- Hyperparameter Tuning: Automatically finds the best version of a model.
- Model Monitoring: Continuously monitors deployed models.
Why Learn Amazon SageMaker in 2024?
Amazon SageMaker is a market leader in the MLOps space, particularly for those already within the AWS ecosystem. Its comprehensive tools and resources make it an essential platform for any ML professional.
6. DVC (Data Version Control)
What is DVC?
DVC is an open-source version control system for machine learning projects. It enables teams to version control datasets, manage experiments, and share results effectively.
Key Features
- Data Management: Version controls large datasets.
- Experiment Tracking: Keeps track of various model iterations.
- Integration with Git: Works seamlessly with Git repositories.
Why Learn DVC in 2024?
DVC is gaining popularity for its ability to integrate smoothly into existing development workflows. It’s especially useful for teams that need to collaborate on large-scale ML projects with complex data dependencies.
7. Weights & Biases
What is Weights & Biases?
Weights & Biases (W&B) is a platform that provides tools for tracking experiments, visualizing metrics, and managing machine learning models.
Key Features
- Real-Time Experiment Tracking: Monitor experiments as they run.
- Collaboration Tools: Share results and collaborate with teams easily.
- Integration: Works with most ML frameworks.
Why Learn Weights & Biases in 2024?
W&B is widely used in both academia and industry, making it a versatile tool for any ML professional. It’s particularly useful for teams that require detailed experiment tracking and model monitoring.
8. Pachyderm
What is Pachyderm?
Pachyderm is a data engineering platform that integrates with Kubernetes, providing data versioning and pipeline automation capabilities for ML projects.
Key Features
- Data Lineage: Tracks data changes throughout the pipeline.
- Pipeline Automation: Automates complex ML pipelines.
- Scalability: Scales effortlessly with Kubernetes.
Why Learn Pachyderm in 2024?
Pachyderm is perfect for those looking to manage complex data pipelines and ensure reproducibility in their ML workflows. Its strong data lineage features make it a standout choice for data-intensive projects.
9. Allegro AI
What is Allegro AI?
Allegro AI is a specialized MLOps platform designed for deep learning and computer vision projects. It offers tools for dataset management, model training, and deployment.
Key Features
- Dataset Management: Efficiently manages large-scale datasets.
- Model Training: Optimized for deep learning workflows.
- Deployment: Streamlines the deployment of complex models.
Why Learn Allegro AI in 2024?
For professionals working in deep learning and computer vision, Allegro AI provides the specialized tools needed to manage and optimize these complex projects. It’s a platform worth mastering if you’re focused on these areas.
Frequently Asked Questions (FAQs)
1. What is MLOps?
MLOps is a set of practices that combines machine learning, DevOps, and data engineering to automate and streamline the process of deploying and maintaining machine learning models in production.
2. Why is MLOps important?
MLOps is crucial because it ensures that ML models are scalable, reliable, and maintainable in production environments. It also fosters collaboration between data scientists, ML engineers, and operations teams.
3. Which MLOps platform is best for beginners?
Platforms like MLflow and Weights & Biases are often recommended for beginners due to their ease of use and strong community support.
4. What skills are needed to excel in MLOps?
To excel in MLOps, one needs a strong foundation in machine learning, familiarity with DevOps practices, and proficiency in tools like Kubernetes, Docker, and version control systems.
5. Is learning MLOps platforms worth it in 2024?
Absolutely! As more companies invest in AI and ML, the demand for professionals with MLOps skills is set to rise, making it a valuable area of expertise.
Conclusion
Mastering MLOps platforms in 2024 is essential for anyone looking to stay competitive in the AI and ML industries. Whether you’re a beginner or an experienced professional, these platforms offer a range of tools and capabilities that can help you manage the ML lifecycle more effectively. Start with a platform that aligns with your current skill set and gradually explore more advanced options as you gain experience. Investing time in learning these platforms will pay off as businesses continue to rely on machine learning to drive innovation and growth. Thank you for reading the DevopsRoles page!