Category Archives: Ansible

Learn Ansible with DevOpsRoles.com. Access detailed guides and tutorials to automate IT tasks and manage configurations efficiently using Ansible for DevOps.

How to Manage a Home Network with Infrastructure as Code

For years, managing a home network has meant a tangle of cables, manual configurations, and frustrating troubleshooting. But what if you could automate this entire process, making your home network more reliable, easier to manage, and even more secure? This is where Infrastructure as Code (IaC) comes in. This guide explores how to leverage the power of IaC to manage your home network, transforming a complex task into a streamlined and efficient operation. We’ll explore various tools, techniques, and examples, empowering you to take control of your home network like never before.

Understanding Infrastructure as Code (IaC) in a Home Network Context

Infrastructure as Code (IaC) is the practice of managing and provisioning computer data centers through machine-readable definition files, rather than physical hardware configuration or interactive configuration tools. While often used for large-scale enterprise deployments, the principles of IaC can be incredibly beneficial for home network management. Instead of manually configuring your router, switches, and other network devices, you define their configurations in code. This approach offers numerous advantages:

  • Automation: Automate the entire network setup and configuration process.
  • Reproducibility: Easily recreate your network environment consistently.
  • Version Control: Track changes to your network configuration over time using Git or similar tools.
  • Scalability: Easily scale your network as your needs evolve.
  • Reduced Errors: Minimize human error associated with manual configurations.
  • Improved Reliability: Ensure consistent and reliable network performance.

Choosing the Right IaC Tools for Your Home Network

Several IaC tools are suitable for managing a home network, each with its strengths and weaknesses. Here are a few popular options:
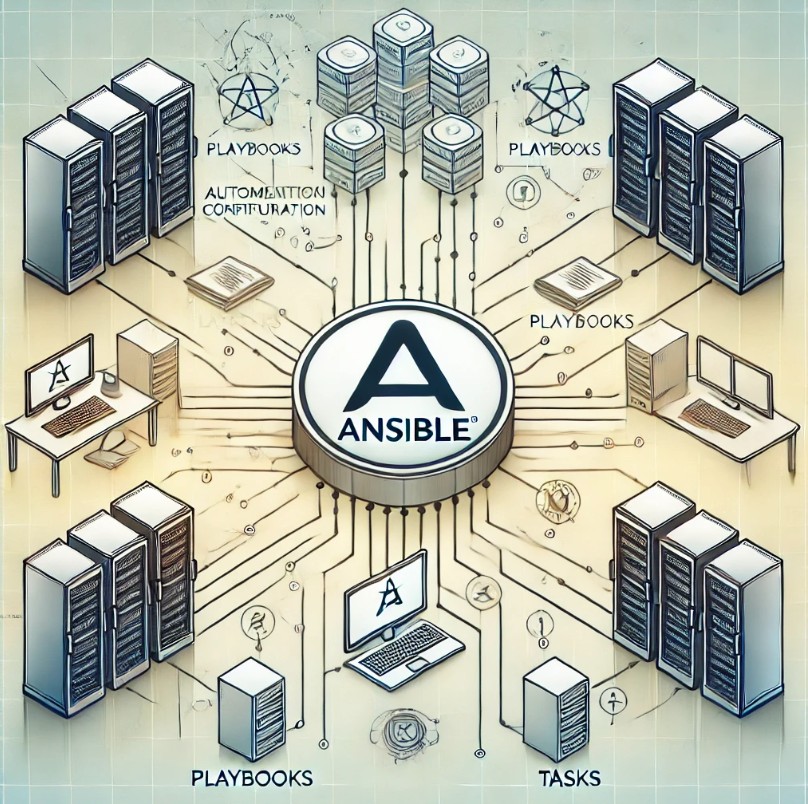
Ansible

Ansible is a powerful and agentless automation tool. Its simple YAML syntax makes it relatively easy to learn, even for those new to IaC. Ansible excels at configuring network devices using modules specifically designed for routers and switches. You can use Ansible to manage tasks like setting up VLANs, configuring DHCP, and managing firewall rules. Learn more about Ansible.

Terraform

Terraform, developed by HashiCorp, is an infrastructure-as-code tool that allows you to define and manage your infrastructure in a declarative way using HashiCorp Configuration Language (HCL). While more complex than Ansible, Terraform’s strength lies in its ability to manage diverse infrastructure components, including cloud services, which can be useful if your home network incorporates cloud-based elements. Learn more about Terraform.

Puppet

Puppet is a robust configuration management tool that uses a declarative language to define the desired state of your infrastructure. While perhaps more complex to learn initially, Puppet’s features provide extensive capabilities for managing complex network environments. It’s commonly used in enterprise environments but can be adapted for home use. Learn more about Puppet.

Examples: Applying IaC to Your Home Network

Let’s explore some practical examples of how you can use IaC to manage different aspects of your home network:

Example 1: Configuring DHCP with Ansible

Ansible’s simplicity makes it ideal for managing basic network configurations. Below is a simplified example of using Ansible to configure DHCP on a router (replace placeholders with your actual values):

---

- hosts: router
  become: yes
  tasks:

    - name: Configure static IP for DHCP
      command: ip addr add 192.168.1.1/24 dev eth0

    - name: Enable DHCP service
      command: /etc/init.d/dhcpd restart

Example 2: Creating VLANs with Terraform

If you’re working with a more advanced home network and need VLANs (virtual LANs), Terraform’s declarative nature shines. You could define your network topology and VLANs within a Terraform configuration file, making it easy to recreate or modify the network structure as needed. The actual code would be more complex and would depend on the specific router and provider you use.

Example 3: Managing Firewall Rules with Ansible

Security is paramount. Ansible can automate the management of firewall rules on your router, ensuring a consistent and secure network configuration. You can define rules to allow or block specific traffic based on ports or IP addresses. The specific commands will depend on your router’s firewall configuration interface.

Advanced IaC Concepts for Home Networking

As your home network grows in complexity, you might consider more advanced IaC practices:

Version Control (Git)

Store your IaC code in a Git repository (like GitHub, GitLab, or Bitbucket). This allows you to track changes, revert to previous configurations, and collaborate on network management if you have multiple users.

Automated Testing

Implement automated tests to verify that your IaC code functions correctly before applying changes to your live network. This prevents accidental disruptions.

Continuous Integration/Continuous Deployment (CI/CD)

Integrate your IaC workflow into a CI/CD pipeline to automate the deployment and testing process. Changes to your IaC code can be automatically tested and deployed to your home network, enhancing efficiency and reducing the risk of errors.

Frequently Asked Questions (FAQ)

  • Q: Is IaC necessary for a small home network? A: While not strictly necessary for a very small, simple network, IaC provides significant benefits in terms of automation, reproducibility, and long-term management, even for smaller setups. The learning curve is the main barrier.
  • Q: What if my router doesn’t support IaC directly? A: Many routers have command-line interfaces (CLIs) or APIs that allow for scripting and automation. You can use IaC tools to interact with these interfaces.
  • Q: What are the security implications? A: Storing your network configuration in code requires careful security practices. Use strong passwords, secure your Git repository, and follow best practices for securing your network infrastructure.
  • Q: What if I make a mistake in my IaC code? A: Proper testing and version control are crucial. Always test your changes in a non-production environment (if possible) before applying them to your live network. Version control allows you to easily revert to previous working configurations.
  • Q: Which tool is best for beginners? A: Ansible’s simpler syntax and agentless nature make it a good starting point for beginners.

Conclusion

Managing a home network with Infrastructure as Code offers a significant advantage over manual configuration. While there’s a learning curve involved, the benefits of automation, reproducibility, and enhanced reliability make it a worthwhile investment, especially as your network complexity grows. By mastering IaC techniques, you can transform your home network management from a tedious chore into a streamlined and efficient process.

Start with a basic configuration using a tool like Ansible, and gradually incorporate more advanced features as your expertise grows. Remember to prioritize security and testing to ensure a stable and secure home network.Thank you for reading the DevopsRoles page!

Automate IT Operations with VMware and Ansible

In today’s dynamic IT landscape, efficiency and agility are paramount. Manual processes are slow, error-prone, and simply cannot keep pace with the demands of modern infrastructure. This is where automation steps in, and the powerful combination of VMware and Ansible offers a compelling solution for automate IT operations. This comprehensive guide will explore how to leverage these technologies to streamline your workflows, improve reliability, and reduce operational costs.

Understanding the Power Duo: VMware and Ansible

VMware, a leading virtualization platform, provides the foundation for managing and deploying virtual machines (VMs) across various environments, from on-premises data centers to public clouds. Ansible, an open-source IT automation engine, excels at automating configuration management, application deployment, and orchestration across diverse infrastructure, including VMware environments.

Together, VMware and Ansible create a robust automation pipeline. Ansible’s agentless architecture simplifies deployment and management, allowing you to control VMware vSphere resources – including VMs, networks, and storage – through simple yet powerful playbooks written in YAML.

Use Cases and Examples: Automating VMware with Ansible

Basic Use Case: Provisioning a Virtual Machine

One of the simplest yet most impactful uses of Ansible with VMware is automated VM provisioning. Instead of manually creating VMs through the vSphere client, you can define a template using Ansible and deploy VMs with specific configurations (CPU, RAM, storage, network) on demand.

Example Ansible Playbook Snippet:

    
- hosts: localhost
  connection: local
  gather_facts: false
  tasks:
    - name: Create a new virtual machine
      vmware_guest:
        hostname: my-new-vm
        template: "my-template"
        resource_pool: "my-resource-pool"
        datastore: "my-datastore"
        network: "my-network"
        cpu: 2
        memory: 4096


This snippet demonstrates a basic VM creation. You’ll need to replace placeholders like “my-template,” “my-resource-pool,” etc., with your actual VMware environment details. This playbook leverages the `vmware_guest` module, a key component for Ansible’s VMware integration.

Advanced Use Case: Orchestrating Complex Deployments

Beyond simple provisioning, Ansible and VMware can orchestrate complex multi-tier deployments. Imagine deploying a three-tier application (web servers, application servers, database servers) across multiple VMs. Ansible can automate the entire process, ensuring consistency and reducing manual intervention.

This would involve creating VMs, configuring networks, installing applications, and configuring databases – all within a single, repeatable playbook. Error handling and rollback mechanisms can be integrated to ensure reliability.

Real-world Example: Automating Database Deployments

DBAs can leverage Ansible and VMware to automate database deployments. Consider deploying a new MySQL database cluster across three VMs. Ansible can:

  • Provision the VMs.
  • Install the MySQL server on each VM.
  • Configure replication between the VMs.
  • Deploy the database schema.
  • Import initial data.

This process, if done manually, is prone to errors and time-consuming. Ansible ensures consistency and speed, leading to faster deployment cycles and reduced operational overhead.

Example: Automating Patching and Updates

Maintaining updated systems is critical for security and stability. Ansible can automate patching and updating of guest operating systems within your VMware environment. Playbooks can be designed to identify VMs needing updates, download patches, and apply them, minimizing downtime and improving security posture. This automation is especially useful in large-scale environments with hundreds or thousands of VMs.

Integrating Ansible with VMware vCenter

For enhanced management and centralized control, integrate Ansible with VMware vCenter. This allows Ansible to manage your entire vSphere infrastructure from a single point, giving you a holistic view of your virtualized environment. This integration usually involves configuring Ansible to connect to the vCenter server using appropriate credentials and modules.

Frequently Asked Questions (FAQ)

Q1: What are the prerequisites for automating IT operations with VMware and Ansible?

A1: You’ll need a working VMware vSphere environment (including vCenter Server is recommended for better management), Ansible installed on a control machine, and the appropriate VMware Ansible modules installed. Network connectivity between your Ansible control machine and the VMware environment is crucial. A good understanding of both VMware and Ansible is also necessary.

Q2: How secure is using Ansible to manage VMware infrastructure?

A2: Security is paramount. Utilize Ansible’s features for secure credential management (e.g., using Ansible Vault to encrypt sensitive information) and leverage role-based access control (RBAC) within your VMware environment. Regular security audits and updates are crucial to maintaining a secure configuration. Always use the latest versions of Ansible and the VMware vSphere client.

Q3: Can Ansible manage all aspects of VMware vSphere?

A3: While Ansible provides extensive coverage of VMware vSphere management, there might be niche functionalities not directly covered by available modules. In such cases, you might need to resort to alternative methods (e.g., using the vSphere API directly) or explore community-contributed modules.

Q4: What are the benefits of using Ansible and VMware together for automation?

A4: The combined power of Ansible and VMware offers numerous benefits, including:

  • Increased efficiency: Automate repetitive tasks, freeing up IT staff for more strategic work.
  • Reduced errors: Automation minimizes human error, leading to more reliable deployments.
  • Improved consistency: Ensure consistent configurations across your entire VMware environment.
  • Faster deployments: Deploy applications and infrastructure much faster than with manual methods.
  • Enhanced scalability: Easily scale your infrastructure up or down as needed.
  • Better resource utilization: Optimize the use of your VMware resources.

Q5: Where can I find more information and resources?

A5: Ansible’s official documentation (https://docs.ansible.com/) is an excellent resource. VMware’s documentation (https://docs.vmware.com/) also provides valuable information on vSphere management. Numerous online communities and forums dedicated to Ansible and VMware offer further support and insights.

Conclusion

Automating IT operations with VMware and Ansible is no longer a luxury but a necessity for organizations striving for efficiency, agility, and scalability. By leveraging Ansible’s powerful automation capabilities to manage your VMware infrastructure, you can significantly improve your IT operations, reducing errors, enhancing consistency, and freeing up valuable resources. Remember to start with small, manageable projects to gain experience and gradually expand your automation efforts. Always prioritize security best practices and maintain up-to-date software for optimal performance and security.Thank you for reading the DevopsRoles page!


ONTAP AI Ansible Automation in 20 Minutes

Tired of spending hours manually configuring NetApp ONTAP AI? This guide shows you how to leverage the power of Ansible automation to streamline the process and deploy ONTAP AI in a mere 20 minutes. Whether you’re a seasoned DevOps engineer or a database administrator looking to improve efficiency, this tutorial provides a practical, step-by-step approach to automating your ONTAP AI deployments.

Understanding the Power of Ansible for ONTAP AI Configuration

NetApp ONTAP AI offers powerful features for optimizing storage performance and efficiency. However, the initial configuration can be time-consuming and error-prone if done manually. Ansible, a leading automation tool, allows you to define your ONTAP AI configuration in a declarative manner, ensuring consistency and repeatability across different environments. This translates to significant time savings, reduced human error, and improved infrastructure management.

Why Choose Ansible?

  • Agentless Architecture: Ansible doesn’t require agents on your target systems, simplifying deployment and management.
  • Idempotency: Ansible playbooks can be run multiple times without causing unintended changes, ensuring consistent state.
  • Declarative Approach: Define the desired state of your ONTAP AI configuration, and Ansible handles the details of achieving it.
  • Community Support and Modules: Ansible boasts a large and active community, providing extensive support and pre-built modules for various technologies, including NetApp ONTAP.

Step-by-Step Guide: Configuring ONTAP AI with Ansible in 20 Minutes

This guide assumes you have a basic understanding of Ansible and have already installed it on a control machine with network access to your ONTAP system. You will also need the appropriate NetApp Ansible modules installed. You can install them using:

ansible-galaxy install netapp.ontap

1. Inventory File

Create an Ansible inventory file (e.g., hosts.ini) containing the details of your ONTAP system:

[ontap_ai]

ontap_server ansible_host=192.168.1.100 ansible_user=admin ansible_password=your_password

Replace placeholders with your actual IP address, username, and password.

2. Ansible Playbook (ontap_ai_config.yml)

Create an Ansible playbook to define the ONTAP AI configuration. This example shows basic configuration; you can customize it extensively based on your needs:

---
- hosts: ontap_ai
  become: true
  tasks:
    - name: Enable ONTAP AI
      ontap_system:
        cluster: "{{ cluster_name }}"
        state: present
        api_user: "{{ api_user }}"
        api_password: "{{ api_password }}"
    - name: Configure ONTAP AI settings (Example - adjust as needed)
      ontap_ai_config:
        cluster: "{{ cluster_name }}"
        feature_flag: "enable"
        param1: value1
        param2: value2
    - name: Verify ONTAP AI status
      ontap_system:
        cluster: "{{ cluster_name }}"
        state: "present"
        api_user: "{{ api_user }}"
        api_password: "{{ api_password }}"
      register: ontap_status
    - debug:
        msg: "ONTAP AI Status: {{ ontap_status }}"
  vars:
    cluster_name: "my_cluster" # Replace with your cluster name.
    api_user: "admin" # Replace with the API user for ONTAP AI
    api_password: "your_api_password" # Replace with the API password.

3. Running the Playbook

Execute the playbook using the following command:

ansible-playbook ontap_ai_config.yml -i hosts.ini

This will automate the configuration of ONTAP AI according to the specifications in your playbook. Monitor the output for any errors or warnings. Remember to replace the placeholder values in the playbook with your actual cluster name, API credentials, and desired configuration parameters.

Use Cases and Examples

Basic Scenario: Enabling ONTAP AI

The playbook above demonstrates a basic use case: enabling ONTAP AI and setting initial parameters. You can expand this to include more granular control over specific AI features.

Advanced Scenario: Automated Performance Tuning

Ansible can be used to automate more complex tasks, such as dynamically adjusting ONTAP AI parameters based on real-time performance metrics. You could create a playbook that monitors storage performance and automatically adjusts deduplication or compression settings to optimize resource utilization. This would require integrating Ansible with monitoring tools and using conditional logic within your playbook.

Example: Integrating with Other Tools

You can integrate this Ansible-based ONTAP AI configuration with other automation tools within your CI/CD pipeline. For instance, you can trigger the Ansible playbook as part of a larger deployment process, ensuring consistent and automated provisioning of your storage infrastructure.

Frequently Asked Questions (FAQs)

Q1: What are the prerequisites for using Ansible to configure ONTAP AI?

You need Ansible installed on a control machine with network connectivity to your ONTAP system. The NetApp Ansible modules for ONTAP must also be installed. Ensure you have appropriate user credentials with sufficient permissions to manage ONTAP AI.

Q2: How do I handle errors during playbook execution?

Ansible provides detailed error reporting. Examine the playbook output carefully for error messages. These messages often pinpoint the source of the problem (e.g., incorrect credentials, network issues, invalid configuration parameters). Ansible also supports error handling mechanisms within playbooks, allowing you to define custom actions in response to errors.

Q3: Can I use Ansible to manage multiple ONTAP AI instances?

Yes, Ansible’s inventory system allows you to manage multiple ONTAP AI instances simultaneously. Define each instance in your inventory file, and then use Ansible’s group functionality to target specific groups of instances within your playbook.

Q4: Where can I find more information on NetApp Ansible modules?

Consult the official NetApp documentation and the Ansible Galaxy website for detailed information on available modules and their usage. The community forums are also valuable resources for troubleshooting and sharing best practices.

Q5: How secure is using Ansible for ONTAP AI configuration?

Security is paramount. Never hardcode sensitive credentials (passwords, API keys) directly into your playbooks. Use Ansible vault to securely store sensitive information and manage access controls. Employ secure network practices and regularly update Ansible and its modules to mitigate potential vulnerabilities.

Conclusion

Automating ONTAP AI configuration with Ansible offers significant advantages in terms of speed, efficiency, and consistency. This guide provides a foundation for streamlining your ONTAP AI deployments and integrating them into broader automation workflows. By mastering the techniques outlined here, you can significantly improve your storage infrastructure management and free up valuable time for other critical tasks. Remember to always consult the official NetApp documentation and Ansible documentation for the most up-to-date information and best practices. Prioritize secure credential management and regularly update your Ansible environment to ensure a robust and secure automation solution. Thank you for reading the DevopsRoles page!

External Links:


Ansible Roles: Efficient Configuration Management & Automation

Introduction

In the world of IT automation and DevOps, Ansible stands out as a powerful tool for configuration management and infrastructure automation. However, managing complex configurations across multiple systems can be challenging. This is where Ansible Roles come into play.

Ansible Roles provide a structured and modular approach to automation, making it easier to organize and reuse tasks across different projects. This guide will walk you through everything you need to know about Ansible Roles, from basic concepts to advanced implementations.

What Are Ansible Roles?

Understanding Ansible Roles

Ansible Roles allow users to break down complex playbooks into reusable components, improving maintainability and scalability. Instead of writing long playbooks, roles help you organize tasks, variables, handlers, and other elements into separate directories.

Key Benefits of Ansible Roles

  • Modularity: Encourages code reuse and simplifies complex configurations.
  • Scalability: Easily apply configurations to multiple servers.
  • Maintainability: Organized structure improves readability and management.
  • Community Support: Ansible Galaxy provides pre-built roles for common use cases.

Ansible Roles Directory Structure

Ansible Roles follow a standard directory structure:

my_role/
├── defaults/        # Default variables
├── files/          # Static files to be copied
├── handlers/       # Handlers for service restarts
├── meta/           # Role metadata (dependencies, author, etc.)
├── tasks/          # Main task definitions
├── templates/      # Jinja2 templates
├── vars/           # Role-specific variables
└── README.md       # Documentation for the role

Explanation of Each Directory:

  • defaults/ → Defines default variables that can be overridden.
  • files/ → Contains static files to be transferred to managed nodes.
  • handlers/ → Includes tasks that respond to events (e.g., restarting a service).
  • meta/ → Stores role metadata, dependencies, and author details.
  • tasks/ → Lists the automation steps that the role performs.
  • templates/ → Contains Jinja2 templates for dynamic configurations.
  • vars/ → Stores variables specific to the role.

Creating and Using Ansible Roles

1. Creating an Ansible Role

To create a new role, use the following command:

ansible-galaxy init my_role

This command generates the standard directory structure for your role.

2. Using a Role in a Playbook

Once the role is created, it can be included in an Ansible Playbook:

---
- name: Deploy Web Server
  hosts: web_servers
  roles:
    - webserver

3. Installing Roles from Ansible Galaxy

Ansible Galaxy provides a repository of community-created roles. To install a role:

ansible-galaxy install geerlingguy.apache

Use the installed role in your playbook:

---
- name: Install Apache
  hosts: web_servers
  roles:
    - geerlingguy.apache

Advanced Use Cases

1. Using Variables in Roles

Variables make roles more flexible. Define variables in the vars/main.yml file:

apache_port: 8080

Reference the variable in a template:

Listen {{ apache_port }}

2. Role Dependencies

Define role dependencies in meta/main.yml:

---
dependencies:
  - role: common_packages
  - role: security_updates

3. Conditional Role Execution

Use when conditions to control role execution:

- name: Include webserver role only on Ubuntu
  include_role:
    name: webserver
  when: ansible_os_family == "Debian"

Frequently Asked Questions (FAQ)

1. What is the difference between Ansible Playbooks and Roles?

Playbooks define automation workflows, while Roles break down tasks into reusable components for better organization and modularity.

2. Can I use multiple roles in a single playbook?

Yes, multiple roles can be included in a playbook, and they will execute sequentially.

roles:
  - security_updates
  - webserver
  - database_server

3. How can I override default variables in a role?

Override variables by defining them in the playbook:

vars:
  apache_port: 9090

4. Are there any best practices for creating Ansible Roles?

  • Follow the standard directory structure.
  • Keep tasks modular and reusable.
  • Use variables for flexibility.
  • Document roles using README.md.
  • Test roles before deploying.

External Resources

Conclusion

Ansible Roles are an essential feature that enhances the modularity, reusability, and maintainability of Ansible Playbooks. By leveraging roles, organizations can simplify complex configurations and achieve efficient automation. Whether you’re a beginner or an advanced user, mastering Ansible Roles can greatly improve your DevOps workflows.

Start implementing Ansible Roles today and optimize your infrastructure automation! Thank you for reading the DevopsRoles page!

Automating Server Configuration with Ansible

Introduction

Managing servers manually is time-consuming and prone to errors, especially in large-scale environments. Ansible, a powerful open-source IT automation tool, revolutionizes server configuration by providing a simple, agentless, and declarative approach to automation. In this article, we explore how to streamline server configuration with Ansible, offering practical examples, expert insights, and answers to common questions.

Why Use Ansible for Server Configuration?

Key Benefits of Ansible

  1. Agentless Architecture: No need to install additional software on managed nodes.
  2. Ease of Use: Uses human-readable YAML syntax.
  3. Scalability: Manages hundreds of servers effortlessly.
  4. Cross-Platform Compatibility: Supports Linux, Windows, and cloud infrastructures.
  5. Idempotency: Ensures consistent configuration regardless of execution frequency.

Use Cases for Ansible in Server Configuration

  • Software Installation: Automate the deployment of software packages.
  • User Management: Add, modify, or delete user accounts.
  • System Updates: Ensure servers are updated with the latest patches.
  • Service Management: Configure and monitor essential services like Apache or MySQL.

Getting Started with Ansible

Prerequisites

  1. Control Node: A machine with Ansible installed.
  2. Managed Nodes: Servers you want to configure.
  3. Python: Ensure Python is installed on all nodes.

Installing Ansible To install Ansible on a Linux control node, run:

sudo apt update
sudo apt install ansible -y

Setting Up Inventory File Create an inventory file to define your managed nodes:

[webservers]
192.168.1.10
192.168.1.11

[dbservers]
192.168.1.20

Automating Server Configuration with Ansible: Examples

Basic Example – Installing Apache Create a playbook install_apache.yml:

---
- name: Install Apache on Web Servers
  hosts: webservers
  become: yes
  tasks:
    - name: Ensure Apache is installed
      apt:
        name: apache2
        state: present

    - name: Start and enable Apache
      service:
        name: apache2
        state: started
        enabled: yes

Run the playbook:

ansible-playbook install_apache.yml

Intermediate Example – Configuring Users Create a playbook user_management.yml:

---
- name: Manage Users
  hosts: all
  become: yes
  tasks:
    - name: Create a user group
      group:
        name: developers

    - name: Add a user to the group
      user:
        name: john
        groups: developers
        state: present

Run the playbook:

ansible-playbook user_management.yml

Advanced Example – Deploying a Web Application Create a playbook deploy_app.yml:

---
- name: Deploy Web Application
  hosts: webservers
  become: yes
  tasks:
    - name: Install dependencies
      apt:
        name:
          - python3-pip
          - python3-venv
        state: present

    - name: Clone the repository
      git:
        repo: 'https://github.com/example/app.git'
        dest: /var/www/app

    - name: Set up virtual environment
      command: python3 -m venv /var/www/app/venv

    - name: Install application requirements
      pip:
        requirements: /var/www/app/requirements.txt
        virtualenv: /var/www/app/venv

    - name: Configure systemd service
      copy:
        dest: /etc/systemd/system/app.service
        content: |
          [Unit]
          Description=Gunicorn instance to serve app
          After=network.target

          [Service]
          User=www-data
          Group=www-data
          WorkingDirectory=/var/www/app
          ExecStart=/var/www/app/venv/bin/gunicorn -w 3 -b 0.0.0.0:8000 wsgi:app

          [Install]
          WantedBy=multi-user.target

    - name: Start the application service
      systemd:
        name: app
        state: started
        enabled: yes

Run the playbook:

ansible-playbook deploy_app.yml

FAQ

Frequently Asked Questions

What is Ansible? Ansible is an open-source IT automation tool that simplifies tasks like configuration management, application deployment, and task automation.

How does Ansible differ from other tools like Puppet or Chef? Unlike Puppet or Chef, Ansible uses an agentless architecture, relies on YAML for configurations, and is simpler to set up and use.

Do I need programming skills to use Ansible? Basic familiarity with YAML and server management is sufficient to get started with Ansible.

Can Ansible manage Windows servers? Yes, Ansible supports Windows server management using modules like winrm and psrp.

External Resources

Conclusion

Automating server configuration with Ansible is a game-changer for IT administrators. Its simplicity, flexibility, and power make it an essential tool for managing modern infrastructure. Whether you’re installing software, managing users, or deploying applications, Ansible offers a streamlined approach to automation. Start exploring Ansible today and transform your server management processes!Thank you for reading the DevopsRoles page!

Using Ansible Galaxy for Role Management: A Complete Guide

Introduction

Ansible Galaxy is one of the most powerful tools in the Ansible ecosystem, enabling users to share, download, and manage Ansible roles. For DevOps professionals, managing and reusing roles can significantly improve automation efficiency, reduce complexity, and save time. This article explores the core features of Ansible Galaxy for role management, from basic usage to advanced scenarios, and provides practical examples to help you get started.

What is Ansible Galaxy?

Ansible Galaxy is a community-driven platform where users can share pre-built Ansible roles. These roles are essentially reusable units of Ansible automation that encapsulate a specific function, such as installing software, configuring services, or managing users. By using roles from Ansible Galaxy, you can avoid the need to reinvent the wheel, speeding up your automation process and ensuring best practices are followed.

Why Use Ansible Galaxy for Role Management?

  • Reusability: Ansible roles in Galaxy are designed to be reusable, meaning you don’t have to write the same automation logic repeatedly.
  • Community Contributions: You can leverage thousands of roles shared by the community, which are often well-tested and updated.
  • Consistency: Galaxy roles provide a consistent structure, making it easier to maintain and scale automation across multiple environments.
  • Faster Automation: Pre-existing roles allow you to quickly implement and deploy automation, reducing the time spent on manual configuration.

How to Install Ansible Galaxy

Prerequisites

Before using Ansible Galaxy, you need to ensure that Ansible is installed on your system. If not, follow these steps to install Ansible:

sudo apt update
sudo apt install ansible

Once Ansible is installed, you can begin using Ansible Galaxy to manage roles.

Installing Roles from Galaxy

To install a role from Ansible Galaxy, you use the ansible-galaxy command. The basic syntax for installing a role is:

ansible-galaxy install <role_name>

For example, to install the geerlingguy.apache role from Ansible Galaxy, run:

ansible-galaxy install geerlingguy.apache

This command downloads the role to your local machine and places it in the default directory (~/.ansible/roles).

Installing a Role with Specific Version

If you need to install a specific version of a role, use the following syntax:

ansible-galaxy install <role_name>,<version>

For example:

ansible-galaxy install geerlingguy.apache,2.0.0

This installs version 2.0.0 of the geerlingguy.apache role.

Managing Roles with Ansible Galaxy

Searching for Roles

One of the key features of Ansible Galaxy is its ability to search for roles based on various criteria, such as tags, categories, or keywords. To search for roles, use the ansible-galaxy search command:

ansible-galaxy search <keyword>

For example, if you are looking for a role related to nginx, you would run:

ansible-galaxy search nginx

This command lists roles related to nginx, which can then be reviewed and installed.

Updating Installed Roles

Ansible Galaxy allows you to keep your roles up to date with the ansible-galaxy install command. If a role is already installed, running the command will automatically update it to the latest version:

ansible-galaxy install <role_name> --force

This ensures you are always using the most recent version of a role, with any bug fixes or improvements that may have been added.

Managing Dependencies

Some Ansible roles depend on other roles to function properly. Ansible Galaxy allows you to manage these dependencies automatically. When you install a role that has dependencies, Ansible Galaxy will automatically install the dependent roles as well. To view the dependencies of a role, you can use the ansible-galaxy command with the info option:

ansible-galaxy info <role_name>

This will display detailed information about the role, including any dependencies it may have.

Best Practices for Using Ansible Galaxy

Review Role Documentation

Before integrating a role into your playbooks, it’s crucial to review its documentation. Most roles on Ansible Galaxy come with detailed documentation that explains how to use the role, what variables are required, and any additional configuration steps.

Use Versioning

When managing roles in production environments, always specify the version of the role you are using to ensure consistency across different systems. This helps avoid potential issues with breaking changes introduced in newer versions of roles.

Create Custom Roles

While Ansible Galaxy provides a wide range of roles, sometimes your organization may require custom roles. Creating custom roles allows you to standardize your automation tasks and reuse code across different projects. To create a new role, run the following command:

ansible-galaxy init <role_name>

This creates a skeleton directory structure for your role, including subdirectories for tasks, handlers, templates, and variables.

Example: Using Ansible Galaxy for Role Management

Basic Example

Let’s say you want to set up an Apache server using an Ansible Galaxy role. Here’s how you can do it:

1.Install the role:

ansible-galaxy install geerlingguy.apache

2.Create a playbook (apache.yml):

---
- hosts: webservers
  become: yes
  roles:
    - geerlingguy.apache

3.Run the playbook:

ansible-playbook apache.yml

This simple playbook installs and configures Apache using the geerlingguy.apache role.

Advanced Example: Managing Multiple Roles

For more complex automation, you can manage multiple roles in a single playbook. Here’s an example where we use multiple roles to set up both Apache and MySQL:

---
- hosts: webservers
  become: yes
  roles:
    - geerlingguy.apache
    - geerlingguy.mysql

This playbook installs and configures both Apache and MySQL on the webservers group.

FAQ: Using Ansible Galaxy for Role Management

1. What is the difference between an Ansible role and a playbook?

An Ansible role is a modular component that contains tasks, variables, and templates designed for a specific task or service. A playbook, on the other hand, is a YAML file that defines a set of tasks and roles to be executed on a target host or group of hosts.

2. Can I create my own Ansible roles and share them on Galaxy?

Yes! Ansible Galaxy allows users to share their custom roles with the community. To share a role, you’ll need to create an account on the Ansible Galaxy website, package your role, and upload it.

3. How can I contribute to existing Ansible Galaxy roles?

If you find an issue or have a suggestion for an existing role, you can fork the role repository on GitHub, make changes, and submit a pull request.

4. Are all roles on Ansible Galaxy free to use?

Most roles on Ansible Galaxy are free and open-source. However, some roles may be offered by commercial vendors or with specific licensing terms.

Conclusion

Ansible Galaxy is an invaluable tool for anyone working with Ansible, especially when managing roles. It provides access to a vast repository of reusable roles, simplifying the automation process and improving efficiency. Whether you’re a beginner looking for ready-made roles or an advanced user managing complex automation tasks, Ansible Galaxy offers everything you need to streamline your workflow.

By leveraging best practices such as role versioning, reviewing documentation, and creating custom roles, you can make the most out of Ansible Galaxy for your infrastructure management needs. Thank you for reading the DevopsRoles page!

Managing Configurations with Ansible Vault: A Comprehensive Guide

Introduction

In today’s world of DevOps and automation, managing sensitive information securely is more critical than ever. Ansible Vault is an essential tool for securely managing configurations, secrets, and other sensitive data in Ansible playbooks. It allows you to encrypt files, variables, and data, ensuring that they are only accessible to authorized users or systems. Whether you’re working on a small project or scaling up to enterprise-level applications, Ansible Vault is indispensable for maintaining security and integrity in your automation workflows.

In this article, we’ll dive into how to use Ansible Vault, from basic setup to more advanced use cases, and explore best practices to keep your configurations secure.

What is Ansible Vault?

Ansible Vault is a feature of Ansible that enables you to encrypt files and variables within your playbooks. It’s designed to protect sensitive data like passwords, API keys, and other confidential information from being exposed during automation tasks. With Vault, you can securely store and manage secrets, while still being able to use them in your Ansible playbooks.

Unlike other secret management tools, Ansible Vault integrates directly into your Ansible workflow, providing a seamless experience for encrypting and decrypting files as part of your automation process.

Benefits of Using Ansible Vault

Ansible Vault offers several advantages, especially in environments where security is a top priority. Some of the key benefits include:

  • Encryption of sensitive data: Store passwords, certificates, and API keys securely.
  • Seamless integration: Works directly with Ansible playbooks and variables.
  • No additional tools required: You don’t need a separate tool to manage encrypted data.
  • Fine-grained access control: Vault passwords and keys can be stored securely, ensuring that only authorized users can access them.
  • Support for multiple encryption methods: Choose from various encryption standards like AES.

How Does Ansible Vault Work?

Ansible Vault works by encrypting YAML files (such as playbooks, variables, or other configuration files) using a password or an encryption key. These encrypted files can then be safely committed to version control systems (VCS) like Git without exposing sensitive data.

The encryption and decryption process is straightforward, making it simple to integrate into your existing automation workflows. Ansible Vault provides commands to create, edit, view, and encrypt/decrypt files.

Basic Commands for Using Ansible Vault

Here are the basic commands you need to interact with Ansible Vault:

ansible-vault create

Use this command to create a new encrypted file.

ansible-vault create secrets.yml

You will be prompted to enter a password, which will be used to encrypt the file. Once created, you can edit the file as needed.

ansible-vault edit

This command allows you to edit an encrypted file.

ansible-vault edit secrets.yml

Once you provide the password, the file will be decrypted and opened in your default editor.

ansible-vault view

This command lets you view the contents of an encrypted file without editing it.

ansible-vault view secrets.yml

You’ll be prompted to enter the password to decrypt and view the file contents.

ansible-vault encrypt

If you have an unencrypted file that you want to encrypt, you can use the encrypt command:

ansible-vault encrypt plain_text.yml

ansible-vault decrypt

If you need to decrypt a file, use:

ansible-vault decrypt secrets.yml

ansible-playbook --vault-password-file

To run an Ansible playbook that includes encrypted files, you need to provide the vault password or the vault password file:

ansible-playbook --vault-password-file .vault_pass.txt site.yml

Advanced Usage of Ansible Vault

Encrypting Variables in Playbooks

You can also encrypt individual variables in your Ansible playbooks. This is useful for securing sensitive information without needing to encrypt the entire file.

Example:

In your vars.yml file, you might store variables like:

db_password: mySuperSecretPassword

To encrypt this file:

ansible-vault encrypt vars.yml

Now, vars.yml is encrypted, and you can safely include it in your playbook.

In your playbook, reference the encrypted variables as usual:

- hosts: db_servers
  vars_files:
    - vars.yml
  tasks:
    - name: Ensure database is running
      service:
        name: mysql
        state: started

Encrypting Single Values in Playbooks

In some cases, you may only need to encrypt a single value, like a password. For this, Ansible Vault provides the ansible-vault encrypt_string command.

ansible-vault encrypt_string 'mySecretPassword' --name 'db_password'

This command outputs the encrypted string, which you can then paste directly into your playbook or variable file.

Vault ID Support for Multiple Vault Passwords

Ansible Vault supports Vault IDs, allowing you to use multiple vault passwords for different use cases. This is helpful in scenarios where different teams or environments require different levels of access.

Example:

You can specify which vault password to use for a specific file:

ansible-playbook --vault-id vault_password_file@env1 site.yml

Using Ansible Vault in CI/CD Pipelines

Integrating Ansible Vault into your continuous integration/continuous deployment (CI/CD) pipelines ensures that sensitive data remains protected during the automation process. This can be done by securely storing vault passwords in CI/CD tools such as Jenkins, GitLab CI, or GitHub Actions.

Example in GitLab CI:

Store your vault password in a GitLab CI secret and pass it to your Ansible playbook run:

stages:
  - deploy

deploy:
  script:
    - ansible-playbook --vault-password-file <(echo "$VAULT_PASSWORD") site.yml

FAQ Section

How do I store my Ansible Vault password securely?

There are several ways to store your Ansible Vault password securely:

  • Environment variables: Store the password in a secure environment variable.
  • Vault password file: Store the password in a separate file and ensure the file is protected.
  • External secret management tools: Use tools like HashiCorp Vault or AWS Secrets Manager.

Can I use Ansible Vault with external secrets managers?

Yes, Ansible Vault can be integrated with external secrets management solutions. By using an Ansible module like hashi_vault or aws_secret, you can retrieve secrets from a central manager during playbook execution.

What encryption algorithm does Ansible Vault use?

By default, Ansible Vault uses the AES-256 encryption algorithm for securing files. This provides a good balance between security and performance.

How do I handle vault password management in a team environment?

In team environments, it’s best to use a central location for storing vault passwords, such as a secure vault management system or CI/CD tool. You can also utilize Vault ID support to manage different vault passwords for different environments or teams.

External Resources

Conclusion

Ansible Vault is a powerful tool for securing sensitive data in your Ansible automation workflows. From basic file encryption to advanced use cases like vault password management and integration with external systems, Vault ensures that your data remains secure throughout the automation lifecycle. By following best practices and understanding its advanced features, you can confidently manage configurations while keeping sensitive information protected.

By incorporating Ansible Vault into your DevOps practices, you ensure that your automated infrastructure is both efficient and secure, reducing the risks associated with exposure of sensitive data. Thank you for reading the DevopsRoles page!

Ansible vs Terraform: Key Differences You Should Know

Introduction

In the modern world of DevOps and infrastructure automation, tools like Ansible and Terraform are essential for simplifying the process of provisioning, configuring, and managing infrastructure. However, while both of these tools share similarities in automating IT tasks, they are designed for different purposes and excel in different areas. Understanding the key differences between Ansible vs Terraform can help you make the right choice for your infrastructure management needs.

This article will explore the main distinctions between Ansible and Terraform, their use cases, and provide real-world examples to guide your decision-making process.

Ansible vs Terraform: What They Are

What is Ansible?

Ansible is an open-source IT automation tool that is primarily used for configuration management, application deployment, and task automation. Developed by Red Hat, Ansible uses playbooks written in YAML to automate tasks across various systems. It’s agentless, meaning it doesn’t require any agents to be installed on the target machines, making it simple to deploy.

Some of the key features of Ansible include:

  • Automation of tasks: Like installing packages, configuring software, or ensuring servers are up-to-date.
  • Ease of use: YAML syntax is simple and human-readable.
  • Agentless architecture: Ansible uses SSH or WinRM for communication, eliminating the need for additional agents on the target machines.

What is Terraform?

Terraform, developed by HashiCorp, is a powerful Infrastructure as Code (IaC) tool used for provisioning and managing cloud infrastructure. Unlike Ansible, which focuses on configuration management, Terraform is specifically designed to manage infrastructure resources such as virtual machines, storage, and networking components in a declarative manner.

Key features of Terraform include:

  • Declarative configuration: Users describe the desired state of the infrastructure in configuration files, and Terraform automatically ensures that the infrastructure matches the specified state.
  • Cross-cloud compatibility: Terraform supports multiple cloud providers like AWS, Azure, Google Cloud, and others.
  • State management: Terraform maintains a state file that tracks the current state of your infrastructure.

Ansible vs Terraform: Key Differences

1. Configuration Management vs Infrastructure Provisioning

The core distinction between Ansible and Terraform lies in their primary function:

  • Ansible is mainly focused on configuration management. It allows you to automate the setup and configuration of software and services on machines once they are provisioned.
  • Terraform, on the other hand, is an Infrastructure as Code (IaC) tool, focused on provisioning infrastructure. It allows you to create, modify, and version control cloud resources like servers, storage, networks, and more.

In simple terms, Terraform manages the “infrastructure”, while Ansible handles the “configuration” of that infrastructure.

2. Approach: Declarative vs Imperative

Another significant difference lies in the way both tools approach automation:

Terraform uses a declarative approach, where you define the desired end state of your infrastructure. Terraform will figure out the steps required to reach that state and will apply those changes automatically.

Example (Terraform):

resource "aws_instance" "example" {
  ami           = "ami-12345678"
  instance_type = "t2.micro"
}

Here, you’re declaring that you want an AWS instance with a specific AMI and instance type. Terraform handles the details of how to achieve that state.

Ansible, on the other hand, uses an imperative approach, where you explicitly define the sequence of actions that need to be executed.

Example (Ansible):

- name: Install Apache web server
  apt:
    name: apache2
    state: present

3. State Management

State management is a crucial aspect of IaC, and it differs greatly between Ansible and Terraform:

  • Terraform keeps track of the state of your infrastructure using a state file. This file contains information about your resources and their configurations, allowing Terraform to manage and update your infrastructure in an accurate and efficient way.
  • Ansible does not use a state file. It runs tasks on the target systems and doesn’t retain any state between runs. This means it doesn’t have an internal understanding of your infrastructure’s current state.

4. Ecosystem and Integrations

Both tools offer robust ecosystems and integrations but in different ways:

  • Ansible has a wide range of modules that allow it to interact with various cloud providers, servers, and other systems. It excels at configuration management, orchestration, and even application deployment.
  • Terraform specializes in infrastructure provisioning and integrates with multiple cloud providers through plugins (known as providers). Its ecosystem is tightly focused on managing resources across cloud platforms.

Use Cases of Ansible and Terraform

When to Use Ansible

Ansible is ideal when you need to:

  • Automate server configuration and software deployment.
  • Manage post-provisioning tasks such as setting up applications or configuring services on VMs.
  • Automate system-level tasks like patching, security updates, and network configurations.

When to Use Terraform

Terraform is best suited for:

  • Managing cloud infrastructure resources (e.g., creating VMs, networks, load balancers).
  • Handling infrastructure versioning, scaling, and resource management across different cloud platforms.
  • Managing complex infrastructures and dependencies in a repeatable, predictable manner.

Example Scenarios: Ansible vs Terraform

Scenario 1: Provisioning Infrastructure

If you want to create a new virtual machine in AWS, Terraform is the best tool to use since it’s designed specifically for infrastructure provisioning.

Terraform Example:

resource "aws_instance" "web" {
  ami           = "ami-abc12345"
  instance_type = "t2.micro"
}

Once the infrastructure is provisioned, you would use Ansible to configure the machine (install web servers, deploy applications, etc.).

Scenario 2: Configuring Servers

Once your infrastructure is provisioned using Terraform, Ansible can be used to configure and manage the software installed on your servers.

Ansible Example:

- name: Install Apache web server
  apt:
    name: apache2
    state: present

FAQ: Ansible vs Terraform

1. Can Ansible be used for Infrastructure as Code (IaC)?

Yes, Ansible can be used for Infrastructure as Code, but it is primarily focused on configuration management. While it can manage cloud resources, Terraform is more specialized for infrastructure provisioning.

2. Can Terraform be used for Configuration Management?

Terraform is not designed for configuration management. However, it can handle some simple tasks, but it’s more suited for provisioning infrastructure.

3. Which one is easier to learn: Ansible or Terraform?

Ansible is generally easier for beginners to learn because it uses YAML, which is a simple, human-readable format. Terraform, while also relatively easy, requires understanding of HCL (HashiCorp Configuration Language) and is more focused on infrastructure provisioning.

4. Can Ansible and Terraform be used together?

Yes, Ansible and Terraform are often used together. Terraform can handle infrastructure provisioning, while Ansible is used for configuring and managing the software and services on those provisioned resources.

Conclusion

Ansible vs Terraform ultimately depends on your specific use case. Ansible is excellent for configuration management and automation of tasks on existing infrastructure, while Terraform excels in provisioning and managing cloud infrastructure. By understanding the key differences between these two tools, you can decide which best fits your needs or how to use them together to streamline your DevOps processes.

For more detailed information on Terraform and Ansible, check out these authoritative resources:

Both tools play an integral role in modern infrastructure management and DevOps practices, making them essential for cloud-first organizations and enterprises managing large-scale systems. Thank you for reading the DevopsRoles page!

Introduction to Continuous Testing in DevOps: Revolutionizing the Software Development Lifecycle

Introduction

In today’s fast-paced software development world, Continuous Testing in DevOps has become a critical component of delivering high-quality products at speed. Traditional testing methods, which often occur at the end of the development cycle, are no longer sufficient to meet the demands of modern, agile development teams. As organizations embrace DevOps practices, continuous testing ensures that quality is maintained throughout the entire development process, from planning and coding to deployment and monitoring.

Continuous testing (CT) in DevOps enables teams to catch defects early, reduce the time spent on debugging, and ultimately speed up the release of software. This article will explore the concept of continuous testing, its role in DevOps, and how organizations can implement it effectively to optimize their software development lifecycle.

What is Continuous Testing in DevOps?

Continuous Testing (CT) is an essential practice in the DevOps pipeline that involves testing software continuously throughout the development cycle. It ensures that code is constantly validated, tested, and assessed for defects as it moves from development to production. Unlike traditional testing, which often occurs at the end of the development cycle, continuous testing enables real-time feedback and faster detection of issues, making it integral to the DevOps culture.

In DevOps, continuous testing aligns with the broader goal of shortening development cycles and improving collaboration between developers, testers, and operations teams. Automated tests are executed in parallel with the development process, allowing teams to validate new features, bug fixes, and other changes almost as soon as they are introduced.

The Core Principles of Continuous Testing

Continuous Testing in DevOps operates on the following key principles:

  1. Automation: Automated tests run continuously across different stages of development, ensuring faster and more efficient validation of code.
  2. Continuous Feedback: Developers receive immediate feedback on code changes, enabling them to address issues promptly.
  3. Integration with CI/CD: CT is integrated into the CI/CD (Continuous Integration/Continuous Delivery) pipeline, ensuring that testing is performed as part of the overall development process.
  4. Real-time Monitoring: Continuous monitoring helps teams detect issues early and prevent them from propagating to production environments.
  5. Scalability: As software grows in complexity, continuous testing allows organizations to scale their testing processes effectively.

Why is Continuous Testing Important for DevOps?

In DevOps, where speed, efficiency, and collaboration are paramount, continuous testing offers numerous advantages:

  1. Faster Time to Market: Continuous testing enables the rapid identification of bugs or issues, allowing teams to fix them quickly and deploy updates faster. This significantly shortens the time between development and production.
  2. Improved Software Quality: By testing code continuously, developers can identify defects early in the process, reducing the chances of bugs making it to production. This enhances the overall quality of the software.
  3. Enhanced Collaboration: Continuous testing promotes better collaboration between development, testing, and operations teams. Since testing is integrated into the development pipeline, teams are encouraged to work together more effectively.
  4. Reduced Cost of Bug Fixes: Catching bugs early means they are less costly to fix. Defects identified later in the development cycle or after deployment are much more expensive to address.
  5. Better Customer Experience: Faster release cycles and fewer defects lead to more reliable software, which improves the end-user experience and boosts customer satisfaction.

How Continuous Testing Works in the DevOps Pipeline

Continuous Testing is closely integrated with the DevOps pipeline, enabling automated tests to run at various stages of the development process. Here’s how continuous testing works within the context of DevOps:

1. Continuous Integration (CI)

Continuous integration is the first step in the pipeline. As developers push new code changes to the repository, automated tests are triggered to validate the changes. This ensures that any defects introduced during development are caught early.

  • Unit Tests: Test individual code components to ensure they work as expected.
  • Integration Tests: Ensure that different components of the application function together as intended.

2. Continuous Testing

Once code changes pass CI, the continuous testing phase begins. During this phase, tests are executed across multiple environments, including development, staging, and production, to validate functionality, performance, security, and compliance.

  • Functional Tests: Validate the functionality of features and user stories.
  • Performance Tests: Assess the system’s behavior under load or stress conditions.
  • Security Tests: Test for vulnerabilities and compliance with security standards.

3. Continuous Delivery (CD)

In the continuous delivery phase, code that passes all tests is automatically pushed to staging or production environments. This ensures that the software is always in a deployable state, and updates can be released without delays.

  • Smoke Tests: Verify that the basic features of the application work as expected after deployment.
  • Regression Tests: Ensure that new changes do not break existing functionality.

Key Tools for Continuous Testing in DevOps

To implement continuous testing effectively, DevOps teams rely on various tools to automate and streamline the process. Here are some popular tools commonly used in continuous testing:

  1. Selenium: A powerful tool for automating web application testing. Selenium supports multiple programming languages and browsers, making it a popular choice for functional testing.
  2. JUnit: A widely-used framework for unit testing Java applications. JUnit integrates well with CI/CD tools, making it ideal for continuous testing in DevOps pipelines.
  3. Jenkins: An open-source automation server that helps implement continuous integration and delivery. Jenkins can trigger automated tests as part of the CI/CD process.
  4. TestComplete: A functional test automation platform for web, desktop, and mobile applications. It enables teams to create automated tests that can be integrated with other tools in the DevOps pipeline.
  5. JUnit: A widely-used testing framework for Java applications that integrates with CI/CD tools and supports unit, integration, and regression testing.

These tools, along with many others, enable teams to continuously test their software across multiple stages of the development process, ensuring that defects are identified and addressed early.

Examples of Continuous Testing in Action

1. Basic Scenario: Unit Testing in CI

A development team is working on a new feature for a web application. As part of their workflow, they use Jenkins to trigger a suite of unit tests every time a new code commit is pushed. These tests run automatically, and if they pass, the code moves to the next phase in the pipeline. If any tests fail, the development team is immediately notified, allowing them to fix the issues before proceeding.

2. Advanced Scenario: Automated Regression Testing in CD

A global e-commerce platform is preparing for a major release. They use Selenium for automated regression testing across multiple browsers. Every time new code is deployed to the staging environment, Selenium tests validate that the core functionality, such as product browsing, checkout, and payment processing, still works as expected. These automated tests run in parallel with performance and security tests to ensure the application is production-ready.

Frequently Asked Questions (FAQ)

1. What is the difference between continuous testing and traditional testing?

Traditional testing typically occurs after development is complete, often at the end of the development cycle. Continuous testing, on the other hand, integrates testing into the development process itself, running tests automatically as code is written, merged, and deployed.

2. What are the main benefits of continuous testing?

The main benefits of continuous testing include faster release cycles, improved software quality, early detection of bugs, and enhanced collaboration between development, testing, and operations teams.

3. What tools can be used for continuous testing in DevOps?

Popular tools for continuous testing in DevOps include Selenium, JUnit, Jenkins, TestComplete, and many more. These tools help automate testing and integrate it with the overall CI/CD pipeline.

4. How does continuous testing improve the software development lifecycle?

Continuous testing ensures that code is validated throughout the development cycle, which reduces the risk of defects reaching production. It also speeds up development by providing quick feedback, allowing teams to fix issues earlier in the process.

Conclusion

Continuous Testing in DevOps is no longer a luxury—it’s a necessity for modern software development. By integrating automated testing into every phase of the development lifecycle, organizations can ensure that they deliver high-quality software quickly and efficiently. As DevOps continues to evolve, continuous testing will remain a crucial practice for organizations aiming to achieve seamless software delivery, improve collaboration, and stay ahead in today’s competitive market. Thank you for reading the DevopsRoles page!

For more on Continuous Testing and DevOps, visit these authoritative sources:

Ansible Playbooks: A Comprehensive Guide to Automation

Introduction

In the rapidly evolving field of IT automation, Ansible Playbooks stand out as a powerful tool for managing configurations, deploying applications, and orchestrating complex workflows. Designed for simplicity and scalability, playbooks enable administrators and developers to automate repetitive tasks with ease. Whether you’re a beginner or an experienced professional, understanding how to create and utilize playbooks can significantly streamline your operations.

In this guide, we’ll dive deep into Ansible Playbooks, exploring their structure, functionality, and use cases. By the end, you’ll have a clear understanding of how to leverage them to simplify and enhance your IT automation tasks.

What Are Ansible Playbooks?

Ansible Playbooks are YAML-based files that define configurations, tasks, and workflows in a human-readable format. They serve as the blueprint for orchestrating IT operations, providing instructions for Ansible to execute on managed nodes.

Key Features of Ansible Playbooks:

  • Human-Readable Syntax: Playbooks use YAML, making them easy to write and understand.
  • Declarative Nature: Specify the desired state, and Ansible ensures it’s achieved.
  • Idempotent Execution: Playbooks prevent redundant changes by ensuring tasks only run when necessary.
  • Agentless Architecture: No need to install additional software on target nodes.

Why Use Ansible Playbooks?

Using playbooks provides several advantages:

  • Efficiency: Automate repetitive tasks like software installation, configuration, and updates.
  • Consistency: Ensure uniform configurations across multiple environments.
  • Scalability: Manage thousands of nodes with a single playbook.
  • Flexibility: Integrate with various tools and cloud providers for diverse workflows.

Getting Started with Ansible Playbooks

Prerequisites

Before writing your first playbook, ensure:

  1. Ansible is installed on your control node.
  2. Target nodes are reachable and configured in your inventory file.
  3. SSH access is set up for passwordless communication.

Structure of an Ansible Playbook

A typical playbook consists of the following components:

  • Hosts: Defines the target machines.
  • Tasks: List of actions Ansible will execute.
  • Modules: Predefined functionalities like file management or service control.
  • Variables: Store data for dynamic configurations.
  • Handlers: Respond to task changes (e.g., restarting a service).

Here’s a simple example:

- name: Install and configure Apache
  hosts: webservers
  become: true
  tasks:
    - name: Install Apache
      apt:
        name: apache2
        state: present

    - name: Start Apache service
      service:
        name: apache2
        state: started

Writing Your First Ansible Playbook

Step 1: Define Your Inventory

The inventory file lists the target hosts. Example inventory file:

[webservers]
192.168.1.10
192.168.1.11

Step 2: Create the Playbook

Save the following content in a site.yml file:

- name: Update and Install NGINX
  hosts: webservers
  become: true
  tasks:
    - name: Update apt repository
      apt:
        update_cache: yes

    - name: Install NGINX
      apt:
        name: nginx
        state: present

    - name: Start NGINX
      service:
        name: nginx
        state: started

Step 3: Execute the Playbook

Run the playbook using the following command:

ansible-playbook -i inventory site.yml

Advanced Ansible Playbook Techniques

Using Variables

Variables allow dynamic configurations. Example:

- name: Configure Web Server
  hosts: webservers
  vars:
    http_port: 80
  tasks:
    - name: Configure NGINX to listen on port {{ http_port }}
      lineinfile:
        path: /etc/nginx/sites-available/default
        regexp: 'listen .*;'
        line: 'listen {{ http_port }};'

Loops

Run tasks multiple times with different inputs:

- name: Install multiple packages
  hosts: all
  tasks:
    - name: Install packages
      apt:
        name: "{{ item }}"
        state: present
      loop:
        - git
        - curl
        - vim

Conditional Tasks

Execute tasks based on conditions:

- name: Conditional Example
  hosts: all
  tasks:
    - name: Install Apache on Debian
      apt:
        name: apache2
        state: present
      when: ansible_facts['os_family'] == 'Debian'

Common Use Cases for Ansible Playbooks

  1. Application Deployment: Automate the deployment of web applications.
  2. Server Configuration: Set up servers with predefined roles like database, application, or cache servers.
  3. Patch Management: Regularly update and patch systems.
  4. Cloud Orchestration: Manage cloud resources across AWS, Azure, or GCP.

FAQ: Ansible Playbooks Explained

What is the difference between a playbook and a role?

  • A playbook defines tasks for a specific scenario, while a role organizes tasks, variables, and handlers into reusable units.

How do I debug playbooks?

Use the -vvv flag for verbose output:

ansible-playbook -i inventory site.yml -vvv

Can I use Ansible Playbooks with Docker?

Yes, Ansible modules like docker_container enable seamless container management.

Are Ansible Playbooks compatible with Windows?

Yes, with the win_* modules, you can manage Windows systems.

External Resources

Conclusion

Ansible Playbooks are an essential tool for automating IT operations. From configuring servers to deploying applications, they offer unmatched flexibility and scalability. By mastering the basics and exploring advanced techniques, you can create robust automation workflows tailored to your needs. Start writing your first playbook today and experience the efficiency of Ansible! Thank you for reading the DevopsRoles page!