Category Archives: Ansible

Learn Ansible with DevOpsRoles.com. Access detailed guides and tutorials to automate IT tasks and manage configurations efficiently using Ansible for DevOps.

Ansible Configuration Management: Basics, Benefits, and Best Practices

Introduction

As the need for efficient and automated IT operations grows, Ansible has become a cornerstone in configuration management, allowing teams to automate complex tasks, streamline workflows, and maintain consistency across environments. This guide delves into Ansible configuration management basics, showcasing how it works, its fundamental commands, and practical examples for both beginners and seasoned professionals.

With its easy-to-read syntax and agentless architecture, Ansible enables you to scale automation efforts quickly without worrying about compatibility issues. Whether you’re managing a single server or deploying complex applications across multiple environments, mastering Ansible configuration management will give you a solid foundation to enhance your operations.

What is Ansible Configuration Management?

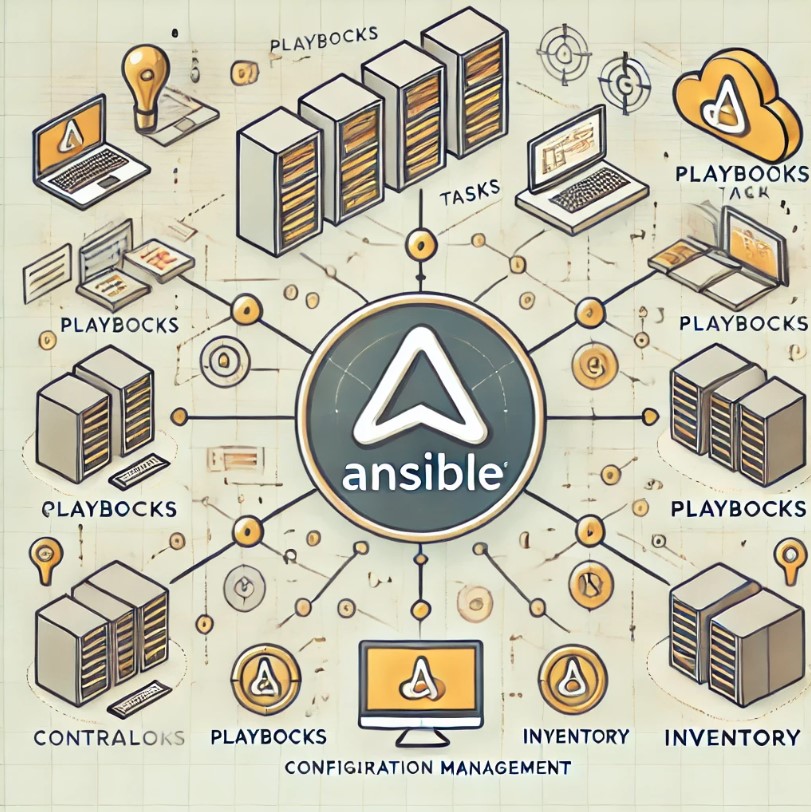
Ansible is an open-source automation tool that simplifies configuration management, application deployment, and task automation. Its popularity stems from being agentless, easy to install, and offering a highly readable YAML syntax, making it accessible even to those new to IT automation.

Key Benefits of Ansible for Configuration Management

  • Agentless: Requires no client software installation on the managed nodes.
  • Ease of Use: Written in YAML, Ansible playbooks are human-readable and straightforward.
  • Scalability: Efficiently handles configurations across thousands of nodes.
  • Versatility: Ansible covers a wide range of IT automation needs, from configuration management to application deployment.

Setting Up Ansible Configuration Management

Setting up Ansible is a straightforward process. Follow these steps to get started:

Prerequisites

  • A machine with Ansible installed (usually your local machine).
  • Managed nodes with SSH access.
  • Root or administrative access on the managed nodes.

Installing Ansible

Use the following command to install Ansible on a system using the APT package manager:

sudo apt update
sudo apt install ansible -y

Once installed, verify the Ansible installation by checking the version:

ansible --version

Basic Ansible Configuration Management Commands

Ansible’s core commands help in managing configurations across your infrastructure. Here are some essential ones:

  1. Inventory Management: List the IP addresses or hostnames of the managed nodes.
  2. Ad-Hoc Commands: Quick one-liner commands for tasks like checking connectivity or uptime.
  3. Playbooks: YAML files containing configuration tasks.

Managing Inventory

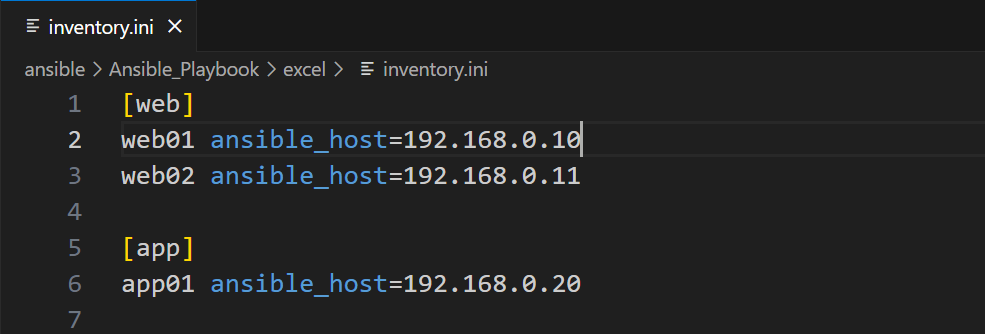
Create a simple inventory file to specify the nodes Ansible will manage. Here’s an example of an inventory.ini file:

[webservers]
192.168.1.10
192.168.1.11

[dbservers]
192.168.1.20

You can verify connectivity with a simple ping command:

ansible all -i inventory.ini -m ping

Writing an Ansible Playbook

Ansible playbooks are YAML files where you define the configuration steps. Here’s an example of a playbook that installs Apache on web servers:

- hosts: webservers
  become: yes
  tasks:
    - name: Install Apache
      apt:
        name: apache2
        state: present

Run the playbook with the following command:

ansible-playbook -i inventory.ini install_apache.yml

Advanced Ansible Configuration Management Scenarios

Ansible excels in complex environments, and mastering its advanced features can significantly streamline operations.

1. Managing Multiple Environments with Variable Files

Variable files allow you to tailor configurations for different environments (e.g., development, staging, production). Here’s an example setup:

# vars/dev.yml
app_port: 8080
db_host: dev-db.example.com
# vars/prod.yml
app_port: 80
db_host: prod-db.example.com

To load these variables conditionally, use the vars_files directive in your playbook:

- hosts: all
  vars_files:
    - vars/{{ env }}.yml
  tasks:
    - name: Ensure app is listening on the correct port
      lineinfile:
        path: /etc/app/config
        line: "port={{ app_port }}"

2. Using Roles for Modular Configuration Management

Roles enable modular playbook design, helping you organize tasks, handlers, variables, and templates. Here’s an example of a role directory structure:

roles/
├── webserver
│   ├── tasks
│   ├── handlers
│   ├── templates
│   └── vars

To assign a role to a playbook:

- hosts: webservers
  roles:
    - webserver

3. Automating with Ansible Tower (AWX)

Ansible Tower, also known as AWX, provides a GUI for managing Ansible projects and scheduling playbooks. It simplifies tasks like job monitoring, multi-tier deployments, and integrations with various DevOps tools.

Frequently Asked Questions (FAQ)

Q: How is Ansible different from other configuration management tools like Puppet or Chef?
A: Unlike Puppet and Chef, Ansible is agentless, meaning no additional software is required on the nodes being managed. Ansible also uses YAML syntax, which is simpler and more readable compared to the Ruby or custom syntax often used in other tools.

Q: Can Ansible manage both Linux and Windows servers?
A: Yes, Ansible can manage both Linux and Windows servers, though managing Windows requires setting up WinRM for remote management.

Q: What are some security best practices for using Ansible?
A: Limit SSH access with secure key pairs, use Ansible Vault to encrypt sensitive variables, and apply role-based access in multi-user setups.

Q: Can I integrate Ansible with CI/CD pipelines?
A: Absolutely! Ansible integrates seamlessly with CI/CD pipelines, commonly in Jenkins, GitLab CI, or similar tools, to automate infrastructure deployments and updates.

External Links

  • Ansible Documentation: Official Ansible documentation for further reading.
  • Red Hat Ansible: Comprehensive insights into Ansible and related Red Hat offerings.
  • GitHub – Ansible Examples: Collection of example playbooks and setups on GitHub.

Conclusion

Ansible configuration management simplifies and accelerates IT operations by offering an agentless, flexible, and scalable approach to automation. From the fundamentals of setting up and managing inventory files to advanced techniques like roles and modular playbook organization, Ansible provides powerful tools to streamline workflows.

Whether you’re deploying applications across multiple environments or automating repetitive administrative tasks, Ansible is an invaluable asset to modern DevOps and IT teams. By incorporating these basics and expanding into advanced scenarios, you’ll be well on your way to mastering Ansible configuration management. Thank you for reading the DevopsRoles page!

Creating an Ansible variable file from an Excel

Introduction

Creating an Ansible variable File from an Excel. In the world of infrastructure as code (IaC), Ansible stands out as a powerful tool for provisioning and managing infrastructure resources. Managing variables for your Ansible scripts can become challenging, especially when dealing with a large number of variables or when collaborating with others.

This blog post will guide you through the process of creating an Ansible variable file from an Excel spreadsheet using Python. By automating this process, you can streamline your infrastructure management workflow and improve collaboration.

Prerequisites

Before we begin, make sure you have the following installed:

Clone the Ansible Excel Tool repository from GitHub:

git clone https://github.com/dangnhuhieu/ansible-excel-tool.git
cd ansible-excel-tool

Steps to Creating an Ansible variable file from an Excel

  • Step 1: 0.hosts sheet setup
  • Step 2: Setting value sheet setup
  • Step 3: Execute the Script to Create an Ansible variable File from Excel

Step 1: 0.hosts sheet setup

Start by organizing your hosts in an Excel spreadsheet.

columnexplain
ホスト名The hostname of server will create an ansible variable file
サーバIPThe hostname of the server will create an ansible variable file
サーバ名The name of the server will create an ansible variable file
グループgroup name of the server will create an ansible variable file
自動化The hostname of the server will create an ansible variable file

The created inventory file will look like this

Step 2: Setting value sheet setup

columnexplain
パラメータ名name of parameter
H~Jsetting the value of object server
自動化create the variable file or not
変数名ansible variable name

Four variable name patterns are created as examples.

Pattern 1: List of objects with the same properties

Example: The list of OS users for RHEL is as follows.

The web01.yml host_vars variables that are generated are as follows

os_users:
- username: apache
  userid: 10010
  groupname: apache
  groupid: 10010
  password: apache
  homedir: /home/apache
  shell: /sbin/nologin
- username: apache2
  userid: 10011
  groupname: apache
  groupid: 10010
  password: apache
  homedir: /home/apache2
  shell: /sbin/nologin

One way to use the host_vars variable

- name: Create user
  user: <br />
    name: "{{ item.username }}"
    uid: "{{ item.userid }}"
    group: "{{ item.groupname }}"
    state: present
  loop: "{{ os_users }}"

Pattern 2: List of dictionaries

Example: RHEL kernel parameters

The host_vars variables created are: para_list is a list of dictionaries, each of which contains a key and value pair.

lst_dic:
- name: os_kernel
  para_list:
  - key: net.ipv4.ip_local_port_range
    value: 32768 64999
  - key: kernel.hung_task_warnings
    value: 10000000
  - key: net.ipv4.tcp_tw_recycle
    value: 0
  - key: net.core.somaxconn
    value: 511

One way to use the host_vars variable

- name: debug list kernel parameters
  debug:
    msg="{{ item.key }} = {{ item.value }}"
  with_items: "{{ lst_dic | selectattr('name', 'equalto', 'os_kernel') | map(attribute='para_list') | flatten }}"

Pattern 3: A list of dictionaries. Each dictionary has a key called name and a key called para_list. para_list is a list of strings.

Example: < Directory /> tag settings in httpd.conf

The web01.yml host_vars variables that are generated are as follows

lst_lst_httpd_conf_b:
- name: <Directory />
  para_list:
  - AllowOverride None
  - Require all denied
  - Options FollowSymLinks

One way to use the host_vars variable

- name: debug lst_lst_httpd_conf_b
  debug:
    msg:
    - "{{ item.0.name }}"
    - "{{ item.1 }}"
  loop: "{{ lst_lst_httpd_conf_b|subelements('para_list') }}"
  loop_control: <br />
    label: "{{ item.0.name }}"

Pattern 4: Similar to pattern 3, but the parameter name is blank.

Example: Include settings in httpd.conf

The web01.yml host_vars variables that are generated are as follows

lst_lst_httpd_conf_a:
- name: Include
  para_list:
  - conf.modules.d/00-base.conf
  - conf.modules.d/00-mpm.conf
  - conf.modules.d/00-systemd.conf
- name: IncludeOptional
  para_list:
  - conf.d/autoindex.conf
  - conf.d/welcome.conf

One way to use the host_vars variable

- name: debug lst_lst_httpd_conf_a
  debug: 
    msg:
    - "{{ item.0.name }}"
    - "{{ item.1 }}"
  loop: "{{ lst_lst_httpd_conf_a|subelements('para_list') }}"
  loop_control:
    label: "{{ item.0.name }}"

Step 3: Execute the Script to Create an Ansible Variable File from Excel

python .\ansible\Ansible_Playbook\excel\main.py httpd_parameter_sheet.xlsx

Output

The inventory and host_vars files will be generated as follows

The web01.yml file contents are as follows

os_users:
- username: apache
  userid: 10010
  groupname: apache
  groupid: 10010
  password: apache
  homedir: /home/apache
  shell: /sbin/nologin
- username: apache2
  userid: 10011
  groupname: apache
  groupid: 10010
  password: apache
  homedir: /home/apache2
  shell: /sbin/nologin
lst_dic:
- name: os_kernel
  para_list:
  - key: net.ipv4.ip_local_port_range
    value: 32768 64999
  - key: kernel.hung_task_warnings
    value: 10000000
  - key: net.ipv4.tcp_tw_recycle
    value: 0
  - key: net.core.somaxconn
    value: 511
- name: httpd_setting
  para_list:
  - key: LimitNOFILE
    value: 65536
  - key: LimitNPROC
    value: 8192
- name: httpd_conf
  para_list:
  - key: KeepAlive
    value: 'Off'
  - key: ServerLimit
    value: 20
  - key: ThreadLimit
    value: 50
  - key: StartServers
    value: 20
  - key: MaxRequestWorkers
    value: 1000
  - key: MinSpareThreads
    value: 1000
  - key: MaxSpareThreads
    value: 1000
  - key: ThreadsPerChild
    value: 50
  - key: MaxConnectionsPerChild
    value: 0
  - key: User
    value: apache
  - key: Group
    value: apache
  - key: ServerAdmin
    value: root@localhost
  - key: ServerName
    value: web01:80
  - key: ErrorLog
    value: logs/error_log
  - key: LogLevel
    value: warn
  - key: CustomLog
    value: logs/access_log combined
  - key: LogFormat
    value: '"%h %l %u %t \"%r\" %>s %b \"%{Referer}i\" \"%{User-Agent}i\" %D" combined'
  - key: Listen
    value: 80
  - key: ListenBackLog
    value: 511
  - key: ServerTokens
    value: ProductOnly
  - key: ServerSignature
    value: 'Off'
  - key: TraceEnable
    value: 'Off'
lst_lst_httpd_conf_a:
- name: Include
  para_list:
  - conf.modules.d/00-base.conf
  - conf.modules.d/00-mpm.conf
  - conf.modules.d/00-systemd.conf
- name: IncludeOptional
  para_list:
  - conf.d/autoindex.conf
  - conf.d/welcome.conf
lst_lst_httpd_conf_b:
- name: <Directory />
  para_list:
  - AllowOverride None
  - Require all denied
  - Options FollowSymLinks
- name: <Directory /var/www/html>
  para_list:
  - Require all granted

Conclusion

By following these steps, you’ve automated the process of creating an Ansible variable file from Excel. This not only saves time but also enhances collaboration by providing a standardized way to manage and document your Ansible variables.

Feel free to customize the script based on your specific needs and scale it for more complex variable structures. Thank you for reading the DevopsRoles page!

Resolve Invalid Value in Environment Field Error in Ansible: A Complete Guide

Introduction

If you’ve used Ansible to manage your IT infrastructure, you’ve probably encountered various errors along the way. One common issue many users face is the Invalid Value in Environment Field error, which can be a real head-scratcher.

This error typically pops up with the message:

ERROR! The field 'environment' has an invalid value

Although it seems tricky at first, this error often results from straightforward issues like incorrect formatting, invalid characters in environment variable names, or even undefined variables. But don’t worry-we’re here to guide you through the process of identifying and resolving the issue from the basics to advanced solutions.

By the end of this guide, you’ll know exactly how to handle this error, ensure your playbooks run smoothly, and avoid the error in the future.

Understanding the Invalid Value in Environment Field Error

Ansible allows you to define environment variables for tasks through the environment field. These environment variables affect how your tasks are executed on remote systems.

The error occurs when the values or the structure provided in the environment field don’t meet Ansible’s expected format or rules. The most common issues are:

  • Incorrect data types (not using a dictionary for environment)
  • Invalid characters in variable names
  • Empty or undefined variables
  • Improper use of quotation marks or spacing in YAML

Let’s dive into these problems and learn how to fix them.

Common Causes of the Invalid Value in Environment Field Error

1. Incorrect Data Type for the Environment Field

Ansible requires the environment field to be a dictionary, not a string or any other data type. If you mistakenly set the environment as a string, you’ll get an error.

Incorrect Example:

- name: Incorrect environment example
shell: echo "This will throw an error"
environment: "PATH=/usr/local/bin:/usr/bin"

This causes an error because Ansible expects a dictionary but finds a string instead.

Correct Example:

- name: Correct environment example
shell: echo "This runs correctly"
environment:
PATH: "/usr/local/bin:/usr/bin"

Here, we’ve used the correct dictionary structure to set the PATH environment variable.

2. Invalid Characters in Environment Variable Names

Environment variable names should only consist of uppercase letters, numbers, and underscores. If you use lowercase letters, hyphens, or special characters, Ansible will flag it as invalid.

Incorrect Example:

environment:
some-var: "value" # Invalid due to lowercase letters and hyphen

Correct Example:

environment:
SOME_VAR: "value" # Valid format

3. Undefined or Empty Variables

Sometimes, you might pass a variable that hasn’t been defined, or assign an empty value to the environment variable. An undefined variable will lead to an error during execution.

Example of Undefined Variable:

- name: Undefined variable example
shell: echo "This might fail"
environment:
SOME_VAR: "{{ undefined_var }}"

In this case, if undefined_var isn’t set elsewhere in the playbook or inventory, the task will fail.

4. Improper Use of Quotation Marks and Spacing

YAML is sensitive to indentation and quotation marks, so even small errors in formatting can lead to issues. Always double-check the formatting of your playbooks to avoid this.

Step-by-Step Solutions to Fix the Invalid Value in Environment Field Error

Now that we’ve covered the common causes, let’s walk through the steps to fix this error.

Step 1: Validate the Dictionary Structure

Ensure the environment field is defined as a dictionary of key-value pairs. If it’s defined as a string, it will trigger the error.

Correct Structure Example:

- name: Ensure proper environment structure
shell: echo "Running smoothly"
environment:
PATH: "/usr/local/bin:/usr/bin"
APP_ENV: "production"

Step 2: Check for Invalid Characters in Variable Names

Ensure that all environment variable names are in uppercase and contain no hyphens or special characters.

Example:

environment:
VALID_VAR: "value"

Step 3: Ensure Variables Are Defined

If you’re passing Ansible variables to the environment field, make sure they are properly defined. Undefined variables can cause errors.

Example:

- name: Pass variables to environment
shell: echo "Running with variables"
environment:
MY_VAR: "{{ ansible_user }}"

Step 4: Use Debugging for Troubleshooting

You can use Ansible’s debug module to check the values of variables and identify potential issues.

Example:

- name: Debug environment variables
debug:
var: environment

This will print the values of the environment variables, allowing you to check if anything is misconfigured.

Advanced Solutions for Handling Environment Variables in Ansible

If you’re working on a more complex setup, here are a few advanced techniques to help manage environment variables.

1. Use Ansible Vault for Sensitive Variables

When dealing with sensitive data like API keys or passwords, Ansible Vault is a great way to encrypt and securely store those variables. You can then pass these variables to the environment field.

Example:

- name: Securely pass encrypted API key
shell: echo "Starting service"
environment:
API_KEY: "{{ vault_api_key }}"

2. Combining Static and Dynamic Environment Variables

You can also combine static and dynamic variables in the environment field. This is useful when you need to mix hardcoded values with those generated during execution.

Example:

- name: Combine static and dynamic variables
shell: echo "Combining variables"
environment:
STATIC_VAR: "static_value"
DYNAMIC_VAR: "{{ inventory_hostname }}_value"

3. Templating Environment Variables with Jinja2

Ansible allows you to use Jinja2 templating for dynamic content in environment variables. You can customize your variables based on conditions or the environment.

Example:

- name: Use templating in environment
shell: echo "Templated variable"
environment:
MY_VAR: "{{ inventory_hostname }}_env"

Optimizing Your Playbooks for Environment Variables

Best Practices for Managing Environment Variables

  1. Use Static Variables When Possible: Avoid unnecessary complexity by keeping your environment variables static unless they need to be dynamic.
  2. Leverage Ansible’s ansible_env Variable: You can reference existing environment variables on the remote machine using ansible_env. This is helpful when you want to append or modify the existing PATH.

Example:

environment:
PATH: "{{ ansible_env.PATH }}:/custom/path"
  1. Secure Sensitive Data with Ansible Vault: Always use Ansible Vault for handling sensitive information like passwords and API keys. Never hard-code sensitive data in your playbooks.
  2. Validate Playbooks Before Running: Always run a syntax check before executing your playbook to catch any formatting errors.
ansible-playbook --syntax-check playbook.yml

Frequently Asked Questions (FAQs)

1. What is the Invalid Value in Environment Field error?

This error indicates that the structure or value assigned to the environment field in your Ansible playbook is incorrect. It could be due to formatting, invalid characters in variable names, or undefined variables.

2. How do I debug environment variable issues in Ansible?

Use the debug module to print out variable values and troubleshoot issues in your playbook. This helps you identify misconfigurations quickly.

3. Can I securely pass sensitive data to the environment field in Ansible?

Yes, you can use Ansible Vault to encrypt and pass sensitive data, such as API keys or passwords, to the environment field.

4. How can I prevent environment variable errors in the future?

Always validate your playbook before running it, ensure proper formatting, use valid characters for variable names, and secure sensitive data using Ansible Vault.

Conclusion

The Invalid Value in Environment Field error can be a minor roadblock in your Ansible journey, but it’s one that’s easily fixable with the right approach. By ensuring proper formatting, checking for invalid characters, and using debugging tools, you can avoid and resolve this error quickly.

Whether you’re just getting started with Ansible or you’re dealing with complex playbooks, following these best practices will help ensure that your tasks run smoothly and error-free. Now, you’re ready to tackle the error and continue automating your infrastructure with confidence! Thank you for reading the DevopsRoles page!

How to Fix “Unable to Find Playbook” Error in Ansible: A Deep Guide

Introduction

Ansible has become a cornerstone tool in the world of IT automation, simplifying complex tasks like server configuration, application deployment, and orchestration. However, while it streamlines many processes, users often encounter errors that disrupt workflows. One common error is “Unable to find playbook”, which usually indicates that Ansible cannot locate the file you specified.

If you’ve run into this issue, don’t worry. This guide covers everything from the root causes of this error to step-by-step solutions that will help you get back on track, whether you’re a beginner or advanced user. Let’s dive into why this error happens and how you can fix it.

What is the Unable to Find Playbook Error in Ansible?

The Unable to find playbook error occurs when Ansible cannot locate the playbook you’re trying to run. This error can be triggered by various factors, including incorrect file paths, missing files, or permission issues. Fortunately, it’s a straightforward issue to fix once you identify the underlying cause.

Why You Encounter the Unable to Find Playbook Error

1. Incorrect File Path

Ansible relies on the file path you provide to locate the playbook. If the path is incorrect, Ansible won’t be able to find the file, leading to this error.

2. Missing Playbook File

If the playbook doesn’t exist in the directory specified, Ansible will throw the “Unable to find playbook” error.

3. Case Sensitivity

Ansible is case-sensitive. A mismatch in case between the playbook’s actual name and the one you provide can cause this error.

4. Typographical Errors

A simple typo in the file name can be all it takes to trigger the error. Double-checking filenames is crucial.

5. Directory Permissions

If Ansible lacks the necessary permissions to access the playbook directory or file, it will fail to execute the playbook.

Step-by-Step Solutions to Fix Unable to Find Playbook Error

Step 1: Verify the File Path

The first step in resolving the error is verifying that the file path is correct. Use the ls command to check if the playbook exists in the directory.

ls /path/to/your/playbook/

Ensure that the playbook file is present and correctly named.

Absolute vs. Relative Paths

Using absolute paths is generally safer, as relative paths can lead to issues when commands are executed from different directories.

# Absolute path example
ansible-playbook /home/user/ansible/playbooks/deploy.yml

# Relative path example
ansible-playbook ./playbooks/deploy.yml

Step 2: Check for Typographical Errors

A typo in the filename can prevent Ansible from finding your playbook. Ensure that the name of the playbook is typed correctly in your command.

# Incorrect
ansible-playbook deployy.yml # Typo in the name

# Correct
ansible-playbook deploy.yml

Step 3: Case Sensitivity Check

Since Ansible is case-sensitive, ensure that the playbook name matches exactly, including the case.

# Incorrect due to case sensitivity
ansible-playbook playbook.yml

# Correct
ansible-playbook Playbook.yml

Step 4: Verify Directory Permissions

Check whether Ansible has the appropriate permissions to access the directory and playbook file. Use ls -l to check the permissions and modify them if necessary.

ls -l /path/to/your/playbook.yml

If permissions are incorrect, modify them using chmod:

chmod 644 /path/to/your/playbook.yml  # For file permissions
chmod 755 /path/to/your/directory # For directory permissions

Step 5: Confirm the Correct File Extension

Ansible playbooks should have .yml or .yaml extensions. Using the wrong extension can lead to the error.

# Incorrect
ansible-playbook playbook.txt

# Correct
ansible-playbook playbook.yml

Step 6: Use the -vvvv Flag for Detailed Logs

If the error persists, running the command with the -vvvv flag will provide more verbose output, allowing you to diagnose the issue more effectively.

ansible-playbook /path/to/your/playbook.yml -vvvv

This will give detailed logs on what Ansible is doing behind the scenes and where it might be going wrong.

Step 7: Advanced Tip – Dynamic Paths

If your environment changes frequently, you can use dynamic paths for more flexibility. In your playbooks, you can leverage Ansible variables to reference paths dynamically.

- name: Run playbook from dynamic path
hosts: localhost
vars:
playbook_dir: "/path/to/playbooks"
tasks:
- command: ansible-playbook {{ playbook_dir }}/deploy.yml

Related Errors and Troubleshooting Tips

“File Not Found” Error

This error is similar to “Unable to find playbook.” It indicates that the specified file doesn’t exist. Make sure the file path and filename are correct.

ansible-playbook /incorrect/path/deploy.yml

Permission Denied Error

If you encounter a “Permission Denied” error, Ansible might not have the necessary permissions to access the playbook or the directory. Adjust the file and directory permissions as shown earlier.

Frequently Asked Questions (FAQs)

Q1: How do I fix the Ansible unable to find playbook error quickly?

The fastest way is to verify the file path, check for case sensitivity, and ensure the playbook file exists in the specified directory. Using absolute paths helps prevent errors.

Q2: Can Ansible handle relative paths for playbooks?

Yes, Ansible can handle relative paths, but absolute paths are safer, especially when executing commands from different directories.

Q3: What if my playbook filename is correct but Ansible still can’t find it?

If the filename is correct but the error persists, check for permission issues or use the -vvvv flag to get more details about the error.

Q4: How can I check if my playbook has any syntax errors?

You can run --syntax-check to verify the structure of your playbook:

ansible-playbook /path/to/playbook.yml --syntax-check

Q5: How do I ensure permissions are correct for Ansible to run playbooks?

Use chmod to set appropriate permissions for both the file and the directory where the playbook is located. Ensure the owner has read and write permissions.

Conclusion

Encountering the Unable to find playbook error in Ansible can disrupt your automation tasks, but it’s an issue that’s easy to resolve with the right approach. By verifying file paths, ensuring the correct file extensions, checking for typos, and adjusting permissions, you can quickly fix this error and get back to automating with Ansible.

By following this guide, you now have a deep understanding of the common causes of this error and the steps you can take to resolve it efficiently. Whether you’re a beginner or an advanced user, these techniques will help you handle Ansible errors like a pro. Thank you for reading the DevopsRoles page!

How to Fix Syntax Error While Loading YAML in Ansible: A Deep Guide

Introduction

Ansible, a powerful open-source automation tool, relies heavily on YAML (YAML Ain’t Markup Language) for defining configurations, tasks, and playbooks. While YAML is known for its simplicity, it’s also extremely sensitive to formatting. A simple mistake in syntax – like improper indentation or misplaced characters – can result in the dreaded error: ERROR! Syntax Error while loading YAML.

This guide delves deeply into the world of YAML syntax issues in Ansible, providing real-world examples, practical solutions, and best practices to help you avoid these errors. Whether you’re new to YAML or an experienced Ansible user, this guide will help you troubleshoot and fix common syntax problems, ensuring your playbooks run seamlessly.

What is YAML?

YAML, short for YAML Ain’t Markup Language, is a human-readable format used for data serialization. It’s often favored for configuration files because of its readability and simplicity. In Ansible, YAML is used to define playbooks, inventory files, roles, and variables.

While YAML may appear straightforward, it has strict formatting rules that make it prone to errors, especially when misused in automation tools like Ansible.

Common Causes of YAML Syntax Errors

1. Indentation Issues

Indentation is crucial in YAML. Ansible will throw errors if your indentation is inconsistent. YAML does not allow the use of tabs; instead, you must use spaces for indentation.

Example Error:

tasks:
  - name: Install packages
    yum:
      name: httpd
  state: present    # Incorrect indentation here

Corrected Version:

tasks:
  - name: Install packages
    yum:
      name: httpd
      state: present  # Properly indented

2. Use of Tabs Instead of Spaces

YAML is very strict about using spaces for indentation, not tabs. Even a single tab in place of a space will cause an error.

Example Error:

tasks:
    - name: Start service
      service:
      name: httpd
      state: started

If tabs were used instead of spaces, Ansible would throw a syntax error.

Solution:

Replace all tabs with spaces, ideally using 2 or 4 spaces per indentation level.

3. Improper List Formatting

YAML uses dashes (-) to indicate lists. Lists must be formatted correctly, with consistent indentation.

Example Error:

packages:
  - nginx
  - postgresql
    - redis    # This extra indentation causes a syntax error

Corrected Version:

packages:
  - nginx
  - postgresql
  - redis    # All list items are now at the same level

4. Quotes Mismanagement

Improper use of quotes can result in YAML syntax errors. Sometimes, users might use both single and double quotes incorrectly, causing confusion.

Example Error:

message: "Welcome to Ansible'

Corrected Version:

message: "Welcome to Ansible"

Make sure to be consistent with either single (') or double (") quotes and avoid mixing them.

5. Invalid Characters

YAML will throw an error if it encounters any invalid characters, such as tab characters or control characters. In addition, characters like &, @, and # have special meanings in YAML, and improper use can lead to syntax issues.

How to Fix Syntax Error While Loading YAML in Ansible

When you encounter the “ERROR! Syntax Error while loading YAML” in Ansible, follow these steps to resolve the issue:

Step-by-Step Debugging Process

1. Review the Error Message

Ansible typically provides the line and column number where the YAML syntax error occurred. Use this information to identify the issue.

2. Check Indentation Levels

Ensure all indentation is consistent. YAML is very particular about indentation, so use spaces (not tabs) and make sure each nested block is indented correctly.

3. Look for Incorrect List Formatting

If you’re working with lists, make sure all list items are properly aligned and start with a dash (-).

4. Ensure Proper Use of Quotes

Check if you are mixing single and double quotes improperly. Correct any inconsistencies to ensure all quotes are properly paired.

5. Use a YAML Validator

To speed up the debugging process, use a YAML validator or linter (like YAML Lint) to automatically check for syntax errors.

Advanced Troubleshooting Techniques

Using YAML Linting Tools

YAML linting tools can be extremely helpful in identifying and resolving syntax errors. These tools will parse your YAML file and point out any issues, such as incorrect indentation, improper list formatting, or misused quotes.

Example YAML Linters:

  • YAML Lint: A web-based tool to check YAML syntax.
  • Prettier: An open-source code formatter that supports YAML and can enforce consistent formatting in your files.

Ansible Playbook –syntax-check

Ansible provides a built-in command to check for syntax errors in your playbooks before executing them. This can save you time by catching syntax issues early.

Command:

ansible-playbook your-playbook.yml --syntax-check

YAML Anchors & Aliases

If you’re using advanced YAML features like anchors and aliases, incorrect usage can lead to syntax errors. Ensure that you’re following the correct syntax for these features.

Example of YAML Anchors:

default_values: &default_values
  state: present

tasks:
  - name: Install nginx
    yum:
      name: nginx
      <<: *default_values

Best Practices to Avoid YAML Syntax Errors

  1. Use a YAML Linter Regularly: Incorporate a linter into your workflow to automatically detect syntax issues.
  2. Use Version Control: Tools like Git can help track changes in your playbooks, making it easier to spot where an error might have been introduced.
  3. Maintain Consistent Indentation: Set your text editor to use spaces instead of tabs and be consistent with how many spaces you use.
  4. Validate YAML Before Running: Always validate your YAML syntax with Ansible’s --syntax-check command before deploying a playbook.

Frequently Asked Questions

1. What is the most common cause of YAML syntax errors in Ansible?

The most common cause is inconsistent indentation. YAML is indentation-sensitive, and using tabs instead of spaces or misaligning blocks can cause syntax errors.

2. Can I use tabs instead of spaces in YAML?

No, YAML requires the use of spaces for indentation. Tabs are not allowed and will result in syntax errors.

3. How can I check for YAML syntax errors before running my playbook?

You can use Ansible’s --syntax-check option to validate your playbook’s YAML syntax before running it.

4. Are there tools to automatically fix YAML syntax errors?

Yes, you can use tools like YAML Lint or code formatters like Prettier to automatically detect and fix syntax issues in YAML files.

5. What are YAML anchors and aliases, and how can they cause errors?

YAML anchors and aliases allow you to reuse blocks of configuration. Incorrectly referencing or formatting anchors can lead to syntax errors.

Conclusion

YAML syntax errors are common but can be easily resolved with careful attention to detail. The most frequent issues stem from incorrect indentation, improper use of lists, and mismanagement of quotes. By following the guidelines in this deep guide and utilizing tools like linters, you can ensure your Ansible playbooks are free of YAML syntax errors. Incorporating best practices like regular validation and version control can further help you avoid these issues in the future. Thank you for reading the DevopsRoles page!

Resolve Invalid Variable Name Error in Ansible: A Deep Dive

Introduction

If you’ve worked with Ansible to automate tasks, you’ve likely come across the dreaded “Invalid Variable Name” error. While Ansible is a powerful tool that makes infrastructure management a breeze, strict variable naming rules can cause errors that interrupt your workflows.

This guide will walk you through everything you need to know about resolving the “Invalid Variable Name” error in Ansible. Whether you’re a beginner or an advanced user, you’ll find actionable tips to help you avoid these pitfalls, understand common causes, and learn best practices to optimize your automation scripts.

What Is the Invalid Variable Name Error in Ansible?

Ansible uses variables extensively to simplify automation tasks, but these variables must follow specific naming rules. When you break these rules, Ansible responds with the following error:

ERROR! Invalid variable name at line X, column Y

The error occurs because the variable name you’ve used doesn’t conform to Ansible’s requirements. To help you get back on track, let’s explore why this happens.

Causes of the “Invalid Variable Name” Error

1. Special Characters in Variable Names

Variable names in Ansible can only include letters, numbers, and underscores (_). Using special characters like hyphens (-), ampersands (&), or asterisks (*) will trigger the error.

Example:
vars:
  invalid-variable: "Hello World"  # This will cause an error

Solution: Replace the hyphen with an underscore.

vars:
  valid_variable: "Hello World"  # This will work 

2. Starting Variables with Numbers

Ansible does not allow variables to start with numbers, as it confuses the YAML parser.

Example:

vars:
  123name: "Ansible"  # Invalid

Solution: Start the variable with a letter.

vars:
  name123: "Ansible"  # Valid

3. Spaces in Variable Names

Spaces in variable names are not allowed in Ansible, as they conflict with YAML’s structure.

Example:

vars:
  my variable: "Ansible"  # Invalid

Solution: Use underscores instead.

vars:
  my_variable: "Ansible"  # Valid

4. Reserved Keywords

Ansible has specific keywords reserved for internal use. If you use one of these reserved keywords as a variable, it will trigger an error.

Example:

vars:
  ansible_facts: "Custom facts"  # Invalid, as this is a reserved keyword

Solution: Rename the variable to avoid conflicts.

vars:
  custom_facts: "Custom facts"  # Valid

5. Incorrect YAML Formatting

Although not directly related to variable names, incorrect YAML formatting—such as missing colons or improper indentation—can sometimes cause variable-related errors.

Example:

vars
  my_var: "Invalid formatting"  # Missing colon after 'vars'

Solution: Fix the formatting to ensure proper structure.

vars:
  my_var: "Correct formatting"

How to Fix the “Invalid Variable Name” Error in Ansible

Once you identify the cause of the error, fixing it becomes straightforward. Below are step-by-step solutions for common variable name errors.

Fix Special Characters

Example:

vars:
  invalid-variable: "Fix this"

Fix: Use underscores instead of hyphens.

vars:
  valid_variable: "Fixed!"

Fix Variables Starting with Numbers

Example:

vars:
  123name: "Fix this"

Fix: Start the variable name with a letter.

vars:
  name123: "Fixed!"

Fix Spaces in Variable Names

Example:

vars:
  my variable: "Fix this"

Fix: Replace spaces with underscores.

vars:
  my_variable: "Fixed!"

Fix Reserved Keywords

Example:

vars:
  ansible_facts: "Reserved keyword"

Fix: Choose a unique name.

vars:
  custom_facts: "Fixed!"

Advanced Debugging: Complex Playbooks

For larger or more complex playbooks, you may need to take a more systematic approach to troubleshoot the “Invalid Variable Name” error.

1. Use YAML Linters

Use a YAML linter like yamllint to catch formatting and variable errors before running your playbooks.

2. Enable Ansible’s Verbose Mode

Running playbooks with Ansible’s verbose mode (-vvv) can provide more detailed error messages, making it easier to track down issues.

ansible-playbook playbook.yml -vvv

3. Break Down Large Playbooks

Divide your large playbook into smaller roles or tasks. Modularizing your playbooks makes it easier to isolate errors and reduces complexity.

Best Practices for Avoiding “Invalid Variable Name” Errors

To avoid encountering this error in the future, follow these best practices:

  1. Stick to Letters, Numbers, and Underscores: Use only valid characters when naming variables.
  2. Descriptive Variable Names: Choose meaningful, descriptive names to improve readability and reduce the risk of errors.
  3. Avoid Reserved Keywords: Never use reserved Ansible keywords as variable names.
  4. Validate Playbooks with Linters: Regularly validate your YAML files using linters to catch errors early.

Frequently Asked Questions (FAQs)

1. What characters are allowed in Ansible variable names?

Ansible variable names can only include letters, numbers, and underscores. Special characters and spaces are not allowed.

2. Why can’t I start a variable name with a number?

Variables cannot start with a number because Ansible uses strict YAML parsing rules. Starting with a letter or underscore ensures compatibility.

3. What are reserved keywords in Ansible?

Reserved keywords include terms like ansible_facts, inventory_hostname, and group_names. These are used internally by Ansible and should not be redefined as variables.

4. How can I quickly identify an invalid variable name?

Using a YAML linter or running your playbook in verbose mode can help quickly identify where the invalid variable name is located.

Conclusion

The “Invalid Variable Name” error in Ansible is a common issue that can be easily avoided by following Ansible’s strict naming conventions. Whether it’s avoiding special characters, numbers, or reserved keywords, a little attention to detail can go a long way in preventing these errors.

By following the examples and best practices outlined in this guide, you can ensure that your playbooks run smoothly and efficiently. If you’re dealing with larger, more complex playbooks, remember to leverage tools like YAML linters and verbose mode to simplify debugging.

Take the time to implement these solutions, and you’ll find your Ansible workflow becoming smoother and more productive. Thank you for reading the DevopsRoles page!

Fix No Hosts Matched Error in Ansible: A Deep Dive

Introduction

Ansible is a powerful automation tool that simplifies configuration management, application deployment, and IT orchestration. Despite its efficiency, users occasionally face issues like the “No Hosts Matched” error, which halts automation processes. When this error occurs, it means that Ansible couldn’t find any hosts in the inventory that match the group or pattern specified in your playbook. Without any matched hosts, Ansible cannot proceed with the task execution.

This blog post will provide a deep dive into how to troubleshoot and resolve the “No Hosts Matched” error, starting from basic fixes to more advanced solutions. Whether you’re new to Ansible or an experienced user, this guide will equip you with the tools needed to solve this error and ensure your automation processes run smoothly.

What is the “No Hosts Matched” Error?

The “No Hosts Matched” error occurs when Ansible is unable to locate any hosts in the inventory that match the target specified in the playbook. This could be due to:

  • Incorrect inventory file paths
  • Host patterns not matching the inventory
  • Dynamic inventory configuration issues
  • Errors in Ansible configuration

Understanding why this error occurs is the first step toward resolving it. Now, let’s dive into the solutions.

Basic Inventory Troubleshooting

The inventory file is a core part of how Ansible operates. If your inventory file is missing, misconfigured, or not properly formatted, Ansible won’t be able to find the hosts, and you’ll encounter the “No Hosts Matched” error.

Step 1: Verify the Inventory File

Make sure your inventory file exists and is correctly formatted. For example, an INI-style inventory should look like this:

[web]
192.168.0.101
192.168.0.102
[db]
192.168.0.103

If you’re running a playbook, you can explicitly specify the inventory file using the -i flag:

ansible-playbook -i /path/to/inventory playbook.yml

Step 2: Validate Your Inventory File

You can validate your inventory file by running the ansible-inventory command:

ansible-inventory --list -i /path/to/inventory

This command will list all the hosts in your inventory and ensure they are correctly parsed by Ansible.

Matching Host Patterns and Group Names

Host patterns are used in playbooks to target specific groups or hosts. If the group or pattern specified in the playbook doesn’t match any of the entries in your inventory file, you’ll encounter the “No Hosts Matched” error.

Step 1: Check Group Names

Ensure that the group names in your playbook match those in your inventory file exactly. For example:

- hosts: web

Make sure your inventory file contains a [web] group. Even minor typos or mismatches in capitalization can cause the error.

Step 2: Review Host Patterns

If you’re using host patterns like wildcards or ranges, make sure they match the hosts in your inventory file. For instance, if your playbook uses a pattern like:

- hosts: web[01:05]

Ensure your inventory file contains hosts such as web01, web02, etc.

Specifying the Correct Inventory File

Sometimes, Ansible uses a different inventory file than expected, leading to the “No Hosts Matched” error. To prevent this, you should always explicitly specify the inventory file when running a playbook. Use the -i flag, or set a default inventory file in your ansible.cfg configuration.

Step 1: Update Your Ansible Configuration

In your ansible.cfg file, set the inventory path under [defaults]:

[defaults]
inventory = /path/to/inventory

This ensures that Ansible uses the correct inventory file unless overridden with the -i flag.

Troubleshooting Ansible Configuration Settings

Ansible’s configuration file (ansible.cfg) could be the root cause of the error if it’s not properly set up.

Step 1: Validate the Inventory Path in ansible.cfg

Make sure the ansible.cfg file points to the correct inventory path:

[defaults]
inventory = /path/to/inventory

This step ensures that Ansible is using the correct inventory.

Step 2: Disable Host Key Checking (If Necessary)

In some cases, host key checking can cause issues with connecting to remote hosts. To disable it, add the following to your ansible.cfg file:

[defaults]
host_key_checking = False

This will prevent host key checking from interrupting your playbook.

Using Dynamic Inventory

Dynamic inventories are common when working with cloud environments like AWS, GCP, and Azure. If your dynamic inventory isn’t working correctly, it may not return any hosts, leading to the “No Hosts Matched” error.

Step 1: Test Your Dynamic Inventory

If you’re using a dynamic inventory script, make sure it’s executable:

chmod +x /path/to/dynamic_inventory_script

Then, manually test the script to ensure it’s returning hosts:

/path/to/dynamic_inventory_script --list

If the script returns no hosts or throws errors, troubleshoot the script itself.

Step 2: Enable Inventory Plugins

If you’re using inventory plugins (e.g., AWS EC2 plugin), ensure they are enabled in your ansible.cfg:

[inventory]
enable_plugins = aws_ec2

Check the plugin’s documentation to ensure it’s correctly configured.

Advanced Debugging Techniques

If the basic and intermediate troubleshooting steps didn’t resolve the issue, you can use more advanced debugging techniques.

Step 1: Debug with ansible-inventory

Use the ansible-inventory command with the --graph option to visualize the inventory structure:

ansible-inventory --graph -i /path/to/inventory

This helps in identifying how hosts and groups are mapped, allowing you to verify if Ansible is correctly recognizing your hosts.

Step 2: Increase Playbook Verbosity

To gain more insight into what Ansible is doing, increase the verbosity of your playbook execution using the -vvvv flag:

ansible-playbook -i /path/to/inventory playbook.yml -vvvv

This provides detailed output, helping you pinpoint the cause of the error.

Frequently Asked Questions (FAQs)

1. What does the “No Hosts Matched” error mean in Ansible?

The “No Hosts Matched” error occurs when Ansible cannot find any hosts in the inventory that match the group or pattern specified in the playbook.

2. How do I fix the “No Hosts Matched” error?

To fix the error, ensure the inventory file is correctly formatted, specify the correct inventory file, validate the group names and host patterns in the playbook, and troubleshoot dynamic inventory scripts or configuration.

3. How can I validate my Ansible inventory?

You can validate your Ansible inventory using the ansible-inventory --list command. This will list all the hosts and groups defined in your inventory file.

4. What is dynamic inventory in Ansible?

Dynamic inventory allows Ansible to query external sources, such as cloud providers, to dynamically retrieve a list of hosts instead of using a static inventory file.

Conclusion

The “No Hosts Matched” error in Ansible may seem like a roadblock, but with the right troubleshooting steps, it’s a solvable problem. By validating your inventory files, ensuring correct host patterns, and checking Ansible’s configuration settings, you can quickly resolve this error and get back to automating your tasks efficiently. Whether you’re working with static inventories or dynamic cloud environments, this guide should provide you with the tools and knowledge to fix the “No Hosts Matched” error in Ansible. Thank you for reading the DevopsRoles page!

Resolve dict object Has No Attribute Error in Ansible

Introduction

Ansible, a powerful IT automation tool, simplifies many complex tasks. However, like all tools, it can sometimes throw frustrating errors. One such error that developers frequently encounter is:

ERROR! 'dict object' has no attribute 'xyz'

The dict object has no attribute error in Ansible generally occurs when the key or attribute you are trying to access in a dictionary doesn’t exist. Whether it’s a simple typo, incorrect data structure, or missing key, this issue can halt your automation processes.

In this blog post, we’ll walk you through the common causes of this error and provide step-by-step solutions ranging from basic to advanced troubleshooting. With clear examples and best practices, you’ll learn how to resolve this error quickly and efficiently.

What Is the dict object Has No Attribute Error in Ansible?

The 'dict object' has no attribute error typically occurs when a playbook tries to access a key or attribute in a dictionary, but that key doesn’t exist or is incorrectly referenced.

Example Error Message:

ERROR! 'dict object' has no attribute 'email'

This error signifies that Ansible is attempting to access a key, such as 'email', in a dictionary, but the key isn’t present, leading to the failure of the playbook execution.

Why Does This Happen?

  • Misspelled keys: A common cause is referencing a key incorrectly.
  • Missing attributes: The desired key doesn’t exist in the dictionary.
  • Incorrect dictionary structure: Mismanagement of nested dictionaries.
  • Dynamic data issues: Inconsistent or unexpected data structure from external sources (e.g., APIs).

Understanding why this error occurs is critical to resolving it, so let’s explore some typical cases and how to fix them.

Common Causes of the 'dict object' Has No Attribute Error

1. Misspelled Keys or Attributes

Typos are a frequent cause of this error. Even a minor difference in spelling between the actual dictionary key and how it’s referenced in the playbook can lead to an error.

Example:

- name: Print the user email
  debug:
    msg: "{{ user_info.email }}"
  vars:
    user_info:
      email_address: john@example.com

Here, the dictionary user_info contains email_address, but the playbook is trying to access email, which doesn’t exist. Ansible throws the 'dict object' has no attribute 'email' error.

Solution:

Always verify that your dictionary keys match. Correcting the key reference resolves the issue.

- name: Print the user email
  debug:
    msg: "{{ user_info.email_address }}"

2. Non-existent Key in the Dictionary

Sometimes, the error occurs because you’re trying to access a key that simply doesn’t exist in the dictionary.

Example:

- name: Show user’s email
  debug:
    msg: "{{ user_data.email }}"
  vars:
    user_data:
      name: Alice
      age: 25

Since the user_data dictionary doesn’t have an email key, the playbook fails.

Solution:

The best practice in this situation is to use Ansible’s default filter, which provides a fallback value if the key is not found.

- name: Show user’s email
  debug:
    msg: "{{ user_data.email | default('Email not available') }}"

This ensures that if the key is missing, the playbook doesn’t fail, and a default message is displayed instead.

3. Incorrect Access to Nested Dictionaries

Accessing nested dictionaries incorrectly is another common cause of this error, especially in complex playbooks with deeply structured data.

Example:

- name: Display the city
  debug:
    msg: "{{ user.location.city }}"
  vars:
    user:
      name: Bob
      location:
        state: Texas

The playbook attempts to access user.location.city, but the dictionary only contains state. This results in the 'dict object' has no attribute' error.

Solution:

To avoid such issues, use the default filter or verify the existence of nested keys.

- name: Display the city
  debug:
    msg: "{{ user.location.city | default('City not specified') }}"

This way, if city doesn’t exist, a default message will be displayed.

4. Data from Dynamic Sources (e.g., APIs)

When working with dynamic data from APIs, the response structure might not always match your expectations. If a key is missing in the returned JSON object, Ansible will throw the 'dict object' has no attribute' error.

Example:

- name: Fetch user info from API
  uri:
    url: http://example.com/api/user
    return_content: yes
  register: api_response

- name: Display email
  debug:
    msg: "{{ api_response.json.email }}"

If the API response doesn’t contain the email key, this results in an error.

Solution:

First, inspect the response using the debug module to understand the data structure. Then, use the default filter to handle missing keys.

- name: Debug API response
  debug:
    var: api_response

- name: Display email
  debug:
    msg: "{{ api_response.json.email | default('Email not found') }}"

Advanced Error Resolution Techniques

5. Using the when Statement for Conditional Execution

You can use Ansible’s when statement to conditionally run tasks if a key exists in the dictionary.

Example:

- name: Print email only if it exists
  debug:
    msg: "{{ user_data.email }}"
  when: user_data.email is defined

This way, the task only runs if the email key exists in the user_data dictionary.

6. Handling Lists of Dictionaries

When dealing with lists of dictionaries, accessing missing keys in an iteration can cause this error. The best approach is to handle missing keys with the default filter.

Example:

- name: Print user emails
  debug:
    msg: "{{ item.email | default('Email not available') }}"
  loop: "{{ users }}"
  vars:
    users:
      - name: Alice
        email: alice@example.com
      - name: Bob

For Bob, who doesn’t have an email specified, the default message will be printed.

7. Combining Conditional Logic and Default Filters

For complex data structures, it’s often necessary to combine conditional logic with the default filter to handle all edge cases.

Example:

- name: Print user city if the location exists
  debug:
    msg: "{{ user.location.city | default('No city available') }}"
  when: user.location is defined

This ensures that the task only executes if the location key is defined and provides a default message if city is not available.

8. Debugging Variables

Ansible’s debug module is a powerful tool for inspecting variables during playbook execution. Use it to output the structure of dictionaries and identify missing keys or values.

Example:

- name: Inspect user data
  debug:
    var: user_data

This will output the entire user_data dictionary, making it easier to spot errors in the structure or identify missing keys.

Best Practices for Avoiding the 'dict object' Has No Attribute' Error

  • Double-Check Key Names: Verify that key names are correctly spelled and match the dictionary.
  • Use default Filters: When unsure whether a key exists, always use the default filter to provide a fallback value.
  • Validate Dynamic Data: Inspect data from APIs and other external sources using the debug module before accessing specific keys.
  • Apply Conditional Logic: Use the when statement to ensure tasks only run when necessary keys are defined.
  • Leverage the debug Module: Regularly inspect variable structures with the debug module to troubleshoot missing or incorrectly referenced keys.

FAQ: Common Questions About Ansible’s Dict Object Error

Q1: Why does the 'dict object' has no attribute error occur in Ansible?

This error happens when Ansible tries to access a key in a dictionary that doesn’t exist. It’s often due to typos, missing keys, or incorrect dictionary structure.

Q2: How can I prevent this error from occurring?

To avoid this error, always validate that the keys exist before accessing them. Use Ansible’s default filter to provide fallback values or check key existence with conditional logic (when statements).

Q3: Can I resolve this error in lists of dictionaries?

Yes, you can iterate over lists of dictionaries using loops and handle missing keys with the default filter or conditional checks.

Q4: How do I debug a dictionary object in Ansible?

Use the debug module to print and inspect the contents of a dictionary. This helps in identifying missing keys or unexpected structures.

Conclusion

The 'dict object' has no attribute' error in Ansible can be daunting, but it’s often straightforward to resolve. By following best practices like checking key names, using fallback

values with the default filter, and debugging variable structures, you can effectively troubleshoot and resolve this issue.

Whether you’re a beginner or an advanced Ansible user, these techniques will help ensure smoother playbook execution and fewer errors. Understanding how dictionaries work in Ansible and how to handle missing keys will give you confidence in automating more complex tasks. Thank you for reading the DevopsRoles page!

Fix Failed to Connect to Host via SSH Error in Ansible: A Deep Guide

Introduction

Ansible is widely recognized as a powerful tool for automating IT tasks, but it heavily relies on SSH to communicate with remote servers. One of the most common issues users face is the “Failed to connect to the host via ssh!” error, which indicates that Ansible cannot establish an SSH connection with the target server.

This guide provides a comprehensive exploration of the potential causes behind this error and walks you through how to fix it. Whether you’re new to Ansible or looking for advanced troubleshooting strategies, this guide will equip you with the knowledge needed to resolve SSH connection issues effectively.

Common Causes of SSH Connection Failures in Ansible

The “Failed to connect to host via SSH” error can result from various underlying issues. Understanding the root causes can help you quickly identify and resolve the problem.

Here are the most common reasons:

  1. Incorrect SSH Credentials: Using the wrong username, password, or SSH key.
  2. SSH Key Permissions: Incorrect permissions on SSH keys that prevent connections.
  3. Firewall Blocking SSH Port: A firewall may block the SSH port, preventing communication.
  4. Host Unreachable: The target server may be down or have an unreachable network.
  5. Incorrect IP Address or Hostname: Typos or misconfigured inventory files.
  6. Missing or Misconfigured SSH Keys: SSH key pairs not correctly set up between the local machine and the remote server.

Now, let’s delve into step-by-step solutions that address both the basic and advanced levels of troubleshooting.

Basic Troubleshooting Steps for Ansible SSH Errors

1. Test SSH Connection Manually

Before diving into Ansible-specific configurations, verify that you can connect to the remote server using SSH directly from the command line. If you can’t connect manually, the issue is not with Ansible but with the SSH service or network configuration.

ssh user@hostname_or_ip

Common Errors:

  • Connection Refused: The SSH service might not be running on the server, or the wrong port is being used.
  • Permission Denied: Likely due to incorrect credentials, such as a bad password or missing SSH key.
  • No Route to Host: This could indicate a network issue or an incorrect IP address.

Solution: Ensure the SSH service is running on the host and that the firewall is not blocking the connection.

2. Verify SSH Key Permissions

For SSH to work correctly, permissions on your private key must be properly configured. Ensure the SSH key has the correct permissions:

chmod 600 ~/.ssh/id_rsa

Why it matters: SSH ignores keys with overly permissive access permissions, such as 777. You must restrict access to the owner only (600 permissions).

3. Ensure Proper Inventory Configuration

Your Ansible inventory file defines the hosts Ansible manages. Any misconfiguration in this file can result in connection failures. Check your inventory file to ensure the correct IP address or hostname, username, and SSH port are specified.

Example inventory configuration:

[webservers]
host1 ansible_host=192.168.1.100 ansible_user=root ansible_port=22 ansible_ssh_private_key_file=~/.ssh/id_rsa

Ensure:

  • ansible_host is the correct IP address.
  • ansible_user is a valid user on the remote machine.
  • ansible_port is the port SSH is listening on (default is 22 unless explicitly changed).

Intermediate Troubleshooting: Optimizing Ansible Configuration

Once you’ve handled basic connectivity issues, you may need to dig deeper into Ansible’s configuration files and logging options to solve more complex problems.

1. Modify ansible.cfg for Global SSH Settings

The ansible.cfg file allows you to configure global SSH settings for your Ansible environment. This file typically resides in the Ansible project directory or in /etc/ansible/ansible.cfg.

Example ansible.cfg configuration:

[defaults]
host_key_checking = False
timeout = 30

[ssh_connection]
ssh_args = -o ControlMaster=auto -o ControlPersist=60s

Key Parameters:

  • host_key_checking = False: Disables SSH host key verification, which may prevent issues when the host key changes.
  • timeout: Adjusts the connection timeout to allow more time for slower connections.
  • ssh_args: Enables SSH multiplexing to speed up connections by reusing the same SSH connection for multiple operations.

2. Enable Verbose Logging for Troubleshooting

Verbose logging is an essential tool for identifying why Ansible cannot connect to a host. Adding the -vvvv flag provides detailed logs, making it easier to troubleshoot.

ansible-playbook -i inventory playbook.yml -vvvv

This flag will print detailed logs for every step of the SSH connection process, including which SSH key was used, which host was contacted, and any errors encountered.

Advanced Solutions for “Failed to Connect to Host via SSH” Error

1. Managing Multiple SSH Keys

If you manage multiple SSH keys and the default key is not being used, specify the key in your Ansible inventory file.

[servers]
host1 ansible_ssh_private_key_file=~/.ssh/custom_key

Alternatively, use the ~/.ssh/config file to specify SSH options for different hosts. Here’s how to configure this file:

Host 192.168.1.100
    User ansible_user
    IdentityFile ~/.ssh/custom_key

This ensures that the correct SSH key is used for specific hosts.

2. Handling Firewalls and Security Groups

In cloud environments, security group settings (e.g., AWS, GCP) or firewalls might block SSH access. Verify that your server’s firewall or security group allows inbound SSH traffic on port 22 (or a custom port if specified).

For ufw (Uncomplicated Firewall):

sudo ufw allow 22
sudo ufw status

For AWS security groups:

  • Go to the EC2 Management Console.
  • Select your instance’s security group.
  • Ensure that port 22 (SSH) is allowed for the correct IP ranges (e.g., your public IP or 0.0.0.0/0 for open access).

3. Increasing SSH Timeout

If Ansible fails to connect because of a timeout, you can increase the SSH timeout in ansible.cfg:

[defaults]
timeout = 60

This gives more time for the SSH connection to establish, which is especially useful for connections over slow networks.

Frequently Asked Questions (FAQs)

1. Why am I getting “Failed to connect to host via SSH” in Ansible?

This error occurs when Ansible cannot establish an SSH connection to a host. Possible reasons include incorrect SSH credentials, network issues, firewall restrictions, or misconfigured SSH settings.

2. How can I resolve SSH key permission issues?

Ensure that the SSH private key has 600 permissions:

chmod 600 ~/.ssh/id_rsa

This restricts access to the file, which is required for SSH to accept the key.

3. What does “Connection refused” mean in SSH?

“Connection refused” indicates that the SSH service is either not running on the remote host, or you’re trying to connect on the wrong port. Verify that SSH is running and that you’re using the correct port.

4. How do I specify a different SSH key in Ansible?

You can specify a custom SSH key by adding ansible_ssh_private_key_file in your inventory file, or by configuring it in your SSH configuration (~/.ssh/config).

Conclusion

The “Failed to connect to host via ssh!” error in Ansible is common but often easy to troubleshoot. By following the steps in this guide, you can diagnose and resolve issues ranging from basic SSH configuration errors to more advanced network and firewall settings.

Begin with simple checks like testing manual SSH access and verifying credentials. Move on to more advanced configurations like modifying the ansible.cfg file, using custom SSH keys, and increasing the connection timeout as needed. Verbose logging and checking network security configurations like firewalls and security groups will help you identify and fix any remaining issues.

By applying these solutions, you’ll be better equipped to prevent and resolve SSH connection errors in Ansible, ensuring smooth automation workflows in your infrastructure. Thank you for reading the DevopsRoles page!

How to Fix UNREACHABLE Error in Ansible: A Comprehensive Guide

Introduction

Ansible is one of the most popular automation tools used for configuration management, application deployment, and task automation across distributed infrastructures. However, even the most well-configured playbooks can sometimes fail to connect to remote systems, leading to the dreaded UNREACHABLE! error.

This error, indicated by the message UNREACHABLE! => {"changed": false, "msg": "Failed to connect to the host via ssh", "unreachable": true}, signifies that Ansible was unable to establish communication with the target host. This often means that Ansible couldn’t reach the machine through SSH, which is the primary method used for remote management in Ansible.

This guide provides a deep dive into how to troubleshoot and resolve the Ansible UNREACHABLE error, covering both simple fixes and more complex, advanced scenarios. By the end, you’ll be better equipped to handle this issue in real-world environments.

What Does the Ansible UNREACHABLE Error Mean?

The Ansible UNREACHABLE error typically occurs when Ansible cannot connect to a remote host through SSH. The error message often looks like this:

fatal: [host]: UNREACHABLE! => {"changed": false, "msg": "Failed to connect to the host via ssh: user@host: Permission denied", "unreachable": true}

In this context:

  • host is the target machine that Ansible tried to connect to.
  • "msg": "Failed to connect to the host via ssh" indicates the connection failure due to SSH issues.

The causes for this error are varied but often boil down to misconfigurations in SSH, incorrect inventory setup, network issues, or host authentication problems.

Understanding the Common Causes of the Ansible UNREACHABLE Error

Before we proceed with the solution, it’s important to understand some of the most common causes of the Ansible UNREACHABLE error:

1. SSH Configuration Problems

Ansible uses SSH to connect to remote hosts, so any issues with SSH—whether it’s incorrect SSH key configuration or disabled SSH access—will result in this error.

2. Firewall Rules

Sometimes, firewalls block SSH connections, which means Ansible won’t be able to reach the target machine.

3. Incorrect Inventory File

The inventory file is where Ansible stores information about the hosts it manages. Incorrectly defining the hostnames, IP addresses, or SSH details here can lead to unreachable errors.

4. Authentication Problems

Ansible will fail to connect if it’s unable to authenticate with the remote host, either due to an incorrect SSH key, wrong username, or incorrect password.

5. Network and DNS Issues

If the target hosts are in different networks, or DNS is not resolving the hostnames correctly, Ansible will not be able to reach them.

6. StrictHostKeyChecking Setting

SSH may fail if the StrictHostKeyChecking option is enabled, preventing connection to untrusted hosts.

Step-by-Step Guide to Fix the Ansible UNREACHABLE Error

Let’s walk through the various steps to fix the Ansible UNREACHABLE error. We will start with basic troubleshooting techniques and move towards more advanced fixes.

1. Verifying SSH Configuration

Since most unreachable errors are caused by SSH problems, the first step should always be to check whether you can connect to the remote machine via SSH.

Step 1.1: Testing SSH Manually

Use the following command to manually test the SSH connection to your remote host:

ssh user@remote_host

If you can’t connect manually, Ansible won’t be able to either. Double-check that:

  • You’re using the correct SSH key.
  • SSH is enabled and running on the remote machine.
  • You’re using the correct username and password or private key.

Step 1.2: Ensuring SSH Key Permissions

The permissions of your SSH key file should be correct. If the permissions are too open, SSH might refuse to use the key:

chmod 600 ~/.ssh/id_rsa

Step 1.3: Configuring SSH in the Inventory File

In your inventory file, make sure you specify the correct user and private key for each host:

[webservers]
server1 ansible_host=192.168.1.10 ansible_user=root ansible_ssh_private_key_file=~/.ssh/id_rsa

You can also specify a specific SSH port if your remote host is not using the default port 22:

server1 ansible_host=192.168.1.10 ansible_port=2222

2. Troubleshooting the Inventory File

The inventory file is key to how Ansible connects to the hosts. Let’s troubleshoot it to ensure everything is set up correctly.

Step 2.1: Checking Hostnames or IPs

Ensure that your inventory file contains the correct IP addresses or hostnames of the remote machines:

[webservers]
192.168.1.10
192.168.1.11

If the hosts are identified by names, ensure that DNS is correctly resolving the hostnames:

nslookup server1

Step 2.2: Verifying the Inventory Format

Ensure that the syntax of your inventory file is correct. Here’s an example of a well-formed inventory:

[webservers]
web1 ansible_host=192.168.1.10 ansible_user=root
web2 ansible_host=192.168.1.11 ansible_user=root

3. Diagnosing Firewall and Network Issues

Even if the SSH configuration and inventory are correct, network problems can still prevent Ansible from reaching the host.

Step 3.1: Checking Firewall Rules

Make sure that the firewall on both the local and remote machines allows SSH connections on port 22 (or the custom port you are using).

On Ubuntu systems, you can check this with:

sudo ufw status

If the firewall is blocking SSH connections, open port 22:

sudo ufw allow 22/tcp

Step 3.2: Testing Connectivity

To ensure that the Ansible control node can reach the target host, try pinging the remote host:

ping 192.168.1.10

If the ping fails, it may indicate a network problem or misconfiguration, such as incorrect routing or firewall rules.

Step 3.3: Check DNS Configuration

If you’re using hostnames instead of IP addresses, verify that the control machine can resolve the hostnames of the target machines. You can use the dig or nslookup commands for this:

nslookup web1

4. Solving Authentication Problems

Authentication issues often arise due to incorrect SSH keys, wrong usernames, or misconfigurations in the SSH settings.

Step 4.1: Ensuring the Correct SSH Key

Make sure that your public key is present in the ~/.ssh/authorized_keys file on the remote host. If the key is missing, add it using the ssh-copy-id command:

ssh-copy-id user@remote_host

Step 4.2: Checking Ansible User Configuration

In your inventory file, ensure that the correct user is specified for each remote host:

[webservers]
server1 ansible_host=192.168.1.10 ansible_user=root

If no user is specified, Ansible will use the default user from the ansible.cfg configuration file, which might be incorrect for your hosts.

5. Advanced Troubleshooting

If the basic steps above don’t resolve the issue, there are more advanced troubleshooting techniques to consider.

Step 5.1: Enabling Ansible Debug Mode

To get more detailed information about the cause of the error, you can enable Ansible’s debug mode. This will provide more verbose output during execution, which can help pinpoint the problem.

You can run your playbook with debug mode enabled by setting the ANSIBLE_DEBUG environment variable:

ANSIBLE_DEBUG=true ansible-playbook playbook.yml

Step 5.2: Disabling StrictHostKeyChecking

Sometimes, SSH may fail due to StrictHostKeyChecking, which prevents SSH from connecting to hosts whose key has not been seen before. You can disable this check in the Ansible configuration by adding the following in your ansible.cfg file or inventory file:

ansible_ssh_common_args='-o StrictHostKeyChecking=no'

Step 5.3: Using SSH Jump Hosts (ProxyJump)

If you are connecting to a remote machine through a bastion or jump server, you’ll need to configure the SSH jump host in your inventory file:

[all]
server1 ansible_host=10.0.0.10 ansible_user=root ansible_ssh_common_args='-o ProxyJump=bastion@bastion_host'

This configuration tells Ansible to use the bastion_host to jump to server1.

Frequently Asked Questions (FAQs)

Why do I keep getting the Ansible UNREACHABLE error?

The Ansible UNREACHABLE error is typically caused by SSH connection issues, firewall restrictions, or incorrect inventory setup. Ensure that SSH is properly configured and that the target machine is reachable from the Ansible control node.

How can I check if my SSH configuration is correct?

You can manually test the SSH connection using the ssh user@host command. If this connection fails, Ansible will not be able to connect either. Double-check your SSH keys, user configuration, and firewall rules.

Can firewalls block Ansible connections?

Yes, firewalls can block SSH connections, resulting in Ansible being unable to reach the target host. Make sure that port 22 (or the custom port you’re using for SSH) is open on both the control machine and the target machine.

How do I troubleshoot DNS issues in Ansible?

If you are using hostnames in your inventory, ensure that they can be resolved to IP addresses using DNS. You can use the nslookup or dig commands to verify that the DNS configuration is correct.

Conclusion

The Ansible UNREACHABLE error can be a challenging issue to troubleshoot, especially in complex environments. However, by systematically addressing the most common causes – starting with SSH configuration, inventory file setup, firewall rules, and network issues – you can often resolve the problem quickly. For more advanced scenarios, such as when using jump hosts or encountering DNS issues, Ansible provides powerful tools and configurations to ensure connectivity.

By following this deep guide, you now have the knowledge to not only fix basic UNREACHABLE errors but also to diagnose and solve more complex networking or configuration issues, making your Ansible playbooks run reliably across your infrastructure. Thank you for reading the DevopsRoles page!