Learn Terraform with DevOpsRoles.com. Access detailed guides and tutorials to master infrastructure as code and automate your DevOps workflows using Terraform.
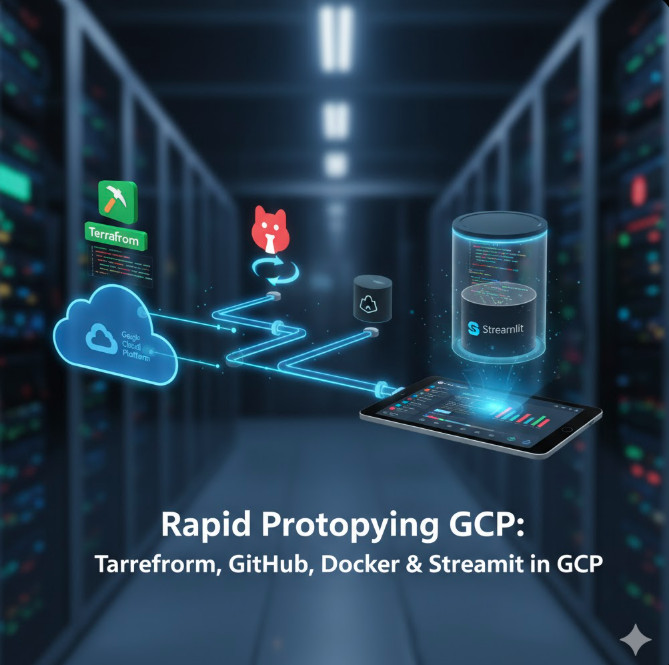
In my experience as a Senior Staff DevOps Engineer, I’ve often seen deployment friction halt brilliant ideas at the proof-of-concept stage. When the primary goal is validating a data product or ML model, speed is the most critical metric. This guide offers an expert-level strategy for achieving true Rapid Prototyping in GCP by integrating an elite toolset: Terraform for infrastructure-as-code, GitHub Actions for CI/CD, Docker for containerization, and Streamlit for the frontend application layer.
We’ll architect a highly automated, cost-optimized pipeline that enables a single developer to push a change to a Git branch and have a fully deployed, tested prototype running on Google Cloud Platform (GCP) minutes later. This methodology transforms your development lifecycle from weeks to hours.
The Foundational Stack for Rapid Prototyping in GCP
To truly master **Rapid Prototyping in GCP**, we must establish a robust, yet flexible, technology stack. Our chosen components prioritize automation, reproducibility, and minimal operational overhead:
Infrastructure: Terraform – Define all GCP resources (VPC, Cloud Run, Artifact Registry) declaratively. This ensures the environment is reproducible and easily torn down after validation.
Application Framework: Streamlit – Allows data scientists and ML engineers to create complex, interactive web applications using only Python, eliminating frontend complexity.
Containerization: Docker – Standardizes the application environment, bundling all dependencies (Python versions, libraries) and ensuring the prototype runs identically from local machine to GCP.
CI/CD & Source Control: GitHub & GitHub Actions – Provides the automated workflow for testing, building the Docker image, pushing it to Artifact Registry, and deploying the application to Cloud Run.
Pro-Tip: Choosing the GCP Target
For rapid prototyping of web-facing applications, **Google Cloud Run** is the superior choice over GKE or Compute Engine. It offers serverless container execution, scales down to zero (minimizing cost), and integrates seamlessly with container images from Artifact Registry.
Step 1: Defining Infrastructure with Terraform
Our infrastructure definition must be minimal but secure. We’ll set up a project, enable the necessary APIs, and define our key deployment targets: a **VPC network**, an **Artifact Registry** repository, and the **Cloud Run** service itself. The service will be made public for easy prototype sharing.
This code block uses the `latest` tag for true rapid iteration, though for production, a commit SHA tag is preferred. By keeping the service public, we streamline the sharing process, a critical part of **Rapid Prototyping GCP** solutions.
Step 2: Containerizing the Streamlit Application with Docker
The Streamlit application requires a minimal, multi-stage Dockerfile to keep image size small and build times fast.
Dockerfile Example:
# Stage 1: Builder
FROM python:3.10-slim as builder
WORKDIR /app
COPY requirements.txt .
RUN pip install --no-cache-dir -r requirements.txt

# Stage 2: Production
FROM python:3.10-slim
WORKDIR /app
COPY --from=builder /usr/local/lib/python3.10/site-packages/ /usr/local/lib/python3.10/site-packages/
COPY --from=builder /usr/local/bin/ /usr/local/bin/
COPY . .

# Streamlit runs on port 8501 by default
EXPOSE 8501

# The command to run the application
CMD ["streamlit", "run", "app.py", "--server.port=8080", "--server.enableCORS=false"]
Note: We explicitly set the Streamlit port to **8080** via the `CMD` instruction, which is the mandatory listening port for Google Cloud Run’s container contract.
Step 3: Implementing CI/CD with GitHub Actions
The core of our **Rapid Prototyping GCP** pipeline is the CI/CD workflow, automated via GitHub Actions. A push to the `main` branch should trigger a container build, push, and deployment.
Advanced Concept: GitHub OIDC Integration
We use **Workload Identity Federation (WIF)**, not static service account keys, for secure authentication. The GitHub Action uses the `id-token: ‘write’` permission to exchange a short-lived token for GCP credentials, significantly enhancing the security posture of our CI/CD pipeline. Refer to the official GCP IAM documentation for setting up the required WIF pool and provider.
Best Practices for Iterative Development and Cost Control
A successful **Rapid Prototyping GCP** pipeline isn’t just about deployment; it’s about making iteration cheap and fast, and managing the associated cloud costs.
Rapid Iteration with Streamlit’s Application State
Leverage Streamlit’s native caching mechanisms (e.g., `@st.cache_data`, `@st.cache_resource`) and session state (`st.session_state`) effectively. This prevents re-running expensive computations (like model loading or large data fetches) on every user interaction, reducing application latency and improving the perceived speed of the prototype.
Cost Management with Cloud Run
Scale-to-Zero: Ensure your Cloud Run service is configured to scale down to 0 minimum instances (`min-instances: 0`). This is crucial. If the prototype isn’t being actively viewed, you pay nothing for compute time.
Resource Limits: Start with the lowest possible CPU/Memory allocation (e.g., 1vCPU, 512MiB) and increase only if necessary. Prototypes should be cost-aware.
Terraform Taint: For temporary projects, use `terraform destroy` when validation is complete. For environments that must persist, use `terraform taint` or manual deletion on the service, and a follow-up `terraform apply` to re-create it when needed.
Frequently Asked Questions (FAQ)
How is this Rapid Prototyping stack different from using App Engine or GKE?
The key difference is **operational overhead and cost**. App Engine (Standard) is limited by language runtimes, and GKE (Kubernetes) introduces significant complexity (managing nodes, deployments, services, ingress) that is unnecessary for a rapid proof-of-concept. Cloud Run is a fully managed container platform that handles autoscaling, patching, and networking, allowing you to focus purely on the application logic for your prototype.
What are the security implications of making the Cloud Run service unauthenticated?
Making the service public (`allow-unauthenticated`) is acceptable for internal or temporary prototypes, as it simplifies sharing. For prototypes that handle sensitive data or move toward production, you must update the Terraform configuration to remove the public access IAM policy and enforce authentication (e.g., using IAP or requiring a valid GCP identity token).
Can I use Cloud Build instead of GitHub Actions for this CI/CD?
Absolutely. Cloud Build is GCP’s native CI/CD platform and can be a faster alternative, especially for image builds that stay within the Google Cloud network. The GitHub Actions approach was chosen here for its seamless integration with the source control repository (GitHub) and its broad community support, simplifying the adoption for teams already using GitHub.
Conclusion
Building a modern **Rapid Prototyping GCP** pipeline requires a holistic view of the entire software lifecycle. By coupling the declarative power of **Terraform** with the automation of **GitHub Actions** and the serverless execution of **Cloud Run**, you gain an unparalleled ability to quickly validate ideas. This blueprint empowers expert DevOps teams and SREs to dramatically reduce the time-to-market for data applications and machine learning models, moving from concept to deployed, interactive prototype in minutes, not days. Thank you for reading the DevopsRoles page!
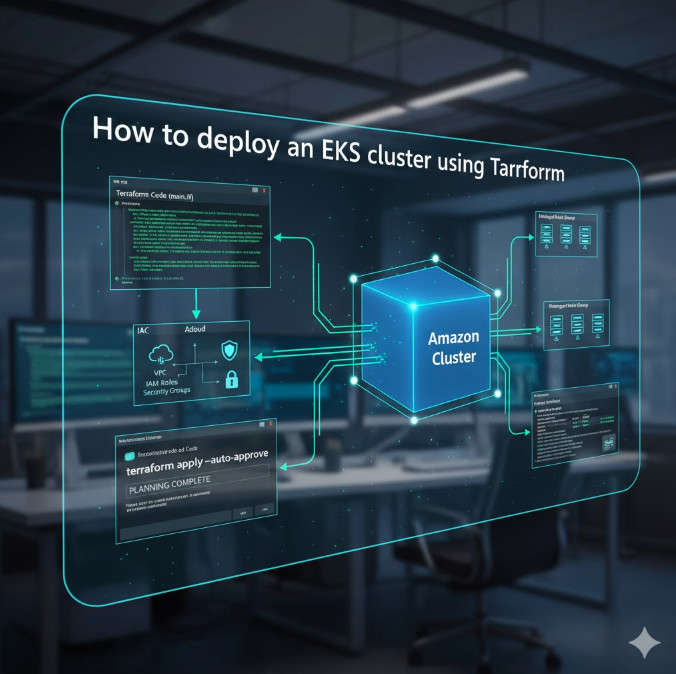
Welcome to the definitive guide on using Terraform to provision and manage Amazon Elastic Kubernetes Service (EKS). Manually setting up a Kubernetes cluster on AWS involves navigating a complex web of resources: VPCs, subnets, IAM roles, security groups, and the EKS control plane itself. This process is not only time-consuming but also prone to human error and difficult to reproduce.
This is where Terraform, the industry-standard Infrastructure as Code (IaC) tool, becomes indispensable. By defining your infrastructure in declarative configuration files, you can automate the entire provisioning process, ensuring consistency, repeatability, and version control. In this comprehensive tutorial, we will walk you through every step required to deploy an EKS cluster using Terraform, from setting up the networking to configuring node groups and connecting with kubectl. This guide is designed for DevOps engineers, SREs, and system administrators looking to adopt best practices for their Kubernetes cluster on AWS.
Why Use Terraform to Deploy an EKS Cluster?
While the AWS Management Console or AWS CLI are valid ways to start, any production-grade system benefits immensely from an IaC approach. When you deploy an EKS cluster, you’re not just creating one resource; you’re orchestrating dozens of interconnected components. Terraform excels at managing this complexity.
The Power of Infrastructure as Code (IaC)
Infrastructure as Code (IaC) is the practice of managing and provisioning infrastructure through machine-readable definition files, rather than physical hardware configuration or interactive configuration tools. Terraform allows you to write, plan, and create your AWS EKS cluster setup with code. This code can be versioned in Git, peer-reviewed, and tested, just like your application code.
Repeatability and Consistency
Need to spin up an identical cluster for staging, development, or a different region? With a manual process, this is a nightmare of forgotten settings and configuration drift. With Terraform, you simply run terraform apply. Your configuration files are the single source of truth, guaranteeing that every environment is a precise, consistent replica.
State Management and Version Control
Terraform creates a state file that maps your configuration to the real-world resources it has created. This state allows Terraform to plan changes, understand dependencies, and manage the entire lifecycle of your infrastructure. When you need to upgrade your EKS version or change a node’s instance type, Terraform calculates the exact changes needed and executes them in the correct order. You can destroy the entire stack with a single terraform destroy command, ensuring no orphaned resources are left behind.
Prerequisites: What You Need Before You Start
Before we begin, ensure you have the following tools and accounts set up. This guide assumes you are comfortable working from the command line.
An AWS Account: You will need an AWS account with IAM permissions to create EKS clusters, VPCs, IAM roles, and associated resources.
Terraform: Terraform (version 1.0.0 or later) installed on your local machine.
kubectl: The Kubernetes command-line tool. This is used to interact with your cluster once it’s created.
aws-iam-authenticator (Optional but Recommended): This helper binary allows kubectl to use AWS IAM credentials for authentication. However, modern AWS CLI versions (1.16.156+) can handle this natively with the aws eks update-kubeconfig command, which we will use.
Step-by-Step Guide: Provisioning Your EKS Infrastructure
We will build our configuration using the official, battle-tested Terraform EKS module. This module abstracts away immense complexity and encapsulates best practices for EKS cluster provisioning.
Step 1: Setting Up Your Terraform Project
First, create a new directory for your project. Inside this directory, we’ll create several .tf files to keep our configuration organized.
Your directory structure will look like this:
.
├── main.tf
├── variables.tf
└── outputs.tf
Let’s start with main.tf. This file will contain our provider configuration and the module calls.
# main.tf

terraform {
  required_version = "~> 1.5"

  required_providers {
    aws = {
      source  = "hashicorp/aws"
      version = "~> 5.0"
    }
  }
}

provider "aws" {
  region = var.aws_region
}

# Define a random string to ensure unique EKS cluster names
resource "random_pet" "cluster_name_suffix" {
  length = 2
}
Next, define your variables in variables.tf. This allows you to easily customize your deployment without changing the core logic.
# variables.tf

variable "aws_region" {
  description = "The AWS region to deploy resources in."
  type        = string
  default     = "us-east-1"
}

variable "cluster_name" {
  description = "The name for your EKS cluster."
  type        = string
  default     = "my-demo-cluster"
}

variable "cluster_version" {
  description = "The Kubernetes version for the EKS cluster."
  type        = string
  default     = "1.29"
}

variable "vpc_cidr" {
  description = "The CIDR block for the EKS cluster VPC."
  type        = string
  default     = "10.0.0.0/16"
}

variable "azs" {
  description = "Availability Zones for the VPC and EKS."
  type        = list(string)
  default     = ["us-east-1a", "us-east-1b", "us-east-1c"]
}
Step 2: Defining the Networking (VPC)
An EKS cluster requires a robust, highly available Virtual Private Cloud (VPC) with both public and private subnets across multiple Availability Zones. We will use the official Terraform VPC module to handle this.
Add the following to your main.tf file:
# main.tf (continued...)

module "vpc" {
  source  = "terraform-aws-modules/vpc/aws"
  version = "5.5.3"

  name = "${var.cluster_name}-vpc"
  cidr = var.vpc_cidr

  azs             = var.azs
  private_subnets = [for k, v in var.azs : cidrsubnet(var.vpc_cidr, 8, k + 4)]
  public_subnets  = [for k, v in var.azs : cidrsubnet(var.vpc_cidr, 8, k)]

  enable_nat_gateway   = true
  single_nat_gateway   = true
  enable_dns_hostnames = true

  # Tags required by EKS
  public_subnet_tags = {
    "kubernetes.io/cluster/${var.cluster_name}-${random_pet.cluster_name_suffix.id}" = "shared"
    "kubernetes.io/role/elb"                                                         = "1"
  }

  private_subnet_tags = {
    "kubernetes.io/cluster/${var.cluster_name}-${random_pet.cluster_name_suffix.id}" = "shared"
    "kubernetes.io/role/internal-elb"                                                = "1"
  }
}
This block provisions a new VPC with public subnets (for load balancers) and private subnets (for worker nodes) across the three AZs we defined. Crucially, it adds the specific tags that EKS requires to identify which subnets it can use for internal and external load balancers.
Step 3: Defining the EKS Cluster with the Official Module
Now for the main event. We will add the terraform-aws-modules/eks/aws module. This single module will create:
The EKS Control Plane
The necessary IAM Roles (for the cluster and nodes)
Security Groups
Managed Node Groups
Add this final block to your main.tf:
# main.tf (continued...)

module "eks" {
  source  = "terraform-aws-modules/eks/aws"
  version = "20.8.4"

  cluster_name    = "${var.cluster_name}-${random_pet.cluster_name_suffix.id}"
  cluster_version = var.cluster_version

  cluster_endpoint_public_access = true

  vpc_id     = module.vpc.vpc_id
  subnet_ids = module.vpc.private_subnets

  # EKS Managed Node Group configuration
  eks_managed_node_groups = {
    general_purpose = {
      name           = "general-purpose-nodes"
      instance_types = ["t3.medium"]

      min_size     = 1
      max_size     = 3
      desired_size = 2

      # Use the private subnets
      subnet_ids = module.vpc.private_subnets

      tags = {
        Purpose = "general-purpose-workloads"
      }
    }
  }

  # This allows our local kubectl to authenticate
  # by mapping the default AWS user/role that runs terraform
  # to the "system:masters" group in Kubernetes RBAC.
  aws_auth_roles = [
    {
      rolearn = "arn:aws:iam::${data.aws_caller_identity.current.account_id}:role/AWSServiceRoleForAmazonEKS"
      username = "system:node:{{EC2PrivateDNSName}}"
      groups = [
        "system:bootstrappers",
        "system:nodes",
      ]
    }
  ]

  aws_auth_users = [
    {
      userarn = data.aws_caller_identity.current.arn
      username = "admin"
      groups = [
        "system:masters"
      ]
    }
  ]

}

data "aws_caller_identity" "current" {}
This configuration defines an EKS cluster and a managed node group named general_purpose. This node group will run t3.medium instances and will auto-scale between 1 and 3 nodes, starting with 2. The aws_auth_users block is critical: it takes the IAM identity (user or role) that is running Terraform and grants it system:masters (admin) permissions within the new Kubernetes cluster.
Step 4: Defining Outputs
Finally, we need to output the cluster’s information so we can connect to it. Create an outputs.tf file.
# outputs.tf

output "cluster_name" {
  description = "The name of the EKS cluster."
  value       = module.eks.cluster_name
}

output "cluster_endpoint" {
  description = "The endpoint for your EKS cluster."
  value       = module.eks.cluster_endpoint
}

output "cluster_ca_certificate" {
  description = "Base64 encoded certificate data for cluster."
  value       = module.eks.cluster_certificate_authority_data
}

output "configure_kubectl_command" {
  description = "Command to configure kubectl to connect to the cluster."
  value       = "aws eks update-kubeconfig --region ${var.aws_region} --name ${module.eks.cluster_name}"
}
Step 5: Deploying and Connecting to Your Cluster
With all our configuration files in place, it’s time to deploy.
Initialize and Apply
Run the following commands in your terminal:
# 1. Initialize the Terraform project
# This downloads the AWS provider and the EKS/VPC modules
terraform init

# 2. Plan the deployment
# This shows you all the resources Terraform will create
terraform plan

# 3. Apply the configuration
# This will build the VPC, IAM roles, and EKS cluster.
# It can take 15-20 minutes for the EKS cluster to become active.
terraform apply --auto-approve
After terraform apply completes, it will print the values from your outputs.tf file.
Configuring kubectl
The easiest way to configure your local kubectl is to use the command we generated in our outputs. Copy the value of configure_kubectl_command from the Terraform output and paste it into your terminal.
# This command will be printed by 'terraform apply'
aws eks update-kubeconfig --region us-east-1 --name my-demo-cluster-xy
This AWS CLI command automatically updates your local ~/.kube/config file with the new cluster’s credentials and endpoint.
Verifying the Cluster
You can now use kubectl to interact with your cluster. Let’s check the status of our nodes:
kubectl get nodes

# You should see an output similar to this, showing your 2 nodes are 'Ready':
# NAME                                         STATUS   ROLES    AGE   VERSION
# ip-10-0-10-123.ec2.internal   Ready       5m    v1.29.0-eks
# ip-10-0-11-45.ec2.internal    Ready       5m    v1.29.0-eks
You can also check the pods running in the kube-system namespace:
kubectl get pods -n kube-system

# You will see core components like coredns and the aws-node (VPC CNI) pods.
Congratulations! You have successfully deployed a production-ready EKS cluster using Terraform.
Advanced Considerations and Best Practices
This guide provides a strong foundation, but a true production environment has more components. Here are key areas to explore next:
IAM Roles for Service Accounts (IRSA): Instead of giving broad permissions to worker nodes, use IRSA to assign fine-grained IAM roles directly to your Kubernetes service accounts. This is the most secure way for your pods (e.g., external-dns, aws-load-balancer-controller) to interact with AWS APIs. The Terraform EKS module has built-in support for this.
Cluster Autoscaling: We configured the Managed Node Group to scale, but for more advanced scaling based on pod resource requests, you should deploy the Kubernetes Cluster Autoscaler.
EKS Add-ons: EKS manages core add-ons like vpc-cni, kube-proxy, and coredns. You can manage the versions of these add-ons directly within the Terraform EKS module block, treating them as code as well.
Logging and Monitoring: Configure EKS control plane logging (api, audit, authenticator) and ship those logs to CloudWatch. Use the EKS module to enable these logs and deploy monitoring solutions like Prometheus and Grafana.
Frequently Asked Questions
Can I use this guide to deploy an EKS cluster into an existing VPC?
Yes. Instead of using the module "vpc", you would remove that block and pass your existing VPC and subnet IDs directly to the module "eks" block’s vpc_id and subnet_ids arguments. You must ensure your subnets are tagged correctly as described in Step 2.
How do I upgrade my EKS cluster’s Kubernetes version using Terraform?
It’s a two-step process. First, update the cluster_version argument in your variables.tf (e.g., from “1.29” to “1.30”). Run terraform apply to upgrade the control plane. Once that is complete, you must also upgrade your node groups by updating their version (or by default, they will upgrade on the next AMI rotation if configured).
What is the difference between Managed Node Groups and Fargate?
Managed Node Groups (used in this guide) provision EC2 instances that you manage (but AWS patches). You have full control over the instance type and operating system. AWS Fargate is a serverless compute engine that allows you to run pods without managing any underlying EC2 instances at all. The EKS module also supports creating Fargate profiles.
Conclusion
You have now mastered the fundamentals of EKS cluster provisioning with Infrastructure as Code. By leveraging the official Terraform EKS module, you’ve abstracted away massive complexity and built a scalable, repeatable, and maintainable foundation for your Kubernetes workloads on AWS. This declarative approach is the cornerstone of modern DevOps and SRE practices, enabling you to manage infrastructure with the same rigor and confidence as application code.
By following this guide, you’ve learned not just how to deploy EKS cluster infrastructure, but how to do it in a way that is robust, scalable, and manageable. From here, you are well-equipped to explore advanced topics like IRSA, cluster autoscaling, and CI/CD pipelines for your new Kubernetes cluster. Thank you for reading the DevopsRoles page!
For any organization scaling its infrastructure, managing multiple environments like development, staging, and production is a fundamental challenge. A common anti-pattern for beginners is duplicating the entire Terraform configuration for each environment. This leads to code duplication, configuration drift, and a high-maintenance nightmare. Fortunately, HashiCorp provides a built-in solution to this problem: Terraform workspaces. This feature allows you to use a single set of configuration files to manage multiple, distinct sets of infrastructure resources, primarily by isolating their state files.
This comprehensive guide will dive deep into what Terraform workspaces are, how to use them effectively, and their best practices. We’ll explore practical examples, variable management strategies, and how they fit into a modern CI/CD pipeline, empowering you to streamline your environment management process.
What Are Terraform Workspaces?
At their core, Terraform workspaces are a mechanism to manage multiple, independent state files for a single Terraform configuration. When you run terraform apply, Terraform writes metadata about the resources it created into a file named terraform.tfstate. A workspace provides a separate, named “space” for that state file.
This means you can have a single directory of .tf files (your main.tf, variables.tf, etc.) and use it to deploy a “dev” environment, a “staging” environment, and a “prod” environment. Each of these will have its own state file, completely isolated from the others. Running terraform destroy in the dev workspace will not affect the resources in your prod workspace, even though they are defined by the same code.
The ‘default’ Workspace
If you’ve never explicitly used workspaces, you’ve still been using one: the default workspace. Every Terraform configuration starts with this single workspace. When you run terraform init and terraform apply, the state is written to terraform.tfstate directly in your root directory (or in your configured remote backend).
How Workspaces Manage State
When you create a new workspace (e.g., dev), Terraform no longer writes to the root terraform.tfstate file. Instead, it creates a new directory called terraform.tfstate.d. Inside this directory, it will create a folder for each workspace, and each folder will contain its own terraform.tfstate file.
For example, if you have dev and prod workspaces, your directory structure might look like this (for local state):
If you are using a remote backend like an S3 bucket, Terraform will instead create paths or keys based on the workspace name to keep the state files separate within the bucket.
Why Use Terraform Workspaces? (And When Not To)
Workspaces are a powerful tool, but they aren’t the solution for every problem. Understanding their pros and cons is key to using them effectively.
Key Advantages
Code Reusability (DRY): The most significant benefit. You maintain one codebase for all your environments. A change to a security group rule is made once in main.tf and then applied to each environment as needed.
Environment Isolation: Separate state files prevent “cross-talk.” You can’t accidentally destroy a production database while testing a change in staging.
Simplicity for Similar Environments: Workspaces are ideal for environments that are structurally identical (or very similar) but differ only in variables (e.g., instance size, count, or name prefixes).
Rapid Provisioning: Quickly spin up a new, temporary environment for a feature branch (e.g., feat-new-api) and tear it down just as quickly, all from the same configuration.
Common Pitfalls and When to Avoid Them
Overuse of Conditional Logic: If you find your .tf files littered with complex if statements or count tricks based on terraform.workspace, you may be forcing a single configuration to do too much. This can make the code unreadable and brittle.
Not for Different Configurations: Workspaces are for deploying the *same* configuration to *different* environments. If your prod environment has a completely different architecture than dev (e.g., uses RDS while dev uses a containerized SQLite), they should probably be separate Terraform configurations (i.e., in different directories).
Large-Scale Complexity: For very large, complex organizations, managing many environments with subtle differences can still become difficult. At this scale, you might consider graduating to a tool like Terragrunt or adopting a more sophisticated module-based architecture where each environment is a separate root module that calls shared, versioned modules.
Getting Started: A Practical Guide to Terraform Workspaces
Let’s walk through a practical example. We’ll define a simple AWS EC2 instance and deploy it to both dev and prod environments, giving each a different instance type and tag.
Step 1: Basic CLI Commands
First, let’s get familiar with the core terraform workspace commands. Initialize a new Terraform directory to get started.
# Show the current workspace
$ terraform workspace show
default

# Create a new workspace
$ terraform workspace new dev
Created and switched to workspace "dev"

# Create another one
$ terraform workspace new prod
Created and switched to workspace "prod"

# List all available workspaces
$ terraform workspace list
  default
* prod
  dev

# Switch back to the dev workspace
$ terraform workspace select dev
Switched to workspace "dev"

# You cannot delete the 'default' workspace
$ terraform workspace delete default
Error: Failed to delete workspace: "default" workspace cannot be deleted

# You also cannot delete the workspace you are currently in
$ terraform workspace delete dev
Error: Failed to delete workspace: cannot delete current workspace "dev"

# To delete a workspace, switch to another one first
$ terraform workspace select prod
Switched to workspace "prod"

$ terraform workspace delete dev
Deleted workspace "dev"!
Step 2: Structuring Your Configuration with terraform.workspace
Terraform exposes the name of the currently selected workspace via the terraform.workspace interpolation. This is incredibly useful for naming and tagging resources to avoid collisions.
Let’s create a main.tf file.
terraform {
  required_providers {
    aws = {
      source  = "hashicorp/aws"
      version = "~> 5.0"
    }
  }
}

provider "aws" {
  region = "us-east-1"
}

# We will define variables later
variable "instance_type" {}
variable "ami_id" {
  description = "The AMI to use for our instance"
  type        = string
  default     = "ami-0c55b159cbfafe1f0" # An Amazon Linux 2 AMI
}

resource "aws_instance" "web_server" {
  ami           = var.ami_id
  instance_type = var.instance_type # This will come from a variable

  tags = {
    # Use the workspace name to differentiate resources
    Name        = "web-server-${terraform.workspace}"
    Environment = terraform.workspace
  }
}

output "instance_id" {
  value = aws_instance.web_server.id
}

output "instance_public_ip" {
  value = aws_instance.web_server.public_ip
}
Notice the tags block. If we are in the dev workspace, the instance will be named web-server-dev. In the prod workspace, it will be web-server-prod. This simple interpolation is the key to managing resources within a single AWS account.
Step 3: Managing Environment-Specific Variables
This is the most critical part. Our dev environment should use a t3.micro, while our prod environment needs a t3.medium. How do we manage this?
There are two primary methods: using map variables or using separate .tfvars files.
Method 1: Using a Map Variable (Recommended)
This is a clean, self-contained approach. We define a map in our variables.tf file that holds the configuration for each environment. Then, we use the terraform.workspace as a key to look up the correct value.
First, update variables.tf (or add it):
# variables.tf

variable "ami_id" {
  description = "The AMI to use for our instance"
  type        = string
  default     = "ami-0c55b159cbfafe1f0" # Amazon Linux 2
}

# Define a map variable to hold settings per environment
variable "env_config" {
  description = "Configuration settings for each environment"
  type = map(object({
    instance_type = string
    instance_count = number
  }))
  default = {
    "default" = {
      instance_type = "t3.nano"
      instance_count = 0 # Don't deploy in default
    },
    "dev" = {
      instance_type = "t3.micro"
      instance_count = 1
    },
    "prod" = {
      instance_type = "t3.medium"
      instance_count = 2 # Example of changing count
    }
  }
}
Now, update main.tf to use this map. We’ll also add the count parameter.
# main.tf (updated)

# ... provider block ...

resource "aws_instance" "web_server" {
  # Use the workspace name to look up the correct config
  count         = var.env_config[terraform.workspace].instance_count
  instance_type = var.env_config[terraform.workspace].instance_type

  ami = var.ami_id

  tags = {
    Name        = "web-server-${terraform.workspace}-${count.index}"
    Environment = terraform.workspace
  }
}

output "instance_public_ips" {
  value = aws_instance.web_server.*.public_ip
}
Now, let’s deploy:
# Make sure we have our workspaces
$ terraform workspace new dev
$ terraform workspace new prod

# Initialize the configuration
$ terraform init

# Select the dev workspace and apply
$ terraform workspace select dev
Switched to workspace "dev"
$ terraform apply -auto-approve

# ... Terraform will plan to create 1 t3.micro instance ...
Apply complete! Resources: 1 added, 0 changed, 0 destroyed.
Outputs:
instance_public_ips = [
  "54.1.2.3",
]

# Now, select the prod workspace and apply
$ terraform workspace select prod
Switched to workspace "prod"
$ terraform apply -auto-approve

# ... Terraform will plan to create 2 t3.medium instances ...
# This plan is totally independent of the 'dev' state.
Apply complete! Resources: 2 added, 0 changed, 0 destroyed.
Outputs:
instance_public_ips = [
  "34.4.5.6",
  "34.7.8.9",
]
You now have two separate environments deployed from the same code, each with its own state file and configuration.
Method 2: Using -var-file
An alternative (and simpler for some) approach is to create separate variable files for each environment.
When you run apply, you must specify which var file to use:
# Select the workspace first!
$ terraform workspace select dev
Switched to workspace "dev"

# Then apply, passing the correct var file
$ terraform apply -var-file="dev.tfvars" -auto-approve

# --- Repeat for prod ---

$ terraform workspace select prod
Switched to workspace "prod"

$ terraform apply -var-file="prod.tfvars" -auto-approve
This method is clear, but it requires you to remember to pass the correct -var-file flag every time, which can be error-prone. The map method (Method 1) is often preferred as it’s self-contained and works automatically with just terraform apply.
Terraform Workspaces in a CI/CD Pipeline
Automating Terraform workspaces is straightforward. Your pipeline needs to do two things:
Select the correct workspace based on the branch or trigger.
Run plan and apply.
Here is a simplified example for GitHub Actions that deploys dev on a push to the main branch and requires a manual approval to deploy prod.
Terraform Workspaces vs. Git Branches: Clearing the Confusion
A very common point of confusion is how workspaces relate to Git branches. They solve different problems.
Git Branches are for code isolation. You use a branch (e.g., feature-x) to develop a new feature without affecting the stable main branch.
Terraform Workspaces are for state isolation. You use a workspace (e.g., prod) to deploy the *same* stable main branch code to a different environment, keeping its state separate from dev.
Anti-Pattern: Using Git branches to manage environments (e.g., a dev branch and a prod branch that have different .tf files). This leads to massive configuration drift and makes merging changes from dev to prod a nightmare.
Best Practice: Use Git branches for feature development. Use Terraform workspaces for environment management. Your main branch should represent the code that defines *all* your environments, with differences handled by variables.
Best Practices for Using Terraform Workspaces
Use Remote State: Always use a remote backend (like S3, Azure Blob Storage, or Terraform Cloud) for your state files. This provides locking (preventing two people from running apply at the same time) and durability. Remote backends fully support workspaces.
Keep Environments Similar: Workspaces are best when environments are 90% the same. If prod is radically different from dev, they should be in separate root modules (directories).
Prefix Resource Names: Always use ${terraform.workspace} in your resource names and tags to prevent clashes.
Use the Map Variable Method: Prefer using a variable "env_config" map (Method 1) over passing -var-file flags (Method 2). It’s cleaner, less error-prone, and easier for CI/CD.
Secure Production: Use CI/CD with branch protection and manual approvals (like the GitHub Actions example) before applying to a prod workspace. Restrict direct CLI access to production state.
Know When to Graduate: If your env_config map becomes gigantic or your main.tf fills with count and if logic, it’s time to refactor. Move your configuration into shared Terraform modules and consider a tool like Terragrunt for orchestration.
Frequently Asked Questions
Q: Are Terraform workspaces the same as Terragrunt workspaces?
A: No, this is a common source of confusion. Terragrunt uses the term “workspaces” in a different way, more akin to how Terraform uses root modules. The feature discussed in this article is a built-in part of Terraform CLI, officially called “Terraform CLI workspaces.”
Q: How do I delete a Terraform workspace?
A: You must first switch to a *different* workspace, then run terraform workspace delete <name>. You cannot delete the workspace you are currently in, and you can never delete the default workspace. Remember to run terraform destroy *before* deleting the workspace if you want to destroy the resources it managed.
Q: What’s the difference between Terraform workspaces and modules?
A: They are complementary. A module is a reusable, packaged set of .tf files (e.g., a module to create an “RDS Database”). A workspace is a way to manage separate states for a *single* configuration. A good pattern is to have a single root configuration that calls multiple modules, and then use workspaces to deploy that entire configuration to dev, staging, and prod.
Q: Is the ‘default’ workspace special?
A: Yes. It’s the one you start in, and it cannot be deleted. Many teams avoid using the default workspace entirely. They immediately create dev or staging and work from there, leaving default empty. This avoids ambiguity.
Conclusion
Terraform workspaces are a fundamental and powerful feature for managing infrastructure across multiple environments. By isolating state files, they allow you to maintain a single, clean, and reusable codebase, adhering to the DRY (Don’t Repeat Yourself) principle. When combined with a robust variable strategy (like the environment map) and an automated CI/CD pipeline, workspaces provide a simple and effective solution for the dev/staging/prod workflow.
By understanding their strengths, and just as importantly, their limitations, you can effectively leverage Terraform workspaces to build a scalable, maintainable, and reliable infrastructure-as-code process. Thank you for reading the DevopsRoles page!
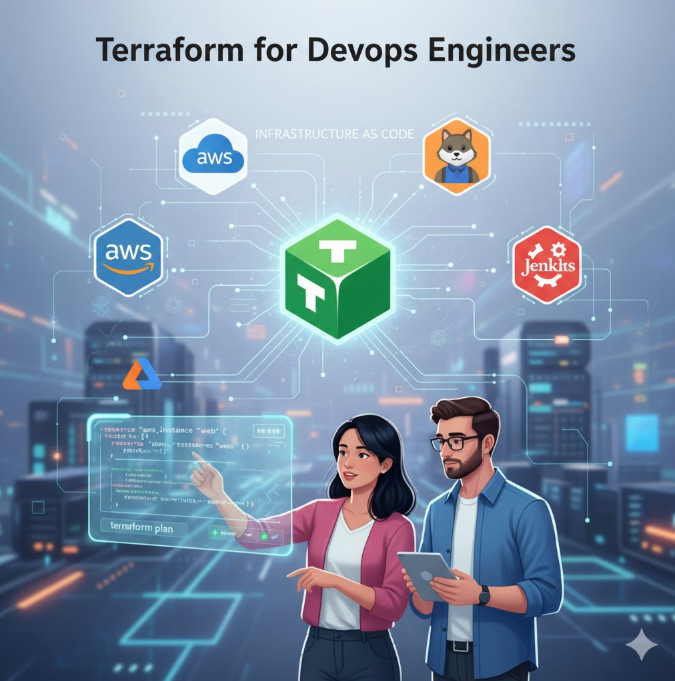
In the modern software delivery lifecycle, the line between “development” and “operations” has all but disappeared. This fusion, known as DevOps, demands tools that can manage infrastructure with the same precision, speed, and version control as application code. This is precisely the problem HashiCorp’s Terraform was built to solve. For any serious DevOps professional, mastering Terraform for DevOps practices is no longer optional; it’s a fundamental requirement for building scalable, reliable, and automated systems. This guide will take you from the core principles of Infrastructure as Code (IaC) to advanced, production-grade patterns for managing complex environments.
Why is Infrastructure as Code (IaC) a DevOps Pillar?
Before we dive into Terraform specifically, we must understand the “why” behind Infrastructure as Code. IaC is the practice of managing and provisioning computing infrastructure (like networks, virtual machines, load balancers, and connection topologies) through machine-readable definition files, rather than through physical hardware configuration or interactive configuration tools.
The “Before IaC” Chaos
Think back to the “old ways,” often dubbed “ClickOps.” A new service was needed, so an engineer would manually log into the cloud provider’s console, click through wizards to create a VM, configure a security group, set up a load balancer, and update DNS. This process was:
Slow: Manual provisioning takes hours or even days.
Error-Prone: Humans make mistakes. A single misclicked checkbox could lead to a security vulnerability or an outage.
Inconsistent: The “staging” environment, built by one engineer, would inevitably drift from the “production” environment, built by another. This “configuration drift” is a primary source of “it worked in dev!” bugs.
Opaque: There was no audit trail. Who changed that firewall rule? Why? When? The answer was often lost in a sea of console logs or support tickets.
The IaC Revolution: Speed, Consistency, and Accountability
IaC, and by extension Terraform, applies DevOps principles directly to infrastructure:
Version Control: Your infrastructure is defined in code (HCL for Terraform). This code lives in Git. You can now use pull requests to review changes, view a complete `git blame` history, and collaborate as a team.
Automation: What used to take hours of clicking now takes minutes with a single command: `terraform apply`. This is the engine of CI/CD for infrastructure.
Consistency & Idempotency: An IaC definition file is a single source of truth. The same file can be used to create identical development, staging, and production environments, eliminating configuration drift. Tools like Terraform are idempotent, meaning you can run the same script multiple times, and it will only make the changes necessary to reach the desired state, without destroying and recreating everything.
Reusability: You can write modular, reusable code to define common patterns, like a standard VPC setup or an auto-scaling application cluster, and share them across your organization.
What is Terraform and How Does It Work?
Terraform is an open-source Infrastructure as Code tool created by HashiCorp. It allows you to define and provide data center infrastructure using a declarative configuration language known as HashiCorp Configuration Language (HCL). It’s cloud-agnostic, meaning a single tool can manage infrastructure across all major providers (AWS, Azure, Google Cloud, Kubernetes, etc.) and even on-premises solutions.
The Core Components: HCL, State, and Providers
To use Terraform effectively, you must understand its three core components:
HashiCorp Configuration Language (HCL): This is the declarative, human-readable language you use to write your `.tf` configuration files. You don’t tell Terraform *how* to create a server; you simply declare *what* server you want.
Terraform Providers: These are the “plugins” that act as the glue between Terraform and the target API (e.g., AWS, Azure, GCP, Kubernetes, DataDog). When you declare an `aws_instance`, Terraform knows to talk to the AWS provider, which then makes the necessary API calls to AWS. You can find thousands of providers on the official Terraform Registry.
Terraform State: This is the most critical and often misunderstood component. Terraform must keep track of the infrastructure it manages. It does this by creating a `terraform.tfstate` file. This JSON file is a “map” between your configuration files and the real-world resources (like a VM ID or S3 bucket name). It’s how Terraform knows what it created, what it needs to update, and what it needs to destroy.
The Declarative Approach: “What” vs. “How”
Tools like Bash scripts or Ansible (in its default mode) are often procedural. You write a script that says, “Step 1: Create a VM. Step 2: Check if a security group exists. Step 3: If not, create it.”
Terraform is declarative. You write a file that says, “I want one VM with this AMI and this instance type. I want one security group with these rules.” You don’t care about the steps. You just define the desired end state. Terraform’s job is to look at the real world (via the state file) and your code, and figure out the most efficient *plan* to make the real world match your code.
The Core Terraform Workflow: Init, Plan, Apply, Destroy
The entire Terraform lifecycle revolves around four simple commands:
terraform init: Run this first in any new or checked-out directory. It initializes the backend (where the state file will be stored) and downloads the necessary providers (e.g., `aws`, `google`) defined in your code.
terraform plan: This is a “dry run.” Terraform compares your code to its state file and generates an execution plan. It will output exactly what it intends to do: `+ 1 resource to create, ~ 1 resource to update, – 0 resources to destroy`. This is the step you show your team in a pull request.
terraform apply: This command executes the plan generated by `terraform plan`. It will prompt you for a final “yes” before making any changes. This is the command that actually builds, modifies, or deletes your infrastructure.
terraform destroy: This command reads your state file and destroys all the infrastructure managed by that configuration. It’s powerful and perfect for tearing down temporary development or test environments.
The Critical Role of Terraform for DevOps Pipelines
This is where the true power of Terraform for DevOps shines. When you combine IaC with CI/CD pipelines (like Jenkins, GitLab CI, GitHub Actions), you unlock true end-to-end automation.
Bridging the Gap Between Dev and Ops
Traditionally, developers would write application code and “throw it over the wall” to operations, who would then be responsible for deploying it. This created friction, blame, and slow release cycles.
With Terraform, infrastructure is just another repository. A developer needing a new Redis cache for their feature can open a pull request against the Terraform repository, defining the cache as code. A DevOps or Ops engineer can review that PR, suggest changes (e.g., “let’s use a smaller instance size for dev”), and once approved, an automated pipeline can run `terraform apply` to provision it. The developer and operator are now collaborating in the same workflow, using the same tool: Git.
Enabling CI/CD for Infrastructure
Your application code has a CI/CD pipeline, so why doesn’t your infrastructure? With Terraform, it can. A typical infrastructure CI/CD pipeline might look like this:
Commit: A developer pushes a change (e.g., adding a new S3 bucket) to a feature branch.
Pull Request: A pull request is created.
CI (Continuous Integration): The pipeline automatically runs:
terraform init (to initialize)
terraform validate (to check HCL syntax)
terraform fmt -check (to check code formatting)
terraform plan -out=plan.tfplan (to generate the execution plan)
Review: A team member reviews the pull request *and* the attached plan file to see exactly what will change.
Apply (Continuous Deployment): Once the PR is merged to `main`, a merge pipeline triggers and runs:
terraform apply "plan.tfplan" (to apply the pre-approved plan)
This “Plan on PR, Apply on Merge” workflow is the gold standard for managing Terraform for DevOps at scale.
Managing Multi-Cloud and Hybrid-Cloud Environments
Few large organizations live in a single cloud. You might have your main applications on AWS, your data analytics on Google BigQuery, and your identity management on Azure AD. Terraform’s provider-based architecture makes this complex reality manageable. You can have a single Terraform configuration that provisions a Kubernetes cluster on GKE, configures a DNS record in AWS Route 53, and creates a user group in Azure AD, all within the same `terraform apply` command. This unified workflow is impossible with cloud-native tools like CloudFormation or ARM templates.
Practical Guide: Getting Started with Terraform
Let’s move from theory to practice. You’ll need the Terraform CLI installed and an AWS account configured with credentials.
Prerequisite: Installation
Terraform is distributed as a single binary. Simply download it from the official website and place it in your system’s `PATH`.
Example 1: Spinning Up an AWS EC2 Instance
Create a directory and add a file named `main.tf`.
# 1. Configure the AWS Provider
terraform {
  required_providers {
    aws = {
      source  = "hashicorp/aws"
      version = "~> 5.0"
    }
  }
}

provider "aws" {
  region = "us-east-1"
}

# 2. Find the latest Ubuntu AMI
data "aws_ami" "ubuntu" {
  most_recent = true

  filter {
    name   = "name"
    values = ["ubuntu/images/hvm-ssd/ubuntu-focal-20.04-amd64-server-*"]
  }

  filter {
    name   = "virtualization-type"
    values = ["hvm"]
  }

  owners = ["099720109477"] # Canonical's AWS account ID
}

# 3. Define a security group to allow SSH
resource "aws_security_group" "allow_ssh" {
  name        = "allow-ssh-example"
  description = "Allow SSH inbound traffic"

  ingress {
    from_port   = 22
    to_port     = 22
    protocol    = "tcp"
    cidr_blocks = ["0.0.0.0/0"] # WARNING: In production, lock this to your IP!
  }

  egress {
    from_port   = 0
    to_port     = 0
    protocol    = "-1"
    cidr_blocks = ["0.0.0.0/0"]
  }

  tags = {
    Name = "allow_ssh_example"
  }
}

# 4. Define the EC2 Instance
resource "aws_instance" "web" {
  ami           = data.aws_ami.ubuntu.id
  instance_type = "t2.micro"
  vpc_security_group_ids = [aws_security_group.allow_ssh.id]

  tags = {
    Name = "HelloWorld-Instance"
  }
}

# 5. Output the public IP address
output "instance_public_ip" {
  description = "Public IP address of the EC2 instance"
  value       = aws_instance.web.public_ip
}
Now, run the workflow:
# 1. Initialize and download the AWS provider
$ terraform init

# 2. See what will be created
$ terraform plan

# 3. Create the resources
$ terraform apply

# 4. When you're done, clean up
$ terraform destroy
In just a few minutes, you’ve provisioned a server, a security group, and an AMI data lookup, all in a repeatable, version-controlled way.
Example 2: Using Variables for Reusability
Hardcoding values like "t2.micro" is bad practice. Let’s parameterize our code. Create a new file, `variables.tf`:
variable "instance_type" {
  description = "The EC2 instance type to use"
  type        = string
  default     = "t2.micro"
}

variable "aws_region" {
  description = "The AWS region to deploy resources in"
  type        = string
  default     = "us-east-1"
}

variable "environment" {
  description = "The deployment environment (e.g., dev, staging, prod)"
  type        = string
  default     = "dev"
}
Now, modify `main.tf` to use these variables:
provider "aws" {
  region = var.aws_region
}

resource "aws_instance" "web" {
  ami           = data.aws_ami.ubuntu.id
  instance_type = var.instance_type # Use the variable
  vpc_security_group_ids = [aws_security_group.allow_ssh.id]

  tags = {
    Name        = "HelloWorld-Instance-${var.environment}" # Use the variable
    Environment = var.environment
  }
}
Now you can override these defaults when you run `apply`:
# Deploy a larger instance for staging
$ terraform apply -var="instance_type=t2.medium" -var="environment=staging"
Advanced Concepts for Seasoned Engineers
Managing a single server is easy. Managing a global production environment used by dozens of engineers is hard. This is where advanced Terraform for DevOps practices become critical.
Understanding Terraform State Management
By default, Terraform saves its state in a local file called `terraform.tfstate`. This is fine for a solo developer. It is disastrous for a team.
If you and a colleague both run `terraform apply` from your laptops, you will have two different state files and will instantly start overwriting each other’s changes.
If you lose your laptop, you lose your state file. You have just lost the *only* record of the infrastructure Terraform manages. Your infrastructure is now “orphaned.”
Why Remote State is Non-Negotiable
You must use remote state backends. This configures Terraform to store its state file in a remote, shared location, like an AWS S3 bucket, Azure Storage Account, or HashiCorp Consul.
State Locking with Backends (like S3 and DynamoDB)
A good backend provides state locking. This prevents two people from running `terraform apply` at the same time. When you run `apply`, Terraform will first place a “lock” in the backend (e.g., an item in a DynamoDB table). If your colleague tries to run `apply` at the same time, their command will fail, stating that the state is locked by you. This prevents race conditions and state corruption.
Here’s how to configure an S3 backend with DynamoDB locking:
# In your main.tf or a new backend.tf
terraform {
  backend "s3" {
    bucket         = "my-company-terraform-state-bucket"
    key            = "global/networking/terraform.tfstate"
    region         = "us-east-1"
    dynamodb_table = "my-company-terraform-state-lock"
    encrypt        = true
  }
}
You must create the S3 bucket and DynamoDB table (with a `LockID` primary key) *before* you can run `terraform init` to migrate your state.
Building Reusable Infrastructure with Terraform Modules
As your configurations grow, you’ll find yourself copying and pasting the same 30 lines of code to define a “standard web server” or “standard S3 bucket.” This is a violation of the DRY (Don’t Repeat Yourself) principle. The solution is Terraform Modules.
What is a Module?
A module is just a self-contained collection of `.tf` files in a directory. Your main configuration (called the “root module”) can then *call* other modules and pass in variables.
Example: Creating a Reusable Web Server Module
Let’s create a module to encapsulate our EC2 instance and security group. Your directory structure will look like this:
variable "instance_name" { type = string }
variable "instance_type" { type = string }
variable "ami_id"        { type = string }
`modules/aws-web-server/outputs.tf`:**
output "instance_id" {
  value = aws_instance.web.id
}
output "public_ip" {
  value = aws_instance.web.public_ip
}
Now, your root `main.tf` becomes incredibly simple:
module "dev_server" {
  source = "./modules/aws-web-server"

  instance_name = "dev-web-01"
  instance_type = "t2.micro"
  ami_id        = "ami-0abcdef123456" # Pass in the AMI ID
}

module "prod_server" {
  source = "./modules/aws-web-server"

  instance_name = "prod-web-01"
  instance_type = "t3.large"
  ami_id        = "ami-0abcdef123456"
}

output "prod_server_ip" {
  value = module.prod_server.public_ip
}
You’ve now defined your “web server” pattern once and can stamp it out many times with different variables. You can even publish these modules to a private Terraform Registry or a Git repository for your whole company to use.
Terraform vs. Other Tools: A DevOps Perspective
A common question is how Terraform fits in with other tools. This is a critical distinction for a DevOps engineer.
Terraform vs. Ansible
This is the most common comparison, and the answer is: use both. They solve different problems.
Terraform (Orchestration/Provisioning): Terraform is for building the house. It provisions the VMs, the load balancers, the VPCs, and the database. It is declarative and excels at managing the lifecycle of *infrastructure*.
Ansible (Configuration Management): Ansible is for furnishing the house. It configures the software *inside* the VM. It installs `nginx`, configures `httpd.conf`, and ensures services are running. It is (mostly) procedural.
A common pattern is to use Terraform to provision a “blank” EC2 instance and output its IP address. Then, a CI/CD pipeline triggers an Ansible playbook to configure that new IP.
Terraform vs. CloudFormation vs. ARM Templates
CloudFormation (AWS) and ARM (Azure) are cloud-native IaC tools.
Pros: They are tightly integrated with their respective clouds and often get “day one” support for new services.
Cons: They are vendor-locked. A CloudFormation template cannot provision a GKE cluster. Their syntax (JSON/YAML) can be extremely verbose and difficult to manage compared to HCL.
The DevOps Choice: Most teams choose Terraform for its cloud-agnostic nature, simpler syntax, and powerful community. It provides a single “language” for infrastructure, regardless of where it lives.
Best Practices for Using Terraform in a Team Environment
Finally, let’s cover some pro-tips for scaling Terraform for DevOps teams.
Structure Your Projects Logically: Don’t put your entire company’s infrastructure in one giant state file. Break it down. Have separate state files (and thus, separate directories) for different environments (dev, staging, prod) and different logical components (e.g., `networking`, `app-services`, `data-stores`).
Integrate with CI/CD: We covered this, but it’s the most important practice. No one should ever run `terraform apply` from their laptop against a production environment. All changes must go through a PR and an automated pipeline.
Use Terragrunt for DRY Configurations: Terragrunt is a thin wrapper for Terraform that helps keep your backend configuration DRY and manage multiple modules. It’s an advanced tool worth investigating once your module count explodes.
Implement Policy as Code (PaC): How do you stop a junior engineer from accidentally provisioning a `p3.16xlarge` (a $25/hour) GPU instance in dev? You use Policy as Code with tools like HashiCorp Sentinel or Open Policy Agent (OPA). These integrate with Terraform to enforce rules like “No instance larger than `t3.medium` can be created in the ‘dev’ environment.”
Here’s a quick example of a `.gitlab-ci.yml` file for a “Plan on MR, Apply on Merge” pipeline:
A: No. While its most popular use is for AWS, Azure, and GCP, Terraform has providers for thousands of services. You can manage Kubernetes, DataDog, PagerDuty, Cloudflare, GitHub, and even on-premises hardware like vSphere and F5 BIG-IP.
Q: What is the difference between terraform plan and terraform apply?
A:terraform plan is a non-destructive dry run. It shows you *what* Terraform *intends* to do. terraform apply is the command that *executes* that plan and makes the actual changes to your infrastructure. Always review your plan before applying!
Q: How do I handle secrets in Terraform?
A:Never hardcode secrets (like database passwords or API keys) in your .tf files or .tfvars files. These get committed to Git. Instead, use a secrets manager. The best practice is to have Terraform fetch secrets at *runtime* from a tool like HashiCorp Vault, AWS Secrets Manager, or Azure Key Vault using their data sources.
Q: Can I import existing infrastructure into Terraform?
A: Yes. If you have “ClickOps” infrastructure, you don’t have to delete it. You can write the Terraform code to match it, and then use the terraform import command (e.g., terraform import aws_instance.web i-1234567890abcdef0) to “import” that existing resource into your state file. This is a manual but necessary process for adopting IaC.
Conclusion
For the modern DevOps engineer, infrastructure is no longer a static, manually-managed black box. It is a dynamic, fluid, and critical component of your application, and it deserves the same rigor and automation as your application code. Terraform for DevOps provides the common language and powerful tooling to make this a reality. By embracing the declarative IaC workflow, leveraging remote state and modules, and integrating infrastructure changes directly into your CI/CD pipelines, you can build, deploy, and manage systems with a level of speed, reliability, and collaboration that was unthinkable just a decade ago. The journey starts with a single terraform init, and scales to entire data centers defined in code. Mastering Terraform for DevOps is investing in a foundational skill for the future of cloud engineering.
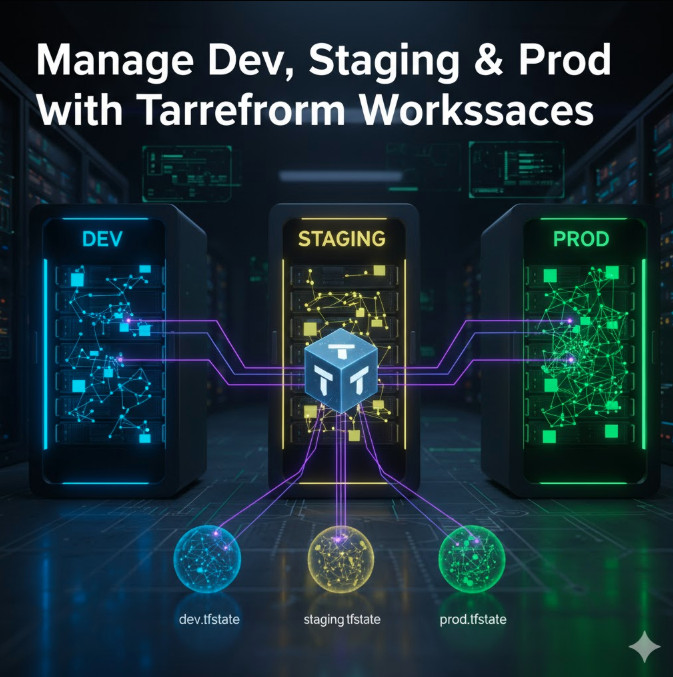
In the world of modern infrastructure, managing multiple environments is a fundamental challenge. Every development lifecycle needs at least a development (dev) environment for building, a staging (or QA) environment for testing, and a production (prod) environment for serving users. Managing these environments manually is a recipe for configuration drift, errors, and significant downtime. This is where Infrastructure as Code (IaC), and specifically HashiCorp’s Terraform, becomes indispensable. But even with Terraform, how do you manage the state of three distinct, long-running environments without duplicating your entire codebase? The answer is built directly into the tool: Terraform Workspaces.
This comprehensive guide will explore exactly what Terraform Workspaces are, why they are a powerful solution for environment management, and how to implement them in a practical, real-world scenario to handle your dev, staging, and prod deployments from a single, unified codebase.
What Are Terraform Workspaces?
At their core, Terraform Workspaces are named instances of a single Terraform configuration. Each workspace maintains its own separate state file. This allows you to use the exact same set of .tf configuration files to manage multiple, distinct sets of infrastructure resources.
When you run terraform apply, Terraform only considers the resources defined in the state file for the *currently selected* workspace. This isolation is the key feature. If you’re in the dev workspace, you can create, modify, or destroy resources without affecting any of the resources managed by the prod workspace, even though both are defined by the same main.tf file.
Workspaces vs. Git Branches: A Common Misconception
A critical distinction to make early on is the difference between Terraform Workspaces and Git branches. They solve two completely different problems.
Git Branches are for managing changes to your code. You use a branch (e.g., feature-x) to develop a new part of your infrastructure. You test it, and once it’s approved, you merge it into your main branch.
Terraform Workspaces are for managing deployments of your code. You use your main branch (which contains your stable, approved code) and deploy it to your dev workspace. Once validated, you deploy the *exact same commit* to your staging workspace, and finally to your prod workspace.
Do not use Git branches to manage environments (e.g., a dev branch, a prod branch). This leads to configuration drift, nightmarish merges, and violates the core IaC principle of having a single source of truth for your infrastructure’s definition.
How Workspaces Manage State
When you initialize a Terraform configuration that uses a local backend (the default), Terraform creates a terraform.tfstate file. As soon as you create a new workspace, Terraform creates a new directory called terraform.tfstate.d. Inside this directory, it will create a separate state file for each workspace you have.
For example, if you have dev, staging, and prod workspaces, your local directory might look like this:
This is why switching workspaces is so effective. Running terraform workspace select prod simply tells Terraform to use the prod/terraform.tfstate file for all subsequent plan and apply operations. When using a remote backend like AWS S3 (which is a strong best practice), this behavior is mirrored. Terraform will store the state files in a path that includes the workspace name, ensuring complete isolation.
Why Use Terraform Workspaces for Environment Management?
Using Terraform Workspaces offers several significant advantages for managing your infrastructure lifecycle, especially when compared to the alternatives like copying your entire project for each environment.
State Isolation: This is the primary benefit. A catastrophic error in your dev environment (like running terraform destroy by accident) will have zero impact on your prod environment, as they have entirely separate state files.
Code Reusability (DRY Principle): You maintain one set of .tf files. You don’t repeat yourself. If you need to add a new monitoring rule or a security group, you add it once to your configuration, and then roll it out to each environment by selecting its workspace and applying the change.
Simplified Configuration: Workspaces allow you to parameterize your environments. Your prod environment might need a large t3.large EC2 instance, while your dev environment only needs a t3.micro. Workspaces provide clean mechanisms to inject these different variable values into the same configuration.
Clean CI/CD Integration: In an automation pipeline, it’s trivial to select the correct workspace based on the Git branch or a pipeline trigger. A deployment to the main branch might trigger a terraform workspace select prod and apply, while a merge to develop triggers a terraform workspace select dev.
Practical Guide: Setting Up Dev, Staging & Prod Environments
Let’s walk through a practical example. We’ll define a simple AWS EC2 instance and see how to deploy different variations of it to dev, staging, and prod.
Step 1: Initializing Your Project and Backend
First, create a main.tf file. It’s a critical best practice to use a remote backend from the very beginning. This ensures your state is stored securely, durably, and can be accessed by your team and CI/CD pipelines. We’ll use AWS S3.
# main.tf

terraform {
  required_providers {
    aws = {
      source  = "hashicorp/aws"
      version = "~> 5.0"
    }
  }

  # Best Practice: Use a remote backend
  backend "s3" {
    bucket         = "my-terraform-state-bucket-unique"
    key            = "global/ec2/terraform.tfstate"
    region         = "us-east-1"
    dynamodb_table = "terraform-lock-table"
    encrypt        = true
  }
}

provider "aws" {
  region = "us-east-1"
}

# We will define variables later
variable "instance_type" {
  description = "The EC2 instance type."
  type        = string
}

variable "ami_id" {
  description = "The AMI to use for the instance."
  type        = string
}

variable "tags" {
  description = "A map of tags to apply to the resources."
  type        = map(string)
  default     = {}
}

resource "aws_instance" "web_server" {
  ami           = var.ami_id
  instance_type = var.instance_type

  tags = merge(
    {
      "Name"        = "web-server-${terraform.workspace}"
      "Environment" = terraform.workspace
    },
    var.tags
  )
}
Notice the use of terraform.workspace in the tags. This is a built-in variable that always contains the name of the currently selected workspace. It’s incredibly useful for naming and tagging resources to identify them easily.
Run terraform init to initialize the backend.
Step 2: Creating Your Workspaces
By default, you start in a workspace named default. Let’s create our three target environments.
# Create the new workspaces
$ terraform workspace new dev
Created and switched to workspace "dev"

$ terraform workspace new staging
Created and switched to workspace "staging"

$ terraform workspace new prod
Created and switched to workspace "prod"

# Let's list them to check
$ terraform workspace list
  default
  dev
  staging
* prod
  (The * indicates the currently selected workspace)

# Switch back to dev for our first deployment
$ terraform workspace select dev
Switched to workspace "dev"
Now, if you check your S3 bucket, you’ll see that Terraform has automatically created paths for your new workspaces under the key you defined. This is how it isolates the state files.
Step 3: Structuring Your Configuration with Variables
Our environments are not identical. Production needs a robust AMI and a larger instance, while dev can use a basic, cheap one. How do we supply different variables?
There are two primary methods: .tfvars files (recommended for clarity) and locals maps (good for simpler configs).
Step 4: Using Environment-Specific .tfvars Files (Recommended)
This is the cleanest and most scalable approach. We create a separate variable file for each environment.
# prod.tfvars
instance_type = "t3.large"
ami_id        = "ami-0a8b421e306b0cfa4" # A custom, hardened production AMI
tags = {
  "CostCenter" = "production-web"
}
Now, your deployment workflow in Step 6 will use these files explicitly.
Step 5: Using the terraform.workspace Variable (The “Map” Method)
An alternative method is to define all environment configurations inside your .tf files using a locals block and the terraform.workspace variable as a map key. This keeps the configuration self-contained but can become unwieldy for many variables.
You would create a locals.tf file:
# locals.tf

locals {
  # A map of environment-specific configurations
  env_config = {
    dev = {
      instance_type = "t3.micro"
      ami_id        = "ami-0c55b159cbfafe1f0"
    }
    staging = {
      instance_type = "t3.small"
      ami_id        = "ami-0c55b159cbfafe1f0"
    }
    prod = {
      instance_type = "t3.large"
      ami_id        = "ami-0a8b421e306b0cfa4"
    }
    # Failsafe for 'default' or other workspaces
    default = {
      instance_type = "t3.nano"
      ami_id        = "ami-0c55b159cbfafe1f0"
    }
  }

  # Dynamically select the config based on the current workspace
  # Use lookup() with a default value to prevent errors
  current_config = lookup(
    local.env_config,
    terraform.workspace,
    local.env_config.default
  )
}
Then, you would modify your main.tf to use these locals instead of var:
# main.tf (Modified for 'locals' method)

resource "aws_instance" "web_server" {
  # Use the looked-up local values
  ami           = local.current_config.ami_id
  instance_type = local.current_config.instance_type

  tags = {
    "Name"        = "web-server-${terraform.workspace}"
    "Environment" = terraform.workspace
  }
}
While this works, we will proceed with the .tfvars method (Step 4) as it’s generally considered a cleaner pattern for complex projects.
Step 6: Deploying to a Specific Environment
Now, let’s tie it all together using the .tfvars method. The workflow is simple: Select Workspace, then Plan/Apply with its .tfvars file.
Deploying to Dev:
# 1. Make sure you are in the 'dev' workspace
$ terraform workspace select dev
Switched to workspace "dev"

# 2. Plan the deployment, specifying the 'dev' variables
$ terraform plan -var-file="dev.tfvars"
...
Plan: 1 to add, 0 to change, 0 to destroy.
  + resource "aws_instance" "web_server" {
      + ami           = "ami-0c55b159cbfafe1f0"
      + instance_type = "t3.micro"
      + tags          = {
          + "CostCenter"  = "development"
          + "Environment" = "dev"
          + "Name"        = "web-server-dev"
        }
      ...
    }

# 3. Apply the plan
$ terraform apply -var-file="dev.tfvars" -auto-approve
You now have a t3.micro server running for your dev environment. Its state is tracked in the dev state file.
Deploying to Prod:
Now, let’s deploy production. Note that we don’t change any code. We just change our workspace and our variable file.
# 1. Select the 'prod' workspace
$ terraform workspace select prod
Switched to workspace "prod"

# 2. Plan the deployment, specifying the 'prod' variables
$ terraform plan -var-file="prod.tfvars"
...
Plan: 1 to add, 0 to change, 0 to destroy.
  + resource "aws_instance" "web_server" {
      + ami           = "ami-0a8b421e306b0cfa4"
      + instance_type = "t3.large"
      + tags          = {
          + "CostCenter"  = "production-web"
          + "Environment" = "prod"
          + "Name"        = "web-server-prod"
        }
      ...
    }

# 3. Apply the plan
$ terraform apply -var-file="prod.tfvars" -auto-approve
You now have a completely separatet3.large server for production, with its state tracked in the prod state file. Destroying the dev instance will have no effect on this new server.
Terraform Workspaces: Best Practices and Common Pitfalls
While powerful, Terraform Workspaces can be misused. Here are some best practices and common pitfalls to avoid.
Best Practice: Use a Remote Backend
This was mentioned in the tutorial but cannot be overstated. Using the local backend (the default) with workspaces is only suitable for solo development. For any team, you must use a remote backend like AWS S3, Azure Blob Storage, or Terraform Cloud. This provides state locking (so two people don’t run apply at the same time), security, and a single source of truth for your state.
Best Practice: Use .tfvars Files for Clarity
As demonstrated, using dev.tfvars, prod.tfvars, etc., is a very clear and explicit way to manage environment variables. It separates the “what” (the main.tf) from the “how” (the environment-specific values). In a CI/CD pipeline, you can easily pass the correct file: terraform apply -var-file="$WORKSPACE_NAME.tfvars".
Pitfall: Avoid Using Workspaces for Different *Projects*
A workspace is not a new project. It’s a new *instance* of the *same* project. If your “prod” environment needs a database, a cache, and a web server, your “dev” environment should probably have them too (even if they are smaller). If you find yourself writing a lot of logic like count = terraform.workspace == "prod" ? 1 : 0 to *conditionally create resources* only in certain environments, you may have a problem. This indicates your environments have different “shapes.” In this case, you might be better served by:
Using separate Terraform configurations (projects) entirely.
Using feature flags in your .tfvars files (e.g., create_database = true).
Pitfall: The default Workspace Trap
Everyone starts in the default workspace. It’s often a good idea to avoid using it for any real environment, as its name is ambiguous. Some teams use it as a “scratch” or “admin” workspace. You can even rename it: terraform workspace rename default admin. A cleaner approach is to create your named environments (dev, prod) immediately and never use default at all.
Alternatives to Terraform Workspaces
Terraform Workspaces are a “built-in” solution, but not the only one. The main alternative is a directory-based structure, often orchestrated with a tool like Terragrunt.
1. Directory-Based Structure (Terragrunt)
This is a very popular and robust pattern. Instead of using workspaces, you create a directory for each environment. Each directory has its own terraform.tfvars file and often a small main.tf that calls a shared module.
In this pattern, each environment is its own distinct Terraform project (with its own state file, managed by its own backend configuration). Terragrunt is a thin wrapper that excels at managing this structure, letting you define backend and variable configurations in a DRY way.
When to Choose Workspaces: Workspaces are fantastic for small-to-medium projects where all environments have an identical “shape” (i.e., they deploy the same set of resources, just with different variables).
When to Choose Terragrunt/Directories: This pattern is often preferred for large, complex organizations where environments may have significant differences, or where you want to break up your infrastructure into many small, independently-managed state files.
Frequently Asked Questions
What is the difference between Terraform Workspaces and modules?
They are completely different concepts.
Modules are for creating reusable code. You write a module once (e.g., a module to create a secure S3 bucket) and then “call” that module many times, even within the same configuration.
Workspaces are for managing separate state files for different deployments of the same configuration.
You will almost always use modules *within* a configuration that is also managed by workspaces.
How do I delete a Terraform Workspace?
You can delete a workspace with terraform workspace delete <name>. However, Terraform will not let you delete a workspace that still has resources managed by it. You must run terraform destroy in that workspace first. You also cannot delete the default workspace.
Are Terraform Workspaces secure for production?
Yes, absolutely. The security of your environments is not determined by the workspace feature itself, but by your operational practices. Security is achieved by:
Using a remote backend with encryption and strict access policies (e.g., S3 Bucket Policies and IAM).
Using state locking (e.g., DynamoDB).
Managing sensitive variables (like database passwords) using a tool like HashiCorp Vault or your CI/CD system’s secret manager, not by committing them in .tfvars files.
Using separate cloud accounts or projects (e.g., different AWS accounts for dev and prod) and separate provider credentials for each workspace, which can be passed in during the apply step.
Can I use Terraform Workspaces with Terraform Cloud?
Yes. In fact, Terraform Cloud is built entirely around the concept of workspaces. In Terraform Cloud, a “workspace” is even more powerful: it’s a dedicated environment that holds your state file, your variables (including sensitive ones), your run history, and your access controls. This is the natural evolution of the open-source workspace concept.
Conclusion
Terraform Workspaces are a powerful, built-in feature that directly addresses the common challenge of managing dev, staging, and production environments. By providing clean state file isolation, they allow you to maintain a single, DRY (Don’t Repeat Yourself) codebase for your infrastructure while safely managing multiple, independent deployments. When combined with a remote backend and a clear variable strategy (like .tfvars files), Terraform Workspaces provide a scalable and professional workflow for any DevOps team looking to master their Infrastructure as Code lifecycle. Thank you for reading the DevopsRoles page!
Deploying a modern web application requires more than just writing code. For a robust, scalable, and maintainable system, the infrastructure that runs it is just as critical as the application logic itself. Django, with its “batteries-included” philosophy, is a powerhouse for building complex web apps. Amazon Web Services (AWS) provides an unparalleled suite of cloud services to host them. But how do you bridge the gap? How do you provision, manage, and scale this infrastructure reliably? The answer is Infrastructure as Code (IaC), and the leading tool for the job is Terraform.
This comprehensive guide will walk you through the end-to-end process to Deploy Django AWS Terraform, moving from a local development setup to a production-grade, scalable architecture. We won’t just scratch the surface; we’ll dive deep into creating a Virtual Private Cloud (VPC), provisioning a managed database with RDS, storing static files in S3, and running our containerized Django application on a serverless compute engine like AWS Fargate with ECS. By the end, you’ll have a repeatable, version-controlled, and automated framework for your Django deployments.
Why Use Terraform for Your Django AWS Deployment?
Before we start writing .tf files, it’s crucial to understand why this approach is superior to manual configuration via the AWS console, often called “click-ops.”
Infrastructure as Code (IaC) Explained
Infrastructure as Code is the practice of managing and provisioning computing infrastructure (like networks, virtual machines, load balancers, and databases) through machine-readable definition files, rather than through physical hardware configuration or interactive configuration tools. Your entire AWS environment—from the smallest security group rule to the largest database cluster—is defined in code.
Terraform, by HashiCorp, is an open-source IaC tool that specializes in this. It uses a declarative configuration language called HCL (HashiCorp Configuration Language). You simply declare the desired state of your infrastructure, and Terraform figures out how to get there. It creates an execution plan, shows you what it will create, modify, or destroy, and then executes it upon your approval.
Benefits: Repeatability, Scalability, and Version Control
Repeatability: Need to spin up a new staging environment that perfectly mirrors production? With a manual setup, this is a checklist-driven, error-prone nightmare. With Terraform, it’s as simple as running terraform apply -var-file="staging.tfvars". You get an identical environment every single time.
Version Control: Your infrastructure code lives in Git, just like your application code. You can review changes through pull requests, track a full history of who changed what and when, and easily roll back to a previous known-good state if a change causes problems.
Scalability: A scalable Django architecture isn’t just about one server. It’s a complex system of load balancers, auto-scaling groups, and replicated database read-replicas. Defining this in code makes it trivial to adjust parameters (e.g., “scale from 2 to 10 web servers”) and apply the change consistently.
Visibility:terraform plan provides a “dry run” that tells you exactly what changes will be made before you commit. This predictive power is invaluable for preventing costly mistakes in a live production environment.
Prerequisites for this Tutorial
This guide assumes you have a foundational understanding of Django, Docker, and basic AWS concepts. You will need the following tools installed and configured:
AWS CLI: Install and configure the AWS CLI with credentials that have sufficient permissions (ideally, an IAM user with programmatic access).
Docker: We will containerize our Django app. Install Docker Desktop.
Python & Django: A working Django project. We’ll focus on the infrastructure, but we’ll cover the key settings.py modifications needed.
Step 1: Planning Your Scalable AWS Architecture for Django
A “scalable” architecture is one that can handle growth. This means decoupling our components. A monolithic “Django on a single EC2 instance” setup is simple, but it’s a single point of failure and a scaling bottleneck. Our target architecture will consist of several moving parts.
The Core Components:
VPC (Virtual Private Cloud): Our own isolated network within AWS.
Subnets: We’ll use public subnets for internet-facing resources (like our Load Balancer) and private subnets for our application and database, enhancing security.
Application Load Balancer (ALB): Distributes incoming web traffic across our Django application instances.
ECS (Elastic Container Service) with Fargate: This is our compute layer. Instead of managing EC2 virtual machines, we’ll use Fargate, a serverless compute engine for containers. We just provide a Docker image, and AWS handles running and scaling the containers.
RDS (Relational Database Service): A managed PostgreSQL database. AWS handles patching, backups, and replication, allowing us to focus on our application.
S3 (Simple Storage Service): Our Django app won’t serve static (CSS/JS) or media (user-uploaded) files. We’ll offload this to S3 for better performance and scalability.
ECR (Elastic Container Registry): A private Docker registry where we’ll store our Django application’s Docker image.
Step 2: Structuring Your Terraform Project
Organization is key. A flat file of 1,000 lines is unmanageable. We’ll use a simple, scalable structure:
variables.tf: Declares input variables like aws_region, db_username, or instance_type. This makes our configuration reusable.
outputs.tf: Defines outputs from our infrastructure, like the database endpoint or the load balancer’s URL.
terraform.tfvars: Where we assign *values* to our variables. This file should be added to .gitignore as it will contain secrets like database passwords.
Step 3: Writing the Terraform Configuration
Let’s start building our infrastructure. We’ll add these blocks to main.tf and variables.tf.
Provider and Backend Configuration
First, we tell Terraform we’re using the AWS provider and specify a version. We also configure a backend, which is where Terraform stores its “state file” (a JSON file that maps your config to real-world resources). Using an S3 backend is highly recommended for any team project, as it provides locking and shared state.
In main.tf:
terraform {
  required_providers {
    aws = {
      source  = "hashicorp/aws"
      version = "~> 5.0"
    }
  }

  # Configuration for a remote S3 backend
  # You must create this S3 bucket and DynamoDB table *before* running init
  # For this tutorial, we will use the default local backend.
  # backend "s3" {
  #   bucket         = "my-terraform-state-bucket-unique-name"
  #   key            = "django-aws/terraform.tfstate"
  #   region         = "us-east-1"
  #   dynamodb_table = "terraform-lock-table"
  # }
}

provider "aws" {
  region = var.aws_region
}
In variables.tf:
variable "aws_region" {
  description = "The AWS region to deploy infrastructure in."
  type        = string
  default     = "us-east-1"
}

variable "project_name" {
  description = "A name for the project, used to tag resources."
  type        = string
  default     = "django-app"
}

variable "vpc_cidr" {
  description = "The CIDR block for the VPC."
  type        = string
  default     = "10.0.0.0/16"
}
Networking: Defining the VPC
We’ll create a VPC with two public and two private subnets across two Availability Zones (AZs) for high availability.
This block sets up a secure, production-grade network. Public subnets can reach the internet directly. Private subnets can reach the internet (e.g., to pull dependencies) via the NAT Gateway, but the internet cannot initiate connections to them.
Security: Security Groups
Security Groups act as virtual firewalls. We need one for our load balancer (allowing web traffic) and one for our database (allowing traffic only from our app).
In main.tf:
# Security group for the Application Load Balancer
resource "aws_security_group" "lb_sg" {
  name        = "${var.project_name}-lb-sg"
  description = "Allow HTTP/HTTPS traffic"
  vpc_id      = aws_vpc.main.id

  ingress {
    from_port   = 80
    to_port     = 80
    protocol    = "tcp"
    cidr_blocks = ["0.0.0.0/0"]
  }

  ingress {
    from_port   = 443
    to_port     = 443
    protocol    = "tcp"
    cidr_blocks = ["0.0.0.0/0"]
  }

  egress {
    from_port   = 0
    to_port     = 0
    protocol    = "-1"
    cidr_blocks = ["0.0.0.0/0"]
  }
}

# Security group for our Django application (ECS Tasks)
resource "aws_security_group" "app_sg" {
  name        = "${var.project_name}-app-sg"
  description = "Allow traffic from LB and self"
  vpc_id      = aws_vpc.main.id

  # Allow all outbound
  egress {
    from_port   = 0
    to_port     = 0
    protocol    = "-1"
    cidr_blocks = ["0.0.0.0/0"]
  }

  tags = {
    Name = "${var.project_name}-app-sg"
  }
}

# Security group for our RDS database
resource "aws_security_group" "db_sg" {
  name        = "${var.project_name}-db-sg"
  description = "Allow PostgreSQL traffic from app"
  vpc_id      = aws_vpc.main.id

  # Allow inbound PostgreSQL traffic from the app security group
  ingress {
    from_port       = 5432
    to_port         = 5432
    protocol        = "tcp"
    security_groups = [aws_security_group.app_sg.id] # IMPORTANT!
  }

  # Allow all outbound (for patches, etc.)
  egress {
    from_port   = 0
    to_port     = 0
    protocol    = "-1"
    cidr_blocks = ["0.0.0.0/0"]
  }

  tags = {
    Name = "${var.project_name}-db-sg"
  }
}

# --- Rule to allow LB to talk to App ---
# We add this rule *after* defining both SGs
resource "aws_security_group_rule" "lb_to_app" {
  type                     = "ingress"
  from_port                = 8000 # Assuming Django runs on port 8000
  to_port                  = 8000
  protocol                 = "tcp"
  security_group_id        = aws_security_group.app_sg.id
  source_security_group_id = aws_security_group.lb_sg.id
}
Database: Provisioning the RDS Instance
We’ll create a PostgreSQL instance. To do this securely, we first need an “RDS Subnet Group” to tell RDS which private subnets it can live in. We also must pass the username and password securely from variables.
In variables.tf (add these):
variable "db_name" {
  description = "Name for the RDS database."
  type        = string
  default     = "djangodb"
}

variable "db_username" {
  description = "Username for the RDS database."
  type        = string
  sensitive   = true # Hides value in logs
}

variable "db_password" {
  description = "Password for the RDS database."
  type        = string
  sensitive   = true # Hides value in logs
}
# --- RDS Database ---

# Subnet group for RDS
resource "aws_db_subnet_group" "default" {
  name       = "${var.project_name}-db-subnet-group"
  subnet_ids = [for subnet in aws_subnet.private : subnet.id]

  tags = {
    Name = "${var.project_name}-db-subnet-group"
  }
}

# The RDS PostgreSQL Instance
resource "aws_db_instance" "default" {
  identifier           = "${var.project_name}-db"
  engine               = "postgres"
  engine_version       = "15.3"
  instance_class       = "db.t3.micro" # Good for dev/staging, use larger for prod
  allocated_storage    = 20

  db_name              = var.db_name
  username             = var.db_username
  password             = var.db_password

  db_subnet_group_name = aws_db_subnet_group.default.name
  vpc_security_group_ids = [aws_security_group.db_sg.id]

  multi_az             = false # Set to true for production HA
  skip_final_snapshot  = true  # Set to false for production
  publicly_accessible  = false # IMPORTANT! Keep database private
}
Storage: Creating the S3 Bucket for Static Files
This S3 bucket will hold our Django collectstatic output and user-uploaded media files.
# --- S3 Bucket for Static and Media Files ---
resource "aws_s3_bucket" "static" {
  # Bucket names must be globally unique
  bucket = "${var.project_name}-static-media-${random_id.bucket_suffix.hex}"

  tags = {
    Name = "${var.project_name}-static-media-bucket"
  }
}

# Need a random suffix to ensure bucket name is unique
resource "random_id" "bucket_suffix" {
  byte_length = 8
}

# Block all public access by default
resource "aws_s3_bucket_public_access_block" "static" {
  bucket = aws_s3_bucket.static.id

  block_public_acls       = true
  block_public_policy     = true
  ignore_public_acls      = true
  restrict_public_buckets = true
}

# We will serve files via CloudFront (or signed URLs), not by making the bucket public.
# For simplicity in this guide, we'll configure Django to use IAM roles.
# A full production setup would add an aws_cloudfront_distribution.
Step 4: Setting Up the Django Application for AWS
Our infrastructure is useless without an application configured to use it.
Now, update your settings.py to read from environment variables (which Terraform will inject into our container) and configure S3.
# settings.py
import os
import dj_database_url

# ...

# SECURITY WARNING: keep the secret key in production secret!
SECRET_KEY = os.environ.get('DJANGO_SECRET_KEY', 'a-fallback-dev-key')

# DEBUG should be False in production
DEBUG = os.environ.get('DJANGO_DEBUG', 'False') == 'True'

ALLOWED_HOSTS = os.environ.get('DJANGO_ALLOWED_HOSTS', 'localhost,127.0.0.1').split(',')

# --- Database ---
# Use dj_database_url to parse the DATABASE_URL environment variable
DATABASES = {
    'default': dj_database_url.config(conn_max_age=600, default='sqlite:///db.sqlite3')
}
# The DATABASE_URL will be set by Terraform like:
# postgres://django_admin:secret_password@my-db-endpoint.rds.amazonaws.com:5432/djangodb


# --- AWS S3 for Static and Media Files ---
# Only use S3 in production (when AWS_STORAGE_BUCKET_NAME is set)
if 'AWS_STORAGE_BUCKET_NAME' in os.environ:
    AWS_STORAGE_BUCKET_NAME = os.environ.get('AWS_STORAGE_BUCKET_NAME')
    AWS_S3_CUSTOM_DOMAIN = f'{AWS_STORAGE_BUCKET_NAME}.s3.amazonaws.com'
    AWS_S3_OBJECT_PARAMETERS = {
        'CacheControl': 'max-age=86400',
    }
    AWS_DEFAULT_ACL = None # Recommended for security
    AWS_S3_FILE_OVERWRITE = False

    # --- Static Files ---
    STATIC_LOCATION = 'static'
    STATIC_URL = f'https://{AWS_S3_CUSTOM_DOMAIN}/{STATIC_LOCATION}/'
    STATICFILES_STORAGE = 'storages.backends.s3boto3.S3Boto3Storage'

    # --- Media Files ---
    MEDIA_LOCATION = 'media'
    MEDIA_URL = f'https://{AWS_S3_CUSTOM_DOMAIN}/{MEDIA_LOCATION}/'
    DEFAULT_FILE_STORAGE = 'storages.backends.s3boto3.S3Boto3Storage'
else:
    # --- Local settings ---
    STATIC_URL = '/static/'
    STATIC_ROOT = os.path.join(BASE_DIR, 'staticfiles')
    MEDIA_URL = '/media/'
    MEDIA_ROOT = os.path.join(BASE_DIR, 'mediafiles')
Dockerizing Your Django App
Create a Dockerfile in your Django project root:
# Use an official Python runtime as a parent image
FROM python:3.11-slim

# Set environment variables
ENV PYTHONDONTWRITEBYTECODE 1
ENV PYTHONUNBUFFERED 1

# Set work directory
WORKDIR /app

# Install dependencies
COPY requirements.txt /app/
RUN pip install --no-cache-dir -r requirements.txt

# Copy project
COPY . /app/

# Run collectstatic (will use S3 if env vars are set)
# We will run this as a separate task, but this is one way
# RUN python manage.py collectstatic --no-input

# Expose port
EXPOSE 8000

# Run gunicorn
# We will override this command in the ECS Task Definition
CMD ["gunicorn", "--bind", "0.0.0.0:8000", "your_project_name.wsgi:application"]
Step 5: Defining the Compute Layer – AWS ECS with Fargate
This is the most complex part, where we tie everything together.
The ALB will receive public traffic on port 80/443 and forward it to our Django app on port 8000.
# --- Application Load Balancer (ALB) ---
resource "aws_lb" "main" {
  name               = "${var.project_name}-lb"
  internal           = false
  load_balancer_type = "application"
  security_groups    = [aws_security_group.lb_sg.id]
  subnets            = [for subnet in aws_subnet.public : subnet.id]

  enable_deletion_protection = false
}

# Target Group: where the LB sends traffic
resource "aws_lb_target_group" "app" {
  name        = "${var.project_name}-tg"
  port        = 8000 # Port our Django container listens on
  protocol    = "HTTP"
  vpc_id      = aws_vpc.main.id
  target_type = "ip" # Required for Fargate

  health_check {
    path                = "/health/" # Add a health-check endpoint to your Django app
    protocol            = "HTTP"
    matcher             = "200"
    interval            = 30
    timeout             = 5
    healthy_threshold   = 2
    unhealthy_threshold = 2
  }
}

# Listener: Listen on port 80 (HTTP)
resource "aws_lb_listener" "http" {
  load_balancer_arn = aws_lb.main.arn
  port              = "80"
  protocol          = "HTTP"

  default_action {
    type             = "forward"
    target_group_arn = aws_lb_target_group.app.arn
  }

  # For production, you would add a listener on port 443 (HTTPS)
  # using an aws_acm_certificate
}
Creating the ECS Task Definition and Service
A **Task Definition** is the blueprint for our application container. An **ECS Service** is responsible for running and maintaining a specified number of instances (Tasks) of that blueprint.
This is where we’ll inject our environment variables. WARNING: Never hardcode secrets. We’ll use AWS Secrets Manager (or Parameter Store) for this.
First, let’s create the secrets (you can also do this in Terraform, but for setup, the console or CLI is fine):
Go to AWS Secrets Manager.
Create a new secret (select “Other type of secret”).
Create key/value pairs for DJANGO_SECRET_KEY, DB_USERNAME, DB_PASSWORD.
Name the secret (e.g., django/app/secrets).
Now, in main.tf:
# --- IAM Roles ---
# Role for the ECS Task to run
resource "aws_iam_role" "ecs_task_execution_role" {
  name = "${var.project_name}_ecs_task_execution_role"
  assume_role_policy = jsonencode({
    Version = "2012-10-17"
    Statement = [
      {
        Action = "sts:AssumeRole"
        Effect = "Allow"
        Principal = {
          Service = "ecs-tasks.amazonaws.com"
        }
      }
    ]
  })
}

# Attach the managed policy for ECS task execution (pulling images, sending logs)
resource "aws_iam_role_policy_attachment" "ecs_task_execution_policy" {
  role       = aws_iam_role.ecs_task_execution_role.name
  policy_arn = "arn:aws:iam::aws:policy/service-role/AmazonECSTaskExecutionRolePolicy"
}

# Role for the Task *itself* (what your Django app can do)
resource "aws_iam_role" "ecs_task_role" {
  name = "${var.project_name}_ecs_task_role"
  assume_role_policy = jsonencode({
    Version = "2012-10-17"
    Statement = [
      {
        Action = "sts:AssumeRole"
        Effect = "Allow"
        Principal = {
          Service = "ecs-tasks.amazonaws.com"
        }
      }
    ]
  })
}

# Policy to allow Django app to access S3 bucket
resource "aws_iam_policy" "s3_access_policy" {
  name        = "${var.project_name}_s3_access_policy"
  description = "Allows ECS tasks to read/write to the S3 bucket"
  policy = jsonencode({
    Version = "2012-10-17"
    Statement = [
      {
        Action = [
          "s3:GetObject",
          "s3:PutObject",
          "s3:DeleteObject",
          "s3:ListBucket"
        ]
        Effect   = "Allow"
        Resource = [
          aws_s3_bucket.static.arn,
          "${aws_s3_bucket.static.arn}/*"
        ]
      }
    ]
  })
}

resource "aws_iam_role_policy_attachment" "task_s3_policy" {
  role       = aws_iam_role.ecs_task_role.name
  policy_arn = aws_iam_policy.s3_access_policy.arn
}

# Policy to allow task to fetch secrets from Secrets Manager
resource "aws_iam_policy" "secrets_manager_access_policy" {
  name        = "${var.project_name}_secrets_manager_access_policy"
  description = "Allows ECS tasks to read from Secrets Manager"
  policy = jsonencode({
    Version = "2012-10-17"
    Statement = [
      {
        Action = [
          "secretsmanager:GetSecretValue"
        ]
        Effect   = "Allow"
        # Be specific with your secret ARN!
        Resource = [aws_secretsmanager_secret.app_secrets.arn]
      }
    ]
  })
}

resource "aws_iam_role_policy_attachment" "task_secrets_policy" {
  role       = aws_iam_role.ecs_task_role.name
  policy_arn = aws_iam_policy.secrets_manager_access_policy.arn
}


# --- Create the Secrets Manager Secret ---
resource "aws_secretsmanager_secret" "app_secrets" {
  name = "${var.project_name}/app/secrets"
}

resource "aws_secretsmanager_secret_version" "app_secrets_version" {
  secret_id = aws_secretsmanager_secret.app_secrets.id
  secret_string = jsonencode({
    DJANGO_SECRET_KEY = "generate-a-strong-random-key-here"
    DB_USERNAME       = var.db_username
    DB_PASSWORD       = var.db_password
  })
  # This makes it easier to update the password via Terraform
  # by only changing the terraform.tfvars file
}

# --- CloudWatch Log Group ---
resource "aws_cloudwatch_log_group" "app_logs" {
  name              = "/ecs/${var.project_name}"
  retention_in_days = 7
}


# --- ECS Task Definition ---
resource "aws_ecs_task_definition" "app" {
  family                   = "${var.project_name}-task"
  network_mode             = "awsvpc" # Required for Fargate
  requires_compatibilities = ["FARGATE"]
  cpu                      = "256"  # 0.25 vCPU
  memory                   = "512"  # 0.5 GB
  execution_role_arn       = aws_iam_role.ecs_task_execution_role.arn
  task_role_arn            = aws_iam_role.ecs_task_role.arn

  # This is the "blueprint" for our container
  container_definitions = jsonencode([
    {
      name      = "${var.project_name}-container"
      image     = "${aws_ecr_repository.app.repository_url}:latest" # We'll push to this tag
      essential = true
      portMappings = [
        {
          containerPort = 8000
          hostPort      = 8000
        }
      ]
      # --- Environment Variables ---
      environment = [
        {
          name  = "DJANGO_DEBUG"
          value = "False"
        },
        {
          name  = "DJANGO_ALLOWED_HOSTS"
          value = aws_lb.main.dns_name # Allow traffic from the LB
        },
        {
          name  = "AWS_STORAGE_BUCKET_NAME"
          value = aws_s3_bucket.static.id
        },
        {
          name = "DATABASE_URL"
          value = "postgres://${var.db_username}:${var.db_password}@${aws_db_instance.default.endpoint}/${var.db_name}"
        }
      ]

      # --- SECRETS (Better way for DATABASE_URL parts and SECRET_KEY) ---
      # This is more secure than the DATABASE_URL above
      # "secrets": [
      #   {
      #     "name": "DJANGO_SECRET_KEY",
      #     "valueFrom": "${aws_secretsmanager_secret.app_secrets.arn}:DJANGO_SECRET_KEY::"
      #   },
      #   {
      #     "name": "DB_PASSWORD",
      #     "valueFrom": "${aws_secretsmanager_secret.app_secrets.arn}:DB_PASSWORD::"
      #   }
      # ],

      # --- Logging ---
      logConfiguration = {
        logDriver = "awslogs"
        options = {
          "awslogs-group"         = aws_cloudwatch_log_group.app_logs.name
          "awslogs-region"        = var.aws_region
          "awslogs-stream-prefix" = "ecs"
        }
      }
    }
  ])
}

# --- ECS Service ---
resource "aws_ecs_service" "app" {
  name            = "${var.project_name}-service"
  cluster         = aws_ecs_cluster.main.id
  task_definition = aws_ecs_task_definition.app.arn
  desired_count   = 2 # Run 2 copies of our app for HA
  launch_type     = "FARGATE"

  network_configuration {
    subnets         = [for subnet in aws_subnet.private : subnet.id] # Run tasks in private subnets
    security_groups = [aws_security_group.app_sg.id]
    assign_public_ip = false
  }

  load_balancer {
    target_group_arn = aws_lb_target_group.app.arn
    container_name   = "${var.project_name}-container"
    container_port   = 8000
  }

  # Ensure the service depends on the LB listener
  depends_on = [aws_lb_listener.http]
}
Finally, let’s output the URL of our load balancer.
In outputs.tf:
output "app_url" {
  description = "The HTTP URL of the application load balancer."
  value       = "http://${aws_lb.main.dns_name}"
}

output "ecr_repository_url" {
  description = "The URL of the ECR repository to push images to."
  value       = aws_ecr_repository.app.repository_url
}
Step 6: The Deployment Workflow: How to Deploy Django AWS Terraform
Now that our code is written, here is the full workflow to Deploy Django AWS Terraform.
Step 6.1: Initializing and Planning
From your terminal in the project’s root directory, run:
# Initializes Terraform, downloads the AWS provider
terraform init

# Creates the execution plan. Review this output carefully!
terraform plan -out=tfplan
Terraform will show you a long list of all the AWS resources it’s about to create.
Step 6.2: Applying the Infrastructure
If the plan looks good, apply it:
# Applies the plan, answers 'yes' automatically
terraform apply "tfplan"
This will take several minutes. AWS needs time to provision the VPC, NAT Gateway, and especially the RDS instance. Once it’s done, it will print your outputs, including the ecr_repository_url and app_url.
Step 6.3: Building and Pushing the Docker Image
Now that our infrastructure exists, we need to push our application code to it.
# 1. Get the ECR URL from Terraform output
REPO_URL=$(terraform output -raw ecr_repository_url)

# 2. Log in to AWS ECR
aws ecr get-login-password --region ${VAR_AWS_REGION} | docker login --username AWS --password-stdin $REPO_URL

# 3. Build your Docker image (from your Django project root)
docker build -t $REPO_URL:latest .

# 4. Push the image to ECR
docker push $REPO_URL:latest
Step 6.4: Running Database Migrations and Collectstatic
Our app containers will start, but the database is empty. We need to run migrations. You can do this using an ECS “Run Task”. This is a one-off task.
You can create a separate “task definition” in Terraform for migrations, or run it manually from the AWS console:
Go to your ECS Cluster -> Task Definitions -> Select your app task.
Click “Actions” -> “Run Task”.
Select “FARGATE”, your cluster, and your private subnets and app security group.
Expand “Container Overrides”, select your container.
In the “Command Override” box, enter: python,manage.py,migrate
Click “Run Task”.
Repeat this process with the command python,manage.py,collectstatic,--no-input to populate your S3 bucket.
Step 6.5: Forcing a New Deployment
The ECS service is now running, but it’s probably using the “latest” tag from before you pushed. To force it to pull the new image, you can run:
# This tells the service to redeploy, which will pull the "latest" image again
aws ecs update-service --cluster ${VAR_PROJECT_NAME}-cluster \
  --service ${VAR_PROJECT_NAME}-service \
  --force-new-deployment \
  --region ${VAR_AWS_REGION}
After a few minutes, your new containers will be running. You can now visit the app_url from your Terraform output and see your live Django application!
Step 7: Automating with a CI/CD Pipeline (Conceptual Overview)
The real power of this setup comes from automation. The manual steps above are great for the first deployment, but tedious for daily updates. A CI/CD pipeline (using GitHub Actions, GitLab CI, or AWS CodePipeline) automates this.
A typical pipeline would look like this:
On Push to main branch:
Lint & Test: Run flake8 and python manage.py test.
Build & Push Docker Image: Build the image, tag it with the Git SHA (e.g., :a1b2c3d) instead of :latest. Push to ECR.
Run Terraform: Run terraform apply. This is safe because Terraform is declarative; it will only apply changes if your .tf files have changed.
Run Migrations: Use the AWS CLI to run a one-off task for migrations.
Update ECS Service: This is the key. Instead of just “forcing” a new deployment, you would update the Task Definition to use the new specific image tag (e.g., :a1b2c3d) and then update the service to use that new task definition. This provides a true, versioned, roll-back-able deployment.
Frequently Asked Questions
How do I handle Django database migrations with Terraform?
Terraform is for provisioning infrastructure, not for running application-level commands. The best practice is to run migrations as a one-off task *after* terraform apply is complete. Use ECS Run Task, as described in Step 6.4. Some people build this into a CI/CD pipeline, or even use a “init container” that runs migrations before the main app container starts (though this can be complex with multiple app instances starting at once).
Is Elastic Beanstalk a better option than ECS/Terraform?
Elastic Beanstalk (EB) is a Platform-as-a-Service (PaaS). It’s faster to get started because it provisions all the resources (EC2, ELB, RDS) for you with a simple eb deploy. However, you lose granular control. Our custom Terraform setup is far more flexible, secure (e.g., Fargate in private subnets), and scalable. EB is great for simple projects or prototypes. For a complex, production-grade application, the custom Terraform/ECS approach is generally preferred by DevOps professionals.
How can I manage secrets like my database password?
Do not hardcode them in main.tf or commit them to Git. The best practice is to use AWS Secrets Manager or AWS Systems Manager (SSM) Parameter Store.
1. Store the secret value (the password) in Secrets Manager.
2. Give your ECS Task Role (ecs_task_role) IAM permission to read that specific secret.
3. In your ECS Task Definition, use the "secrets" key (as shown in the commented-out example) to inject the secret into the container as an environment variable. Your Django app reads it from the environment, never knowing the value until runtime.
What’s the best way to run collectstatic?
Similar to migrations, this is an application-level command.
1. In CI/CD: The best place is in your CI/CD pipeline. After building the Docker image but before pushing it, you can run the collectstatic command *locally* (or in the CI runner) with the correct AWS credentials and environment variables set. It will collect files and upload them directly to S3.
2. One-off Task: Run it as an ECS “Run Task” just like migrations.
3. In the Dockerfile: You *can* run it in the Dockerfile, but this is often discouraged as it bloats the image and requires build-time AWS credentials, which can be a security risk.
Conclusion
You have successfully journeyed from an empty AWS account to a fully scalable, secure, and production-ready home for your Django application. This is no small feat. By defining your entire infrastructure in code, you’ve unlocked a new level of professionalism and reliability in your deployment process.
We’ve provisioned a custom VPC, secured our app and database in private subnets, offloaded state to RDS and S3, and created a scalable, serverless compute layer with ECS Fargate. The true power of the Deploy Django AWS Terraform workflow is its repeatability and manageability. You can now tear down this entire stack with terraform destroy and bring it back up in minutes. You can create a new staging environment with a single command. Your infrastructure is no longer a fragile, manually-configured black box; it’s a version-controlled, auditable, and automated part of your application’s codebase. Thank you for reading the DevopsRoles page!
In the world of cloud computing, serverless architectures and Infrastructure as Code (IaC) are two paradigms that have revolutionized how we build and manage applications. AWS Lambda, a leading serverless compute service, allows you to run code without provisioning servers. Terraform, an open-source IaC tool, enables you to define and manage infrastructure with code. Combining them is a match made in DevOps heaven. This guide provides a deep dive into deploying, managing, and automating your serverless functions with AWS Lambda Terraform, transforming your workflow from manual clicks to automated, version-controlled deployments.
Why Use Terraform for AWS Lambda Deployments?
While you can easily create a Lambda function through the AWS Management Console, this approach doesn’t scale and is prone to human error. Using Terraform to manage your Lambda functions provides several key advantages:
Repeatability and Consistency: Define your Lambda function, its permissions, triggers, and environment variables in code. This ensures you can deploy the exact same configuration across different environments (dev, staging, prod) with a single command.
Version Control: Store your infrastructure configuration in a Git repository. This gives you a full history of changes, the ability to review updates through pull requests, and the power to roll back to a previous state if something goes wrong.
Automation: Integrate your Terraform code into CI/CD pipelines to fully automate the deployment process. A `git push` can trigger a pipeline that plans, tests, and applies your infrastructure changes seamlessly.
Full Ecosystem Management: Lambda functions rarely exist in isolation. They need IAM roles, API Gateway triggers, S3 bucket events, or DynamoDB streams. Terraform allows you to define and manage this entire ecosystem of related resources in a single, cohesive configuration.
Prerequisites
Before we start writing code, make sure you have the following tools installed and configured on your system:
AWS Account: An active AWS account with permissions to create IAM roles and Lambda functions.
AWS CLI: The AWS Command Line Interface installed and configured with your credentials (e.g., via `aws configure`).
Terraform: The Terraform CLI (version 1.0 or later) installed.
A Code Editor: A text editor or IDE like Visual Studio Code.
Python 3: We’ll use Python for our example Lambda function, so ensure you have a recent version installed.
Core Components of an AWS Lambda Terraform Deployment
A typical serverless deployment involves more than just the function code. With Terraform, we define each piece as a resource. Let’s break down the essential components.
1. The Lambda Function Code (Python Example)
This is the actual application logic you want to run. For this guide, we’ll use a simple “Hello World” function in Python.
# src/lambda_function.py
import json

def lambda_handler(event, context):
    print("Lambda function invoked!")
    return {
        'statusCode': 200,
        'body': json.dumps('Hello from Lambda deployed by Terraform!')
    }
2. The Deployment Package (.zip)
AWS Lambda requires your code and its dependencies to be uploaded as a deployment package, typically a `.zip` file. Instead of creating this file manually, we can use Terraform’s built-in `archive_file` data source to do it automatically during the deployment process.
# main.tf
data "archive_file" "lambda_zip" {
  type        = "zip"
  source_dir  = "${path.module}/src"
  output_path = "${path.module}/dist/lambda_function.zip"
}
3. The IAM Role and Policy
Every Lambda function needs an execution role. This is an IAM role that grants the function permission to interact with other AWS services. At a minimum, it needs permission to write logs to Amazon CloudWatch. We define the role and attach a policy to it.
# main.tf

# IAM role that the Lambda function will assume
resource "aws_iam_role" "lambda_exec_role" {
  name = "lambda_basic_execution_role"

  assume_role_policy = jsonencode({
    Version   = "2012-10-17",
    Statement = [
      {
        Action    = "sts:AssumeRole",
        Effect    = "Allow",
        Principal = {
          Service = "lambda.amazonaws.com"
        }
      }
    ]
  })
}

# Attaching the basic execution policy to the role
resource "aws_iam_role_policy_attachment" "lambda_policy_attachment" {
  role       = aws_iam_role.lambda_exec_role.name
  policy_arn = "arn:aws:iam::aws:policy/service-role/AWSLambdaBasicExecutionRole"
}
The `assume_role_policy` document specifies that the AWS Lambda service is allowed to “assume” this role. We then attach the AWS-managed `AWSLambdaBasicExecutionRole` policy, which provides the necessary CloudWatch Logs permissions. For more details, refer to the official documentation on AWS Lambda Execution Roles.
4. The Lambda Function Resource (`aws_lambda_function`)
This is the central resource that ties everything together. It defines the Lambda function itself, referencing the IAM role and the deployment package.
# main.tf
resource "aws_lambda_function" "hello_world_lambda" {
  function_name = "HelloWorldLambdaTerraform"

  # Reference to the zipped deployment package
  filename         = data.archive_file.lambda_zip.output_path
  source_code_hash = data.archive_file.lambda_zip.output_base64sha256

  # Reference to the IAM role
  role = aws_iam_role.lambda_exec_role.arn

  # Function configuration
  handler = "lambda_function.lambda_handler" # filename.handler_function_name
  runtime = "python3.9"
}
Notice the `source_code_hash` argument. This is crucial. It tells Terraform to trigger a new deployment of the function only when the content of the `.zip` file changes.
Step-by-Step Guide: Your First AWS Lambda Terraform Project
Let’s put all the pieces together into a working project.
Step 1: Project Structure
Create a directory for your project with the following structure:
Place the simple Python “Hello World” code into `src/lambda_function.py` as shown in the previous section.
Step 3: Defining the Full Terraform Configuration
Combine all the Terraform snippets into your `main.tf` file. This single file will define our entire infrastructure.
# main.tf

# Configure the AWS provider
provider "aws" {
  region = "us-east-1" # Change to your preferred region
}

# 1. Create a zip archive of our Python code
data "archive_file" "lambda_zip" {
  type        = "zip"
  source_dir  = "${path.module}/src"
  output_path = "${path.module}/dist/lambda_function.zip"
}

# 2. Create the IAM role for the Lambda function
resource "aws_iam_role" "lambda_exec_role" {
  name = "lambda_basic_execution_role"

  assume_role_policy = jsonencode({
    Version   = "2012-10-17",
    Statement = [
      {
        Action    = "sts:AssumeRole",
        Effect    = "Allow",
        Principal = {
          Service = "lambda.amazonaws.com"
        }
      }
    ]
  })
}

# 3. Attach the basic execution policy to the role
resource "aws_iam_role_policy_attachment" "lambda_policy_attachment" {
  role       = aws_iam_role.lambda_exec_role.name
  policy_arn = "arn:aws:iam::aws:policy/service-role/AWSLambdaBasicExecutionRole"
}

# 4. Create the Lambda function resource
resource "aws_lambda_function" "hello_world_lambda" {
  function_name = "HelloWorldLambdaTerraform"

  filename         = data.archive_file.lambda_zip.output_path
  source_code_hash = data.archive_file.lambda_zip.output_base64sha256

  role    = aws_iam_role.lambda_exec_role.arn
  handler = "lambda_function.lambda_handler"
  runtime = "python3.9"

  # Ensure the IAM role is created before the Lambda function
  depends_on = [
    aws_iam_role_policy_attachment.lambda_policy_attachment,
  ]

  tags = {
    ManagedBy = "Terraform"
  }
}

# 5. Output the Lambda function name
output "lambda_function_name" {
  value = aws_lambda_function.hello_world_lambda.function_name
}
Step 4: Deploying the Infrastructure
Now, open your terminal in the `my-lambda-project` directory and run the standard Terraform workflow commands:
Initialize Terraform: This downloads the necessary AWS provider plugin.
terraform init
Plan the deployment: This shows you what resources Terraform will create. It’s a dry run.
terraform plan
Apply the changes: This command actually creates the resources in your AWS account.
terraform apply
Terraform will prompt you to confirm the action. Type `yes` and hit Enter. After a minute, your IAM role and Lambda function will be deployed!
Step 5: Invoking and Verifying the Lambda Function
You can invoke your newly deployed function directly from the AWS CLI:
This command calls the function and saves the response to `output.json`. If you inspect the file (`cat output.json`), you should see:
{"statusCode": 200, "body": "\"Hello from Lambda deployed by Terraform!\""}
Success! You’ve just automated a serverless deployment.
Advanced Concepts and Best Practices
Let’s explore some more advanced topics to make your AWS Lambda Terraform deployments more robust and feature-rich.
Managing Environment Variables
You can securely pass configuration to your Lambda function using environment variables. Simply add an `environment` block to your `aws_lambda_function` resource.
A common use case is to trigger a Lambda function via an HTTP request. Terraform can manage the entire API Gateway setup for you. Here’s a minimal example of creating an HTTP endpoint that invokes our function.
# Create the API Gateway
resource "aws_apigatewayv2_api" "lambda_api" {
  name          = "lambda-gw-api"
  protocol_type = "HTTP"
}

# Create the integration between API Gateway and Lambda
resource "aws_apigatewayv2_integration" "lambda_integration" {
  api_id           = aws_apigatewayv2_api.lambda_api.id
  integration_type = "AWS_PROXY"
  integration_uri  = aws_lambda_function.hello_world_lambda.invoke_arn
}

# Define the route (e.g., GET /hello)
resource "aws_apigatewayv2_route" "api_route" {
  api_id    = aws_apigatewayv2_api.lambda_api.id
  route_key = "GET /hello"
  target    = "integrations/${aws_apigatewayv2_integration.lambda_integration.id}"
}

# Grant API Gateway permission to invoke the Lambda
resource "aws_lambda_permission" "api_gw_permission" {
  statement_id  = "AllowAPIGatewayInvoke"
  action        = "lambda:InvokeFunction"
  function_name = aws_lambda_function.hello_world_lambda.function_name
  principal     = "apigateway.amazonaws.com"
  source_arn    = "${aws_apigatewayv2_api.lambda_api.execution_arn}/*/*"
}

output "api_endpoint" {
  value = aws_apigatewayv2_api.lambda_api.api_endpoint
}
Frequently Asked Questions
How do I handle function updates with Terraform?
Simply change your Python code in the `src` directory. The next time you run `terraform plan` and `terraform apply`, the `archive_file` data source will compute a new `source_code_hash`, and Terraform will automatically upload the new version of your code.
What’s the best way to manage secrets for my Lambda function?
Avoid hardcoding secrets in Terraform files or environment variables. The best practice is to use AWS Secrets Manager or AWS Systems Manager Parameter Store. You can grant your Lambda’s execution role permission to read from these services and fetch secrets dynamically at runtime.
Can I use Terraform to manage multiple Lambda functions in one project?
Absolutely. You can define multiple `aws_lambda_function` resources. For better organization, consider using Terraform modules to create reusable templates for your Lambda functions, each with its own code, IAM role, and configuration.
How does the `source_code_hash` argument work?
It’s a base64-encoded SHA256 hash of the content of your deployment package. Terraform compares the hash in your state file with the newly computed hash from the `archive_file` data source. If they differ, Terraform knows the code has changed and initiates an update to the Lambda function. For more details, consult the official Terraform documentation.
Conclusion
You have successfully configured, deployed, and invoked a serverless function using an Infrastructure as Code approach. By leveraging Terraform, you’ve created a process that is automated, repeatable, and version-controlled. This foundation is key to building complex, scalable, and maintainable serverless applications on AWS. Adopting an AWS Lambda Terraform workflow empowers your team to move faster and with greater confidence, eliminating manual configuration errors and providing a clear, auditable history of your infrastructure’s evolution. Thank you for reading the DevopsRoles page!
In modern cloud engineering, Infrastructure as Code (IaC) is the gold standard for managing resources. Terraform has emerged as a leader in this space, allowing teams to define and provision infrastructure using a declarative configuration language. However, a significant challenge remains: how do you test your Terraform configurations efficiently without spinning up costly cloud resources and slowing down your development feedback loop? The answer lies in local cloud emulation. This guide provides a comprehensive walkthrough on how to leverage the powerful combination of Terraform LocalStack and the Go programming language to create a robust, local testing framework for your AWS infrastructure. This approach enables rapid, cost-effective integration testing, ensuring your code is solid before it ever touches a production environment.
Why Bother with Local Cloud Development?
The traditional “code, push, and pray” approach to infrastructure changes is fraught with risk and inefficiency. Testing against live AWS environments incurs costs, is slow, and can lead to resource conflicts between developers. A local cloud development strategy, centered around tools like LocalStack, addresses these pain points directly.
Cost Efficiency: By emulating AWS services on your local machine, you eliminate the need to pay for development or staging resources. This is especially beneficial when testing services that can be expensive, like multi-AZ RDS instances or EKS clusters.
Speed and Agility: Local feedback loops are orders of magnitude faster. Instead of waiting several minutes for a deployment pipeline to provision resources in the cloud, you can apply and test changes in seconds. This dramatically accelerates development and debugging.
Offline Capability: Develop and test your infrastructure configurations even without an internet connection. This is perfect for remote work or travel.
Isolated Environments: Each developer can run their own isolated stack, preventing the “it works on my machine” problem and eliminating conflicts over shared development resources.
Enhanced CI/CD Pipelines: Integrating local testing into your continuous integration (CI) pipeline allows you to catch errors early. You can run a full suite of integration tests against a LocalStack instance for every pull request, ensuring a higher degree of confidence before merging.
Setting Up Your Development Environment
Before we dive into the code, we need to set up our toolkit. This involves installing the necessary CLIs and getting LocalStack up and running with Docker.
Installing Core Tools
Ensure you have the following tools installed on your system. Most can be installed easily with package managers like Homebrew (macOS) or Chocolatey (Windows).
Terraform: The core IaC tool we’ll be using.
Go: The programming language for writing our integration tests.
Docker: The container platform needed to run LocalStack.
AWS CLI v2: Useful for interacting with and debugging our LocalStack instance.
Running LocalStack with Docker Compose
The easiest way to run LocalStack is with Docker Compose. Create a docker-compose.yml file with the following content. This configuration exposes the necessary ports and sets up a persistent volume for the LocalStack state.
Start LocalStack by running the following command in the same directory as your file:
docker-compose up -d
You can verify that it’s running correctly by checking the logs or using the AWS CLI, configured for the local endpoint:
aws --endpoint-url=http://localhost:4566 s3 ls
If this command returns an empty list without errors, your local AWS cloud is ready!
Crafting Your Terraform Configuration for LocalStack
The key to using Terraform with LocalStack is to configure the AWS provider to target your local endpoints instead of the official AWS APIs. This is surprisingly simple.
The provider Block: Pointing Terraform to LocalStack
In your Terraform configuration file (e.g., main.tf), you’ll define the aws provider with custom endpoints. This tells Terraform to direct all API calls for the specified services to your local container.
Important: For this to work seamlessly, you must use dummy values for access_key and secret_key. LocalStack doesn’t validate credentials by default.
With this configuration, you can now run terraform init and terraform apply. Terraform will communicate with your LocalStack container and create the S3 bucket locally.
Writing Go Tests with the AWS SDK for your Terraform LocalStack Setup
Now for the exciting part: writing automated tests in Go to validate the infrastructure that Terraform creates. We will use the official AWS SDK for Go V2, configuring it to point to our LocalStack instance.
Initializing the Go Project
In the same directory, initialize a Go module:
go mod init terraform-localstack-test
go get github.com/aws/aws-sdk-go-v2
go get github.com/aws/aws-sdk-go-v2/config
go get github.com/aws/aws-sdk-go-v2/service/s3
go get github.com/aws/aws-sdk-go-v2/aws
Configuring the AWS Go SDK v2 for LocalStack
To make the Go SDK talk to LocalStack, we need to provide a custom configuration. This involves creating a custom endpoint resolver and disabling credential checks. Create a helper file, perhaps aws_config.go, to handle this logic.
// aws_config.go
package main

import (
	"context"
	"github.com/aws/aws-sdk-go-v2/aws"
	"github.com/aws/aws-sdk-go-v2/config"
)

const (
	awsRegion    = "us-east-1"
	localstackEP = "http://localhost:4566"
)

// newAWSConfig creates a new AWS SDK v2 configuration pointed at LocalStack
func newAWSConfig(ctx context.Context) (aws.Config, error) {
	// Custom resolver for LocalStack endpoints
	customResolver := aws.EndpointResolverWithOptionsFunc(func(service, region string, options ...interface{}) (aws.Endpoint, error) {
		return aws.Endpoint{
			URL:           localstackEP,
			SigningRegion: region,
			Source:        aws.EndpointSourceCustom,
		}, nil
	})

	// Load default config and override with custom settings
	return config.LoadDefaultConfig(ctx,
		config.WithRegion(awsRegion),
		config.WithEndpointResolverWithOptions(customResolver),
		config.WithCredentialsProvider(aws.AnonymousCredentials{}),
	)
}
Writing the Integration Test: A Practical Example
Now, let’s write the test file main_test.go. We’ll use Go’s standard testing package. The test will create an S3 client using our custom configuration and then perform checks against the S3 bucket created by Terraform.
Test Case 1: Verifying S3 Bucket Creation
This test will check if the bucket exists. The HeadBucket API call is a lightweight way to do this; it succeeds if the bucket exists and you have permission, and fails otherwise.
A good test goes beyond mere existence. Let’s verify that the tags we defined in our Terraform code were applied correctly.
// Add this test to main_test.go
func TestS3BucketHasCorrectTags(t *testing.T) {
	// Arrange
	ctx := context.TODO()
	bucketName := "my-unique-local-test-bucket"
	expectedTags := map[string]string{
		"Environment": "Development",
		"ManagedBy":   "Terraform",
	}

	cfg, err := newAWSConfig(ctx)
	if err != nil {
		t.Fatalf("failed to create aws config: %v", err)
	}
	s3Client := s3.NewFromConfig(cfg)

	// Act
	output, err := s3Client.GetBucketTagging(ctx, &s3.GetBucketTaggingInput{
		Bucket: &bucketName,
	})
	if err != nil {
		t.Fatalf("GetBucketTagging failed: %v", err)
	}

	// Assert
	actualTags := make(map[string]string)
	for _, tag := range output.TagSet {
		actualTags[*tag.Key] = *tag.Value
	}

	for key, expectedValue := range expectedTags {
		actualValue, ok := actualTags[key]
		if !ok {
			t.Errorf("Expected tag '%s' not found", key)
			continue
		}
		if actualValue != expectedValue {
			t.Errorf("Tag '%s' has wrong value. Got: '%s', Expected: '%s'", key, actualValue, expectedValue)
		}
	}
}
The Complete Workflow: Tying It All Together
Now you have all the pieces. Here is the end-to-end workflow for developing and testing your infrastructure locally.
Step 1: Start LocalStack
Ensure your local cloud is running.
docker-compose up -d
Step 2: Apply Terraform Configuration
Initialize Terraform (if you haven’t already) and apply your configuration to provision the resources inside the LocalStack container.
terraform init
terraform apply -auto-approve
Step 3: Run the Go Integration Tests
Execute your test suite to validate the infrastructure.
go test -v
If all tests pass, you have a high degree of confidence that your Terraform code correctly defines the infrastructure you intended.
Step 4: Tear Down the Infrastructure
After testing, clean up the resources in LocalStack and, if desired, stop the container.
terraform destroy -auto-approve
docker-compose down
Frequently Asked Questions
1. Is LocalStack free? LocalStack has a free, open-source Community version that covers many core AWS services like S3, DynamoDB, Lambda, and SQS. More advanced services are available in the Pro/Team versions.
2. How does this compare to Terratest?
Terratest is another excellent framework for testing Terraform code, also written in Go. The approach described here is complementary. You can use Terratest’s helper functions to run terraform apply and then use the AWS SDK configuration method shown in this article to point your Terratest assertions at a LocalStack endpoint.
3. Can I use other languages for testing?
Absolutely! The core principle is configuring the AWS SDK of your chosen language (Python’s Boto3, JavaScript’s AWS-SDK, etc.) to use the LocalStack endpoint. The logic remains the same.
4. What if a service isn’t supported by LocalStack?
While LocalStack’s service coverage is extensive, it’s not 100%. For unsupported services, you may need to rely on mocks, stubs, or targeted tests against a real (sandboxed) AWS environment. Always check the official LocalStack documentation for the latest service coverage.
Conclusion
Adopting a local-first testing strategy is a paradigm shift for cloud infrastructure development. By combining the declarative power of Terraform with the high-fidelity emulation of LocalStack, you can build a fast, reliable, and cost-effective testing loop. Writing integration tests in Go with the AWS SDK provides the final piece of the puzzle, allowing you to programmatically verify that your infrastructure behaves exactly as expected. This Terraform LocalStack workflow not only accelerates your development cycle but also dramatically improves the quality and reliability of your infrastructure deployments, giving you and your team the confidence to innovate and deploy with speed. Thank you for reading the DevopsRoles page!
In the rapidly evolving landscape of cloud-native infrastructure, maintaining stringent security, operational, and cost compliance policies is a formidable challenge. Traditional, manual approaches to policy enforcement are often error-prone, inconsistent, and scale poorly, leading to configuration drift and potential security vulnerabilities. Enter GitOps and Terraform – two powerful methodologies that, when combined, offer a revolutionary approach to declarative policy management. This article will delve into how leveraging GitOps principles with Terraform’s infrastructure-as-code capabilities can transform your policy enforcement, ensuring consistency, auditability, and automation across your entire infrastructure lifecycle, ultimately boosting your overall policy management.
The Policy Management Conundrum in Modern IT
The acceleration of cloud adoption and the proliferation of microservices architectures have introduced unprecedented complexity into IT environments. While this agility offers immense business value, it simultaneously magnifies the challenges of maintaining effective policy management. Organizations struggle to ensure that every piece of infrastructure adheres to internal standards, regulatory compliance, and security best practices.
Manual Processes: A Recipe for Inconsistency
Many organizations still rely on manual checks, ad-hoc scripts, and human oversight for policy enforcement. This approach is fraught with inherent weaknesses:
Human Error: Manual tasks are susceptible to mistakes, leading to misconfigurations that can expose vulnerabilities or violate compliance.
Lack of Version Control: Changes made manually are rarely tracked in a systematic way, making it difficult to audit who made what changes and when.
Inconsistency: Without a standardized, automated process, policies might be applied differently across various environments or teams.
Scalability Issues: As infrastructure grows, manual policy checks become a significant bottleneck, unable to keep pace with demand.
Configuration Drift and Compliance Gaps
Configuration drift occurs when the actual state of your infrastructure deviates from its intended or desired state. This drift often arises from manual interventions, emergency fixes, or unmanaged updates. In the context of policy management, configuration drift means that your infrastructure might no longer comply with established rules, even if it was compliant at deployment time. Identifying and remediating such drift manually is resource-intensive and often reactive, leaving organizations vulnerable to security breaches or non-compliance penalties.
The Need for Automated, Declarative Enforcement
To overcome these challenges, modern IT demands a shift towards automated, declarative policy enforcement. Declarative approaches define what the desired state of the infrastructure (and its policies) should be, rather than how to achieve it. Automation then ensures that this desired state is consistently maintained. This is where the combination of GitOps and Terraform shines, offering a robust framework for managing policies as code.
Understanding GitOps: A Paradigm Shift for Infrastructure Management
GitOps is an operational framework that takes DevOps best practices like version control, collaboration, compliance, and CI/CD, and applies them to infrastructure automation. It champions the use of Git as the single source of truth for declarative infrastructure and applications.
Core Principles of GitOps
At its heart, GitOps is built on four fundamental principles:
Declarative Configuration: The entire system state (infrastructure, applications, policies) is described declaratively in a way that machines can understand and act upon.
Git as the Single Source of Truth: All desired state is stored in a Git repository. Any change to the system must be initiated by a pull request to this repository.
Automated Delivery: Approved changes in Git are automatically applied to the target environment through a continuous delivery pipeline.
Software Agents (Controllers): These agents continuously observe the actual state of the system and compare it to the desired state in Git. If a divergence is detected (configuration drift), the agents automatically reconcile the actual state to match the desired state.
Benefits of a Git-Centric Workflow
Adopting GitOps brings a multitude of benefits to infrastructure management:
Enhanced Auditability: Every change, who made it, and when, is recorded in Git’s immutable history, providing a complete audit trail.
Improved Security: With Git as the control plane, all changes go through code review, approval processes, and automated checks, reducing the attack surface.
Faster Mean Time To Recovery (MTTR): If a deployment fails or an environment breaks, you can quickly revert to a known good state by rolling back a Git commit.
Increased Developer Productivity: Developers can deploy applications and manage infrastructure using familiar Git workflows, reducing operational overhead.
Consistency Across Environments: By defining infrastructure and application states declaratively in Git, consistency across development, staging, and production environments is ensured.
GitOps in Practice: The Reconciliation Loop
A typical GitOps workflow involves a “reconciliation loop.” A GitOps operator or controller (e.g., Argo CD, Flux CD) continuously monitors the Git repository for changes to the desired state. When a change is detected (e.g., a new commit or merged pull request), the operator pulls the updated configuration and applies it to the target infrastructure. Simultaneously, it constantly monitors the live state of the infrastructure, comparing it against the desired state in Git. If any drift is found, the operator automatically corrects it, bringing the live state back into alignment with Git.
Terraform: Infrastructure as Code for Cloud Agility
Terraform, developed by HashiCorp, is an open-source infrastructure-as-code (IaC) tool that allows you to define and provision data center infrastructure using a high-level configuration language (HashiCorp Configuration Language – HCL). It supports a vast ecosystem of providers for various cloud platforms (AWS, Azure, GCP, VMware, OpenStack), SaaS services, and on-premise solutions.
The Power of Declarative Configuration
With Terraform, you describe your infrastructure in a declarative manner, specifying the desired end state rather than a series of commands to reach that state. For example, instead of writing scripts to manually create a VPC, subnets, and security groups, you write a Terraform configuration file that declares these resources and their attributes. Terraform then figures out the necessary steps to provision or update them.
Here’s a simple example of a Terraform configuration for an AWS S3 bucket:
This code explicitly declares that an S3 bucket named “my-unique-application-bucket” should exist, be private, and have public access completely blocked – an implicit policy definition.
Managing Infrastructure Lifecycle
Terraform provides a straightforward workflow for managing infrastructure:
terraform init: Initializes a working directory containing Terraform configuration files.
terraform plan: Generates an execution plan, showing what actions Terraform will take to achieve the desired state without actually making any changes. This is crucial for review and policy validation.
terraform apply: Executes the actions proposed in a plan, provisioning or updating infrastructure.
terraform destroy: Tears down all resources managed by the current Terraform configuration.
State Management and Remote Backends
Terraform keeps track of the actual state of your infrastructure in a “state file” (terraform.tfstate). This file maps the resources defined in your configuration to the real-world resources in your cloud provider. For team collaboration and security, it’s essential to store this state file in a remote backend (e.g., AWS S3, Azure Blob Storage, HashiCorp Consul/Terraform Cloud) and enable state locking to prevent concurrent modifications.
Implementing Policy Management with GitOps and Terraform
The true power emerges when we integrate GitOps and Terraform for policy management. This combination allows organizations to treat policies themselves as code, version-controlling them, automating their enforcement, and ensuring continuous compliance.
Policy as Code with Terraform
Terraform configurations inherently define policies. For instance, creating an AWS S3 bucket with acl = "private" is a policy. Similarly, an AWS IAM policy resource dictates access permissions. By defining these configurations in HCL, you are effectively writing “policy as code.”
However, basic Terraform doesn’t automatically validate against arbitrary external policies. This is where additional tools and GitOps principles come into play. The goal is to enforce policies that go beyond what Terraform’s schema directly offers, such as “no S3 buckets should be public” or “all EC2 instances must use encrypted EBS volumes.”
Git as the Single Source of Truth for Policies
In a GitOps model, all Terraform code – including infrastructure definitions, module calls, and implicit or explicit policy definitions – resides in Git. This makes Git the immutable, auditable source of truth for your infrastructure policies. Any proposed change to infrastructure, which might inadvertently violate a policy, must go through a pull request (PR). This PR serves as a critical checkpoint for policy validation.
Automated Policy Enforcement via GitOps Workflows
Combining GitOps and Terraform creates a robust pipeline for automated policy enforcement:
Developer Submits PR: A developer proposes an infrastructure change by submitting a PR to the Git repository containing Terraform configurations.
CI Pipeline Triggered: The PR triggers an automated CI pipeline (e.g., GitHub Actions, GitLab CI, Jenkins).
terraform plan Execution: The CI pipeline runs terraform plan to determine the exact infrastructure changes.
Policy Validation Tools Engaged: Before terraform apply, specialized policy-as-code tools analyze the terraform plan output or the HCL code itself against predefined policy rules.
Feedback and Approval: If policy violations are found, the PR is flagged, and feedback is provided to the developer. If no violations, the plan is approved (potentially after manual review).
Automated Deployment (CD): Upon PR merge to the main branch, a CD pipeline (often managed by a GitOps controller like Argo CD or Flux) automatically executes terraform apply, provisioning the compliant infrastructure.
Continuous Reconciliation: The GitOps controller continuously monitors the live infrastructure, detecting and remediating any drift from the Git-defined desired state, thus ensuring continuous policy compliance.
Effective policy management with GitOps and Terraform involves integrating policy checks at various stages of the development and deployment lifecycle.
Pre-Deployment Policy Validation (CI-Stage)
This is the most crucial stage for preventing policy violations from reaching your infrastructure. Tools are used to analyze Terraform code and plans before deployment.
Static Analysis Tools:
terraform validate: Checks configuration syntax and internal consistency.
tflint: A pluggable linter for Terraform that can enforce best practices and identify potential errors.
Open Policy Agent (OPA) / Rego: A general-purpose policy engine. You can write policies in Rego (OPA’s query language) to evaluate Terraform plans or HCL code against custom rules. Tools like Checkov and Terrascan are built on OPA or similar engines to scan Terraform code for security and compliance issues.
HashiCorp Sentinel: An enterprise-grade policy-as-code framework integrated with HashiCorp products like Terraform Enterprise/Cloud.
Infracost: While not strictly a policy tool, Infracost can provide cost estimates for Terraform plans, allowing you to enforce cost policies (e.g., “VMs cannot exceed X cost”).
Code Example: GitHub Actions for Policy Validation with Checkov
name: Terraform Policy Scan

on: [pull_request]

jobs:
  terraform_policy_scan:
    runs-on: ubuntu-latest
    steps:
    - uses: actions/checkout@v3
    - uses: hashicorp/setup-terraform@v2
      with:
        terraform_version: 1.x.x

    - name: Terraform Init
      id: init
      run: terraform init

    - name: Terraform Plan
      id: plan
      run: terraform plan -no-color -out=tfplan.binary
      # Save the plan to a file for Checkov to scan

    - name: Convert Terraform Plan to JSON
      id: convert_plan
      run: terraform show -json tfplan.binary > tfplan.json

    - name: Run Checkov with Terraform Plan
      uses: bridgecrewio/checkov-action@v12
      with:
        file: tfplan.json # Scan the plan JSON
        output_format: cli
        framework: terraform_plan
        soft_fail: false # Set to true to allow PR even with failures, for reporting
        # Customize policies:
        # skip_check: CKV_AWS_18,CKV_AWS_19
        # check: CKV_AWS_35
This example demonstrates how a CI pipeline can leverage Checkov to scan a Terraform plan for policy violations, preventing non-compliant infrastructure from being deployed.
Even with robust pre-deployment checks, continuous monitoring is essential. This can involve:
Cloud-Native Policy Services: Services like AWS Config, Azure Policy, and Google Cloud Organization Policy Service can continuously assess your deployed resources against predefined rules and flag non-compliance. These can often be integrated with GitOps reconciliation loops for automated remediation.
OPA/Gatekeeper (for Kubernetes): While Terraform provisions the underlying cloud resources, OPA Gatekeeper can enforce policies on Kubernetes clusters provisioned by Terraform. It acts as a validating admission controller, preventing non-compliant resources from being deployed to the cluster.
Regular Drift Detection: A GitOps controller can periodically run terraform plan and compare the output against the committed state in Git. If drift is detected and unauthorized, it can trigger alerts or even automatically apply the Git-defined state to remediate.
Policy for Terraform Modules and Providers
To scale policy management, organizations often create a centralized repository of approved Terraform modules. These modules are pre-vetted to be compliant with organizational policies. Teams then consume these modules, ensuring that their deployments inherit the desired policy adherence. Custom Terraform providers can also be developed to enforce specific policies or interact with internal systems.
Advanced Strategies and Enterprise Considerations
For large organizations, implementing GitOps and Terraform for policy management requires careful planning and advanced strategies.
Multi-Cloud and Hybrid Cloud Environments
GitOps and Terraform are inherently multi-cloud capable, making them ideal for consistent policy enforcement across diverse environments. Terraform’s provider model allows defining infrastructure in different clouds using a unified language. GitOps principles ensure that the same set of policy checks and deployment workflows can be applied consistently, regardless of the underlying cloud provider. For hybrid clouds, specialized providers or custom integrations can extend this control to on-premises infrastructure.
Integrating with Governance and Compliance Frameworks
The auditable nature of Git, combined with automated policy checks, provides strong evidence for meeting regulatory compliance requirements (e.g., NIST, PCI-DSS, HIPAA, GDPR). Every infrastructure change, including those related to security configurations, is recorded and can be traced back to a specific commit and reviewer. Integrating policy-as-code tools with security information and event management (SIEM) systems can further enhance real-time compliance monitoring and reporting.
Drift Detection and Remediation
Beyond initial deployment, continuous drift detection is vital. GitOps operators can be configured to periodically run terraform plan and compare the output to the state defined in Git. If a drift is detected:
Alerting: Trigger alerts to relevant teams for investigation.
Automated Remediation: For certain types of drift (e.g., a security group rule manually deleted), the GitOps controller can automatically trigger terraform apply to revert the change and enforce the desired state. Careful consideration is needed for automated remediation to avoid unintended consequences.
Scalability and Organizational Structure
As organizations grow, managing a single monolithic Terraform repository becomes challenging. Strategies include:
Module Decomposition: Breaking down infrastructure into reusable, versioned Terraform modules.
Workspace/Project Separation: Using separate Git repositories and Terraform workspaces for different teams, applications, or environments.
Federated GitOps: Multiple Git repositories, each managed by a dedicated GitOps controller for specific domains or teams, all feeding into a higher-level governance structure.
Role-Based Access Control (RBAC): Implementing strict RBAC for Git repositories and CI/CD pipelines to control who can propose and approve infrastructure changes.
Benefits of Combining GitOps and Terraform for Policy Management
The synergy between GitOps and Terraform offers compelling advantages for modern infrastructure policy management:
Enhanced Security and Compliance: By enforcing policies at every stage through automated checks and Git-driven workflows, organizations can significantly reduce their attack surface and demonstrate continuous compliance. Every change is auditable, leaving a clear trail.
Reduced Configuration Drift: The core GitOps principle of continuous reconciliation ensures that the actual infrastructure state always matches the desired state defined in Git, minimizing inconsistencies and policy violations.
Increased Efficiency and Speed: Automating policy validation and enforcement within CI/CD pipelines accelerates deployment cycles. Developers receive immediate feedback on policy violations, enabling faster iterations.
Improved Collaboration and Transparency: Git provides a collaborative platform where teams can propose, review, and approve infrastructure changes. Policies embedded in this workflow become transparent and consistently applied.
Cost Optimization: Policies can be enforced to ensure resource efficiency (e.g., preventing oversized instances, enforcing auto-scaling, managing resource tags for cost allocation), leading to better cloud cost management.
Disaster Recovery and Consistency: The entire infrastructure, including its policies, is defined as code in Git. This enables rapid and consistent recovery from disasters by simply rebuilding the environment from the Git repository.
Overcoming Potential Challenges
While powerful, adopting GitOps and Terraform for policy management also comes with certain challenges:
Initial Learning Curve
Teams need to invest time in learning Terraform HCL, GitOps principles, and specific policy-as-code tools like OPA/Rego. This cultural and technical shift requires training and strong leadership buy-in.
Tooling Complexity
Integrating various tools (Terraform, Git, CI/CD platforms, GitOps controllers, policy engines) can be complex. Choosing the right tools and ensuring seamless integration is key to a smooth workflow.
State Management Security
Terraform state files contain sensitive information about your infrastructure. Securing remote backends, implementing proper encryption, and managing access to state files is paramount. GitOps principles should extend to securing access to the Git repository itself.
Frequently Asked Questions
Can GitOps and Terraform replace all manual policy checks?
While GitOps and Terraform significantly reduce the need for manual policy checks by automating enforcement and validation, some high-level governance or very nuanced, human-driven policy reviews might still be necessary. The goal is to automate as much as possible, focusing manual effort on complex edge cases or strategic oversight.
What are some popular tools for policy as code with Terraform?
Popular tools include Open Policy Agent (OPA) with its Rego language (used by tools like Checkov and Terrascan), HashiCorp Sentinel (for Terraform Enterprise/Cloud), and cloud-native policy services such as AWS Config, Azure Policy, and Google Cloud Organization Policy Service. Each offers different strengths depending on your specific needs and environment.
How does this approach handle emergency changes?
In a strict GitOps model, even emergency changes should ideally go through a rapid Git-driven workflow (e.g., a fast-tracked PR with minimal review). However, some organizations maintain an “escape hatch” mechanism for critical emergencies, allowing direct access to modify infrastructure. If such direct changes occur, the GitOps controller will detect the drift and either revert the change or require an immediate Git commit to reconcile the desired state, thereby ensuring auditability and eventual consistency with the defined policies.
Is GitOps only for Kubernetes, or can it be used with Terraform?
While GitOps gained significant traction in the Kubernetes ecosystem with tools like Argo CD and Flux, its core principles are applicable to any declarative system. Terraform, being a declarative infrastructure-as-code tool, is perfectly suited for a GitOps workflow. The Git repository serves as the single source of truth for Terraform configurations, and CI/CD pipelines or custom operators drive the “apply” actions based on Git changes, embodying the GitOps philosophy.
Conclusion
The combination of GitOps and Terraform offers a paradigm shift in how organizations manage infrastructure and enforce policies. By embracing declarative configurations, version control, and automated reconciliation, you can transform policy management from a manual, error-prone burden into an efficient, secure, and continuously compliant process. This approach not only enhances security and ensures adherence to regulatory standards but also accelerates innovation by empowering teams with agile, auditable, and automated infrastructure deployments. As you navigate the complexities of modern cloud environments, leveraging GitOps and Terraform will be instrumental in building resilient, compliant, and scalable infrastructure. Thank you for reading the DevopsRoles page!
In the world of data science and machine learning, rapidly developing interactive web applications is crucial for showcasing models, visualizing data, and building internal tools. Streamlit has emerged as a powerful, user-friendly framework that empowers developers and data scientists to create beautiful, performant data apps with pure Python code. However, taking these applications from local development to a scalable, cost-efficient production environment often presents a significant challenge, especially when aiming for a serverless Streamlit deployment.
Traditional deployment methods can involve manual server provisioning, complex dependency management, and a constant struggle with scalability and maintenance. This article will guide you through an automated, repeatable, and robust approach to achieving a serverless Streamlit deployment using Terraform. By combining the agility of Streamlit with the infrastructure-as-code (IaC) prowess of Terraform, you’ll learn how to build a scalable, cost-effective, and reproducible deployment pipeline, freeing you to focus on developing your innovative data applications rather than managing underlying infrastructure.
Understanding Streamlit and Serverless Architectures
Before diving into the mechanics of automation, let’s establish a clear understanding of the core technologies involved: Streamlit and serverless computing.
What is Streamlit?
Streamlit is an open-source Python library that transforms data scripts into interactive web applications in minutes. It simplifies the web development process for Pythonistas by allowing them to create custom user interfaces with minimal code, without needing extensive knowledge of front-end frameworks like React or Angular.
Simplicity: Write Python scripts, and Streamlit handles the UI generation.
Interactivity: Widgets like sliders, buttons, text inputs are easily integrated.
Data-centric: Optimized for displaying and interacting with data, perfect for machine learning models and data visualizations.
Rapid Prototyping: Speeds up the iteration cycle for data applications.
The Appeal of Serverless
Serverless computing is an execution model where the cloud provider dynamically manages the allocation and provisioning of servers. You, as the developer, write and deploy your code, and the cloud provider handles all the underlying infrastructure concerns like scaling, patching, and maintenance. This model offers several compelling advantages:
No Server Management: Eliminate the operational overhead of provisioning, maintaining, and updating servers.
Automatic Scaling: Resources automatically scale up or down based on demand, ensuring your application handles traffic spikes without manual intervention.
Pay-per-Execution: You only pay for the compute time and resources your application consumes, leading to significant cost savings, especially for applications with intermittent usage.
High Availability: Serverless platforms are designed for high availability and fault tolerance, distributing your application across multiple availability zones.
Faster Time-to-Market: Developers can focus more on code and less on infrastructure, accelerating the deployment process.
While often associated with function-as-a-service (FaaS) platforms like AWS Lambda, the serverless paradigm extends to container-based services such as AWS Fargate or Google Cloud Run, which are excellent candidates for containerized Streamlit applications. Deploying Streamlit in a serverless manner allows your data applications to be highly available, scalable, and cost-efficient, adapting seamlessly to varying user loads.
Challenges in Traditional Streamlit Deployment
Even with Streamlit’s simplicity, traditional deployment can quickly become complex, hindering the benefits of rapid application development.
Manual Configuration Headaches
Deploying a Streamlit application typically involves setting up a server, installing Python, managing dependencies, configuring web servers (like Nginx or Gunicorn), and ensuring proper networking and security. This manual process is:
Time-Consuming: Each environment (development, staging, production) requires repetitive setup.
Prone to Errors: Human error can lead to misconfigurations, security vulnerabilities, or application downtime.
Inconsistent: Subtle differences between environments can cause the “it works on my machine” syndrome.
Lack of Reproducibility and Version Control
Without a defined process, infrastructure changes are often undocumented or managed through ad-hoc scripts. This leads to:
Configuration Drift: Environments diverge over time, making debugging and maintenance difficult.
Poor Auditability: It’s hard to track who made what infrastructure changes and why.
Difficulty in Rollbacks: Reverting to a previous, stable infrastructure state becomes a guessing game.
Scaling and Maintenance Overhead
Once deployed, managing the operational aspects of a Streamlit app on traditional servers adds further burden:
Scaling Challenges: Manually adding or removing server instances, configuring load balancers, and adjusting network settings to match demand is complex and slow.
Patching and Updates: Keeping operating systems, libraries, and security patches up-to-date requires constant attention.
Resource Utilization: Under-provisioning leads to performance issues, while over-provisioning wastes resources and money.
Terraform: The Infrastructure as Code Solution
This is where Infrastructure as Code (IaC) tools like Terraform become indispensable. Terraform addresses these deployment challenges head-on by enabling you to define your cloud infrastructure in a declarative language.
What is Terraform?
Terraform, developed by HashiCorp, is an open-source IaC tool that allows you to define and provision cloud and on-premise resources using human-readable configuration files. It supports a vast ecosystem of providers for various cloud platforms (AWS, Azure, GCP, etc.), SaaS offerings, and custom services.
Declarative Language: You describe the desired state of your infrastructure, and Terraform figures out how to achieve it.
Providers: Connect to various cloud services (e.g., aws, google, azurerm) to manage their resources.
Resources: Individual components of your infrastructure (e.g., a virtual machine, a database, a network).
State File: Terraform maintains a state file that maps your configuration to the real-world resources it manages. This allows it to understand what changes need to be made.
Leveraging Terraform for your serverless Streamlit deployment offers numerous advantages:
Automation and Consistency: Automate the provisioning of all necessary cloud resources, ensuring consistent deployments across environments.
Reproducibility: Infrastructure becomes code, meaning you can recreate your entire environment from scratch with a single command.
Version Control: Store your infrastructure definitions in a version control system (like Git), enabling change tracking, collaboration, and easy rollbacks.
Cost Optimization: Define resources precisely, avoid over-provisioning, and easily manage serverless resources that scale down to zero when not in use.
Security Best Practices: Embed security configurations directly into your code, ensuring compliance and reducing the risk of misconfigurations.
Reduced Manual Effort: Developers and DevOps teams spend less time on manual configuration and more time on value-added tasks.
Designing Your Serverless Streamlit Architecture with Terraform
A robust serverless architecture for Streamlit needs several components to ensure scalability, security, and accessibility. We’ll focus on AWS as a primary example, as its services like Fargate are well-suited for containerized applications.
Choosing a Serverless Platform for Streamlit
While AWS Lambda is a serverless function service, Streamlit applications typically require a persistent process and more memory than a standard Lambda function provides, making direct deployment challenging. Instead, container-based serverless options are preferred:
AWS Fargate (with ECS): A serverless compute engine for containers that works with Amazon Elastic Container Service (ECS). Fargate abstracts away the need to provision, configure, or scale clusters of virtual machines. You simply define your application’s resource requirements, and Fargate runs it. This is an excellent choice for Streamlit.
Google Cloud Run: A fully managed platform for running containerized applications. It automatically scales your container up and down, even to zero, based on traffic.
Azure Container Apps: A fully managed serverless container service that supports microservices and containerized applications.
For the remainder of this guide, we’ll use AWS Fargate as our target serverless environment due to its maturity and robust ecosystem, making it a powerful choice for a serverless Streamlit deployment.
Key Components for Deployment on AWS Fargate
A typical serverless Streamlit deployment on AWS using Fargate will involve:
AWS ECR (Elastic Container Registry): A fully managed Docker container registry that makes it easy to store, manage, and deploy Docker images. Your Streamlit app’s Docker image will reside here.
AWS ECS (Elastic Container Service): A highly scalable, high-performance container orchestration service that supports Docker containers. We’ll use it with Fargate launch type.
AWS VPC (Virtual Private Cloud): Your isolated network in the AWS cloud, containing subnets, route tables, and network gateways.
Security Groups: Act as virtual firewalls to control inbound and outbound traffic to your ECS tasks.
Application Load Balancer (ALB): Distributes incoming application traffic across multiple targets, such as your ECS tasks. It also handles SSL termination and routing.
AWS Route 53 (Optional): For managing your custom domain names and pointing them to your ALB.
AWS Certificate Manager (ACM) (Optional): For provisioning SSL/TLS certificates for HTTPS.
Architecture Sketch:
User -> Route 53 (Optional) -> ALB -> VPC (Public/Private Subnets) -> Security Group -> ECS Fargate Task (Running Streamlit Container from ECR)
Step-by-Step: Accelerating Your Serverless Streamlit Deployment with Terraform on AWS
Let’s walk through the process of setting up your serverless Streamlit deployment using Terraform on AWS.
AWS CLI installed and configured with your credentials.
Docker installed on your local machine.
Terraform installed on your local machine.
Step 1: Streamlit Application Containerization
First, you need to containerize your Streamlit application using Docker. Create a simple Streamlit app (e.g., app.py) and a Dockerfile in your project root.
app.py:
import streamlit as st

st.set_page_config(page_title="My Serverless Streamlit App")
st.title("Hello from Serverless Streamlit!")
st.write("This application is deployed on AWS Fargate using Terraform.")

name = st.text_input("What's your name?")
if name:
    st.write(f"Nice to meet you, {name}!")

st.sidebar.header("About")
st.sidebar.info("This is a simple demo app.")
requirements.txt:
streamlit==1.x.x # Use a specific version
Dockerfile:
# Use an official Python runtime as a parent image
FROM python:3.9-slim-buster

# Set the working directory in the container
WORKDIR /app

# Copy the current directory contents into the container at /app
COPY requirements.txt ./
COPY app.py ./

# Install any needed packages specified in requirements.txt
RUN pip install --no-cache-dir -r requirements.txt

# Make port 8501 available to the world outside this container
EXPOSE 8501

# Run app.py when the container launches
ENTRYPOINT ["streamlit", "run", "app.py", "--server.port=8501", "--server.enableCORS=false", "--server.enableXsrfProtection=false"]
Note: --server.enableCORS=false and --server.enableXsrfProtection=false are often needed when Streamlit is behind a load balancer to prevent connection issues. Adjust as per your security requirements.
Step 2: Initialize Terraform Project
Create a directory for your Terraform configuration (e.g., terraform-streamlit). Inside this directory, create the following files:
main.tf: Defines AWS resources.
variables.tf: Declares input variables.
outputs.tf: Specifies output values.
main.tf (initial provider configuration):
variable "region" {
  description = "AWS region"
  type        = string
  default     = "us-east-1" # Or your preferred region
}

variable "project_name" {
  description = "Name of the project for resource tagging"
  type        = string
  default     = "streamlit-fargate-app"
}

variable "vpc_cidr_block" {
  description = "CIDR block for the VPC"
  type        = string
  default     = "10.0.0.0/16"
}

variable "public_subnet_cidrs" {
  description = "List of CIDR blocks for public subnets"
  type        = list(string)
  default     = ["10.0.1.0/24", "10.0.2.0/24"] # Adjust based on your region's AZs
}

variable "container_port" {
  description = "Port on which the Streamlit container listens"
  type        = number
  default     = 8501
}
outputs.tf (initially empty, will be populated later):
/* No outputs defined yet */
Initialize your Terraform project:
terraform init
Step 3: Define AWS ECR Repository
Add the ECR repository definition to your main.tf. This is where your Docker image will be pushed.
resource "aws_ecr_repository" "streamlit_repo" { name = "${var.project_name}-repo" image_tag_mutability = "MUTABLE"
output "ecr_repository_url" { description = "URL of the ECR repository" value = aws_ecr_repository.streamlit_repo.repository_url }
Step 4: Build and Push Docker Image
Before deploying with Terraform, you need to build your Docker image and push it to the ECR repository created in Step 3. You’ll need the ECR repository URL from Terraform’s output.
# After `terraform apply`, get the ECR URL:
terraform output ecr_repository_url

# Example shell commands (replace with your ECR URL and desired tag):
# Login to ECR
aws ecr get-login-password --region us-east-1 | docker login --username AWS --password-stdin .dkr.ecr.us-east-1.amazonaws.com

# Build the Docker image
docker build -t ${var.project_name} .

# Tag the image
docker tag ${var.project_name}:latest .dkr.ecr.us-east-1.amazonaws.com/${var.project_name}-repo:latest

# Push the image to ECR
docker push .dkr.ecr.us-east-1.amazonaws.com/${var.project_name}-repo:latest
Step 5: Provision AWS ECS Cluster and Fargate Service
This is the core of your serverless Streamlit deployment. We’ll define the VPC, subnets, security groups, ECS cluster, task definition, and service, along with an Application Load Balancer.
default_action { type = "forward" target_group_arn = aws_lb_target_group.streamlit_tg.arn } }
# --- ECS Service --- resource "aws_ecs_service" "streamlit_service" { name = "${var.project_name}-service" cluster = aws_ecs_cluster.streamlit_cluster.id task_definition = aws_ecs_task_definition.streamlit_task.arn desired_count = 1 # Start with 1 instance, can be scaled with auto-scaling
launch_type = "FARGATE"
network_configuration { subnets = aws_subnet.public.*.id security_groups = [aws_security_group.ecs_task.id] assign_public_ip = true # Required for Fargate tasks in public subnets to reach ECR, etc. }
lifecycle { ignore_changes = [desired_count] # Prevents Terraform from changing desired_count if auto-scaling is enabled later }
tags = { Project = var.project_name }
depends_on = [ aws_lb_listener.http ] }
# Output the ALB DNS name output "streamlit_app_url" { description = "The URL of the deployed Streamlit application" value = aws_lb.streamlit_alb.dns_name }
Remember to update variables.tf with required variables (like project_name, vpc_cidr_block, public_subnet_cidrs, container_port) if not already done. The outputs.tf will now have the streamlit_app_url.
Step 6: Deploy and Access
Navigate to your Terraform project directory and run the following commands:
# Review the plan to see what resources will be created
terraform plan

# Apply the changes to create the infrastructure
terraform apply --auto-approve

# Get the URL of your deployed Streamlit application
terraform output streamlit_app_url
Once terraform apply completes successfully, you will get an ALB DNS name. Paste this URL into your browser, and you should see your Streamlit application running!
Advanced Considerations
Custom Domains and HTTPS
For a production serverless Streamlit deployment, you’ll want a custom domain and HTTPS. This involves:
AWS Certificate Manager (ACM): Request and provision an SSL/TLS certificate.
AWS Route 53: Create a DNS A record (or CNAME) pointing your domain to the ALB.
ALB Listener: Add an HTTPS listener (port 443) to your ALB, attaching the ACM certificate and forwarding traffic to your target group.
CI/CD Integration
Automate the build, push, and deployment process with CI/CD tools like GitHub Actions, GitLab CI, or AWS CodePipeline/CodeBuild. This ensures that every code change triggers an automated infrastructure update and application redeployment.
A typical CI/CD pipeline would:
On code push to main branch:
Build Docker image.
Push image to ECR.
Run terraform init, terraform plan, terraform apply to update the ECS service with the new image tag.
Logging and Monitoring
Ensure your ECS tasks are configured to send logs to AWS CloudWatch Logs (as shown in the task definition). You can then use CloudWatch Alarms and Dashboards for monitoring your application’s health and performance.
Terraform State Management
For collaborative projects and production environments, it’s crucial to store your Terraform state file remotely. Amazon S3 is a common choice for this, coupled with DynamoDB for state locking to prevent concurrent modifications.
Add this to your main.tf:
terraform {
  backend "s3" {
    bucket         = "your-terraform-state-bucket" # Replace with your S3 bucket name
    key            = "streamlit-fargate/terraform.tfstate"
    region         = "us-east-1"
    encrypt        = true
    dynamodb_table = "your-terraform-state-lock-table" # Replace with your DynamoDB table name
  }
}
You would need to manually create the S3 bucket and DynamoDB table before initializing Terraform with this backend configuration.
Frequently Asked Questions
Q1: Why not use Streamlit Cloud for serverless deployment?
Streamlit Cloud offers the simplest way to deploy Streamlit apps, often with a few clicks or GitHub integration. It’s a fantastic option for quick prototypes, personal projects, and even some production use cases where its features meet your needs. However, using Terraform for a serverless Streamlit deployment on a cloud provider like AWS gives you:
Full control: Over the underlying infrastructure, networking, security, and resource allocation.
Customization: Ability to integrate with a broader AWS ecosystem (databases, queues, machine learning services) that might be specific to your architecture.
Cost Optimization: Fine-tuned control over resource sizing and auto-scaling rules can sometimes lead to more optimized costs for specific traffic patterns.
IaC Benefits: All the advantages of version-controlled, auditable, and repeatable infrastructure.
The choice depends on your project’s complexity, governance requirements, and existing cloud strategy.
Q2: Can I use this approach for other web frameworks or Python apps?
Absolutely! The approach demonstrated here for containerizing a Streamlit app and deploying it on AWS Fargate with Terraform is highly generic. Any web application or Python service that can be containerized with Docker can leverage this identical pattern for a scalable, serverless deployment. You would simply swap out the Streamlit specific code and port for your application’s requirements.
Q3: How do I handle stateful Streamlit apps in a serverless environment?
Serverless environments are inherently stateless. For Streamlit applications requiring persistence (e.g., storing user sessions, uploaded files, or complex model outputs), you must integrate with external state management services:
Databases: Use managed databases like AWS RDS (PostgreSQL, MySQL), DynamoDB, or ElastiCache (Redis) for session management or persistent data storage.
Object Storage: For file uploads or large data blobs, AWS S3 is an excellent choice.
External Cache: Use Redis (via AWS ElastiCache) for caching intermediate results or session data.
Terraform can be used to provision and configure these external state services alongside your Streamlit deployment.
Q4: What are the cost implications of Streamlit on AWS Fargate?
AWS Fargate is a pay-per-use service, meaning you are billed for the amount of vCPU and memory resources consumed by your application while it’s running. Costs are generally competitive, especially for applications with variable or intermittent traffic, as Fargate scales down when not in use. Factors influencing cost include:
CPU and Memory: The amount of resources allocated to each task.
Number of Tasks: How many instances of your Streamlit app are running.
Data Transfer: Ingress and egress data transfer costs.
Other AWS Services: Costs for ALB, ECR, CloudWatch, etc.
Compared to running a dedicated EC2 instance 24/7, Fargate can be significantly more cost-effective if your application experiences idle periods. For very high, consistent traffic, dedicated EC2 instances might sometimes offer better price performance, but at the cost of operational overhead.
Q5: Is Terraform suitable for small Streamlit projects?
For a single, small Streamlit app that you just want to get online quickly and don’t foresee much growth or infrastructure complexity, the initial learning curve and setup time for Terraform might seem like overkill. In such cases, Streamlit Cloud or manual deployment to a simple VM could be faster. However, if you anticipate:
Future expansion or additional services.
Multiple environments (dev, staging, prod).
Collaboration with other developers.
The need for robust CI/CD pipelines.
Any form of compliance or auditing requirements.
Then, even for a “small” project, investing in Terraform from the start pays dividends in the long run by providing a solid foundation for scalable, maintainable, and cost-efficient infrastructure.
Conclusion
Deploying Streamlit applications in a scalable, reliable, and cost-effective manner is a common challenge for data practitioners and developers. By embracing the power of Infrastructure as Code with Terraform, you can significantly accelerate your serverless Streamlit deployment process, transforming a manual, error-prone endeavor into an automated, version-controlled pipeline.
This comprehensive guide has walked you through containerizing your Streamlit application, defining your AWS infrastructure using Terraform, and orchestrating its deployment on AWS Fargate. You now possess the knowledge to build a robust foundation for your data applications, ensuring they can handle varying loads, remain highly available, and adhere to modern DevOps principles. Embracing this automated approach will not only streamline your current projects but also empower you to manage increasingly complex cloud architectures with confidence and efficiency. Invest in IaC; it’s the future of cloud resource management.