Table of Contents
Introduction
Setting up Active Directory (AD) on Windows Server 2012 R2 is a crucial task for any organization aiming to manage users, groups, and computers efficiently. Active Directory provides a centralized and standardized system that automates network management, enhancing security and ease of access. In this guide, we will walk you through the step-by-step process of How to Install Active Directory Windows Server 2012 R2, ensuring that your infrastructure is robust, secure, and ready to handle your organizational needs.
I. Prepare
To get started, ensure that you have Windows Server 2012 R2 installed on VirtualBox. If you haven’t done this yet, you can follow VirtualBox’s installation guide to set up your virtual machine with Windows Server 2012 R2. Once your server is ready, proceed with the following steps to Install Active Directory Windows Server 2012 R2.
II. Install
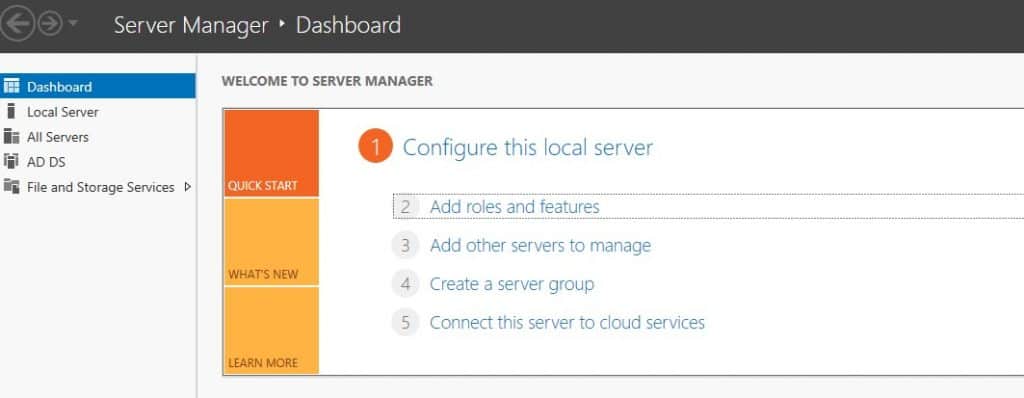
1. Run [Start] – [Server Manager].
2. Click [Add roles and features].

| 3. Click the [Next] button. |
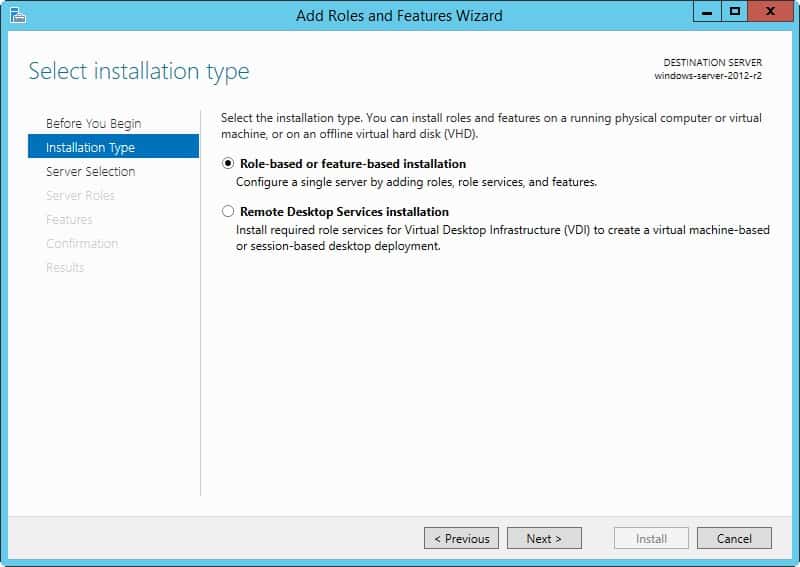
4. Select [Role-based or feature-based installation].
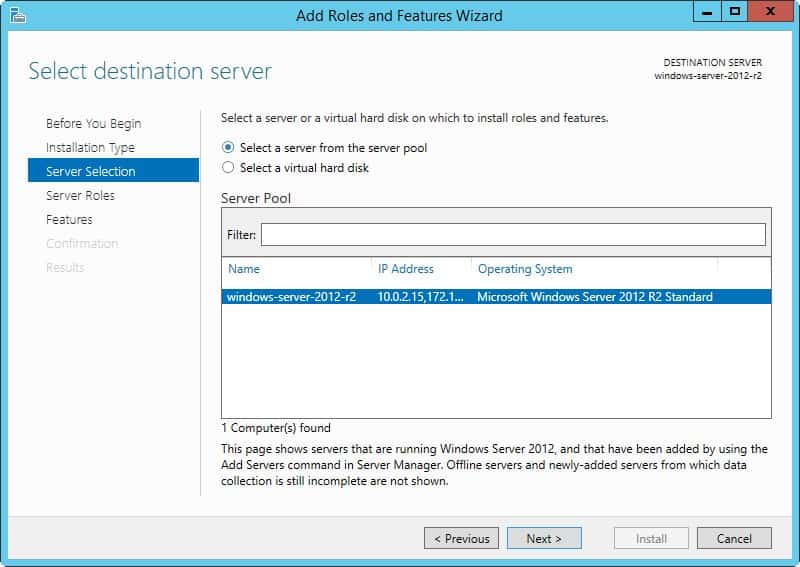
5. Select a Host to which you’d like to add services.
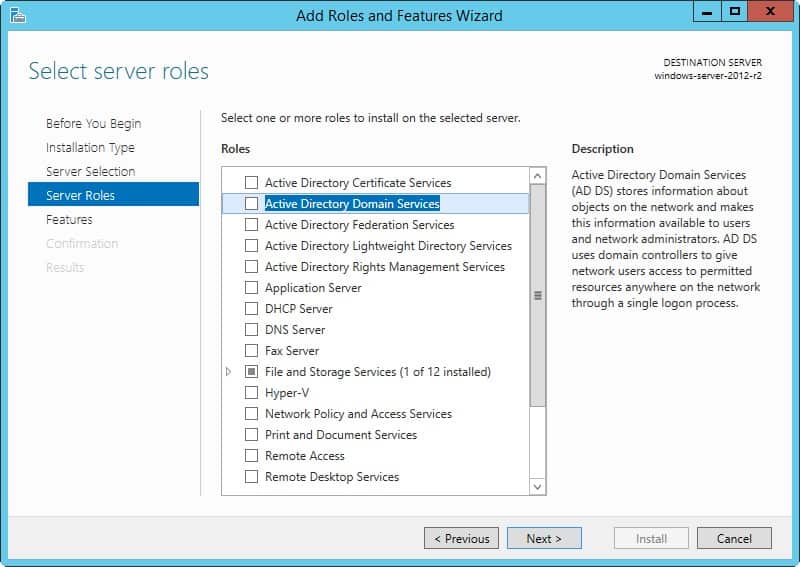
6. Check a box [Active Directory Domain Services].
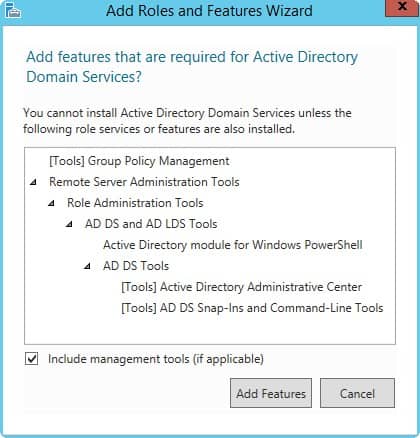
7. Additional features are required to add AD DS. Click the [Add Features] button.
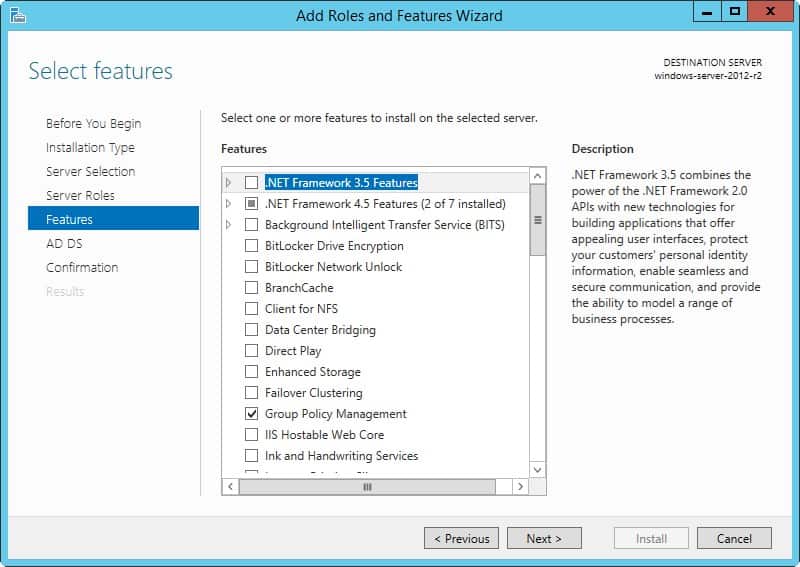
8. Click the [Next] button.

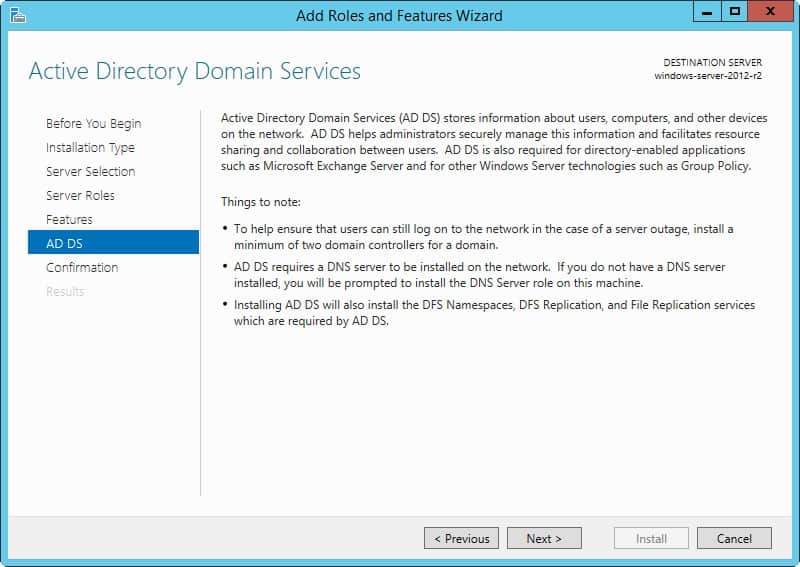
9. Click the [Next] button.
10. Click the [Next] button.
11. Click [Install] button.

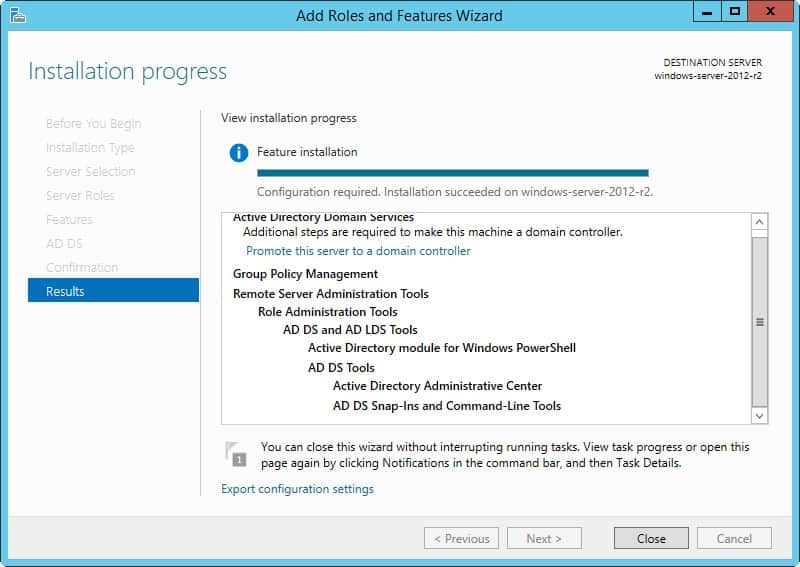
12. Installation is started.
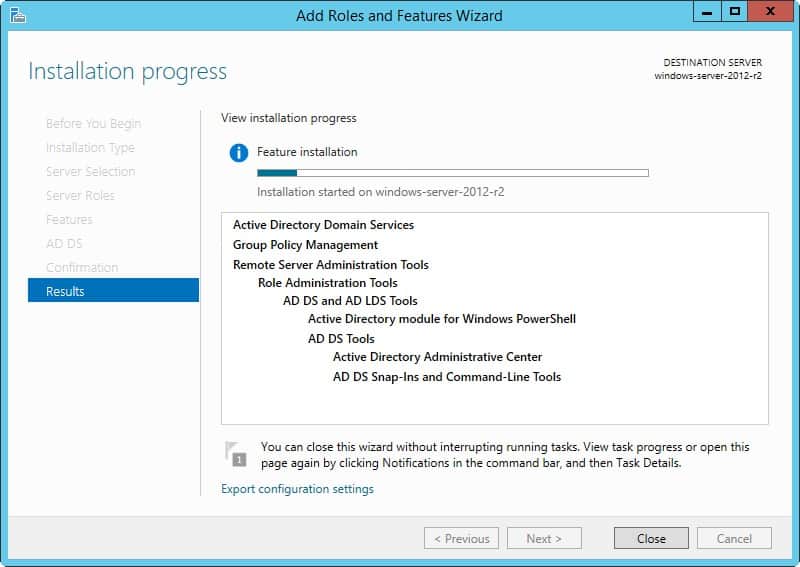
13. After finishing Installation, click [Close] button.
III. Configure New DC (Domain Controler).
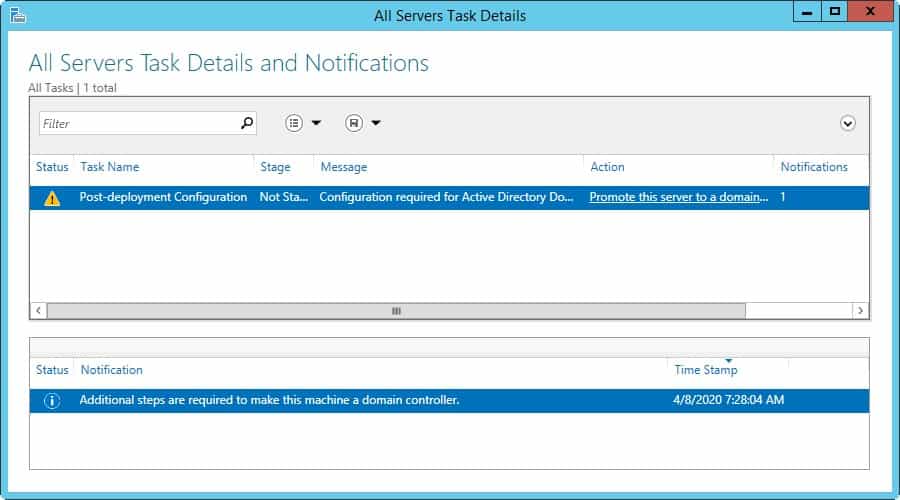
1. Run [Server Manager] and click [AD DS].
2. Click the [More…] link which is upper-right.

3. Click the [Promote this server to domain...] link.
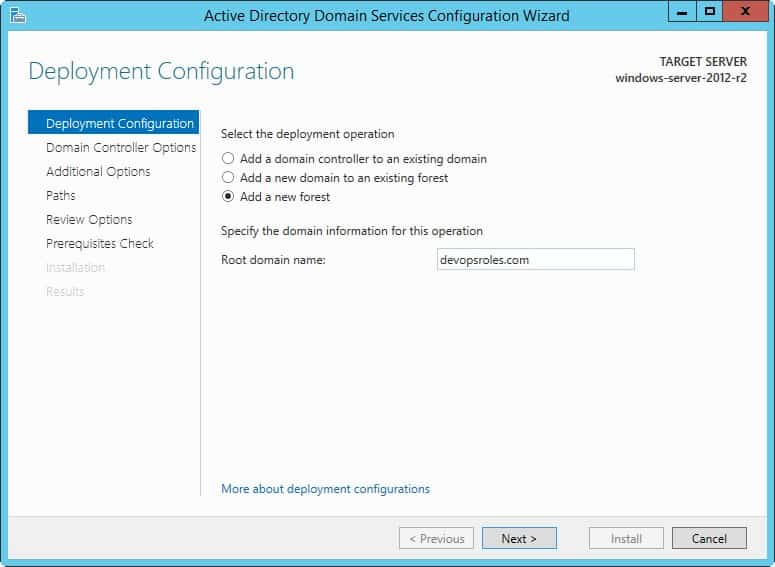
4. Check a box [Add a new forest] and input any Domain name you’d like to set for the [Root domain name] field.
5. Select [Forest functional level] and [Domain functional level].
Set any password for Directory Services Restore Mode.
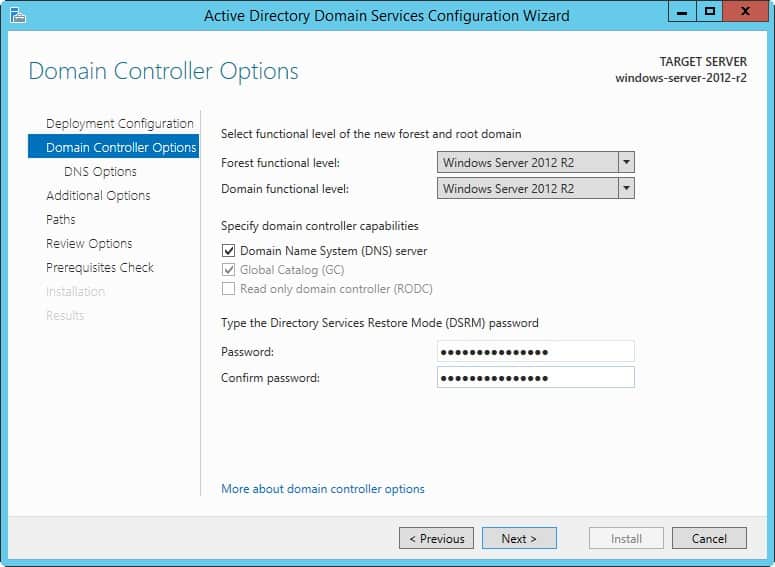
6. Click the [Next] button.
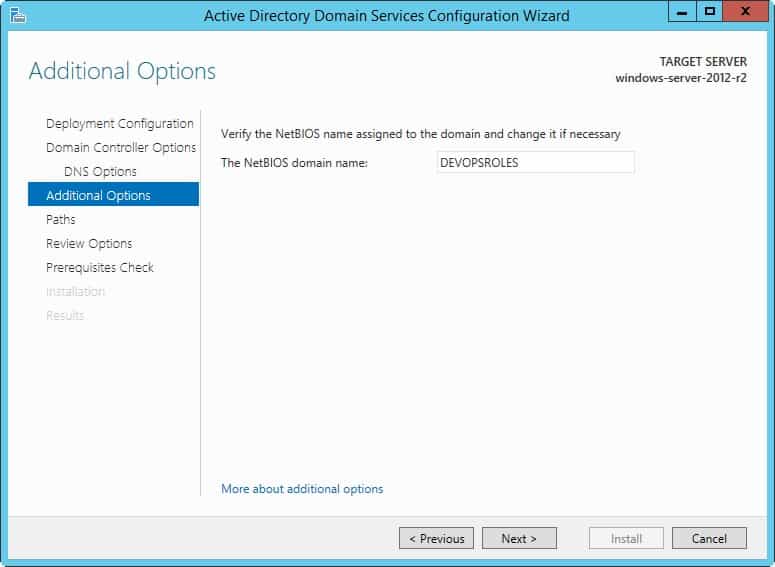
7. Set NetBIOS name.
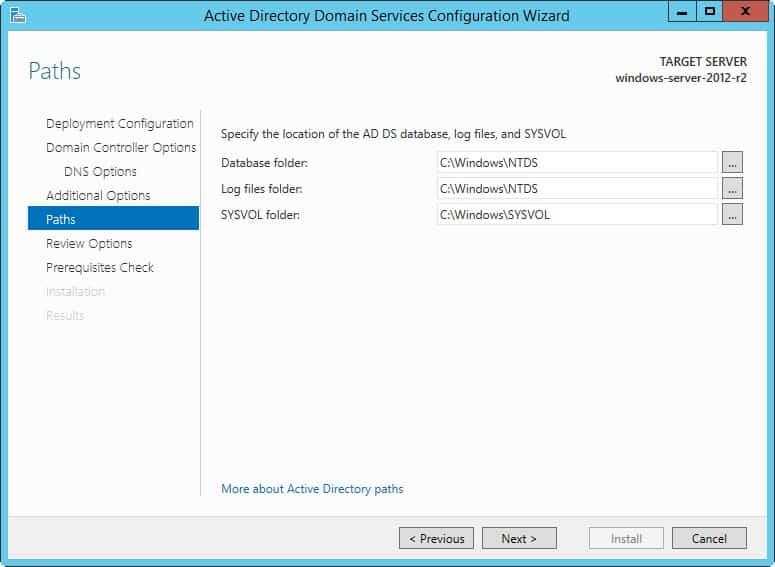
8. Specify the Database folder or Log folder and so on. It’s Ok to keep default if you don’t have specific requirements.
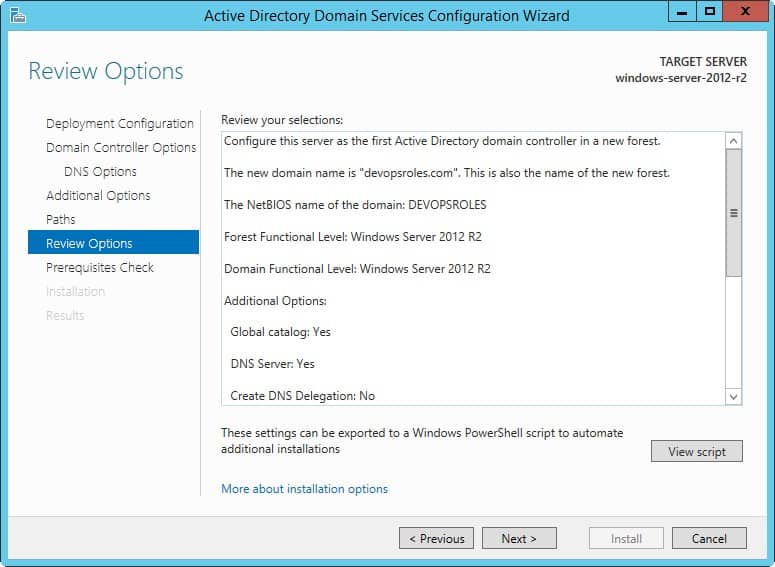
9. Check the contents you configured and click the [Next] button.
10. Click the [Install] button. After finishing installation, the System will restart.

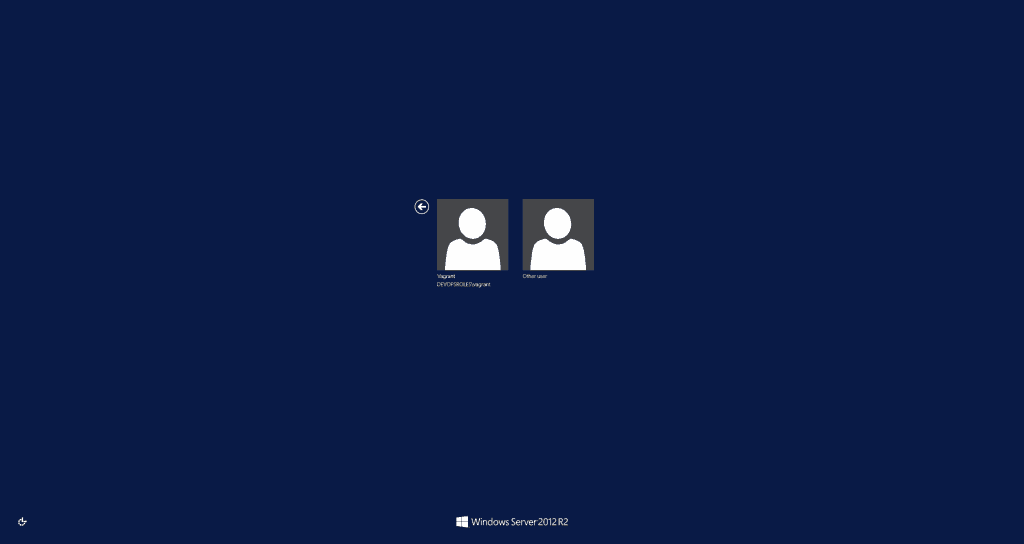
11. After restarting the System, the logon name is changed to [Domain name]\[User name].
Conclusion
By following this guide, you have successfully installed and configured Active Directory on your Windows Server 2012 R2. This setup not only streamlines user and resource management but also strengthens your network security. With AD in place, you can now leverage its full capabilities to enhance your organization’s IT infrastructure, ensuring efficient and secure operations. As your organization grows, Active Directory will continue to provide the scalability and reliability needed to manage complex network environments. The end! Happy with Windows Server. Thank you for reading the DevopsRoles page!


1 thought on “Install Active Directory Windows Server 2012 R2”