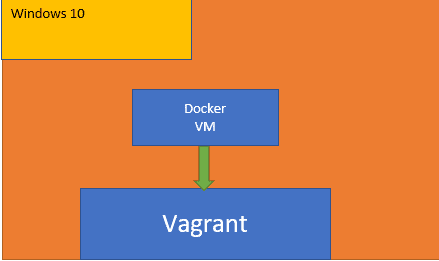
Category Archives: Docker

Master Docker with DevOpsRoles.com. Discover comprehensive guides and tutorials to efficiently use Docker for containerization and streamline your DevOps processes.

Creating a Dockerfile step by step Instructions

Introduction

Creating efficient and reliable Docker images starts with a well-crafted Dockerfile step by step. In this article, we will provide a step-by-step guide to writing Dockerfiles, covering essential commands, best practices, and tips to optimize your Docker workflow. Whether you are new to Docker or looking to enhance your skills, this comprehensive guide will help you create Dockerfiles that streamline your development and deployment processes. For a detailed walkthrough, visit Dockerfile Step-by-Step.

Docker Image command

  • shows all images: docker images
  • creates an image from Dockerfile: docker build
  • creates an image from a tarball: docker import
  • turns container filesystem into tarball archive stream to STDOUT: docker export
  • loads an image from a tar archive as STDIN, including images and tags (as of 0.7): docker load
  • saves an image to a tar archive stream to STDOUT with all parent layers, tags & versions (as of 0.7): docker save
  • removes an image: docker rmi
  • tags an image to a name (local or registry): docker tag
  • shows the history of the image: docker history
  • creates an image from a container, Pausing it temporarily if it is running: docker commit

Dockerfile step by step

What is Dockerfile?

A Dockerfile is a text document that contains all the commands a user.

FROM, RUN, CMD in Dockerfile

Example Dockerfile for installing the Nginx web server.

FROM centos:7
RUN yum install -y nginx
CMD ["nginx", "-g", "daemon off;"]

Docker shell command line

docker build -t test/nginx:v1 .
docker run -it --rm -p 80:80 test/nginx:v1

Docker build cache

After each build step, Docker takes a snapshot of the resulting image. You can force a rebuild with docker build –no-cache

Docker JSON syntax

Most Dockerfile arguments

Plain string format:

RUN yum install -y nginx

JSON format list:

RUN ["yum", "install", "-y", "nginx"]

COPY, ENV, EXPOSE in Dockerfile

Example Dockerfile

FROM centos:7
RUN yum update -y
RUN yum install -y nginx
# make utf-8 enabled by default
ENV LANG en_US.utf8
COPY index.html /usr/share/nginx/html/index.html
EXPOSE 80 443
CMD ["nginx", "-g", "daemon off;"]

VOLUME in Dockerfile

For example Dockerfile

VOLUME ["/etc/nginx/"]

ENTRYPOINT vs CMD in Dockerfile

#For example
CMD ["nginx", "-g", "daemon off;"]
ENTRYPOINT ["/docker-entrypoint.sh"]

You will use ENTRYPOINT and CMD together

  • ENTRYPOINT will define the base command for our container.
  • CMD will define the default parameter(s) for this command.
  • They both have to use JSON syntax.

More

  • MAINTAINER: Set the Author field of the generated images. Ex: MAINTAINER Huu Phan “huupv@gmail.com”
  • ADD: Copies new files, directories, or remote files to the container. Invalidates caches. Avoid ADD and use COPY instead. Ex: ADD build-nginx /tmp/build-nginx
  • STOPSIGNAL: Sets the system call signal that will be sent to the container to exit. Ex: STOPSIGNAL SIGINT
  • WORKDIR: Sets the working directory. Ex: WORKDIR /etc/nginx
  • USER: Sets the username for following RUN / CMD / ENTRYPOINT commands. Ex: USER nginx
  • LABEL: Apply key/value metadata to your images, containers, or daemons. Ex: LABEL architecture=”amd64″
  • ARG: Defines a build-time variable. Ex: ARG buildno
  • ONBUILD: Adds a trigger instruction when the image is used as the base for another build. Ex: ONBUILD COPY . /app/src

Conclusion

A solid understanding of Dockerfile construction is crucial for leveraging the full potential of Docker in your projects. This step-by-step guide aims to equip you with the knowledge and techniques to create efficient and effective Dockerfiles.

By following these guidelines, you can ensure smoother builds, reduced image sizes, and enhanced performance in your Docker environments. To stay updated with the latest tips and best practices, be sure to visit Dockerfile Step-by-Step. Let this guide be your roadmap to mastering Dockerfile creation.

Quick start install Elasticsearch and Kibana with Docker

In this tutorial, How to Quickstart install Elasticsearch and Kibana with Docker.

  • Elasticssearch: localhost:9200
  • Kibana: localhost:5601

Docker-compose start with

docker-compose -f docker-compose.yml up -d

Docker-compose Stop

$ docker-compose -f docker-compose.yml down

Be careful with command docker-compose down. If you want Stop and remove containers, networks, images, and volumes as in the picture below

Install Elasticsearch with Kibana with Docker-compose

For example docker-compose.yml

version: '3'
services:
  elasticsearch:
    image: docker.elastic.co/elasticsearch/elasticsearch:6.3.2
    ports:
      - 9200:9200
    volumes:
      - ./share/elasticsearch/data:/usr/share/elasticsearch/data
      - ./share/elasticsearch/config/elasticsearch.yml:/usr/share/elasticsearch/config/elasticsearch.yml
    networks: [elastic]
    environment:
      - discovery.type=single-node
  kibana:
    image: docker.elastic.co/kibana/kibana-oss:6.3.2
    ports:
      - 5601:5601
    networks: [elastic]
networks:
  elastic:

Host OS ./share/elasticsearch/data and Guest OS /usr/share/elasticsearch/data are mounted for data persistence of Elasticsearch.

File configure single node “./share//config/elasticsearch.yml”

cluster.name: "docker-cluster"
network.host: 0.0.0.0
discovery.zen.minimum_master_nodes: 1

Steps install Elasticsearch and Kibana with Docker as the picture below

[vagrant@localhost ~]$ tree /home/vagrant/
/home/vagrant/
├── docker-compose.yml
└── share
    └── elasticsearch
        ├── config
        │   └── elasticsearch.yml
        └── data

4 directories, 2 files

Access the client browser as the picture below

Kibana: localhost:5601

Elasticsearch: localhost:9200

Conclusion

Thought the article, How to “Quickstart install Elasticsearch and Kibana with Docker” as above. I hope will this your helpful. Thank you for reading the DevopsRoles page!

Docker Images history

The size of the Docker Image was suddenly increasing, I will check it. Using docker history <Image name> you can check the change history for Image before. Now, let’s Docker Images history.

Docker Images history

Docker pull command

Requires Image to be downloaded locally. As an example, I use docker pull image centos as below

[vagrant@localhost ~]$ docker pull centos:6.10
6.10: Pulling from library/centos
1c8f9aa56c90: Pull complete
Digest: sha256:b4c3fe75b135ca1c26ef6feb8153aade8a31c4e3e763376529c1088de7e973f4
Status: Downloaded newer image for centos:6.10

[vagrant@localhost ~]$ docker images
REPOSITORY          TAG                 IMAGE ID            CREATED             SIZE
centos              6.10                30e66b619e9f        4 months ago        194MB

Try it

The output order is new, and it seems that it becomes an old layer as going down as below

[vagrant@localhost ~]$ docker history centos:6.10
IMAGE               CREATED             CREATED BY                                      SIZE                COMMENT
30e66b619e9f        4 months ago        /bin/sh -c #(nop)  CMD ["/bin/bash"]            0B
<missing>           4 months ago        /bin/sh -c #(nop)  LABEL org.label-schema.sc…   0B
<missing>           4 months ago        /bin/sh -c #(nop) ADD file:769078df784180af4…   194MB

Also, With the “–human” option, the actual date is displayed below

[vagrant@localhost ~]$ docker history centos:6.10 --human=false
IMAGE               CREATED AT                  CREATED BY                                      SIZE                COMMENT
30e66b619e9f        2018-10-10T01:22:51+07:00   /bin/sh -c #(nop)  CMD ["/bin/bash"]            0
<missing>           2018-10-10T01:22:51+07:00   /bin/sh -c #(nop)  LABEL org.label-schema.sc…   0
<missing>           2018-10-10T01:22:51+07:00   /bin/sh -c #(nop) ADD file:769078df784180af4…   193889316

Docker inspect container information

Using docker inspect command to Confirmation of container information.

[vagrant@localhost ~]$ docker inspect centos:6.10
[
    {
        "Id": "sha256:30e66b619e9f73941f418bb08a081132607433f5b8ccaefd3b7bceb08c770b20",
        "RepoTags": [
            "centos:6.10"
        ],
        "RepoDigests": [
            "centos@sha256:b4c3fe75b135ca1c26ef6feb8153aade8a31c4e3e763376529c1088de7e973f4"
        ],
        "Parent": "",
        "Comment": "",
        "Created": "2018-10-09T18:22:51.586650744Z",
        "Container": "9a31860c3402344acd1f16127fec864b93038c86e8716f08e5dc2a60851a602e",
        "ContainerConfig": {
            "Hostname": "9a31860c3402",
            "Domainname": "",
            "User": "",
            "AttachStdin": false,
            "AttachStdout": false,
            "AttachStderr": false,
            "Tty": false,
            "OpenStdin": false,
            "StdinOnce": false,
            "Env": [
                "PATH=/usr/local/sbin:/usr/local/bin:/usr/sbin:/usr/bin:/sbin:/bin"
            ],
            "Cmd": [
                "/bin/sh",
                "-c",
                "#(nop) ",
                "CMD [\"/bin/bash\"]"
            ],
            "ArgsEscaped": true,
            "Image": "sha256:34321cccc68dac29b496363ca05c47e7f23c3e59d664fea4de03695975443b8b",
            "Volumes": null,
            "WorkingDir": "",
            "Entrypoint": null,
            "OnBuild": null,
            "Labels": {
                "org.label-schema.build-date": "20180804",
                "org.label-schema.license": "GPLv2",
                "org.label-schema.name": "CentOS Base Image",
                "org.label-schema.schema-version": "1.0",
                "org.label-schema.vendor": "CentOS"
            }
        },
        "DockerVersion": "17.06.2-ce",
        "Author": "",
        "Config": {
            "Hostname": "",
            "Domainname": "",
            "User": "",
            "AttachStdin": false,
            "AttachStdout": false,
            "AttachStderr": false,
            "Tty": false,
            "OpenStdin": false,
            "StdinOnce": false,
            "Env": [
                "PATH=/usr/local/sbin:/usr/local/bin:/usr/sbin:/usr/bin:/sbin:/bin"
            ],
            "Cmd": [
                "/bin/bash"
            ],
            "ArgsEscaped": true,
            "Image": "sha256:34321cccc68dac29b496363ca05c47e7f23c3e59d664fea4de03695975443b8b",
            "Volumes": null,
            "WorkingDir": "",
            "Entrypoint": null,
            "OnBuild": null,
            "Labels": {
                "org.label-schema.build-date": "20180804",
                "org.label-schema.license": "GPLv2",
                "org.label-schema.name": "CentOS Base Image",
                "org.label-schema.schema-version": "1.0",
                "org.label-schema.vendor": "CentOS"
            }
        },
        "Architecture": "amd64",
        "Os": "linux",
        "Size": 193889316,
        "VirtualSize": 193889316,
        "GraphDriver": {
            "Data": {
                "MergedDir": "/var/lib/docker/overlay2/f799911e2d9e2de958ee359b6a6e125a93a69992c34851acb63ec1f22e2f9da2/merged",
                "UpperDir": "/var/lib/docker/overlay2/f799911e2d9e2de958ee359b6a6e125a93a69992c34851acb63ec1f22e2f9da2/diff",
                "WorkDir": "/var/lib/docker/overlay2/f799911e2d9e2de958ee359b6a6e125a93a69992c34851acb63ec1f22e2f9da2/work"
            },
            "Name": "overlay2"
        },
        "RootFS": {
            "Type": "layers",
            "Layers": [
                "sha256:18c81886066a186e754291bab5ae87b273b274c66c2c9fea8e869a7cb67dac1b"
            ]
        },
        "Metadata": {
            "LastTagTime": "0001-01-01T00:00:00Z"
        }
    }
]

Extract only environment variables as below

[vagrant@localhost ~]$ docker inspect --format='{{range .Config.Env}}{{println .}}{{end}}' centos:6.10
PATH=/usr/local/sbin:/usr/local/bin:/usr/sbin:/usr/bin:/sbin:/bin

Conclusion

Through the article, You can inspect “Docker images history” as above. I hope will this your helpful. Thank you for reading the DevopsRoles page!

Nginx reverse proxy for Jenkins in docker

Introduction

In this tutorial, I use Nginx reverse proxy for Jenkins in docker as the whole picture below

Nginx reverse proxy for Jenkins in docker

Procedure as below

  • Host OS: Install Nginx and Docker. Using account root for setup server.
  • Docker containers: Jenkins and app_devops

Installing and Configuring on CentOS/RedHat 7/6

Install Epel and Remi repository on CentOS/RedHat 6/7

### Install Epel For CentOS/RHEL 7 ###
# rpm -Uvh http://dl.fedoraproject.org/pub/epel/7/x86_64/Packages/e/epel-release-7-11.noarch.rpm

### Install Epel For CentOS/RHEL 6 ###
# rpm -Uvh http://dl.fedoraproject.org/pub/epel/6/x86_64/epel-release-6-8.noarch.rpm

### Install REMI Repository For CentOS/RHEL 7 ###
rpm -Uvh http://rpms.famillecollet.com/enterprise/remi-release-7.rpm

### Install REMI Repository For CentOS/RHEL 6 ###
rpm -Uvh http://rpms.famillecollet.com/enterprise/remi-release-6.rpm

Docker install

Nginx install

# yum install nginx

start Nginx service

# service nginx start

Set up Jenkins with docker

Nginx configure

Creating Nginx configuration file directory for myapp

# mkdir /etc/nginx/conf.d/myapp/

Backup the default configuration file

# mv /etc/nginx/conf.d/default.conf  /etc/nginx/conf.d/default.conf_bk

Create the configuration file for myapp

# vi /etc/nginx/conf.d/server.conf

The content is below

server {
    listen       80;
    include /etc/nginx/default.d/*.conf;
    root         /usr/share/nginx/html;
    #common
    proxy_set_header    Host $host:$server_port;
    proxy_set_header    X-Real-IP    $remote_addr;
    proxy_set_header    X-Forwarded-Host       $host:$server_port;
    proxy_set_header    X-Forwarded-Server    $host:$server_port;
    proxy_set_header    X-Forwarded-For    $proxy_add_x_forwarded_for;
    proxy_set_header    X-Forwarded-Proto $scheme;

    include /etc/nginx/conf.d/myapp/*.conf;
}

Nginx reverse proxy for devopsroles.com and jenkins Configuring

Creating file devops.conf in folder myall

# vi /etc/nginx/conf.d/myapp/devops.conf

The content is below

#for myapp
location /devopsroles/ {
    proxy_pass    http://localhost:68081/;
    proxy_redirect  http://localhost:68081/ /devopsroles/;

}

# For jenkins
location /dev_jenkins/ {
    proxy_pass    http://localhost:68080 ;
    proxy_redirect  http://localhost:68080/ /dev_jenkins/;
}

Conclusion

Through the article, You can set up “ Nginx reverse proxy for Jenkins in docker as above. I hope will this your helpful. Thank you for reading the DevopsRoles page!

Docker tutorial series – part 2

In this article, I will write about “data mount (volume), Docker Network, Docker Compose”. Now, let’s go Docker tutorial series – part 2.

Data management in Docker

Dynamic data to be handled in the started container can be placed in the top layer (container layer) that can be read and written.

  • When the container is deleted, data in the container disappears.
  • Can not share data among containers.
  • Since writing to the container layer uses a union file system different from the normal file system, the writing speed is slow.

Disadvantage

Docker manages data on the host machine and mounts it on the container is used.

There are three main methods, which I will explain below.

volume

A method of mounting the specified directory (/var/lib/docker/volumes) which is automatically generated on the host machine to the container

On the host machine

$ docker volume create [volume name]

By doing so, When you create a volume (/var/lib/docker/volumes directory) and start up the container.

For example
$ docker run -itd -name mount-test --mount source=volume1,target=/app nginx

You can mount the specified volume by attaching the –mount option (it can also be the -v option) as shown in.

The mounted volumes directory should not be directly manipulated from the directory on the host from which it is mounted.

Even different containers that are set up on the same host can share files by mounting the same volume respectively.

Furthermore, if you want to share volume with multiple containers, you can also set edit permission for each container.

$ docker run -itd -name mount-c4 --mount source=copy-vol,destination=/etc/nginx,readonly nginx

volume management command

Check volume list

$ docker volume ls

Check volume details

$ docker volume inspect [volume name]

Delete volume

$ docker volume rm [volume name]

Note that deleting the container will keep the volume, so you need to delete it with the $docker volume rm [volume name].

bind mount

Bind mount is a mount method different from the volume, in that you can mount arbitrary directories on the host machine and directly manipulate directories on the host side.

It is not necessary to set it in advance like volume, but mount it by specifying it as an option at container startup with the following command.

For example:
$ docker run -itd -name bind-mount-test --mount type=bind,source="$ (pwd)"/mount,target=/app nginx

If the source (mount source) directory does not exist, an error will occur, so let’s make it in advance. (It is automatically created when using the -v option)

if you mount an empty directory on the host. on the container, data on the container will disappear and the container may not work properly, so be careful.

tmpfs (tempfs)

A method of mounting the memory area of the host machine on the container

Whether the host machine is terminated or when the container is closed, the held data is released.

For example:
$ docker run --itd --name tmpfs-test --mount type=tmpfs,destination=/app nginx

You can mount by specifying as the type of the -mount option at the time of container startup.

Also, in order to eliminate the possibility of unlimited use of memory on the host,

$ docker run --itd --name tmpfs-test --mount type=tmpfs,destination=/app,tmpfs-size=100000000,tmpfs-mode=800 nginx

You can also limit the memory size that can be used as an option.

Docker network

we will explain here the method of communicating between multiple containers launched.

For example, when operating a web page, if you start up a WordPress container and a MySQL container, the WordPress container needs to communicate with the MySQL container.

As a method of inter-container communication here, it is the Docker network that connects and communicates with multiple containers.

The Docker network has three networks that exist by default and networks that you define yourself.

Bridge network

In the existing network by default, the created container is connected by default to the bridge network.

In the Bridge network, you can communicate with a container that exists in the same network by specifying an IP address.
However, in the Bridge network, since DNS is not defined, the container name can no communicate with other containers.

In other words, it is possible to communicate by specifying an IP address among containers launched without specifying Network, but it is impossible to communicate by specifying a container name.

Although it is a network that is not exposed to the outside in the default state, it can be accessed from the outside by releasing the port specified by the -p option.

Host network

The host network is the network that exists by default with the host driver.

The connected container will have the same network settings as the docker host.

Therefore, it is possible to connect to the container by connecting to the Docker host’s IP number 80 only by starting the container without setting the -p option at the container startup and opening the port to the outside like the bridge network I will.

None Network

It is the default existing network, and the connected container has no network interface. When connecting to a network, it is necessary to be disconnected from all other networks.

Docker create

By creating your own network, you can communicate between containers by container name.

$ docker network create [network name]

Create a new network with (Default driver is a bridge)

$ docker network connect [Network name to connect to] [Container name]

Docker Daemon’s built-in DNS works on the user-defined unique network resolve names by container name and associates with IP, so you can connect to other containers by container name.

Network commands

Check the network list

$ docker network ls

Check network details

$ docker network inspect [network name]

Create a new network

$ docker network create [network name]

The default driver is bridge

Connect a container to a network

$ docker network connect[ Network name to connect to] [Container name]

Disconnect container from a network

$ docker network disconnect Network name container name

Docker Compose

Docker Compose is a tool for predefining and running multiple container Docker applications. So, Docker Compose is able to automate them.

When building the execution environment of a Web service with Docker, by writing the definitions of the Web server, DB server, Cache server, etc. in one docker-compose.yml file, based on that, the container required for execution You can start and set all at once.

The procedure is as follows.

  • Prepare a Dockerfile or prepare an image to use for Docker Hub etc.
  • Define docker-compose.yml
  • Execute $ docker-compose up in the directory containing the yml file

docker-compose command list

Display a list of containers started with docker-compose

$ docker-compose ps

Container activation from the setting described in docker-compose.yml

$ docker-compose up

It restarts even if the container is already running

Delete containers and networks created with docker-compose

$ docker-compose down
# $ docker-compose down -v

The volume is also deleted together with the -v option

Execute command within specified service container

$ docker-compose run [container name] [command]

A series of container stops

$ docker-compose stop

A series of container activation

$ docker-compose start

Docker tutorial series – part 1

Docker tutorial series part 1

In this article, I will Write about understanding the mechanism of Docker. The whole picture of various concepts around Docker. Now, let’s go Docker tutorial series part 1.

docker-compose
docker-machine
docker swarm, etc. from the basics of images and containers.

In the Docker tutorial series part 1

I will write about “the container, image, image sharing with DockerHub“.

What is Docker

It is “container type virtualization technology” provided by Docker.

What is Virtualization?

  • Virtual computer in PC or Server” is virtualization.
  • Host operating system installed on a machine such as PC or server.
  • Hosted virtualization uses a virtualization software/hypervisor on a Host OS to launch a Virual Machine call is Guest OS

Container type virtualization?

  • Docker provides container type virtualization.
  • Containers are build from Docker Engine running on Host OS without booting guest OS.

Docker Engine

Docker Engine will operate as a resident program and you can use Docker.

Tag

The Docker image has the concept of tag. Tag is the “version of image”. If no tag name is specified, the “latest” tag is automatically used.

For example, the image name and tag name as below

nginx: latest
nginx: 1.14-wordpress

image structure

  • it has a layer structure
  • Once created image is not editable (read only)

The layer of the image is Read-only, it can not be edited, only the container layer created when the container is activated from an image can be edited.

List image on the local machine as command below

$ docker images

How to prepare image

  • Obtain an image made by others (mainly from Docker Hub)
  • Make it yourself

I will go through step by step

1. Image from Docker Hub

Retrieve image from #dockerhub (server hosted by docker)

$ docker pull <image name>

2. Image creation from Dockerfile

Create a text file named Dockerfile, describe the settings related to image build (image creation) in it.

Dockerfile example

# CentOS 7 Dockerfile
 # Docker build:
 # sudo docker build -t devopsroles/centos:latest .
 # Docker create:
 # sudo docker create -it --name centos -h centos devopsroles/centos
 # Docker start:
 # sudo docker start centos
 # Connect with bash
 # sudo docker exec -it centos bash
 FROM centos:latest
 MAINTAINER PHAN VAN HUU <pvhuu90@gmail.com> My blogs: devopsroles.com
 #Update centos
 RUN yum update -y && yum upgrade -y
 RUN yum -y install git curl net-tools wget vim
 # Install EPEL Repository
 RUN yum install -y epel-release
 # Clean CentOS 7
 RUN yum clean all
 # Set the environment variables
 ENV HOME /root
 # Working directory
 WORKDIR /root
 # Default command
 CMD ["bash"]

Docker build the image from our Dockerfile

$ sudo docker create -it --name centos -h centos devopsroles/centos

Docker Container

After preparing the image, the container can be started from the image.

Launch container from image

Create containers from images as command below

$ docker create --name centos

As a command to acquire and start a container by acquiring the specified image that we have seen from DockerHub. Launch Container as command below

$ docker start <Container name>

The docker run command is the command to execute at the same time.

$ docker run <image name>
  • Retrieve images from DockerHub : docker pull
  • Create container from acquired image: docker create
  • Start up the created container: docker start

Docker container commands

Show currently running Container

$ docker ps

Display container list currently existing

$ docker ps -a

Display detailed information of the container

$ docker inspect <container name>

Create Container

$ docker create --name <arbitrary name of container> -it <image name> /bin/bash

Launch Container with the command below

$ docker start <container name>

You can pause containers

$ docker pause <container name>

you can cancel the pause of the container with the command below

$ docker unpause <container name>

Restarting the container. If you do not use containers you do not use, your hard disk will be pressured.

$ docker stop <container name>

Delete Container

$ docker rm <container name>

Forced removal container

$ docker rm -f <container name>

Connect to the shell of the active container

There are two connection methods, using docker attach and docker exec

$ docker attach <Starting Container Name>
$ docker exec -it <Starting Container Name> /bin/bash

Create an image from a container

A command to save the state of the container as an image with the specified “<image name>: <tag name>

$ docker commit <container name> <image name>:<tag name>

You can check the change history of the image

$ docker history <image name>

3. Docker Hub (Docker Registry)

Sharing images with Docker Hub

It is almost the same as Github. You need to have a Dockerhub account.

As a procedure

  • Create repository on Docker hub
  • Create image locally
  • Log in to the docker hub with the following command on the local command line
$ docker login

4. Tag the image you want to push with the following command

$ docker tag <image name you want to push> <docker hub ID>/<image name>:<tag name>

5. Push the local image to the remote repository with the following command

$ docker push <docker hub ID>/<image name>:<tag name>

Docker tutorial series – part 2

Docker My Note: A Complete Reference Guide

Introduction

Docker is a popular tool in the DevOps field that simplifies the deployment and management of applications.

In this article, we will explore important notes about Docker, including basic concepts, common commands, and useful tips. Whether you are a beginner or have some experience, these notes will help you optimize your work with Docker. To learn more, visit Docker My Note.

Docker My Note: Your Go-To Guide for DevOps Success

Cannot connect to the Docker daemon. Is the docker daemon running on this host?

Solve the problem: Add this user to the docker group.

Detach and Attach

  • Detach : Ctrl-p + Ctrl-q
  • Attach: docker attach [container]

Why can not detach?

Solve the problem: docker run with “-i”, “-t” options. http://stackoverflow.com/questions/20145717/how-to-detach-from-a-docker-container

Docker runs without -it, but attach, so can not type CTRL-C

Close your terminal! Anything OK.

To safely detach…

Docker runs without “-i”, “-t” options. But you want to detach, if you hit Ctrl-C then the docker process be killed.
To avoid it, attach with

--sig-proxy=false

You want to log in to a container…

docker exec -it [container-name] /bin/bash

start on os-startup

docker command

 --restart=always

docker-compose add restart: always in docker-compose.yaml file

search a docker image in hub.docker.com

docker search nginx

Download a docker image from hub.docker.com

docker image pull <image_name>:<image_version/tag>

List out docker images from your local system

docker image ls

Expose your application to host server

docker run -d -p <host_port>:<container_port> --name <container_Name> <image_name>:<Image_version/tag>

List out running containers

docker ps

List out all docker containers (running, stpooed, terminated, etc…)

docker ps -a

Stop/Start a container

docker stop <container_id>

docker start <container_id>

Remove a container

docker rm <container_id>

Conclusion

Docker has become an indispensable tool in the modern DevOps toolkit. Through this article, we hope you have grasped the basic knowledge and useful commands to effectively apply Docker in your work. If you want to learn more and stay updated with the latest information about Docker, don’t forget to visit Docker My Note. Let Docker help you simplify and optimize your application deployment process.

Install Docker compose on Vagrant

In this tutorial, How to install docker compose on Vagrant? Docker Compose is a tool for defining and running multi-container Docker applications. Docker the essential for DevOps Roles.

Step by step Install Docker compose on Vagrant

  • Launch CentOS 7 with Vagrant
  • Install Docker on CentOS 7
  • Install Docker compose on CentOS 7
  • Sharing directory with host OS and guest OS ( CentOS 7)

Precondition

Vagrant must be installed. You can refer to Install Vagrant as below:

Directory Structure

The directory Structure looks something like as below

$/home/huupv/DockerHost
- share # Directory
- install.sh
- Vagrantfile

The content Vagrantfile file as below

# -*- mode: ruby -*-
# vi: set ft=ruby :

Vagrant.configure("2") do |config|
    config.vm.box = "centos/7"
    config.vm.network :private_network, type: "dhcp", ip: "192.168.3.6"
    config.vm.synced_folder "./share", "/home/vagrant/share", type: "rsync"
    config.vm.network :forwarded_port, host: 80, guest: 80
    config.vm.provision :shell, path: "./install.sh"
end

Install docker on Centos 7 ( guest )

Check the current release and if necessary, update it in the command below:

The content “install.sh” file as below

# SELinux Permissive
sudo setenforce 0
# set timezone JST
sudo timedatectl set-timezone Asia/Ho_Chi_Minh
# EPEL
sudo yum install -y epel-release
sudo yum install -y vim git
# install docker
sudo yum remove docker \
docker-client \
docker-client-latest \
docker-common \
docker-latest \
docker-latest-logrotate \
docker-logrotate \
docker-selinux \
docker-engine-selinux \
docker-engine
sudo yum install -y yum-utils \
device-mapper-persistent-data \
lvm2
sudo yum-config-manager \
--add-repo \
https://download.docker.com/linux/centos/docker-ce.repo
sudo yum install -y docker-ce
# install docker-compose
sudo mkdir -p /opt/bin/
sudo curl -L https://github.com/docker/compose/releases/download/1.21.2/docker-compose-$(uname -s)-$(uname -m) > ./docker-compose
sudo mv docker-compose /usr/local/bin/docker-compose
sudo chmod +x /usr/local/bin/docker-compose
# vagrant user add docker group
sudo gpasswd -a vagrant docker
# docker running
sudo systemctl enable docker
sudo systemctl start docker

Execute vagrant command

$ cd /home/huupv/DockerHost
$ vagrant up && vagrant ssh

Conclusion

Through the article, You can “Install docker compose on Vagrant as above. I hope will this your helpful.

Install Docker on Vagrant

In this tutorial, How to install docker on Vagrant? Docker the essential for DevOps Roles.

Step by step Install Docker on Vagrant

  • Launch CentOS 7 with Vagrant
  • Install Docker on CentOS 7
  • Sharing directory with host OS and guest OS ( CentOS 7)

Precondition

Vagrant must be installed. You can refer to Install Vagrant as below:

Directory Structure

The directory structure looks something like as below

$/home/huupv/DockerHost
- share # Directory
- install.sh
- Vagrantfile

The content Vagrantfile file as below

# -*- mode: ruby -*-
# vi: set ft=ruby :

Vagrant.configure("2") do |config|
    config.vm.box = "centos/7"
    config.vm.network :private_network, type: "dhcp", ip: "192.168.3.6"
    config.vm.synced_folder "./share", "/home/vagrant/share", type: "rsync"
    config.vm.network :forwarded_port, host: 80, guest: 80
    config.vm.provision :shell, path: "./install.sh"
end

Install docker on Centos 7 ( guest )

The content “install.sh” file as below

# SELinux Permissive
sudo setenforce 0
# set timezone JST
sudo timedatectl set-timezone Asia/Ho_Chi_Minh
# EPEL
sudo yum install -y epel-release
sudo yum install -y vim git
# install docker
sudo yum remove docker \
docker-client \
docker-client-latest \
docker-common \
docker-latest \
docker-latest-logrotate \
docker-logrotate \
docker-selinux \
docker-engine-selinux \
docker-engine
sudo yum install -y yum-utils \
device-mapper-persistent-data \
lvm2
sudo yum-config-manager \
--add-repo \
https://download.docker.com/linux/centos/docker-ce.repo
sudo yum install -y docker-ce
# vagrant user add docker group
sudo gpasswd -a vagrant docker
# docker running
sudo systemctl enable docker
sudo systemctl start docker

Execute vagrant command

$ cd /home/huupv/DockerHost
$ vagrant up && vagrant ssh
Video How to Install Docker using Vagrant

Conclusion

Thought the article, You can “install docker on Vagrant as above . I hope will this your helpful. Thank you for reading the DevopsRoles page!

Set up Jenkins with docker

In this tutorial, Quickstart with Jenkins in docker. Jenkins is an automation CI/CD tool. with Jenkins, you can create jobs to build, test and deploy your application. Docker the essential for DevOps Roles.

Set up Jenkins with docker

Docker compose for Jenkins

You can create “jenkins-docker-compose.yml” file for Jenkins

version: '2'

services:
  jenkins:
    image: 'jenkins:2.60.3'
    container_name: jenkins
    user: root
    restart: always
    ports:
      - '8080:8080'
      - '5000:5000'
    volumes:
      - /home/huupv/data/jenkins:/var/jenkins_home
      - /var/run/docker.sock:/var/run/docker.sock

Note:

  • docker.sock with Host in the volume. But be careful, you can delete the container from Docker.
  • “/var/jenkins_home” is a place to read docker images. so do not change. If Docker has died, then your data remains and restore if you start it again.

Starting Jenkins with docker

Execute this command as below

docker-compose -f jenkins-docker-compose.yml up

From local, you can access  Jenkins at browser at http://0.0.0.0:8080

Conclusion

Through the article, You can “Set up Jenkins with docker“ as above. I hope will this your helpful.