Introduction
Amazon Web Services (AWS) has become the go-to cloud provider for many organizations seeking scalability, reliability, and extensive toolsets for DevOps. AWS offers a range of tools designed to streamline workflows, automate processes, and improve collaboration between development and operations teams. In this article, we’ll explore some of the best DevOps tools for AWS, covering both basic and advanced examples to help you optimize your cloud development and deployment pipelines.
Whether you’re new to AWS DevOps or an experienced developer looking to expand your toolkit, this guide will cover all the essentials. By the end, you’ll have a clear understanding of which tools can make a difference in your AWS environment.
Why DevOps Tools Matter in AWS
Effective DevOps practices allow organizations to:
- Automate repetitive tasks and reduce human error.
- Scale efficiently with infrastructure as code.
- Improve collaboration between development and operations.
- Enhance security with continuous monitoring and compliance tools.
AWS provides native tools that integrate seamlessly with other AWS services, allowing organizations to build a comprehensive DevOps stack.
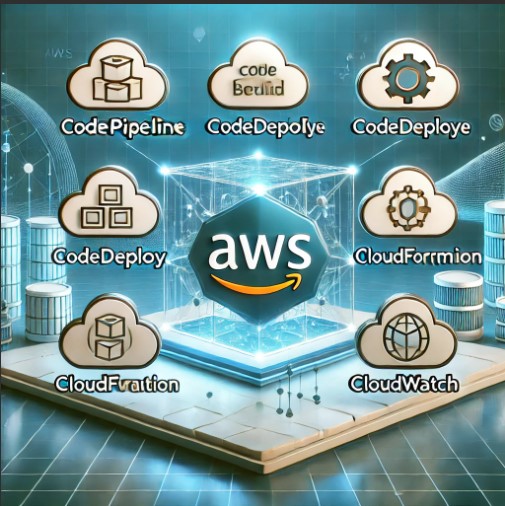
Best DevOps Tools for AWS
1. AWS CodePipeline
Overview
AWS CodePipeline is a fully managed continuous integration and continuous delivery (CI/CD) service. It enables you to automate your release pipelines, allowing faster and more reliable updates.
Key Features
- Automation: Automates your release process from code commit to production deployment.
- Integrations: Works well with other AWS services like CodeBuild and CodeDeploy.
- Scalability: Supports scaling without the need for additional infrastructure.
Best Use Cases
- Teams that want a native AWS solution for CI/CD.
- Development workflows that require quick updates with minimal downtime.
2. AWS CodeBuild
Overview
AWS CodeBuild is a fully managed build service that compiles source code, runs tests, and produces deployable software packages.
Key Features
- Fully Managed: No need to manage or provision build servers.
- Supports Multiple Languages: Compatible with Java, Python, JavaScript, and more.
- Customizable Build Environments: You can customize the build environment to fit specific requirements.
Best Use Cases
- Scalable builds with automated test suites.
- Continuous integration workflows that require custom build environments.
3. AWS CodeDeploy
Overview
AWS CodeDeploy is a service that automates application deployment to a variety of compute services, including Amazon EC2, Lambda, and on-premises servers.
Key Features
- Deployment Automation: Automates code deployments to reduce downtime.
- Flexible Target Options: Supports EC2, on-premises servers, and serverless environments.
- Health Monitoring: Offers in-depth monitoring to track application health.
Best Use Cases
- Managing complex deployment processes.
- Applications requiring rapid and reliable deployments.
4. Amazon Elastic Container Service (ECS) & Kubernetes (EKS)
Overview
AWS ECS and EKS provide managed services for deploying, managing, and scaling containerized applications.
Key Features
- Container Orchestration: Enables large-scale containerized applications.
- Integration with CI/CD: Seamlessly integrates with CodePipeline and other DevOps tools.
- Scalable Infrastructure: Supports rapid scaling based on workload demands.
Best Use Cases
- Applications leveraging microservices architecture.
- Workflows needing scalability and flexible orchestration options.
5. AWS CloudFormation
Overview
AWS CloudFormation allows you to model and set up AWS resources using infrastructure as code (IaC).
Key Features
- Automation: Automates resource creation and configuration.
- Template-Based: Uses JSON or YAML templates for defining resources.
- Stack Management: Manages updates and rollbacks for AWS resources.
Best Use Cases
- Managing complex cloud environments.
- Implementing Infrastructure as Code (IaC) for scalable and reproducible infrastructure.
Advanced DevOps Tools for AWS
6. AWS OpsWorks
Overview
AWS OpsWorks is a configuration management service that supports Chef and Puppet.
Key Features
- Configuration Management: Automates server configurations with Chef and Puppet.
- Customizable Stacks: Allows you to define and manage application stacks.
- Lifecycle Management: Provides lifecycle events to trigger configuration changes.
Best Use Cases
- Managing complex configurations in dynamic environments.
- Applications requiring in-depth configuration management and automation.
7. AWS X-Ray
Overview
AWS X-Ray is a service that helps developers analyze and debug applications.
Key Features
- Distributed Tracing: Traces requests from end to end.
- Error Tracking: Helps identify performance bottlenecks and issues.
- Real-Time Insights: Visualizes application performance in real-time.
Best Use Cases
- Troubleshooting complex, distributed applications.
- Real-time performance monitoring in production environments.
8. Amazon CloudWatch
Overview
Amazon CloudWatch provides monitoring for AWS resources and applications.
Key Features
- Metrics and Logs: Collects and visualizes metrics and logs in real-time.
- Alarm Creation: Creates alarms based on metric thresholds.
- Automated Responses: Triggers responses based on alarm conditions.
Best Use Cases
- Monitoring application health and performance.
- Setting up automated responses for critical alerts.
Getting Started: DevOps Pipeline Example with AWS
Creating a DevOps pipeline in AWS can be as simple or complex as needed. Here’s an example of a basic pipeline using CodePipeline, CodeBuild, and CodeDeploy:
- Code Commit: Use CodePipeline to track code changes.
- Code Build: Trigger a build with CodeBuild for each commit.
- Automated Testing: Run automated tests as part of the build.
- Code Deployment: Use CodeDeploy to deploy to EC2 or Lambda.
For more advanced scenarios, consider adding CloudFormation to manage infrastructure as code and CloudWatch for real-time monitoring.
Frequently Asked Questions (FAQ)
What is AWS DevOps?
AWS DevOps is a set of tools and services provided by AWS to automate and improve collaboration between development and operations teams. It covers everything from CI/CD and infrastructure as code to monitoring and logging.
Is CodePipeline free?
CodePipeline offers a free tier, but usage beyond the free limit incurs charges. You can check the CodePipeline pricing on the AWS website.
How do I monitor my AWS applications?
AWS offers monitoring tools like CloudWatch and X-Ray to help track performance, set alerts, and troubleshoot issues.
What is infrastructure as code (IaC)?
Infrastructure as code (IaC) is the practice of defining and managing infrastructure using code. Tools like CloudFormation enable IaC on AWS, allowing automated provisioning and scaling.

Conclusion
The AWS ecosystem provides a comprehensive set of DevOps tools that can help streamline your development workflows, enhance deployment processes, and improve application performance. From the basic CodePipeline to advanced tools like X-Ray and CloudWatch, AWS offers a tool for every step of your DevOps journey.
By implementing the right tools for your project, you’ll not only improve efficiency but also gain a competitive edge in delivering reliable, scalable applications. Start small, integrate tools as needed, and watch your DevOps processes evolve.
For more insights on DevOps and AWS, visit the AWS DevOps Blog. Thank you for reading the DevopsRoles page!