The era of manual prompt engineering is over. For modern firms, deploying AI for agencies is no longer about giving employees access to ChatGPT; it is about architecting intelligent, autonomous ecosystems that function as force multipliers. As we move from experimental pilot programs to production-grade implementation, the challenge shifts from “What can AI do?” to “How do we scale AI across 50+ unique client environments without breaking compliance or blowing up token costs?”
This guide is written for technical leaders and solutions architects who need to build robust, multi-tenant AI infrastructures. We will bypass the basics and dissect the architectural patterns, security protocols, and workflow orchestration strategies required to serve more clients efficiently using high-performance AI pipelines.
The Architectural Shift: From Chatbots to Agentic Workflows
To truly leverage AI for agencies, we must move beyond simple Request/Response patterns. The future lies in Agentic Workflows—systems where LLMs act as reasoning engines that can plan, execute tools, and iterate on results before presenting them to a human.
Pro-Tip: Do not treat LLMs as databases. Treat them as reasoning kernels. Offload memory to Vector Stores (e.g., Pinecone, Weaviate) and deterministic logic to traditional code. This hybrid approach reduces hallucinations and ensures client-specific data integrity.
The Multi-Agent Pattern
For complex agency deliverables—like generating a full SEO audit or a monthly performance report—a single prompt is insufficient. You need a Multi-Agent System (MAS) where specialized agents collaborate:
The Router: Classifies the incoming client request (e.g., “SEO”, “PPC”, “Content”) and directs it to the appropriate sub-system.
The Researcher: Uses RAG (Retrieval-Augmented Generation) to pull client brand guidelines and past performance data.
The Executor: Generates the draft content or performs the analysis.
The Critic: Reviews the output against specific quality heuristics before final delivery.
Engineering Multi-Tenancy for Client Isolation
The most critical risk in deploying AI for agencies is data leakage. You cannot allow Client A’s strategy documents to influence Client B’s generated content. Deep multi-tenancy must be baked into the retrieval layer.
Logical Partitioning in Vector Databases
When implementing RAG, you must enforce strict metadata filtering. Every chunk of embedded text must be tagged with a `client_id` or `namespace`.
import pinecone
from langchain.embeddings import OpenAIEmbeddings

# Initialize connection
pinecone.init(api_key="YOUR_API_KEY", environment="us-west1-gcp")
index = pinecone.Index("agency-knowledge-base")

def query_client_knowledge(query, client_id, top_k=5):
    """
    Retrieves context strictly isolated to a specific client.
    """
    embeddings = OpenAIEmbeddings()
    vector = embeddings.embed_query(query)

    # CRITICAL: The filter ensures strict data isolation
    results = index.query(
        vector=vector,
        top_k=top_k,
        include_metadata=True,
        filter={
            "client_id": {"$eq": client_id}
        }
    )
    return results
This approach allows you to maintain a single, cost-effective vector index while mathematically guaranteeing that Client A’s context is invisible to Client B’s queries.
Productionizing Workflows with LangGraph & Queues
Scaling AI for agencies requires handling concurrency. If you have 100 clients triggering reports simultaneously at 9:00 AM on Monday, direct API calls to OpenAI or Anthropic will hit rate limits immediately.
The Asynchronous Queue Pattern
Implement a message broker (like Redis or RabbitMQ) between your application layer and your AI workers.
Ingestion: Client request is pushed to a `high-priority` or `standard` queue based on their retainer tier.
Worker Pool: Background workers pick up tasks.
Rate Limiting: Workers respect global API limits (e.g., Token Bucket algorithm) to prevent 429 errors.
Persistence: Intermediate states are saved. If a workflow fails (e.g., an API timeout), it can retry from the last checkpoint rather than restarting.
Architecture Note: Consider using LangGraph for stateful orchestration. Unlike simple chains, graphs allow for cycles—enabling the AI to “loop” and self-correct if an output doesn’t meet quality standards.
Cost Optimization & Token Economics
Margins matter. Running GPT-4 for every trivial task will erode profitability. A smart AI for agencies strategy involves “Model Routing.”
Task Complexity
Recommended Model
Cost Efficiency
High Reasoning (Strategy, complex coding, creative conceptualization)
Semantic Caching: Implement a semantic cache (e.g., GPTCache). If a user asks a question that is semantically similar to a previously answered question (for the same client), serve the cached response instantly. This reduces latency by 90% and costs by 100% for repetitive queries.
Frequently Asked Questions (FAQ)
How do we handle hallucination risks in client deliverables?
Never send raw LLM output directly to a client. Implement a “Human-in-the-Loop” (HITL) workflow where the AI generates a draft, and a notification is sent to a human account manager for approval. Additionally, use “Grounding” techniques where the LLM is forced to cite sources from the retrieved documents.
Should we fine-tune our own models?
Generally, no. For 95% of agency use cases, RAG (Retrieval-Augmented Generation) is superior to fine-tuning. Fine-tuning is for teaching a model a new form or style (e.g., writing code in a proprietary internal language), whereas RAG is for providing the model with new facts (e.g., a client’s specific Q3 performance data). RAG is cheaper, faster to update, and less prone to catastrophic forgetting.
How do we ensure compliance (SOC2/GDPR) when using AI?
Ensure you are using “Enterprise” or “API” tiers of model providers, which typically guarantee that your data is not used to train their base models (unlike the free ChatGPT interface). For strict data residency requirements, consider hosting open-source models (like Llama 3 or Mixtral) on your own VPC using tools like vLLM or TGI.
Conclusion
Mastering AI for agencies is an engineering challenge, not just a creative one. By implementing robust multi-tenant architectures, leveraging agentic workflows with stateful orchestration, and managing token economics strictly, your agency can scale operations non-linearly.
The agencies that win in the next decade won’t just use AI; they will be built on top of AI primitives. Start by auditing your current workflows, identify the bottlenecks that require high-reasoning capabilities, and build your first multi-agent router today. Thank you for reading the DevopsRoles page!
The paradigm of game development is shifting from purely imperative coding to intent-based generation. For technical directors and senior developers, Roblox AI game creation represents more than just a novelty; it is a fundamental workflow accelerator. By integrating Large Language Models (LLMs) and generative texture synthesis directly into the engine, Roblox Studio is reducing the friction between architectural concept and playable prototype. This article dissects the technical implementation of these features, analyzing how they optimize Luau scripting and asset generation for high-velocity development cycles.
The Architecture of Roblox’s Generative AI Stack
Roblox’s approach to AI is distinct because it operates within a highly constrained, physics-simulated environment. Unlike generic chatbots, the models powering Roblox AI game creation are fine-tuned specifically on the Luau language corpus and the Roblox API surface area.
The stack generally operates on two primary modalities:
Code Generation: Leveraging transformer-based models trained on years of open-source Roblox scripts to predict logic and syntax.
Material Synthesis: Utilizing diffusion-like models to generate tileable PBR (Physically Based Rendering) textures (albedo, normal, roughness, metalness maps) from semantic text prompts.
Pro-Tip for AI Engineers: The efficacy of the Code Assist tool relies heavily on the “Context Window.” When prompting for script generation, keeping relevant Service definitions and variable declarations in the active file helps the model infer the correct API references (e.g., distinguishing between ServerStorage and ReplicatedStorage usage).
Accelerating Scripting with AI-Powered Code Assist
For the expert developer, the value of AI is not in writing print("Hello World"), but in boilerplate reduction and algorithmic suggestions. The Roblox AI game creation suite integrates directly into the Script Editor, offering autocomplete and full-function generation.
Context-Aware Logic Generation
The AI analyzes the comment preceding the cursor to determine intent. It attempts to construct valid Luau code that respects Roblox’s event-driven architecture.
Example: Generating a Proximity Prompt Handler
Input Comment:
-- Create a function that tween's the part's color to red when a player interacts with the ProximityPrompt, then resets it after 5 seconds.
AI Output:
local TweenService = game:GetService("TweenService")
local part = script.Parent
local prompt = part:WaitForChild("ProximityPrompt")

local goalOpen = {Color = Color3.fromRGB(255, 0, 0)}
local goalClose = {Color = Color3.fromRGB(255, 255, 255)} -- Assuming white is default
local tweenInfo = TweenInfo.new(1)

local tweenOpen = TweenService:Create(part, tweenInfo, goalOpen)
local tweenClose = TweenService:Create(part, tweenInfo, goalClose)

prompt.Triggered:Connect(function(player)
    tweenOpen:Play()
    task.wait(5)
    tweenClose:Play()
end)
Note the use of task.wait() over the deprecated wait(). The model has been tuned to prefer modern Roblox best practices, reducing the technical debt typically associated with auto-generated code.
Refactoring and Optimization
Beyond generation, the Assistant can be used to refactor inefficient loops or deprecated methods. By highlighting a block of code and invoking the AI assistant, you can request optimizations such as “Convert this generic for-loop to utilize table.foreach or parallel Luau where applicable.”
Generative Materials: PBR at Scale
The visual component of Roblox AI game creation addresses the asset bottleneck. Creating custom materials usually involves external tools like Substance Designer or searching through expansive libraries.
The Material Generator allows developers to prompt for specific physical properties. For example, prompting “Wet cobblestone with moss in crevices” does not just paste an image; it generates the necessary maps to interact with Roblox’s lighting engine.
Technical Considerations for Material AI
Tiling: The generator optimizes for seamless tiling, crucial for large terrain or architectural surfaces.
Resolution: While currently optimized for performance (memory budget), the consistency of the normal maps generated ensures that depth perception remains high even at lower texture resolutions.
Style Consistency: You can enforce a “Low Poly” or “Realistic” style token in your prompts to maintain visual coherence across different assets.
DevOps Integration: AI in the CI/CD Pipeline
For teams using Rojo to sync Roblox projects with Git, the AI tools inside Studio act as the “local development environment” accelerator. While the AI generation happens in Studio, the output is standard text (Lua) or binary assets (rbxmx) that can be committed to version control.
Workflow Note: Currently, Roblox’s AI features are Studio-bound. You cannot yet invoke the generation API programmatically via CLI for automated build pipelines, but the generated code is fully compatible with standard linting tools like Selene or StyLua.
Frequently Asked Questions (FAQ)
How does Roblox AI handle security and malicious code?
Roblox utilizes a multi-layered filter. The training data excludes known malicious patterns (backdoors, obfuscated viruses). Additionally, the output is subject to standard Roblox text filtering policies. However, developers must always review AI-generated code, as the AI acts as a “copilot,” not a security guarantor.
Can the AI write complex ModuleScripts for frameworks like Knit?
Yes, but it requires context. If your current script requires a module, the AI can infer usage if the require() statement is present and the variable naming is semantic. It struggles with architectural decisions but excels at implementation details within a defined structure.
Is the generated code optimized for Parallel Luau?
Not by default. You must explicitly prompt the Assistant to “Use Parallel Luau Actors” or “Write this using task.desynchronize” to leverage multi-threading capabilities.
Conclusion
Roblox AI game creation is not about replacing the engineer; it is about elevating the abstraction level. By offloading the syntax of boilerplates and the tedium of texture hunting to generative models, Senior Developers and Technical Artists can focus on gameplay loops, system architecture, and user experience. As these models evolve, we expect deeper integration into the Entity Component System (ECS) and potentially runtime AI generation features.
To stay competitive, teams should begin incorporating these prompts into their daily workflows, treating the AI as a junior pair programmer that is always available and intimately familiar with the Roblox API. Thank you for reading the DevopsRoles page!
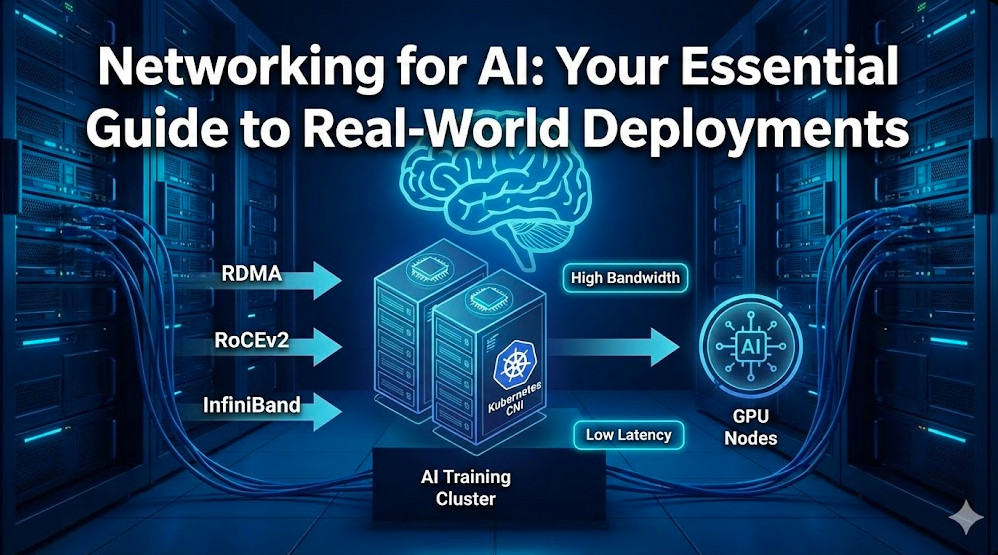
In the era of Large Language Models (LLMs) and trillion-parameter architectures, compute is rarely the sole bottleneck. The true limiting factor often lies in the fabric connecting those GPUs. Networking for AI is fundamentally different from traditional data center networking. It is not about connecting microservices with HTTP requests; it is about synchronizing massive state across thousands of chips where a single microsecond of tail latency can stall an entire training run.
For expert infrastructure engineers, the challenge is shifting from standard TCP-based leaf-spine topologies to lossless, high-bandwidth fabrics capable of sustaining the unique traffic patterns of distributed training, such as AllReduce. This guide moves beyond the basics to explore the architectural decisions, protocols, and configurations required for production-grade AI clusters.
The Physics of AI Traffic: Why TCP Fails
Before optimizing, we must understand the workload. Unlike web traffic (short flows, random access), AI training traffic is characterized by heavy, synchronized bursts. During the gradient exchange phase of distributed training, all GPUs attempt to communicate simultaneously.
Standard TCP/IP stacks introduce too much CPU overhead and latency jitter (OS kernel context switching) for these synchronous operations. This is why Remote Direct Memory Access (RDMA) is non-negotiable for high-performance AI networking.
Pro-Tip: In a synchronous AllReduce operation, the speed of the entire cluster is dictated by the slowest link. If one packet is dropped and retransmitted via TCP, hundreds of expensive H100s sit idle waiting for that gradient update. Zero packet loss is the goal.
The Great Debate: InfiniBand vs. RoCEv2 (Ethernet)
The industry is currently bifurcated between two dominant technologies for the AI backend fabric: native InfiniBand (IB) and RDMA over Converged Ethernet v2 (RoCEv2). Both support GPUDirect RDMA, but they handle congestion differently.
Feature
InfiniBand (IB)
RoCEv2 (Ethernet)
Flow Control
Credit-based (Hardware level). Native lossless.
Priority Flow Control (PFC) & ECN (software/switch config required).
Distributed control (BGP, etc.). Easier for NetOps teams.
Cost
High (Proprietary cables/switches).
Moderate (Commodity switches, standard optics).
While InfiniBand has historically been the gold standard for HPC, many hyperscalers are moving toward RoCEv2 to leverage existing Ethernet operational knowledge and supply chains. However, RoCEv2 requires rigorous tuning of PFC (Priority Flow Control) to prevent head-of-line blocking and congestion spreading.
Configuring RoCEv2 for Lossless Behavior
To make Ethernet behave like InfiniBand, you must configure ECN (Explicit Congestion Notification) and DCQCN (Data Center Quantized Congestion Notification). Below is a conceptual configuration snippet for a SONiC-based switch to enable lossless queues:
Note: Enabling the PFC watchdog is critical. It detects “PFC storms” where a malfunctioning NIC halts the entire network, automatically ignoring the pause frames to recover the link.
Optimizing the Data Plane: NCCL and GPU Direct
NVIDIA’s NCCL (NVIDIA Collective Communication Library) is the de facto standard for inter-GPU communication. It automatically detects the topology and selects the optimal path (NVLink inside the node, InfiniBand/RoCE between nodes).
However, default settings are rarely optimal for custom clusters. You must ensure that GPUDirect RDMA is active, allowing the NIC to read/write directly to GPU memory, bypassing the CPU and system memory entirely.
Validating GPUDirect
You can verify if GPUDirect is working by inspecting the topology and running the NCCL tests. A common pitfall is the PCI switch configuration or IOMMU settings blocking P2P traffic.
# Check NVLink and PCIe topology
nvidia-smi topo -m

# Run NCCL performance test (AllReduce)
./build/all_reduce_perf -b 8 -e 128M -f 2 -g 8
Advanced Tuning: If you see bandwidth drops, try forcing specific NCCL algorithms or protocols via environment variables. For example, `NCCL_ALGO=RING` might stabilize performance on networks with high jitter compared to `TREE`.
Network Architectures: Rail-Optimized Designs
In traditional data centers, servers are connected to a Top-of-Rack (ToR) switch. In high-performance networking for AI, we often use a “Rail-Optimized” topology.
In a rail-optimized design, if you have nodes with 8 GPUs each, you create 8 distinct network fabrics (rails).
Rail 1: Connects GPU 0 of Node A to GPU 0 of Node B, C, D…
Rail 2: Connects GPU 1 of Node A to GPU 1 of Node B, C, D…
This maximizes the utilization of available bandwidth for collective operations like AllReduce, as traffic flows in parallel across independent planes without contending for the same switch buffers.
Kubernetes Integration: Multus and SR-IOV
Most AI training happens on Kubernetes. However, the standard K8s networking model (one IP per pod) is insufficient for high-performance fabrics. To expose the high-speed InfiniBand or RoCE interfaces to the pod, we utilize the Multus CNI.
Multus allows a Pod to have multiple network interfaces: a primary `eth0` for Kubernetes control plane traffic (managed by Calico/Cilium) and secondary interfaces (net1, net2…) dedicated to MPI/NCCL traffic.
Manifest Example: SR-IOV with Multus
Below is an example of a `NetworkAttachmentDefinition` to inject a high-speed interface into a training pod.
1. Can I use standard 10GbE for distributed AI training?
Technically yes, but it will be a severe bottleneck. Modern GPUs (H100/A100) have massive compute throughput. A 10GbE link will leave these expensive GPUs idle for most of the training time. For serious work, 400Gbps (NDR InfiniBand or 400GbE) is the standard recommendation.
2. What is the impact of “Tail Latency” on AI?
In synchronous training, the gradient update step cannot proceed until every node has reported in. If 99 packets arrive in 1ms, but the 100th packet takes 50ms due to congestion, the effective latency of the cluster is 50ms. AI networking requires optimizing the P99 or P99.9 latency, not just the average.
3. How do I debug NCCL hangs?
NCCL hangs are notoriously difficult to debug. Start by setting `NCCL_DEBUG=INFO` to see the initialization logs. If it hangs during training, use `NCCL_DEBUG_SUBSYS=COLL` to trace collective operations. Often, firewall rules or mismatched MTU sizes (Jumbo Frames are mandatory) are the culprits.
Conclusion
Networking for AI is a discipline of extremes: extreme bandwidth, extreme synchronization, and extreme cost per port. Whether you choose the vertically integrated path of InfiniBand or the flexible, hyperscale-friendly route of RoCEv2, the goal remains the same: keep the GPUs fed.
As models grow, the network is becoming the computer. By implementing rail-optimized topologies, leveraging GPUDirect RDMA, and mastering the nuances of Kubernetes CNI plugins like Multus, you can build an infrastructure that enables the next generation of AI breakthroughs rather than holding them back. Thank you for reading the DevopsRoles page!
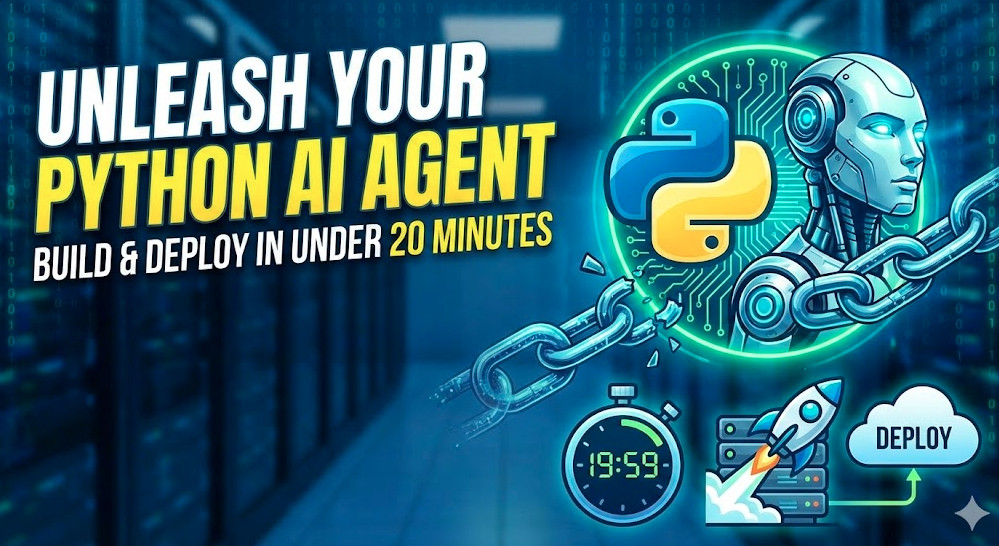
The transition from static chatbots to autonomous agents represents a paradigm shift in software engineering. We are no longer writing rigid procedural code; we are orchestrating probabilistic reasoning loops. For expert developers, the challenge isn’t just getting an LLM to respond—it’s controlling the side effects, managing state, and deploying a reliable Python AI Agent that can interact with the real world.
This guide bypasses the beginner fluff. We won’t be explaining what a variable is. Instead, we will architect a production-grade agent using LangGraph for state management, OpenAI for reasoning, and FastAPI for serving, wrapping it all in a multi-stage Docker build ready for Kubernetes or Cloud Run.
1. The Architecture: ReAct & Event Loops
Before writing code, we must define the control flow. A robust Python AI Agent typically follows the ReAct (Reasoning + Acting) pattern. Unlike a standard RAG pipeline which retrieves and answers, an agent maintains a loop: Think $\rightarrow$ Act $\rightarrow$ Observe $\rightarrow$ Repeat.
In a production environment, we model this as a state machine (a directed cyclic graph). This provides:
Cyclic Capability: The ability for the agent to retry failed tool calls.
Persistence: Storing the state of the conversation graph (checkpoints) in Redis or Postgres.
Human-in-the-loop: Pausing execution for approval before sensitive actions (e.g., writing to a database).
Pro-Tip: Avoid massive “God Chains.” Decompose your agent into specialized sub-graphs (e.g., a “Research Node” and a “Coding Node”) passed via a supervisor architecture for better determinism.
2. Prerequisites & Tooling
We assume a Linux/macOS environment with Python 3.11+. We will use uv (an extremely fast Python package manager written in Rust) for dependency management, though pip works fine.
Ensure your OPENAI_API_KEY is set in your environment.
3. Step 1: The Reasoning Engine (LangGraph)
We will use LangGraph rather than standard LangChain `AgentExecutor` because it offers fine-grained control over the transition logic.
Defining the State
First, we define the AgentState using TypedDict. This effectively acts as the context object passed between nodes in our graph.
from typing import TypedDict, Annotated, Sequence
import operator
from langchain_core.messages import BaseMessage

class AgentState(TypedDict):
    messages: Annotated[Sequence[BaseMessage], operator.add]
    # You can add custom keys here like 'user_id' or 'trace_id'
The Graph Construction
Here we bind the LLM to tools and define the execution nodes.
from langchain_openai import ChatOpenAI
from langgraph.graph import StateGraph, END
from langchain_core.tools import tool

# Initialize Model
model = ChatOpenAI(model="gpt-4-turbo-preview", temperature=0)

# Define the nodes
def call_model(state):
    messages = state['messages']
    response = model.invoke(messages)
    return {"messages": [response]}

# Define the graph
workflow = StateGraph(AgentState)
workflow.add_node("agent", call_model)
# Note: "action" node logic for tool execution will be added in Step 2

workflow.set_entry_point("agent")
4. Step 2: Implementing Deterministic Tools
A Python AI Agent is only as good as its tools. We use Pydantic for strict schema validation of tool inputs. This ensures the LLM hallucinates arguments less frequently.
from langchain_core.tools import tool
from langchain_community.tools.tavily_search import TavilySearchResults

@tool
def get_weather(location: str) -> str:
    """Returns the weather for a specific location."""
    # In production, this would hit a real API like OpenWeatherMap
    return f"The weather in {location} is 22 degrees Celsius and sunny."

# Bind tools to the model
tools = [get_weather]
model = model.bind_tools(tools)

# Update the graph with a ToolNode
from langgraph.prebuilt import ToolNode

tool_node = ToolNode(tools)
workflow.add_node("tools", tool_node)

# Add Conditional Edge (The Logic)
def should_continue(state):
    last_message = state['messages'][-1]
    if last_message.tool_calls:
        return "tools"
    return END

workflow.add_conditional_edges("agent", should_continue)
workflow.add_edge("tools", "agent")

app = workflow.compile()
5. Step 3: Asynchronous Serving with FastAPI
Running an agent in a script is useful for debugging, but deployment requires an HTTP interface. FastAPI provides the asynchronous capabilities needed to handle long-running LLM requests without blocking the event loop.
from fastapi import FastAPI, HTTPException
from pydantic import BaseModel
from langchain_core.messages import HumanMessage

class QueryRequest(BaseModel):
    query: str
    thread_id: str = "default_thread"

api = FastAPI(title="Python AI Agent API")

@api.post("/chat")
async def chat_endpoint(request: QueryRequest):
    try:
        inputs = {"messages": [HumanMessage(content=request.query)]}
        config = {"configurable": {"thread_id": request.thread_id}}

        # Stream or invoke
        response = await app.ainvoke(inputs, config=config)

        return {
            "response": response["messages"][-1].content,
            "tool_usage": len(response["messages"]) > 2 # varied based on flow
        }
    except Exception as e:
        raise HTTPException(status_code=500, detail=str(e))

# Run with: uvicorn main:api --host 0.0.0.0 --port 8000
6. Step 4: Production Containerization
To deploy this “under 20 minutes,” we need a Dockerfile that leverages caching and multi-stage builds to keep the image size low and secure.
# Use a slim python image for smaller attack surface
FROM python:3.11-slim as builder

WORKDIR /app

# Install dependencies
COPY requirements.txt .
RUN pip install --no-cache-dir -r requirements.txt

# Copy source code
COPY . .

# Runtime configuration
ENV PORT=8080
EXPOSE 8080

# Use array syntax for CMD to handle signals correctly
CMD ["uvicorn", "main:api", "--host", "0.0.0.0", "--port", "8080"]
Security Note: Never bake your OPENAI_API_KEY into the Docker image. Inject it as an environment variable or a Kubernetes Secret at runtime.
7. Advanced Patterns: Memory & Observability
Once your Python AI Agent is live, two problems emerge immediately: context window limits and “black box” behavior.
Vector Memory
For long-term memory, simply passing the full history becomes expensive. Implementing a RAG (Retrieval-Augmented Generation) memory store allows the agent to recall specific details from past conversations without reloading the entire context.
The relevance of a memory is often calculated using Cosine Similarity:
Where $\mathbf{A}$ is the query vector and $\mathbf{B}$ is the stored memory vector.
Observability
You cannot improve what you cannot measure. Integrate tools like LangSmith or Arize Phoenix to trace the execution steps inside your graph. This allows you to pinpoint exactly which tool call failed or where the latency bottleneck exists.
8. Frequently Asked Questions (FAQ)
How do I reduce the latency of my Python AI Agent?
Latency usually comes from the LLM generation tokens. To reduce it: 1) Use faster models (GPT-4o or Haiku) for routing and heavy models only for complex reasoning. 2) Implement semantic caching (Redis) for identical queries. 3) Stream the response to the client using FastAPI’s StreamingResponse so the user sees the first token immediately.
Can I run this agent locally without an API key?
Yes. You can swap ChatOpenAI for ChatOllama using Ollama. This allows you to run models like Llama 3 or Mistral locally on your machine, though you will need significant RAM/VRAM.
How do I handle authentication for the tools?
If your tools (e.g., a Jira or GitHub integration) require OAuth, do not let the LLM generate the token. Handle authentication at the middleware level or pass the user’s token securely in the configurable config of the graph, injecting it into the tool execution context safely.
9. Conclusion
Building a Python AI Agent has evolved from a scientific experiment to a predictable engineering discipline. By combining the cyclic graph capabilities of LangGraph with the type safety of Pydantic and the scalability of Docker/FastAPI, you can deploy agents that are not just cool demos, but reliable enterprise assets.
The next step is to add “human-in-the-loop” breakpoints to your graph, ensuring that your agent asks for permission before executing high-stakes tools. The code provided above is your foundation—now build the skyscraper. Thank you for reading the DevopsRoles page!
The era of “Autocomplete” is dead. The era of “Agentic Orchestration” has arrived. For the last two years, we’ve been treating AI as a really smart pair programmer—a chatbot living in your sidebar that suggests lines of code or refactors functions. Google Antigravity IDE fundamentally changes this relationship. It doesn’t just want to help you write code; it wants to build the software for you while you act as the architect.
Powered by the newly released Gemini 3 model, Antigravity is an “agent-first” IDE that introduces a new paradigm: asynchronous task execution. Instead of typing alongside you, it spins up autonomous agents to plan, implement, debug, and—crucially—verify features in a headless browser. In this deep dive, we’ll move past the marketing fluff to understand the architecture, the “Mission Control” interface, and the security implications of handing your terminal keys to an LLM.
Beyond the VS Code Fork: The Agent-First Architecture
At first glance, Antigravity looks like a highly polished fork of Visual Studio Code (because, under the hood, it is). However, unlike Cursor or Windsurf, which focus on deep context integration within the editor, Antigravity bifurcates the developer experience into two distinct modes.
1. The Editor View (Synchronous)
This is the familiar IDE experience. You type, you get IntelliSense, and you have an AI chat panel. It utilizes Gemini 3 Pro (or Claude Sonnet 4.5 if configured) for low-latency code completion and inline refactoring. It’s what you use when you need to be “hands-on-keyboard.”
2. The Manager View (Asynchronous)
This is the revolutionary shift. Also called “Mission Control,” this interface treats development tasks as tickets. You assign a high-level goal (e.g., “Refactor the Auth middleware to support JWT rotation”), and an autonomous agent accepts the mission. The agent then:
Plans: Generates a step-by-step execution strategy.
Acts: Edits files, runs terminal commands, and manages dependencies.
Verifies: Spins up a browser instance to physically click through the UI to confirm the fix works.
Pro-Tip: The Manager View allows for parallel execution. You can have one agent fixing a CSS bug on the frontend while another agent writes unit tests for the backend API. You are no longer the bottleneck.
The “Artifacts” Protocol: Trust but Verify
The biggest friction point in AI coding has always been trust. How do you know the AI didn’t hallucinate a dependency or break a downstream service? Antigravity solves this with Artifacts.
Artifacts are structured, verifiable outputs that the agent produces to prove its work. It doesn’t just say “I fixed it.” It presents:
Artifact Type
Function
Why it Matters for Experts
Implementation Plan
A markdown document outlining the proposed changes before code is touched.
Allows you to catch architectural flaws (e.g., “Don’t use a global variable there”) before implementation begins.
Browser Recording
A video file of the agent navigating your local localhost app.
Visual proof that the button is clickable and the modal opens, without you needing to pull the branch locally.
Test Manifest
A structured log of new unit tests created and their pass/fail status.
Ensures the agent isn’t just writing code, but also maintaining coverage standards.
Technical Implementation: Sandboxing & Security
Giving an autonomous agent access to your shell (`zsh` or `bash`) is terrifying for any security-conscious DevOps engineer. Google handles this via a permission model similar to Android’s intent system, but for the CLI.
Configuring the Allow/Deny Lists
Antigravity operates in three modes: Off (Safe), Auto (Balanced), and Turbo (Risky). For enterprise environments, you should explicitly configure the terminal.executionPolicy in your settings.json to whitelist only benign commands.
Here is a production-ready configuration that allows build tools but blocks network egress tools like curl or wget to prevent data exfiltration by a hallucinating agent:
SECURITY WARNING: Researchers at Mindgard recently identified a “Persistent Code Execution” vulnerability in early previews of Antigravity. If a workspace is compromised, an agent could theoretically embed malicious startup scripts that persist across sessions. Always treat the Agent’s terminal sessions as untrusted and run Antigravity within an ephemeral container (like a DevContainer) rather than directly on your host metal.
Workflow: The “Architect” Loop
To get the most out of Google Antigravity, you must stop coding and start architecting. Here is the ideal workflow for an expert developer:
Context Loading: Instead of pasting snippets, use the @codebase symbol to let Gemini 3 index your entire repository AST (Abstract Syntax Tree).
The Prompt: Issue a high-level directive.
“Create a new ‘Settings’ page with a toggle for Dark Mode. Use the existing Tailwind components from /src/components/ui. Ensure state persists to LocalStorage.”
Plan Review: The agent will generate a text artifact. Review it. If it suggests a new dependency you hate, comment on the artifact directly: “No, use native Context API, do not install Redux.”
Async Execution: Switch to the Manager View. Let the agent work. Go review a PR or grab coffee.
Verification: The agent pings you. Watch the Browser Recording artifact. If the toggle works in the video, accept the diff.
Frequently Asked Questions (FAQ)
Is Google Antigravity free?
Currently, it is in Public Preview and free for individuals using a Google Account. However, heavy usage of the Gemini 3 agentic loop will eventually be tied to a Gemini Advanced or Google Cloud subscription.
How does this compare to Cursor?
Cursor is currently the king of “Editor Mode” (synchronous coding). Antigravity is betting the farm on “Manager Mode” (asynchronous agents). If you like writing code yourself with super-powers, stick with Cursor. If you want to delegate entire features to an AI junior developer, Antigravity is the superior tool.
Can I use other models besides Gemini?
Yes. Antigravity supports “Model Optionality.” You can swap the underlying reasoning engine to Claude Sonnet 4.5 or GPT-OSS via the settings, though Gemini 3 currently has the tightest integration with the “Artifacts” verification system.
Conclusion Google Antigravity IDE
Google Antigravity IDE is a glimpse into the future where “Senior Engineer” means “Manager of AI Agents.” It reduces the cognitive load of syntax and boilerplate, allowing you to focus on system design, security, and user experience.
However, the abstraction comes with risks. The removal of “gravity” (manual effort) can lead to a detachment from the codebase quality if you rely too heavily on the agent without rigorous review. Use the tool to amplify your output, not to replace your judgment.
Next Step: Download the Antigravity preview, open a non-critical repository, and try the “Mission Control” view. Assign the agent a task to “Write a comprehensive README.md based on the code,” and see how well it interprets your architecture. Thank you for reading the DevopsRoles page!
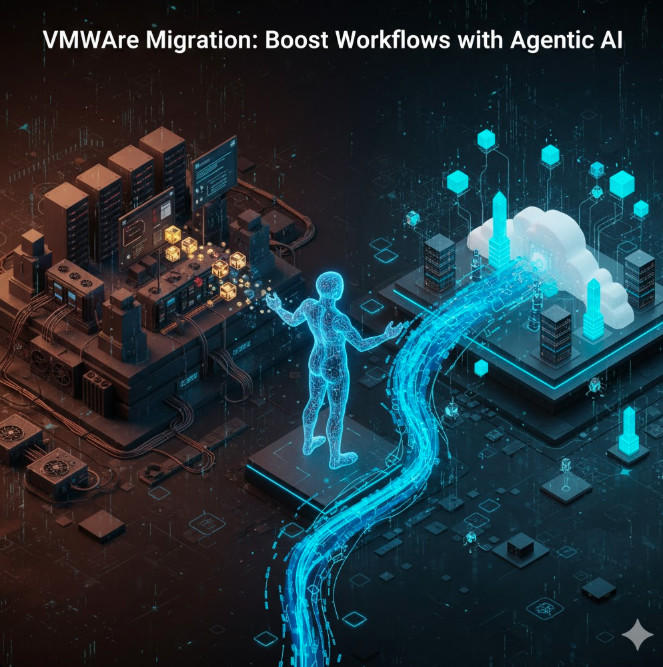
The infrastructure landscape has shifted seismicially. Following broad market consolidations and licensing changes, VMware migration has graduated from a “nice-to-have” modernization project to a critical boardroom imperative. For Enterprise Architects and Senior DevOps engineers, the challenge isn’t just moving bits—it’s untangling decades of technical debt, undocumented dependencies, and “pet” servers without causing business downtime.
Traditional migration strategies often rely on “Lift and Shift” approaches that carry legacy problems into new environments. This is where Agentic AI—autonomous AI systems capable of reasoning, tool use, and execution—changes the calculus. Unlike standard generative AI which simply suggests code, Agentic AI can actively analyze vSphere clusters, generate target-specific Infrastructure as Code (IaC), and execute validation tests.
In this guide, we will dissect how to architect an agent-driven migration pipeline, moving beyond simple scripts to intelligent, self-correcting workflows.
The Scale Problem: Why Traditional Scripts Fail
In a typical enterprise environment managing thousands of VMs, manual migration via UI wizards or basic PowerCLI scripts hits a ceiling. The complexity isn’t in the data transfer (rsync is reliable); the complexity is in the context.
Opaque Dependencies: That legacy database VM might have hardcoded IP dependencies in an application server three VLANs away.
Configuration Drift: What is defined in your CMDB often contradicts the actual running state in vCenter.
Target Translation: Mapping a Distributed Resource Scheduler (DRS) rule from VMware to a Kubernetes PodDisruptionBudget or an AWS Auto Scaling Group requires semantic understanding, not just format conversion.
Pro-Tip: The “6 Rs” Paradox
While AWS defines the “6 Rs” of migration (Rehost, Replatform, etc.), Agentic AI blurs the line between Rehost and Refactor. By using agents to automatically generate Terraform during the move, you can achieve a “Refactor-lite” outcome with the speed of a Rehost.
Architecture: The Agentic Migration Loop
To leverage AI effectively, we treat the migration as a software problem. We employ “Agents”—LLMs wrapped with execution environments (like LangChain or AutoGen)—that have access to specific tools.
1. The Discovery Agent (Observer)
Instead of relying on static Excel sheets, a Discovery Agent connects to the vSphere API and SSH terminals. It doesn’t just list VMs; it builds a semantic graph.
Task: Identify “affinity groups.” If VM A and VM B talk 5,000 times an hour, the Agent tags them to migrate in the same wave.
2. The Transpiler Agent (Architect)
This agent takes the source configuration (VMX files, NSX rules) and “transpiles” them into the target dialect (Terraform for AWS, YAML for KubeVirt/OpenShift).
3. The Validation Agent (Tester)
Before any switch is flipped, this agent spins up a sandbox environment, applies the new config, and runs smoke tests. If a test fails, the agent reads the error log, adjusts the Terraform code, and retries—autonomously.
Technical Implementation: Building a Migration Agent
Let’s look at a simplified Python representation of how you might structure a LangChain agent to analyze a VMware VM and generate a corresponding KubeVirt manifest.
import os
from langchain.agents import initialize_agent, Tool
from langchain.llms import OpenAI

# Mock function to simulate vSphere API call
def get_vm_config(vm_name):
    # In production, use pyvmomi or govc here
    return f"""
    VM: {vm_name}
    CPUs: 4
    RAM: 16GB
    Network: VLAN_10 (192.168.10.x)
    Storage: 500GB vSAN
    Annotations: "Role: Postgres Primary"
    """

# Tool definition for the Agent
tools = [
    Tool(
        name="GetVMConfig",
        func=get_vm_config,
        description="Useful for retrieving current hardware specs of a VMware VM."
    )
]

# The Prompt Template instructs the AI on specific migration constraints
system_prompt = """
You are a Senior DevOps Migration Assistant.
Your goal is to convert VMware configurations into KubeVirt (VirtualMachineInstance) YAML.
1. Retrieve the VM config.
2. Map VLANs to Multus CNI network-attachment-definitions.
3. Add a 'migration-wave' label based on the annotations.
"""

# Initialize the Agent (Pseudo-code for brevity)
# agent = initialize_agent(tools, llm, agent="zero-shot-react-description", verbose=True)

# Execution
# response = agent.run("Generate a KubeVirt manifest for vm-postgres-01")
The magic here isn’t the string formatting; it’s the reasoning. If the agent sees “Role: Postgres Primary”, it can be instructed (via system prompt) to automatically add a podAntiAffinity rule to the generated YAML to ensure high availability in the new cluster.
Strategies for Target Environments
Your VMware migration strategy depends heavily on where the workloads are landing.
Target
Agent Focus
Key Tooling
Public Cloud (AWS/Azure)
Right-sizing instances to avoid over-provisioning cost shock. Agents analyze historical CPU/RAM usage (95th percentile) rather than allocated specs.
Terraform, Packer, CloudEndure
KubeVirt / OpenShift
Converting vSwitch networking to CNI/Multus configurations and mapping storage classes (vSAN to ODF/Ceph).
Konveyor, oc-cli, customize
Bare Metal (Nutanix/KVM)
Driver compatibility (VirtIO) and preserving MAC addresses for license-bound legacy software.
Virt-v2v, Ansible
Best Practices & Guardrails
While “Agentic” implies autonomy, migration requires strict guardrails. We are dealing with production data.
1. Read-Only Access by Default
Ensure your Discovery Agents have Read-Only permissions in vCenter. Agents should generate *plans* (Pull Requests), not execute changes directly against production without human approval (Human-in-the-Loop).
2. The “Plan, Apply, Rollback” Pattern
Use your agents to generate Terraform Plans. These plans serve as the artifact for review. If the migration fails during execution, the agent must have a pre-generated rollback script ready.
3. Hallucination Checks
LLMs can hallucinate configuration parameters that don’t exist. Implement a “Linter Agent” step where the output of the “Architect Agent” is validated against the official schema (e.g., kubectl validate or terraform validate) before it ever reaches a human reviewer.
Frequently Asked Questions (FAQ)
Can AI completely automate a VMware migration?
Not 100%. Agentic AI is excellent at the “heavy lifting” of discovery, dependency mapping, and code generation. However, final cutover decisions, complex business logic validation, and UAT (User Acceptance Testing) sign-off should remain human-led activities.
How does Agentic AI differ from using standard migration tools like HCX?
VMware HCX is a transport mechanism. Agentic AI operates at the logic layer. HCX moves the bits; Agentic AI helps you decide what to move, when to move it, and automatically refactors the infrastructure-as-code wrappers around the VM for the new environment.
What is the biggest risk in AI-driven migration?
Context loss. If an agent refactors a network configuration without understanding the security group implications, it could expose a private database to the public internet. Always use Policy-as-Code (e.g., OPA Gatekeeper or Sentinel) to validate agent outputs.
Conclusion
The era of the “spreadsheet migration” is ending. By integrating Agentic AI into your VMware migration pipelines, you do more than just speed up the process—you increase accuracy and reduce the technical debt usually incurred during these high-pressure transitions.
Start small. Deploy a “Discovery Agent” to map a non-critical cluster. Audit its findings against your manual documentation. You will likely find that the AI sees connections you missed, proving the value of machine intelligence in modern infrastructure operations. Thank you for reading the DevopsRoles page!
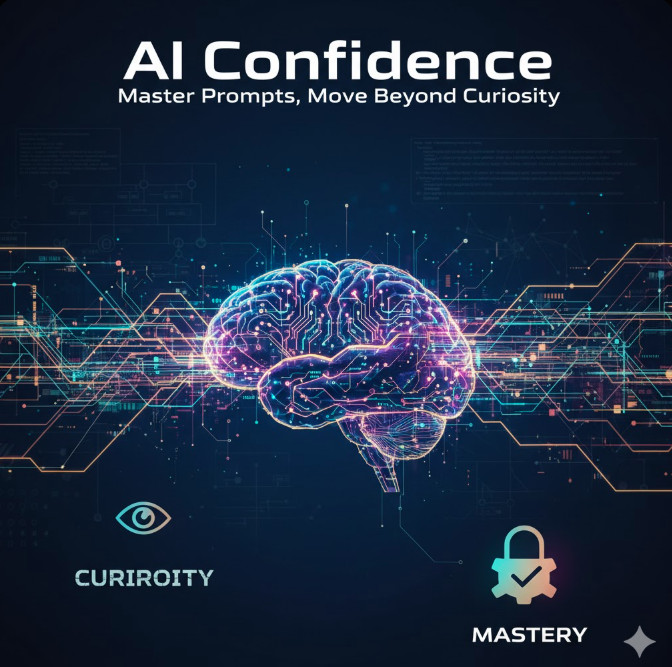
For expert AI practitioners, the initial “magic” of Large Language Models (LLMs) has faded, replaced by a more pressing engineering challenge: reliability. Your AI confidence is no longer about being surprised by a clever answer. It’s about predictability. It’s the professional’s ability to move beyond simple “prompt curiosity” and engineer systems that deliver specific, reliable, and testable outcomes at scale.
This “curiosity phase” is defined by ad-hoc prompting, hoping for a good result. The “mastery phase” is defined by structured engineering, *guaranteeing* a good result within a probabilistic tolerance. This guide is for experts looking to make that leap. We will treat prompt design not as an art, but as a discipline of probabilistic systems engineering.
Beyond the ‘Magic 8-Ball’: Redefining AI Confidence as an Engineering Discipline
The core problem for experts is the non-deterministic nature of generative AI. In a production environment, “it works most of the time” is synonymous with “it’s broken.” True AI confidence is built on a foundation of control, constraint, and verifiability. This means fundamentally shifting how we interact with these models.
From Prompt ‘Art’ to Prompt ‘Engineering’
The “curiosity” phase is characterized by conversational, single-shot prompts. The “mastery” phase relies on complex, structured, and often multi-turn prompt systems.
Curiosity Prompt:"Write a Python script that lists files in a directory."
Mastery Prompt:"You are a Senior Python Developer following PEP 8. Generate a function list_directory_contents(path: str) -> List[str]. Include robust try/except error handling for FileNotFoundError and PermissionError. The output MUST be only the Python code block, with no conversational preamble."
The mastery-level prompt constrains the persona, defines the input/output signature, specifies error handling, and—critically—controls the output format. This is the first step toward building confidence: reducing the model’s “surface area” for unwanted behavior.
The Pillars of AI Confidence: How to Master Probabilistic Systems
Confidence isn’t found; it’s engineered. For expert AI users, this is achieved by implementing three core pillars that move your interactions from guessing to directing.
Pillar 1: Structured Prompting and Constraint-Based Design
Never let the model guess the format you want. Use structuring elements, like XML tags or JSON schemas, to define the *shape* of the response. This is particularly effective for forcing models to follow a specific “chain of thought” or output format.
By enclosing instructions in tags, you create a clear, machine-readable boundary that the model is heavily incentivized to follow.
<?xml version="1.0" encoding="UTF-8"?>
<prompt_instructions>
  <system_persona>
    You are an expert financial analyst. Your responses must be formal, data-driven, and cite sources.
  </system_persona>
  <task>
    Analyze the attached quarterly report (context_data_001.txt) and provide a summary.
  </task>
  <constraints>
    <format>JSON</format>
    <schema>
      {
        "executive_summary": "string",
        "key_metrics": [
          { "metric": "string", "value": "string", "analysis": "string" }
        ],
        "risks_identified": ["string"]
      }
    </schema>
    <tone>Formal, Analytical</tone>
    <style>Do not use conversational language. Output *only* the valid JSON object.</style>
  </constraints>
</prompt_instructions>
Pillar 2: Grounding with Retrieval-Augmented Generation (RAG)
The fastest way to lose AI confidence is to catch the model “hallucinating” or, more accurately, confabulating. RAG is the single most important architecture for building confidence in factual, high-stakes applications.
Instead of *asking* the model if it “knows” something, you *tell* it the facts. The prompt is “augmented” with retrieved data (e.g., from a vector database) at runtime. The model’s job shifts from “recall” (unreliable) to “synthesis” (highly reliable).
Advanced Concept: Context-Aware Grounding
RAG isn’t just for documents. You can “ground” a model on *any* runtime context: API documentation, application logs, database schemas, or user permissions. The prompt becomes an instruction to “use *this* data to perform *this* task.” This focus on grounding is detailed in foundational papers like the original RAG paper by Lewis et al. (See: arxiv.org/abs/2005.11401).
Pillar 3: Implementing Self-Correcting and Reflective Models
Build reflection and critique directly into your prompt chain. Instead of a single-shot prompt, use a multi-step process where the model (or a second, “critic” model) reviews and refines the output. This mimics human expert workflows.
This “ReAct” (Reason and Act) or “Chain of Thought” (CoT) pattern is the key to solving complex, multi-step problems.
--- PROMPT 1: DRAFT ---
"User wants a deployment plan for a new microservice.
Draft a step-by-step plan."

--- MODEL 1 RESPONSE (Internal) ---
"1. Build Docker image. 2. Push to ECR. 3. Create K8s deployment. 4. Create K8s service. 5. Expose via Ingress."

--- PROMPT 2: CRITIQUE ---
"You are a Principal SRE. Review the following deployment plan.
[Plan from Step 1]
Identify missing steps, risks, and assumptions. Focus on security, testing, and observability."

--- MODEL 2 RESPONSE (Internal) ---
"Critique: The plan is simplistic.
Missing:
- Security: No mention of SA, RoleBindings, or image scanning.
- Testing: No canary or blue/green strategy.
- Observability: No HPA, PodDisruptionBudget, or logging/monitoring configuration.
- Risk: Assumes 'latest' tag, which is bad practice."

--- PROMPT 3: FINAL SYNTHESIS ---
"Using the original draft and the SRE critique, generate a production-ready, comprehensive deployment plan."

--- FINAL MODEL RESPONSE (to User) ---
"Here is a production-ready deployment plan, including CI/CD integration, security principles, and a phased canary rollout strategy..."
Moving from Curiosity to Mastery: The Test-Driven Prompting (TDP) Framework
In software engineering, we build confidence with testing. AI should be no different. “Test-Driven Prompting” (TDP) is an SRE-inspired methodology for building and maintaining AI confidence.
Step 1: Define Your ‘Golden Set’ of Test Cases
A “Golden Set” is a curated list of inputs (prompts) and their *expected* outputs. This set should include:
Happy Path: Standard inputs and their ideal responses.
Edge Cases: Difficult, ambiguous, or unusual inputs.
Negative Tests: Prompts designed to fail (e.g., out-of-scope requests, attempts to bypass constraints) and their *expected* failure responses (e.g., “I cannot complete that request.”).
Step 2: Automate Prompt Evaluation
Do not “eyeball” test results. For structured data (JSON/XML), evaluation is simple: validate the output against a schema. For unstructured text, use a combination of:
Keyword/Regex Matching: For simple assertions (e.g., “Does the response contain ‘Error: 404’?”).
Semantic Similarity: Use embedding models to score how “close” the model’s output is to your “golden” answer.
Model-as-Evaluator: Use a powerful model (like GPT-4) with a strict rubric to “grade” the output of your application model.
Step 3: Version Your Prompts (Prompt-as-Code)
Treat your system prompts, your constraints, and your test sets as code. Store them in a Git repository. When you want to change a prompt, you create a new branch, run your “Golden Set” evaluation pipeline, and merge only when all tests pass.
This “Prompt-as-Code” workflow is the ultimate expression of mastery. It moves prompting from a “tweak and pray” activity to a fully-managed, regression-tested CI/CD-style process.
The Final Frontier: System-Level Prompts and AI Personas
Many experts still only interact at the “user” prompt level. True mastery comes from controlling the “system” prompt. This is the meta-instruction that sets the AI’s “constitution,” boundaries, and persona before the user ever types a word.
Strategic Insight: The System Prompt is Your Constitution
The system prompt is the most powerful tool for building AI confidence. It defines the rules of engagement that the model *must* follow. This is where you set your non-negotiable constraints, define your output format, and imbue the AI with its specific role (e.g., “You are a code review bot, you *never* write new code, you only critique.”) This is a core concept in modern AI APIs. (See: OpenAI API Documentation on ‘system’ role).
Frequently Asked Questions (FAQ)
How do you measure the effectiveness of a prompt?
For experts, effectiveness is measured, not felt. Use a “Golden Set” of test cases. Measure effectiveness with automated metrics:
1. Schema Validation: For JSON/XML, does the output pass validation? (Pass/Fail)
2. Semantic Similarity: For text, how close is the output’s embedding vector to the ideal answer’s vector? (Score 0-1)
3. Model-as-Evaluator: Does a “judge” model (e.g., GPT-4) rate the response as “A+” on a given rubric?
4. Latency & Cost: How fast and how expensive was the generation?
How do you reduce or handle AI hallucinations reliably?
You cannot “eliminate” hallucinations, but you can engineer systems to be highly resistant.
1. Grounding (RAG): This is the #1 solution. Don’t ask the model to recall; provide the facts via RAG and instruct it to *only* use the provided context.
2. Constraints: Use system prompts to forbid speculation. (e.g., “If the answer is not in the provided context, state ‘I do not have that information.'”)
3. Self-Correction: Use a multi-step prompt to have the AI “fact-check” its own draft against the source context.
What’s the difference between prompt engineering and fine-tuning?
This is a critical distinction for experts.
Prompt Engineering is “runtime” instruction. You are teaching the model *how* to behave for a specific task within its context window. It’s fast, cheap, and flexible.
Fine-Tuning is “compile-time” instruction. You are creating a new, specialized model by updating its weights. This is for teaching the model *new knowledge* or a *new, persistent style/behavior* that is too complex for a prompt. Prompt engineering (with RAG) is almost always the right place to start.
Conclusion: From Probabilistic Curiosity to Deterministic Value
Moving from “curiosity” to “mastery” is the primary challenge for expert AI practitioners today. This shift requires us to stop treating LLMs as oracles and start treating them as what they are: powerful, non-deterministic systems that must be engineered, constrained, and controlled.
True AI confidence is not a leap of faith. It’s a metric, built on a foundation of structured prompting, context-rich grounding, and a rigorous, test-driven engineering discipline. By mastering these techniques, you move beyond “hoping” for a good response and start “engineering” the precise, reliable, and valuable outcomes your systems demand. Thank you for reading the DevopsRoles page!
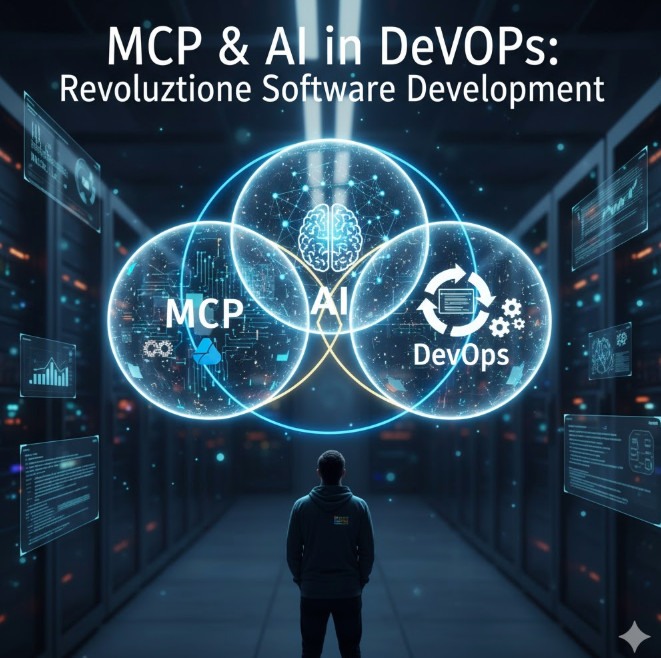
The worlds of software development, operations, and artificial intelligence are not just colliding; they are fusing. For experts in the DevOps and AI fields, and especially for the modern Microsoft Certified Professional (MCP), this convergence signals a fundamental paradigm shift. We are moving beyond simple automation (CI/CD) and reactive monitoring (traditional Ops) into a new era of predictive, generative, and self-healing systems. Understanding the synergy of MCP & AI in DevOps isn’t just an academic exercise—it’s the new baseline for strategic, high-impact engineering.
This guide will dissect this “new trinity,” exploring how AI is fundamentally reshaping the DevOps lifecycle and what strategic role the expert MCP plays in architecting and governing these intelligent systems within the Microsoft ecosystem.
Defining the New Trinity: MCP, AI, and DevOps
To grasp the revolution, we must first align on the roles these three domains play. For this expert audience, we’ll dispense with basic definitions and focus on their modern, synergistic interpretations.
The Modern MCP: Beyond Certifications to Cloud-Native Architect
The “MCP” of today is not the on-prem Windows Server admin of the past. The modern, expert-level Microsoft Certified Professional is a cloud-native architect, a master of the Azure and GitHub ecosystems. Their role is no longer just implementation, but strategic governance, security, and integration. They are the human experts who build the “scaffolding”—the Azure Landing Zones, the IaC policies, the identity frameworks—upon which intelligent applications run.
AI in DevOps: From Reactive AIOps to Generative Pipelines
AI’s role in DevOps has evolved through two distinct waves:
AIOps (AI for IT Operations): This is the *reactive and predictive* wave. It involves using machine learning models to analyze telemetry (logs, metrics, traces) to find patterns, detect multi-dimensional anomalies (that static thresholds miss), and automate incident response.
Generative AI: This is the *creative* wave. Driven by Large Language Models (LLMs), this AI writes code, authors test cases, generates documentation, and even drafts declarative pipeline definitions. Tools like GitHub Copilot are the vanguard of this movement.
The Synergy: Why This Intersection Matters Now
The synergy lies in the feedback loop. DevOps provides the *process* and *data* (from CI/CD pipelines and production monitoring). AI provides the *intelligence* to analyze that data and automate complex decisions. The MCP provides the *platform* and *governance* (Azure, GitHub Actions, Azure Monitor, Azure ML) that connects them securely and scalably.
Advanced Concept: This trinity creates a virtuous cycle. Better DevOps practices generate cleaner data. Cleaner data trains more accurate AI models. More accurate models drive more intelligent automation (e.g., predictive scaling, automated bug detection), which in turn optimizes the DevOps lifecycle itself.
The Core Impact of MCP & AI in DevOps
When you combine the platform expertise of an MCP with the capabilities of AI inside a mature DevOps framework, you don’t just get faster builds. You get a fundamentally different *kind* of software development lifecycle. The core topic of MCP & AI in DevOps is about this transformation.
Standard DevOps uses declarative IaC (Terraform, Bicep) and autoscaling (like HPA in Kubernetes). An AI-driven approach goes further. Instead of scaling based on simple CPU/memory thresholds, an AI-driven system uses predictive analytics.
An MCP can architect a solution using KEDA (Kubernetes Event-driven Autoscaling) to scale a microservice based on a custom metric from an Azure ML model, which predicts user traffic based on time of day, sales promotions, and even external events (e.g., social media trends).
2. Generative AI in the CI/CD Lifecycle
This is where the revolution is most visible. Generative AI is being embedded directly into the “inner loop” (developer) and “outer loop” (CI/CD) processes.
Test Case Generation: AI models can read a function, understand its logic, and generate a comprehensive suite of unit tests, including edge cases human developers might miss.
Pipeline Definition: An MCP can prompt an AI to “generate a GitHub Actions workflow that builds a .NET container, scans it with Microsoft Defender for Cloud, and deploys it to Azure Kubernetes Service,” receiving a near-production-ready YAML file in seconds.
3. Hyper-Personalized Observability and Monitoring
Traditional monitoring relies on pre-defined dashboards and alerts. AIOps tools, integrated by an MCP using Azure Monitor, can build a dynamic baseline of “normal” system behavior. Instead of an alert storm, AI correlates thousands of signals into a single, probable root cause: “Alert fatigue is reduced, and Mean Time to Resolution (MTTR) plummets.”
The MCP’s Strategic Role in an AI-Driven DevOps World
The MCP is the critical human-in-the-loop, the strategist who makes this AI-driven world possible, secure, and cost-effective. Their role shifts from *doing* to *architecting* and *governing*.
Architecting the Azure-Native AI Feedback Loop
The MCP is uniquely positioned to connect the dots. They will design the architecture that pipes telemetry from Prayer to Azure Monitor, feeds that data into an Azure ML workspace for training, and exposes the resulting model via an API that Azure DevOps Pipelines or GitHub Actions can consume to make intelligent decisions (e.g., “Go/No-Go” on a deployment based on predicted performance impact).
Championing GitHub Copilot and Advanced Security
An MCP won’t just *use* Copilot; they will *manage* it. This includes:
Policy & Governance: Using GitHub Advanced Security to scan AI-generated code for vulnerabilities or leaked secrets.
Quality Control: Establishing best practices for *reviewing* AI-generated code, ensuring it meets organizational standards, not just that it “works.”
Governance and Cost Management for AI/ML Workloads (FinOps)
AI is expensive. Training models and running inference at scale can create massive Azure bills. A key MCP role will be to apply FinOps principles to these new workloads, using Azure Cost Management and Policy to tag resources, set budgets, and automate the spin-down of costly GPU-enabled compute clusters.
Practical Applications: Code & Architecture
Let’s move from theory to practical, production-oriented examples that an expert audience can appreciate.
Example 1: Predictive Scaling with KEDA and Azure ML
An MCP wants to scale a Kubernetes deployment based on a custom metric from an Azure ML model that predicts transaction volume.
Step 1: The ML team exposes a model via an Azure Function.
Step 2: The MCP deploys a KEDA ScaledObject that queries this Azure Function. KEDA (a CNCF project) integrates natively with Azure.
apiVersion: keda.sh/v1alpha1
kind: ScaledObject
metadata:
  name: azure-ml-scaler
  namespace: e-commerce
spec:
  scaleTargetRef:
    name: order-processor-deployment
  minReplicaCount: 3
  maxReplicaCount: 50
  triggers:
  - type: azure-http
    metadata:
      # The Azure Function endpoint hosting the ML model
      endpoint: "https://my-prediction-model.azurewebsites.net/api/GetPredictedTransactions"
      # The target value to scale on. If the model returns '500', KEDA will scale to 5 replicas (500/100)
      targetValue: "100"
      method: "GET"
    authenticationRef:
      name: keda-trigger-auth-function-key
In this example, the MCP has wired AI directly into the Kubernetes control plane, creating a predictive, self-optimizing system.
Example 2: Generative IaC with GitHub Copilot
An expert MCP needs to draft a complex Bicep file to create a secure App Service Environment (ASE).
Instead of starting from documentation, they write a comment-driven prompt:
// Bicep file to create an App Service Environment v3
// Must be deployed into an existing VNet and two subnets (frontend, backend)
// Must use a user-assigned managed identity
// Must have FTPS disabled and client certs enabled
// Add resource tags for 'env' and 'owner'

param location string = resourceGroup().location
param vnetName string = 'my-vnet'
param frontendSubnetName string = 'ase-fe'
param backendSubnetName string = 'ase-be'
param managedIdentityName string = 'my-ase-identity'

// ... GitHub Copilot will now generate the next ~40 lines of Bicep resource definitions ...

resource ase 'Microsoft.Web/hostingEnvironments@2022-09-01' = {
  name: 'my-production-ase'
  location: location
  kind: 'ASEv3'
  // ... Copilot continues generating properties ...
  properties: {
    internalLoadBalancingMode: 'None'
    virtualNetwork: {
      id: resourceId('Microsoft.Network/virtualNetworks', vnetName)
      subnet: frontendSubnetName // Copilot might get this wrong, needs review. Should be its own subnet.
    }
    // ... etc ...
  }
}
The MCP’s role here is *reviewer* and *validator*. The AI provides the velocity; the MCP provides the expertise and security sign-off.
The Future: Autonomous DevOps and the Evolving MCP
We are on a trajectory toward “Autonomous DevOps,” where AI-driven agents manage the entire lifecycle. These agents will detect a business need (from a Jira ticket), write the feature code, provision the infrastructure, run a battery of tests, perform a canary deploy, and validate the business outcome (from product analytics) with minimal human intervention.
In this future, the MCP’s role becomes even more strategic:
AI Model Governor: Curating the “golden path” models and data sources the AI agents use.
Chief Security Officer: Defining the “guardrails of autonomy,” ensuring AI agents cannot bypass security or compliance controls.
Business-Logic Architect: Translating high-level business goals into the objective functions that AI agents will optimize for.
Frequently Asked Questions (FAQ)
How does AI change DevOps practices?
AI infuses DevOps with intelligence at every stage. It transforms CI/CD from a simple automation script into a generative, self-optimizing process. It changes monitoring from reactive alerting to predictive, self-healing infrastructure. Key changes include generative code/test/pipeline creation, AI-driven anomaly detection, and predictive resource scaling.
What is the role of an MCP in a modern DevOps team?
The modern MCP is the platform and governance expert, typically for the Azure/GitHub ecosystem. In an AI-driven DevOps team, they architect the underlying platform that enables AI (e.g., Azure ML, Azure Monitor), integrate AI tools (like Copilot) securely, and apply FinOps principles to govern the cost of AI/ML workloads.
How do you use Azure AI in a CI/CD pipeline?
You can integrate Azure AI in several ways:
Quality Gates: Use a model in Azure ML to analyze a build’s performance metrics. The pipeline calls this model’s API, and if the predicted performance degradation is too high, the pipeline fails the build.
Dynamic Testing: Use a generative AI model (like one from Azure OpenAI Service) to read a new pull request and dynamically generate a new set of integration tests specific to the changes.
Incident Response: On a failed deployment, an Azure DevOps pipeline can trigger an Azure Logic App that queries an AI model for a probable root cause and automated remediation steps.
What is AIOps vs MLOps?
This is a critical distinction for experts.
AIOps (AI for IT Operations): Is the *consumer* of AI models. It *applies* pre-built or custom-trained models to IT operations data (logs, metrics) to automate monitoring, anomaly detection, and incident response.
MLOps (Machine Learning Operations): Is the *producer* of AI models. It is a specialized form of DevOps focused on the lifecycle of the machine learning model itself—data ingestion, training, versioning, validation, and deployment of the model as an API.
In short: MLOps builds the model; AIOps uses the model.
Conclusion: The New Mandate
The integration of MCP & AI in DevOps is not a future-state trend; it is the current, accelerating reality. For expert practitioners, the mandate is clear. DevOps engineers must become AI-literate, understanding how to consume and leverage models. AI engineers must understand the DevOps lifecycle to productionize their models effectively via MLOps. And the modern MCP stands at the center, acting as the master architect and governor who connects these powerful domains on the cloud platform.
Those who master this synergy will not just be developing software; they will be building intelligent, autonomous systems that define the next generation of technology. Thank you for reading the DevopsRoles page!
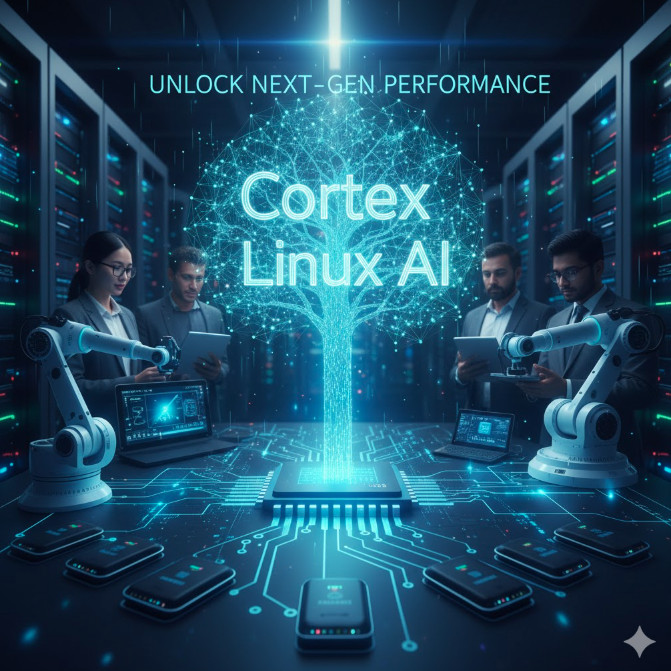
Artificial intelligence is no longer confined to massive, power-hungry data centers. A new wave of computation is happening at the edge—on our phones, in our cars, and within industrial IoT devices. At the heart of this revolution is a powerful trifecta of technologies: Arm Cortex processors, the Linux kernel, and optimized AI workloads. This convergence, which we’ll call the “Cortex Linux AI” stack, represents the future of intelligent, efficient, and high-performance computing.
For expert Linux and AI engineers, mastering this stack isn’t just an option; it’s a necessity. This guide provides a deep, technical dive into optimizing AI models on Cortex-powered Linux systems, moving from high-level architecture to practical, production-ready code.
Understanding the “Cortex Linux AI” Stack
First, a critical distinction: “Cortex Linux AI” is not a single commercial product. It’s a technical term describing the powerful ecosystem built from three distinct components:
Arm Cortex Processors: The hardware foundation. This isn’t just one CPU. It’s a family of processors, primarily the Cortex-A series (for high-performance applications, like smartphones and automotive) and the Cortex-M series (for real-time microcontrollers). For AI, we’re typically focused on 64-bit Cortex-A (AArch64) designs.
Linux: The operating system. From minimal, custom-built Yocto or Buildroot images for embedded devices to full-featured server distributions like Ubuntu or Debian for Arm, Linux provides the necessary abstractions, drivers, and userspace for running complex applications.
AI Workloads: The application layer. This includes everything from traditional machine learning models to deep neural networks (DNNs), typically run as inference engines using frameworks like TensorFlow Lite, PyTorch Mobile, or the ONNX Runtime.
Why Cortex Processors? The Edge AI Revolution
The dominance of Cortex processors at the edge stems from their unparalleled performance-per-watt. While a data center GPU measures performance in TFLOPS and power in hundreds of watts, an Arm processor excels at delivering “good enough” or even exceptional AI performance in a 5-15 watt power envelope. This is achieved through specialized architectural features:
NEON: A 128-bit SIMD (Single Instruction, Multiple Data) architecture extension. NEON is critical for accelerating common ML operations (like matrix multiplication and convolutions) by performing the same operation on multiple data points simultaneously.
SVE/SVE2 (Scalable Vector Extension): The successor to NEON, SVE allows for vector-length-agnostic programming. Code written with SVE can automatically adapt to use 256-bit, 512-bit, or even larger vector hardware without being recompiled.
Arm Ethos-N NPUs: Beyond the CPU, many SoCs (Systems-on-a-Chip) integrate a Neural Processing Unit, like the Arm Ethos-N. This co-processor is designed only to run ML models, offering massive efficiency gains by offloading work from the Cortex-A CPU.
Optimizing AI Workloads on Cortex-Powered Linux
Running model.predict() on a laptop is simple. Getting real-time performance on an Arm-based device requires a deep understanding of the full software and hardware stack. This is where your expertise as a Linux and AI engineer provides the most value.
Choosing Your AI Framework: The Arm Ecosystem
Not all AI frameworks are created equal. For the Cortex Linux AI stack, you must prioritize those built for edge deployment.
TensorFlow Lite (TFLite): The de facto standard. TFLite models are converted from standard TensorFlow, quantized (reducing precision from FP32 to INT8, for example), and optimized for on-device inference. Its key feature is the “delegate,” which allows it to offload graph execution to hardware accelerators (like the GPU or an NPU).
ONNX Runtime: The Open Neural Network Exchange (ONNX) format is an interoperable standard. The ONNX Runtime can execute these models and has powerful “execution providers” (similar to TFLite delegates) that can target NEON, the Arm Compute Library, or vendor-specific NPUs.
PyTorch Mobile: While PyTorch dominates research, PyTorch Mobile is its leaner counterpart for production edge deployment.
Hardware Acceleration: The NPU and Arm NN
The single most important optimization is moving beyond the CPU. This is where Arm’s own software libraries become essential.
Arm NN is an inference engine, but it’s more accurate to think of it as a “smart dispatcher.” When you provide an Arm NN-compatible model (from TFLite, ONNX, etc.), it intelligently partitions the neural network graph. It analyzes your specific SoC and decides, layer by layer:
“This convolution layer runs fastest on the Ethos-N NPU.”
“This normalization layer is best suited for the NEON-accelerated CPU.”
“This unusual custom layer must run on the main Cortex-A CPU.”
This heterogeneous compute approach is the key to unlocking peak performance. Your job as the Linux engineer is to ensure the correct drivers (e.g., /dev/ethos-u) are present and that your AI framework is compiled with the correct Arm NN delegate enabled.
Advanced Concept: The Arm Compute Library (ACL)
Underpinning many of these frameworks (including Arm NN itself) is the Arm Compute Library. This is a collection of low-level functions for image processing and machine learning, hand-optimized in assembly for NEON and SVE. If you’re building a custom C++ AI application, you can link against ACL directly for maximum “metal” performance, bypassing framework overhead.
Practical Guide: Building and Deploying a TFLite App
Let’s bridge theory and practice. The most common DevOps challenge in the Cortex Linux AI stack is cross-compilation. You develop on an x86_64 laptop, but you deploy to an AArch64 (Arm 64-bit) device. Docker with QEMU makes this workflow manageable.
Step 1: The Cross-Compilation Environment (Dockerfile)
This Dockerfile uses qemu-user-static to build an AArch64 image from your x86_64 machine. This example sets up a basic AArch64 Debian environment with build tools.
# Use a multi-stage build to get QEMU
FROM --platform=linux/arm64 arm64v8/debian:bullseye-slim AS builder

# Install build dependencies for a C++ TFLite application
RUN apt-get update && apt-get install -y \
    build-essential \
    curl \
    libjpeg-dev \
    libz-dev \
    git \
    cmake \
    && rm -rf /var/lib/apt/lists/*

# (Example) Clone and build the TensorFlow Lite C++ library
RUN git clone https://github.com/tensorflow/tensorflow.git /tensorflow_src
WORKDIR /tensorflow_src
# Note: This is a simplified build command. A real build would be more complex.
RUN cmake -S tensorflow/lite -B /build/tflite -DCMAKE_BUILD_TYPE=Release
RUN cmake --build /build/tflite -j$(nproc)

# --- Final Stage ---
FROM --platform=linux/arm64 arm64v8/debian:bullseye-slim

# Copy the build artifacts
COPY --from=builder /build/tflite/libtensorflow-lite.a /usr/local/lib/
COPY --from=builder /tensorflow_src/tensorflow/lite/tools/benchmark /usr/local/bin/benchmark_model

# Copy your own pre-compiled application and model
COPY ./my_cortex_ai_app /app/
COPY ./my_model.tflite /app/

WORKDIR /app
CMD ["./my_cortex_ai_app"]
To build this for Arm on your x86 machine, you need Docker Buildx:
# Enable the Buildx builder
docker buildx create --use

# Build the image, targeting the arm64 platform
docker buildx build --platform linux/arm64 -t my-cortex-ai-app:latest . --load
Step 2: Deploying and Running Inference
Once your container is built, you can push it to a registry and pull it onto your Arm device (e.g., a Raspberry Pi 4/5, NVIDIA Jetson, or custom-built Yocto board).
You can then use tools like benchmark_model (copied in the Dockerfile) to test performance:
# Run this on the target Arm device
docker run --rm -it my-cortex-ai-app:latest \
    /usr/local/bin/benchmark_model \
    --graph=/app/my_model.tflite \
    --num_threads=4 \
    --use_nnapi=true
The --use_nnapi=true (on Android) or equivalent delegate flags are what trigger hardware acceleration. On a standard Linux build, you might specify the Arm NN delegate explicitly: --external_delegate_path=/path/to/libarmnn_delegate.so.
Advanced Performance Analysis on Cortex Linux AI
Your application runs, but it’s slow. How do you find the bottleneck?
Profiling with ‘perf’: The Linux Expert’s Tool
The perf tool is the Linux standard for system and application profiling. On Arm, it’s invaluable for identifying CPU-bound bottlenecks, cache misses, and branch mispredictions.
Let’s find out where your AI application is spending its CPU time:
# Install perf (e.g., apt-get install linux-perf)
# 1. Record a profile of your application
perf record -g --call-graph dwarf ./my_cortex_ai_app --model=my_model.tflite

# 2. Analyze the results with a report
perf report
The perf report output will show you a “hotspot” list of functions. If you see 90% of the time spent in a TFLite kernel like tflite::ops::micro::conv::Eval, you know that:
1. Your convolution layers are the bottleneck (expected).
2. You are running on the CPU (the “micro” kernel).
3. Your NPU or NEON delegate is not working correctly.
This tells you to fix your delegates, not to waste time optimizing your C++ image pre-processing code.
Pro-Tip: Containerization Strategy on Arm
Be mindful of container overhead. While Docker is fantastic for development, on resource-constrained devices, every megabyte of RAM and every CPU cycle counts. For production, you should:
Use multi-stage builds to create minimal images.
Base your image on distroless or alpine (if glibc is not a hard dependency).
Ensure you pass hardware devices (like /dev/ethos-u or /dev/mali for GPU) to the container using the --device flag.
Challenges and Future Trends
The Cortex Linux AI stack is not without its challenges. Hardware fragmentation is chief among them. An AI model optimized for one SoC’s NPU may not run at all on another. This is where standards like ONNX and abstraction layers like Arm NN are critical.
The next frontier is Generative AI at the Edge. We are already seeing early demonstrations of models like Llama 2-7B and Stable Diffusion running (slowly) on high-end Arm devices. Unlocking real-time performance for these models will require even tighter integration between the Cortex CPUs, next-gen NPUs, and the Linux kernel’s scheduling and memory management systems.
Frequently Asked Questions (FAQ)
What is Cortex Linux AI?
Cortex Linux AI isn’t a single product. It’s a technical term for the ecosystem of running artificial intelligence (AI) and machine learning (ML) workloads on devices that use Arm Cortex processors (like the Cortex-A series) and run a version of the Linux operating system.
Can I run AI training on an Arm Cortex processor?
You can, but you generally shouldn’t. Cortex processors are designed for power-efficient inference (running a model). The massive, parallel computation required for training is still best suited for data center GPUs (like NVIDIA’s A100 or H100). The typical workflow is: train on x86/GPU, convert/quantize, and deploy/infer on Cortex/Linux.
What’s the difference between Arm Cortex-A and Cortex-M for AI?
Cortex-A: These are “application” processors. They are 64-bit (AArch64), run a full OS like Linux or Android, have an MMU (Memory Management Unit), and are high-performance. They are used in smartphones, cars, and high-end IoT. They run frameworks like TensorFlow Lite.
Cortex-M: These are “microcontroller” (MCU) processors. They are much smaller, lower-power, and run real-time operating systems (RTOS) or bare metal. They are used for TinyML (e.g., with TensorFlow Lite for Microcontrollers). You would typically not run a full Linux kernel on a Cortex-M.
What is Arm NN and do I need to use it?
Arm NN is a free, open-source inference engine. You don’t *have* to use it, but it’s highly recommended. It acts as a bridge between high-level frameworks (like TensorFlow Lite) and the low-level hardware accelerators (like the CPU’s NEON, the GPU, or a dedicated NPU like the Ethos-N). It finds the most efficient way to run your model on the available Arm hardware.
Conclusion
The Cortex Linux AI stack is the engine of the intelligent edge. For decades, “performance” in the Linux world meant optimizing web servers on x86. Today, it means squeezing every last drop of inference performance from a 10-watt Arm SoC.
By understanding the deep interplay between the Arm architecture (NEON, SVE, NPUs), the Linux kernel’s instrumentation (perf), and the AI framework’s hardware delegates, you can move from simply *running* models to building truly high-performance, next-generation products. Thank you for reading the DevopsRoles page!
In the world of DevOps, SREs, and software development, Generative AI has evolved from a novel curiosity into a powerful co-pilot. Whether it’s drafting a complex Bash script, debugging a Kubernetes manifest, or scaffolding a Terraform module, AI models can drastically accelerate our workflows. But there’s a catch: their utility is directly proportional to the quality of our instructions. This skill, which we call The Art of Prompting, is the new dividing line between frustrating, generic outputs and precise, production-ready results. For technical professionals, mastering this art isn’t just a recommendation; it’s becoming a core competency.
If you’ve ever asked an AI for a script and received a “hello world” example, or requested a complex configuration only to get a buggy, insecure, or completely hallucinatory response, this guide is for you. We will move beyond simple questions and dive into the structured techniques of “prompt engineering” tailored specifically for a technical audience. We’ll explore how to provide context, define personas, set constraints, and use advanced methods to transform your AI assistant from a “clueless intern” into a “seasoned senior engineer.”
Why Is Mastering “The Art of Prompting” Critical for Technical Roles?
The “Garbage In, Garbage Out” (GIGO) principle has never been more relevant. In a non-technical context, a bad prompt might lead to a poorly written email or a nonsensical story. In a DevOps or SRE context, a bad prompt can lead to a buggy deployment, a security vulnerability, or system downtime. The stakes are an order of magnitude higher, making The Art of Prompting a critical risk-management and productivity-enhancing skill.
From Vague Request to Precise Tool
Think of a Large Language Model (LLM) as an incredibly knowledgeable, eager-to-please, but literal-minded junior developer. It has read virtually every piece of documentation, blog post, and Stack Overflow answer ever written. However, it lacks real-world experience, context, and the implicit understanding that a human senior engineer possesses.
A vague prompt like “make a script to back up my database” is ambiguous. What database? What backup method? Where should it be stored? What are the retention policies? The AI is forced to guess, and it will likely provide a generic pg_dump command with no error handling.
A precise prompt specifies the persona (“You are a senior SRE”), the context (“I have a PostgreSQL database running on RDS”), the constraints (“use pg_dump, compress with gzip, upload to an S3 bucket”), and the requirements (“the script must be idempotent and include robust error handling and logging”).
The second prompt treats the AI not as a magic wand, but as a technical tool. It provides a “spec” for the code it wants, resulting in a far more useful and safer output.
The Cost of Imprecision: Security, Stability, and Time
In our field, small mistakes have large consequences. An AI-generated script that forgets to set correct file permissions (chmod 600) on a key file, a Terraform module that defaults to allowing public access on an S3 bucket, or a sed command that misinterprets a regex can all create critical security flaws. Relying on a vague prompt and copy-pasting the result is a recipe for disaster. Mastering prompting is about embedding your own senior-level knowledge—your “non-functional requirements” like security, idempotency, and reliability—into the request itself.
The Core Principles of Effective Prompting for AI
Before diving into advanced techniques, let’s establish the four pillars of a perfect technical prompt. Think of it as the “R.C.C.E.” framework: Role, Context, Constraints, and Examples.
1. Set the Stage: The Power of Personas (Role)
Always begin your prompt by telling the AI *who it is*. This simple instruction dramatically shifts the tone, style, and knowledge base the model draws from. By assigning a role, you prime the AI to think in terms of best practices associated with that role.
Bad: “How do I expose a web server in Kubernetes?”
Good: “You are a Kubernetes Security Expert. What is the most secure way to expose a web application to the internet, and why is using a NodePort service generally discouraged for production?”
2. Be Explicit: Providing Clear Context
The AI does not know your environment, your tech stack, or your goals. You must provide this context explicitly. The more relevant details you provide, the less the AI has to guess.
Vague: “My code isn’t working.”
Detailed Context: “I’m running a Python 3.10 script in a Docker container based on alpine:3.18. I’m getting a ModuleNotFoundError for the requests library, even though I’m installing it in my requirements.txt file. Here is my Dockerfile and my requirements.txt:”
This is where you tell the AI what *not* to do and define the shape of the desired output. Constraints are your “guardrails.”
Tech Constraints: “Use only standard Bash utilities (avoid jq or yq).” “Write this in Python 3.9 without any external libraries.” “This Ansible playbook must be idempotent.”
Format Constraints: “Provide the output in JSON format.” “Structure the answer as a .tf file for the module and a separate variables.tf file.” “Explain the solution in bullet points, followed by the complete code block.”
Negative Constraints: “Do not use the latest tag for any Docker images.” “Ensure the solution does not store any secrets in plain text.”
4. Provide Examples: Zero-Shot vs. Few-Shot Prompting
This is one of the most powerful concepts in prompt engineering.
Zero-Shot Prompting: This is what we do most of the time. You ask the AI to perform a task it has never seen an example of *in your prompt*. “Summarize this log file.”
Few-Shot Prompting: This is where you provide examples of the input-output pattern you want. This is incredibly effective for formatting, translation, or complex extraction tasks.
Imagine you need to convert a messy list of server names into a structured JSON object.
You are a log parsing utility. Your job is to convert unstructured log lines into a JSON object. Follow the examples I provide.

---
Example 1:
Input: "ERROR: Failed to connect to db-primary-01.us-east-1.prod (10.0.1.50) on port 5432."
Output:
{
  "level": "ERROR",
  "service": "db-primary-01",
  "region": "us-east-1",
  "env": "prod",
  "ip": "10.0.1.50",
  "port": 5432,
  "message": "Failed to connect"
}
---
Example 2:
Input: "INFO: Successful login for user 'admin' from 192.168.1.100."
Output:
{
  "level": "INFO",
  "service": null,
  "region": null,
  "env": null,
  "ip": "192.168.1.100",
  "port": null,
  "message": "Successful login for user 'admin'"
}
---
Now, process the following input:
Input: "WARN: High CPU usage (95%) on app-worker-03.eu-west-1.dev (10.2.3.40)."
Output:
By providing “shots” (examples), you’ve trained the AI for your specific task, and it will almost certainly return the perfectly formatted JSON you’re looking for.
Advanced Prompt Engineering Techniques for DevOps and Developers
Once you’ve mastered the basics, you can combine them into more advanced, structured techniques to tackle complex problems.
Technique 1: Chain-of-Thought (CoT) Prompting
For complex logic, debugging, or planning, simply asking for the answer can fail. The AI tries to jump to the conclusion and makes a mistake. Chain-of-Thought (CoT) prompting forces the AI to “show its work.” By adding a simple phrase like “Let’s think step-by-step,” you instruct the model to
break down the problem, analyze each part, and then synthesize a final answer. This dramatically increases accuracy for reasoning-heavy tasks.
Bad Prompt: “Why is my CI/CD pipeline failing at the deploy step? It says ‘connection refused’.”
Good CoT Prompt: “My CI/CD pipeline (running in GitLab-CI) is failing when the deploy script tries to ssh into the production server. The error is ssh: connect to host 1.2.3.4 port 22: Connection refused. The runner is on a dynamic IP, and the production server has a firewall.
Let’s think step-by-step.
1. What does ‘Connection refused’ mean in the context of SSH?
2. What are the possible causes (firewall, SSHd not running, wrong port)?
3. Given the runner is on a dynamic IP, how would a firewall be a likely culprit?
4. What are the standard solutions for allowing a CI runner to SSH into a server? (e.g., bastion host, static IP for runner, VPN).
5. Based on this, what are the top 3 most likely root causes and their solutions?”
Technique 2: Structuring Your Prompt for Complex Code Generation
When you need a non-trivial piece of code, don’t write a paragraph. Use markdown, bullet points, and clear sections in your prompt to “scaffold” the AI’s answer. This is like handing a developer a well-defined ticket.
Example: Prompt for a Multi-Stage Dockerfile
You are a Senior DevOps Engineer specializing in container optimization.
I need you to write a multi-stage Dockerfile for a Node.js application.

Here are the requirements:

## Stage 1: "builder"
-   Start from the `node:18-alpine` image.
-   Set the working directory to `/usr/src/app`.
-   Copy `package.json` and `package-lock.json`.
-   Install *only* production dependencies using `npm ci --omit=dev`.
-   Copy the rest of the application source code.
-   Run the build script: `npm run build`.

## Stage 2: "production"
-   Start from a *minimal* base image: `node:18-alpine-slim`.
-   Set the working directory to `/app`.
-   Create a non-root user named `appuser` and switch to it.
-   Copy the `node_modules` and `dist` directory from the "builder" stage.
-   Copy the `package.json` file from the "builder" stage.
-   Expose port 3000.
-   Set the command to `node dist/main.js`.

Please provide the complete, commented `Dockerfile`.
Technique 3: The “Explain and Critique” Method
Don’t just ask for new code; use the AI to review your *existing* code. This is an excellent way to learn, find bugs, and discover best practices. Paste your code and ask the AI to act as a reviewer.
You are a Senior Staff SRE and a Terraform expert.
I'm going to give you a Terraform module I wrote for an S3 bucket.
Please perform a critical review.

Focus on:
1.  **Security:** Are there any public access loopholes? Is encryption handled correctly?
2.  **Best Practices:** Is the module flexible? Does it follow standard conventions?
3.  **Bugs:** Are there any syntax errors or logical flaws?

Here is the code:

# main.tf
resource "aws_s3_bucket" "my_bucket" {
  bucket = "my-awesome-app-bucket"
  acl    = "public-read"

  website {
    index_document = "index.html"
  }
}

Please provide your review in a bulleted list, followed by a "fixed" version of the HCL.
Practical Examples: Applying The Art of Prompting to Real-World Scenarios
Let’s put this all together. Here are three common DevOps tasks, comparing a “vague” prompt with a “precision” prompt.
Scenario 1: Writing a Complex Bash Script
Task: A script to back up a PostgreSQL database and upload to S3.
The “Vague” Prompt
make a postgres backup script that uploads to s3
Result: You’ll get a simple pg_dump ... | aws s3 cp - ... one-liner. It will lack error handling, compression, logging, and configuration.
The “Expert” Prompt
You are a Senior Linux System Administrator.
Write a Bash script to back up a PostgreSQL database.

## Requirements:
1.  **Configuration:** The script must be configurable via environment variables: `DB_NAME`, `DB_USER`, `DB_HOST`, `S3_BUCKET_PATH`.
2.  **Safety:** Use `set -euo pipefail` to ensure the script exits on any error.
3.  **Backup Command:** Use `pg_dump` with a custom format (`-Fc`).
4.  **Compression:** The dump must be piped through `gzip`.
5.  **Filename:** The filename should be in the format: `[DB_NAME]_[YYYY-MM-DD_HHMMSS].sql.gz`.
6.  **Upload:** Upload the final gzipped file to the `S3_BUCKET_PATH` using `aws s3 cp`.
7.  **Cleanup:** The local backup file must be deleted after a successful upload.
8.  **Logging:** The script should echo what it's doing at each major step (e.g., "Starting backup...", "Uploading to S3...", "Cleaning up...").
9.  **Error Handling:** Include a trap to clean up the local file if the script is interrupted or fails.
Scenario 2: Debugging a Kubernetes Configuration
Task: A pod is stuck in a CrashLoopBackOff state.
The “Vague” Prompt
my pod is CrashLoopBackOff help
Result: The AI will give you a generic list: “Check kubectl logs, check kubectl describe, check your image…” This is not helpful.
The “Expert” Prompt
You are a Certified Kubernetes Administrator (CKA) with deep debugging expertise.
I have a pod stuck in `CrashLoopBackOff`.

Here is the output of `kubectl describe pod my-app-pod`:
[... paste your 'kubectl describe' output here, especially the 'Last State' and 'Events' sections ...]

Here is the output of `kubectl logs my-app-pod`:
[... paste the log output here, e.g., "Error: could not connect to redis on port 6379" ...]

Here is the Deployment YAML:
[... paste your 'deployment.yaml' manifest ...]

Let's think step-by-step:
1.  Analyze the pod logs. What is the explicit error message?
2.  Analyze the 'describe' output. What does the 'Events' section say? What was the exit code?
3.  Analyze the YAML. Is there a liveness/readiness probe failing? Is there a ConfigMap or Secret missing?
4.  Based on the log message "could not connect to redis", cross-reference the YAML.
5.  What is the most probable root cause? (e.g., The app is trying to connect to 'redis:6379', but the Redis service is named 'my-redis-service').
6.  What is the exact fix I need to apply to my Deployment YAML?
Scenario 3: Generating Infrastructure as Code (IaC)
Task: Create a Terraform module for a secure S3 bucket.
The “Vague” Prompt
write terraform for an s3 bucket
Result: You’ll get a single resource "aws_s3_bucket" "..." {} block with no security, no versioning, and no variables.
The “Expert” Prompt
You are a Cloud Security Engineer using Terraform.
I need a reusable Terraform module for a *secure* S3 bucket.

## File Structure:
-   `main.tf` (The resources)
-   `variables.tf` (Input variables)
-   `outputs.tf` (Outputs)

## Requirements for `main.tf`:
1.  **`aws_s3_bucket`:** The main resource.
2.  **`aws_s3_bucket_versioning`:** Versioning must be enabled.
3.  **`aws_s3_bucket_server_side_encryption_configuration`:** Must be enabled with `AES256` encryption.
4.  **`aws_s3_bucket_public_access_block`:** All four settings (`block_public_acls`, `ignore_public_acls`, `block_public_policy`, `restrict_public_buckets`) must be set to `true`.
5.  **Tags:** The bucket must be tagged with `Name`, `Environment`, and `ManagedBy` tags, which should be provided as variables.

## Requirements for `variables.tf`:
-   `bucket_name`: string
-   `environment`: string (default "dev")
-   `common_tags`: map(string) (default {})

## Requirements for `outputs.tf`:
-   `bucket_id`: The ID of the bucket.
-   `bucket_arn`: The ARN of the bucket.

Please provide the complete code for all three files.
Pitfalls to Avoid: Common Prompting Mistakes in Tech
Mastering this art also means knowing what *not* to do.
Never Paste Secrets: This is rule zero. Never, ever paste API keys, passwords, private keys, or proprietary production code into a public AI. Treat all inputs as public. Ask for *patterns* and *templates*, then fill in your secrets locally.
Blind Trust: The AI *will* “hallucinate.” It will invent libraries, flags, and configuration values that look plausible but are completely wrong. Always review, test, and *understand* the code before running it. The AI is your assistant, not your oracle.
Forgetting Security: If you don’t *ask* for security, you won’t get it. Always explicitly prompt for security best practices (e.g., “non-root user,” “private access,” “least-privilege IAM policy”).
Giving Up Too Early: Your first prompt is rarely your last. Treat it as a conversation. Iteratively refine your request. “That’s good, but now add error handling.” “Can you optimize this for speed?” “Remove the use of that library and do it with Bash built-ins.”
The Future: AI-Assisted DevOps and AIOps
We are just scratching the surface. The next generation of DevOps tools, CI/CD platforms, and observability systems are integrating this “conversational” paradigm. AIOps platforms are already using AI to analyze metrics and logs to predict failures. AIOps is fundamentally about applying AI to automate and improve IT operations. Furthermore, the concept of “AI pair programming” is changing how we write and review code, as discussed by experts like Martin Fowler. Your ability to prompt effectively is your entry ticket to this new-generation of tooling.
Frequently Asked Questions
What is the difference between prompt engineering and “The Art of Prompting”?
“Prompt engineering” is the formal, scientific discipline of designing and optimizing prompts to test and guide AI models. “The Art of Prompting,” as we use it, is the practical, hands-on application of these techniques by professionals to get useful results for their daily tasks. It’s less about model research and more about high-leverage communication.
How can I use AI to write secure code?
You must be explicit. Always include security as a core requirement in your prompt.
Example: “Write a Python Flask endpoint that accepts a file upload. You must be a security expert. Include checks for file size, file type (only .png and .jpg), and use a secure filename to prevent directory traversal attacks. Do not store the file in a web-accessible directory.”
Can AI replace DevOps engineers?
No. AI is a tool—a massive force multiplier. It can’t replace the experience, judgment, and “systems thinking” of a good engineer. An engineer who doesn’t understand *why* a firewall rule is needed won’t know to ask the AI for it. AI will replace the *tedious* parts of the job (scaffolding, boilerplate, simple scripts), freeing up engineers to focus on higher-level architecture, reliability, and complex problem-solving. It won’t replace engineers, but engineers who use AI will replace those who don’t.
What is few-shot prompting and why is it useful for technical tasks?
Few-shot prompting is providing 2-3 examples of an input/output pair *before* giving the AI your real task. It’s extremely useful for technical tasks involving data transformation, such as reformatting logs, converting between config formats (e.g., XML to JSON), or extracting specific data from unstructured text.
Conclusion
Generative AI is one of the most powerful tools to enter our ecosystem in a decade. But like any powerful tool, it requires skill to wield. You wouldn’t run rm -rf / without understanding it, and you shouldn’t blindly trust an AI’s output. The key to unlocking its potential lies in your ability to communicate your intent, context, and constraints with precision.
Mastering The Art of Prompting is no longer a ‘nice-to-have’—it is the new superpower for DevOps, SREs, and developers. By treating the AI as a technical co-pilot and providing it with expert-level direction, you can offload rote work, debug faster, learn new technologies, and ultimately build more reliable systems. Start practicing these techniques, refine your prompts, and never stop treating your AI interactions with the same critical thinking you apply to your own code. Thank you for reading the DevopsRoles page!