Introduction
Linux offers various command-line tools that simplify system management, one of which is the date command in Linux. This command is crucial for both system administrators and regular users as it displays or sets the system’s date and time.

date command syntax
date [OPTION]… [+FORMAT]
date [-u|–utc|–universal] [MMDDhhmm[[CC]YY][.ss]]
In the manual page, it describes the command as follows:date – prints or sets the system’s date and time.
For more detailed information about the date command, refer to the manual page by entering man date in the terminal.
date command in Linux with Examples
$ date
Get year-month-day
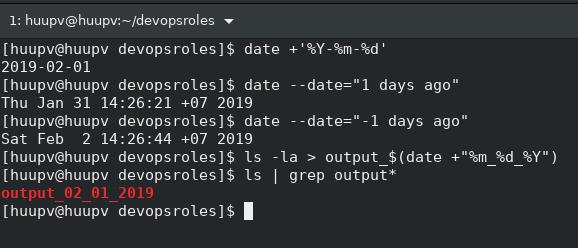
[huupv@huupv devopsroles]$ date +%Y-%m-%d
2019-03-10
Get date command usage in Linux
[huupv@huupv devopsroles]$ date -d now
Sun Mar 10 13:18:55 +07 2019
[huupv@huupv devopsroles]$ date -d tomorrow
Mon Mar 11 13:19:00 +07 2019
[huupv@huupv devopsroles]$ date -d yesterday
Sat Mar  9 13:19:06 +07 2019
[huupv@huupv devopsroles]$ date -d last-sunday
Sun Mar  3 00:00:00 +07 2019
[huupv@huupv devopsroles]$ date +'%Y-%m-%d'
2019-03-10
Customizing the Output
One of the powerful features of the date command is its ability to format the output. You can customize how the date and time are displayed using format specifiers. For example, to display the date in YYYY-MM-DD format, you would use:
date +%Y-%m-%dConclusion
The date command in Linux is a straightforward yet widely used tool in Linux. It allows users to either display or set the system’s date and time from the terminal. Thank you for visiting the DevopsRoles page!