Introduction
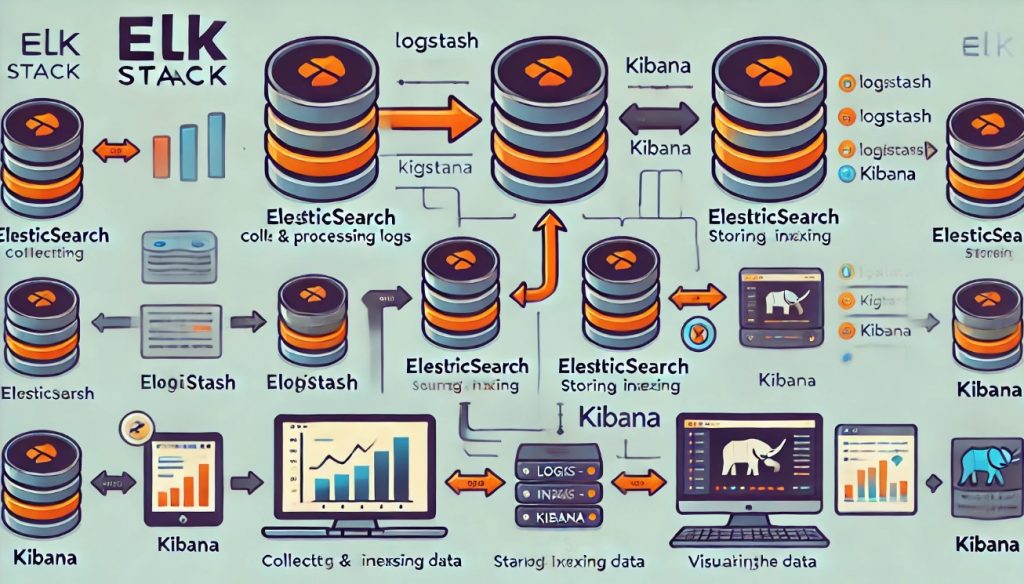
In the world of DevOps, log management and data visualization are crucial tasks. The ELK Stack, consisting of Elasticsearch, Logstash, and Kibana, offers a powerful and comprehensive solution to achieve these tasks efficiently. In this tutorial, I guide install ELK stack on Linux. The ELK Stack is a collection of three open-source Elasticsearch, Kibana, and Logstash. Now, let’s install ELK stack on Linux.

For my example install ELK stack
- Elasticsearch, Kibana and Logstash -> 192.168.3.4
- Filebeat -> 192.168.3.5
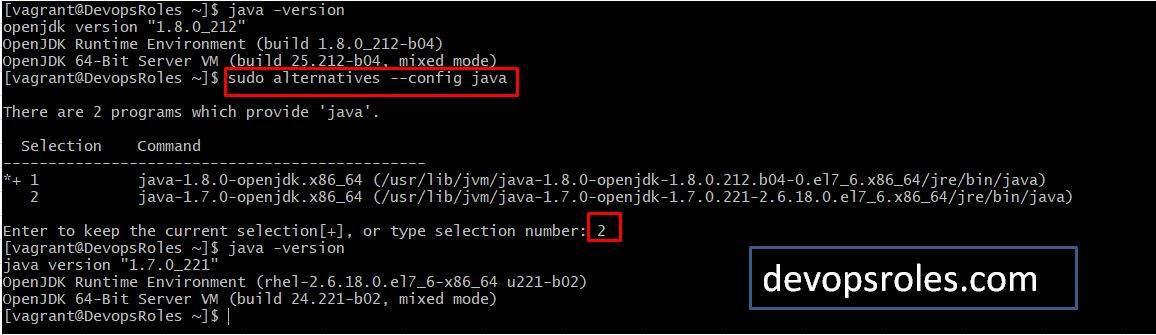
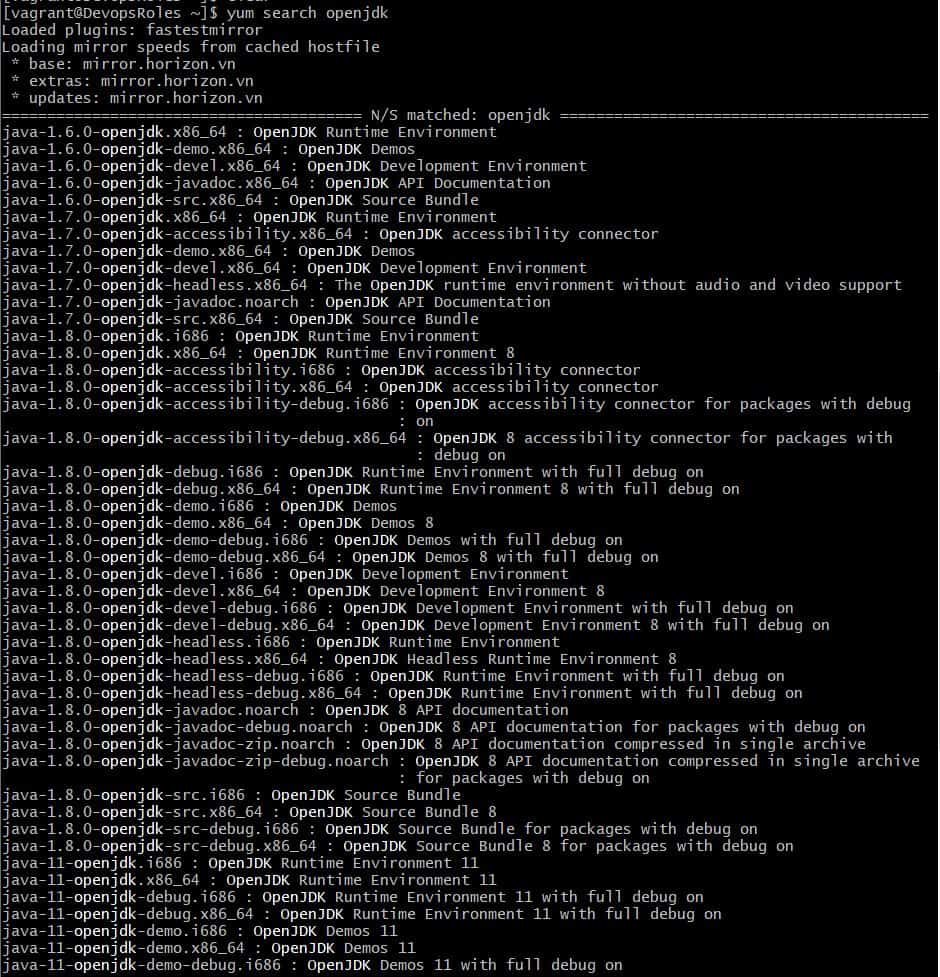
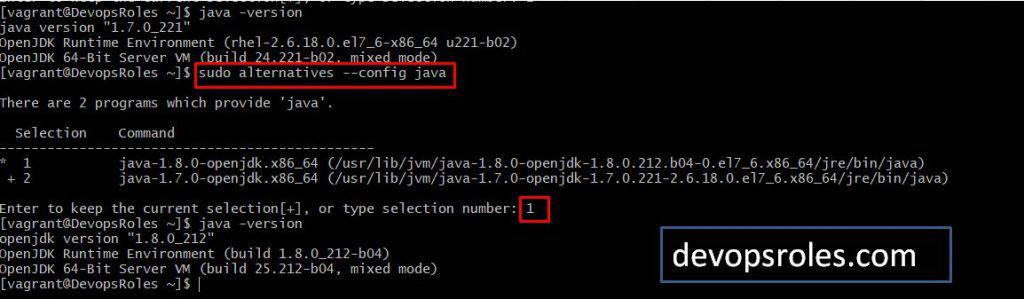
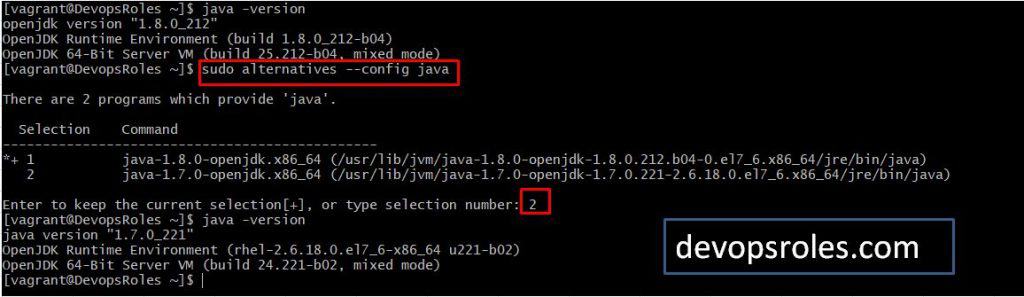
Requirements to install elk you need JAVA. If you do not yet install java on your system. The guided install Java on server ELK as below
Installing Java
ELK requires the installation of Java 8 and higher.
$ sudo yum install java-1.8.0-openjdkSet JAVA_HOME for Elasticsearch
# sudo cp /etc/profile /etc/profile_backup
# echo 'export JAVA_HOME=/usr/lib/jvm/jre-1.8.0-openjdk' | sudo tee -a /etc/profile
# source /etc/profile
To check “JAVA_HOME”
[huupv@localhost ~]$ echo $JAVA_HOME
/usr/lib/jvm/jre-1.8.0-openjdk
Change to your home directory.
# cd $HOMEOpen the .bashrc file.
# vi .bashrcAdd the following line to the file
export PATH=$PATH:$JAVA_HOME/binSave the file and exit.
Apply the change
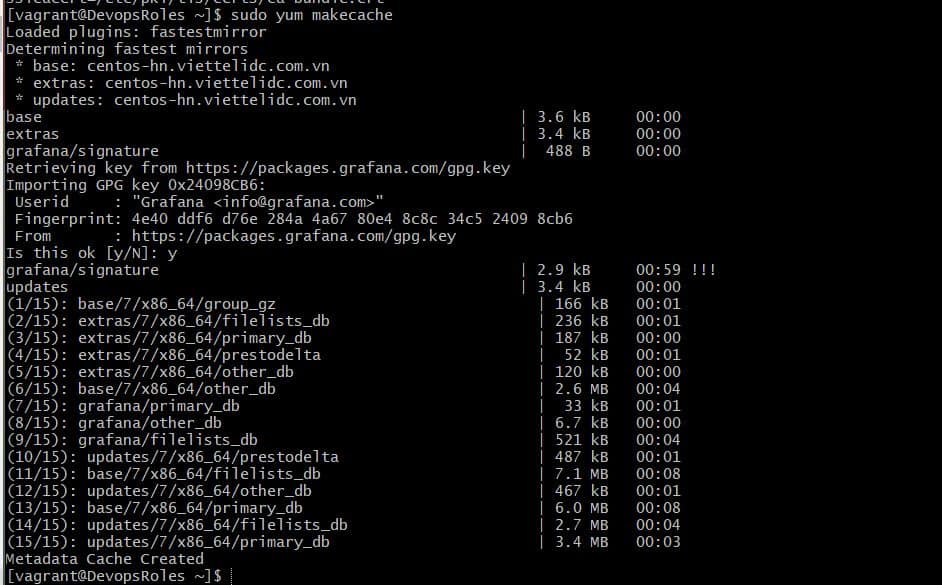
# source .bashrcInstall elasticsearch kibana logstash
# yum install elasticsearch kibana logstashAnother Method to install ELK use Docker as the link below
Elasticsearch Configure
Open the elasticsearch.yml file
$ sudo vim /etc/elasticsearch/elasticsearch.ymlThe content as below
network.host: "localhost"
http.port:9200
Kibana Configure
$ sudo vim /etc/kibana/kibana.ymlThe content as below
# server.port: 5601
server.port: 17000
server.host: "0.0.0.0"
elasticsearch.hosts: ["http://localhost:9200"]
logstash Configure
Logstash: unrecognized service Centos 6. How to start it. Refer to below
sudo initctl status logstash
sudo initctl start logstash
Create a setting file and start Logstash. For My example, create a setting that Logstash collects sshd fail logs from [/var/log/secure]
# vi /etc/logstash/conf.d/sshd.confThe content as below
input {
  file {
    type => "seucure_log"
    path => "/var/log/secure"
  }
}
filter {
  grok {
    add_tag => [ "sshd_fail" ]
    match => { "message" => "Failed %{WORD:sshd_auth_type} for %{USERNAME:sshd_invalid_user} from %{IP:sshd_client_ip} port %{NUMBER:sshd_port} %{GREEDYDATA:sshd_protocol}" }
  }
}

output {
  elasticsearch {
    index => "sshd_fail-%{+YYYY.MM}"
  }
}
Enable Logstash on Boot and Start Logstash:
chgrp logstash /var/log/secure
chmod 640 /var/log/secure
systemctl start logstash
systemctl enable logstash
A few minutes later, Checked logs collected normally.
# curl localhost:9200/_cat/indices?vAnother server install and configure filebeat
Install Filebeat:
# yum install filebeatBackup Filebeat configuration:
$ mkdir /home/huupv/backups/filebeat -p
$ mv /etc/filebeat/filebeat.yml /home/huupv/backups/filebeat/filebeat.yml.BAK
Create the Filebeat configuration, and specify the Logstash outputs:
$ cat > /etc/filebeat/filebeat.yml << EOF
filebeat.prospectors:
- input_type: log
  paths:
    - /var/log/secure
  exclude_files: ['\.gz$']

output.logstash:
  hosts: ["192.168.3.4:5400"]
EOF
Testing
Conclusion
Installing and configuring the ELK Stack can significantly enhance your system’s log management and analysis capabilities. With Elasticsearch’s powerful search capabilities, Logstash’s diverse log collection and processing features, and Kibana’s intuitive interface, the entire ELK Stack provides a robust tool for every DevOps professional. We hope that through this article, you have mastered the steps to install the ELK Stack and can effectively apply it to your projects. Don’t hesitate to explore other features of the ELK Stack to further optimize your work. Thank you for reading the DevopsRoles page!