Table of Contents
Introduction
CloudPanel is a powerful web-based control panel that simplifies the management of cloud infrastructure and services. In this guide, we will walk you through the process of installing CloudPanel on Ubuntu, setting up monitoring for your cloud resources, and creating a WordPress website. Let’s dive in!
Installing CloudPanel on Ubuntu
Installation requires a few steps, but with our detailed instructions, you’ll have it up and running in no time. Follow these steps:
Step 1: Update System Packages Start by updating your Ubuntu system packages to ensure you have the latest updates.
sudo apt update
sudo apt upgrade
Step 2: Install Dependencies Install the necessary dependencies, including software-properties-common, curl, and unzip.
sudo apt install software-properties-common curl unzipStep 3: Add PHP PPA Repository Add the PHP PPA repository to access the required PHP packages.
sudo add-apt-repository ppa:ondrej/php
sudo apt update
Step 4: Install PHP and Extensions Install PHP 7.4 and the necessary PHP extensions needed.
sudo apt install php7.4 php7.4-cli php7.4-fpm php7.4-mysql php7.4-curl php7.4-gd php7.4-mbstring php7.4-xml php7.4-zip php7.4-bcmath php7.4-soapStep 5: Install MariaDB Database Server Install the MariaDB database server, which Cloud-Panel relies on for data storage.
sudo apt install mariadb-serverStep 6: Secure MariaDB Installation Secure your MariaDB installation by running the mysql_secure_installation script.
sudo mysql_secure_installationStep 7: Download and Install CloudPanel Use the provided curl command to download and install it on your Ubuntu server.
curl -sSL https://installer.cloudpanel.io/ce/v1/install.sh | sudo bashOnce the installation is complete, you can access CloudPanel by opening a web browser and navigating to https://your-server-ip. Replace your-server-ip with the IP address or domain name of your Ubuntu server.
Monitoring Your Cloud Resources
Monitoring your cloud resources is crucial for ensuring their optimal performance. Here’s how to set it up:
Step 1: Access CloudPanel Dashboard After installing CloudPanel, access the CloudPanel dashboard using your server’s IP address or domain name.
Step 2: Enable Monitoring Navigate to the monitoring section in Cloud-Panel and enable the monitoring feature.
Step 3: Configure Monitoring Settings Configure the monitoring settings according to your requirements, such as the frequency of data collection and alert thresholds.
Step 4: View Resource Metrics Explore the monitoring dashboard to view real-time metrics of your cloud resources, including CPU usage, memory usage, disk I/O, and network traffic.
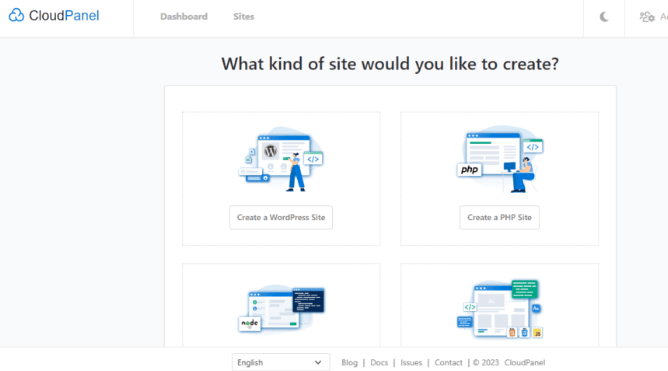
Creating a WordPress Website with CloudPanel
Setting up a WordPress website becomes a breeze. Follow these steps:
Step 1: Add a Domain In the CloudPanel dashboard, add your domain name, and configure DNS settings to point to your server.

Step 2: Create a Database Create a new database for your WordPress installation through the Cloud-Panel interface.
Step 3: Download and Install WordPress Download the latest version of WordPress and extract it into the webroot directory specified by Cloud-Panel.
Step 4: Configure WordPress Access your website’s URL and follow the WordPress installation wizard to set up your website.
Step 5: Customize and Manage Your Website Utilize the powerful features of WordPress to customize your website’s appearance and functionality. Install themes and plugins, create pages and blog posts, and manage user accounts.
Note: By default, CloudPanel will install a Self-signed SSL certificate for the website, therefore, make sure you have opened port number 443 in your Cloud service firewall.
The final, Point your Domain A record
Conclusion
CloudPanel offers a comprehensive solution for managing cloud infrastructure and services. By following this guide, you have learned how to install CloudPanel on Ubuntu, set up monitoring for your cloud resources, and create a WordPress website using Cloud-Panel.
Now, you can efficiently manage your cloud environment and host websites with ease. Enjoy the benefits of CloudPanel and take your cloud management to the next level! I hope will this your helpful. Thank you for reading the DevopsRoles page!