Table of Contents
In this series, let together will exercise these practices below
- S3 Amazon Simple Storage Service and Amazon Glacier Storage
- Amazon Elastic Compute Cloud (Amazon EC2) and Amazon Elastic Block Store (Amazon EBS)
- Amazon Virtual Private Cloud (Amazon VPC)
- Elastic Load Balancing, Amazon CloudWatch, and Auto Scaling
- AWS Identity and Access Management (IAM)
- Databases and AWS
- SQS, SWF, and SNS
- Domain Name System (DNS) and Amazon Route 53
- Amazon ElastiCache
- Additional Key Services
- Security on AWS
- AWS Risk and Compliance
- Architecture Best Practices
Based on the document: AWS-Certified-Solutions-Architect-Official-Study-Guide.pdf
Now, start practicing!!!
1. AWS Certified Solutions Architect Exercises- part 1 Amazon S3 and Amazon Glacier Storage
1.1. Today’s tasks
1: Create an Amazon Simple Storage Service (Amazon S3) Bucket
2: Upload, Make Public, and Delete Objects in Your Bucket
3: Enable Version Control
4: Delete an Object and Then Restore It.
5: Lifecycle Management
6: Enable Static Hosting on Your Bucket
1.2. Before you begin
I default you have an AWS account.
1.3. Let’s do it
EXERCISE 1: Create an Amazon Simple Storage Service (Amazon S3) Bucket
1. Log in to the AWS Management Console at the link: https://console.aws.amazon.com/console/home?nc2=h_ct&src=header-signin
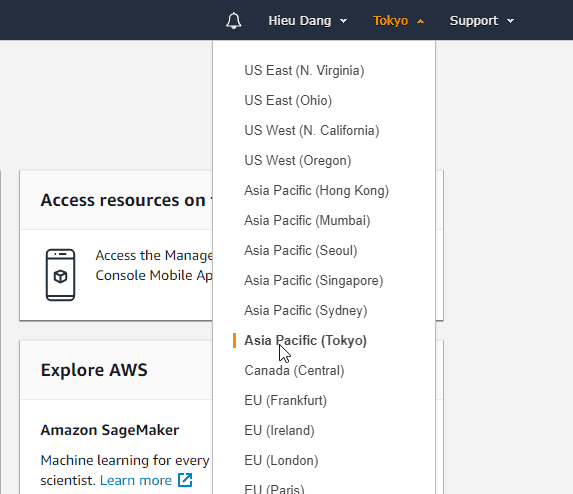
2. Choose an appropriate region, such as the Asia Pacific (Tokyo) Region.
3. Navigate to the Amazon S3 console. Notice that the region indicator now says Global. Remember that Amazon S3 buckets form a global namespace, even though each bucket is created in a specific region.

4. Start the create bucket process. Click the button Create bucket.
5. When prompted for Bucket Name, use yourname-demo-bucket-yyyymmdd.
6. Choose a region, such as Asia Pacific (Tokyo).
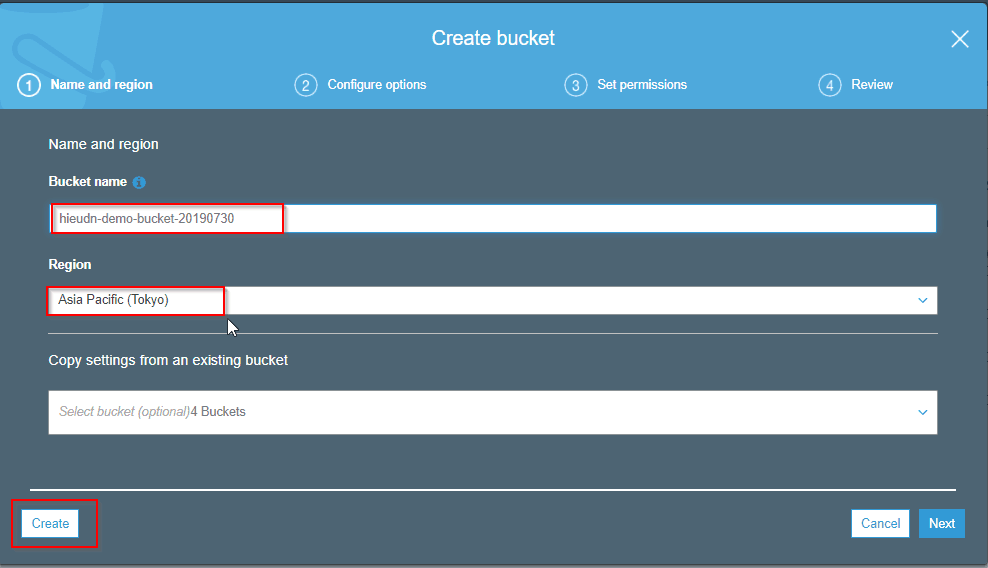
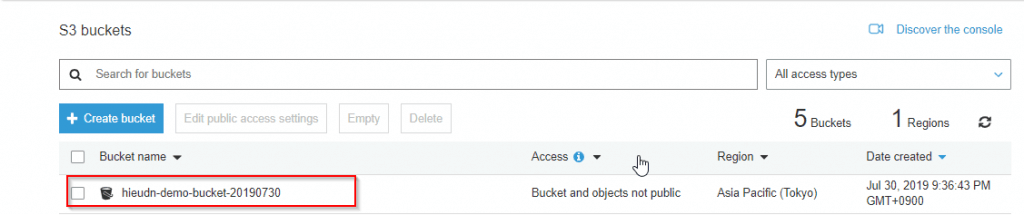
You should now have a new Amazon S3 bucket.
EXERCISE 2: Upload, Make Public, and Delete Objects in Your Bucket
In this exercise, you will upload a new object to your bucket. You will then make this object public and view the object in your browser. You will then rename the object and finally delete it from the bucket.
Upload an Object
1. Load your new bucket in the Amazon S3 console.
2. Select Upload, then Add Files.
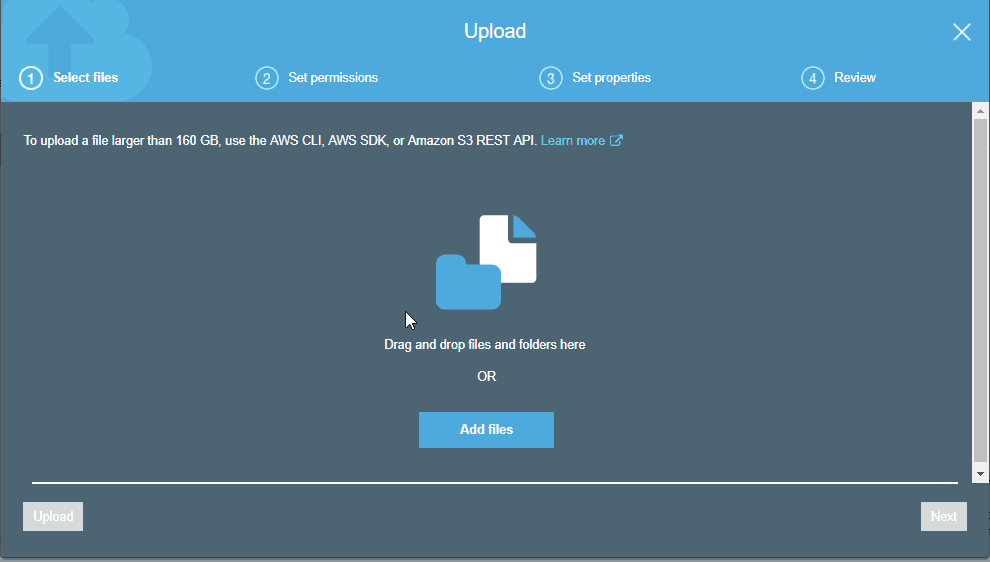
3. Locate a file on your PC that you are okay with uploading to Amazon S3 and making public to the Internet. (We suggest using a non-personal image file for the purposes of this exercise.)
4. Select a suitable file, then Start Upload. You will see the status of your file in the Transfers section.
5. After your file is uploaded, the status should change to Done.
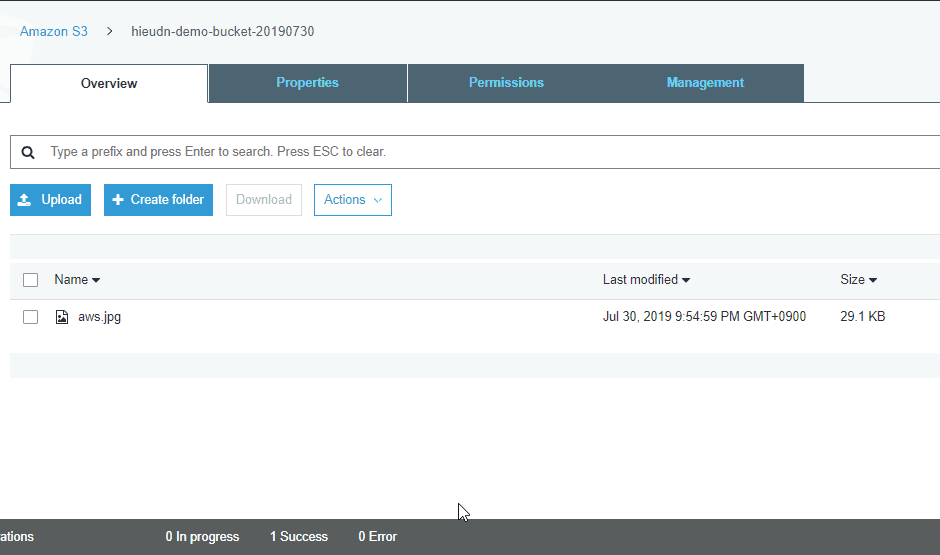
The file you uploaded is now stored as an Amazon S3 object and should be now listed in the contents of your bucket
Open the Amazon S3 URL
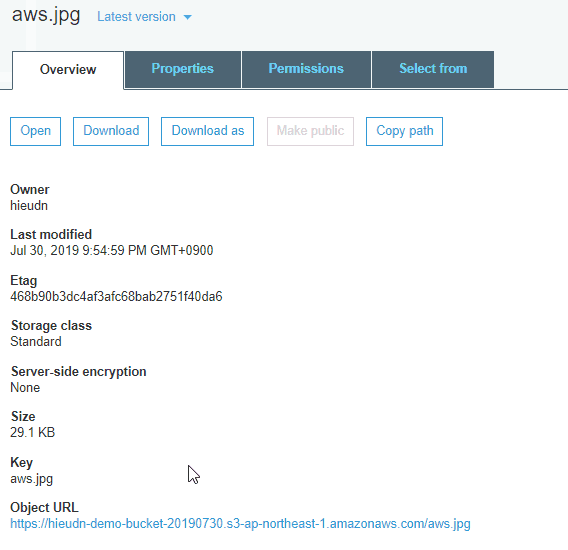
1. Now open the properties for the object. The properties should include bucket, name, and link.
2. Copy the Amazon S3 URL for the object.
3. Paste the URL in the address bar of a new browser window or tab.
You should get a message with an XML error code AccessDenied. Even though the object has a URL, it is private by default, so it cannot be accessed by a web browser.
Make the Bucket Public
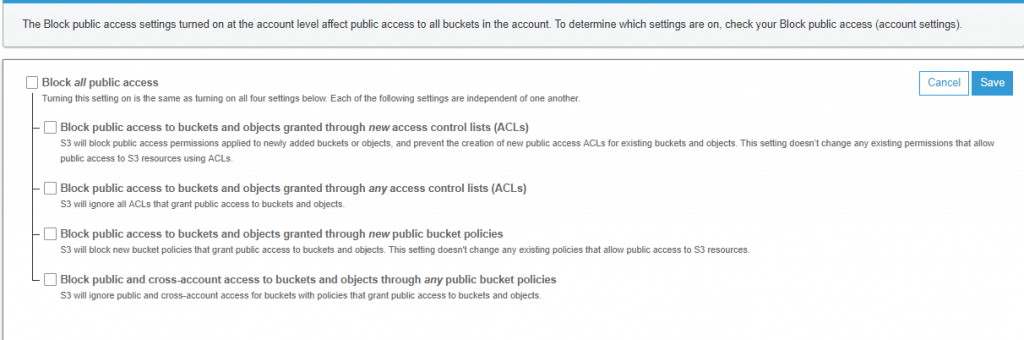
1. Go back to the Permission tab of your bucket and set Block public access is Off.
2. Policy for everyone access with action is readonly
{
     "Version": "2012-10-17",
     "Id": "http referer policy example",
     "Statement": [
         {
             "Sid": "Allow get requests originating from global",
             "Effect": "Allow",
             "Principal": "",
             "Action": "s3:GetObject",
             "Resource": "arn:aws:s3:::yourname-demo-bucket-yyyymmdd/"
         }
     ]
 }
2. Copy the Amazon S3 URL again and try to open it in a browser or tab. Your public image file should now display in the browser or browser tab.
3. Another public setting, read more at the link: https://aws.amazon.com/premiumsupport/knowledge-center/read-access-objects-s3-bucket/
Delete the Object
1. In the Amazon S3 console, select Object ➝ Actions ➝ Delete. Choose Delete when prompted if you want to delete the object.
2. The object has now been deleted.
3. To verify, try to reload the deleted object’s Amazon S3 URL.
You should once again get the XML AccessDenied error message.
EXERCISE 3: Enable Version Control
In this exercise, you will enable version control on your newly created bucket.
Enable Versioning
1. In the Amazon S3 console, open your bucket. Click Properties tab ➝ Versioning ➝ select Enable versioning ➝ Save.
Your bucket now has versioning enabled.
Create Multiple Versions of an Object
1. Create a text file named foo.txt on your computer and write the word blue in the text file.
2. Save the text file to a location of your choosing.
3. Upload the text file to your bucket. This will be version 1.
4. After you have uploaded the text file to your bucket, open the copy on your local computer and change the word blue to red. Save the text file with the original filename.
5. Upload the modified file to your bucket.
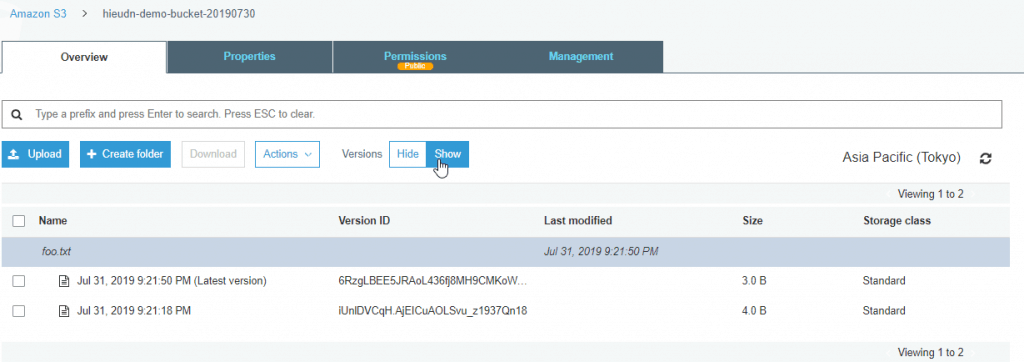
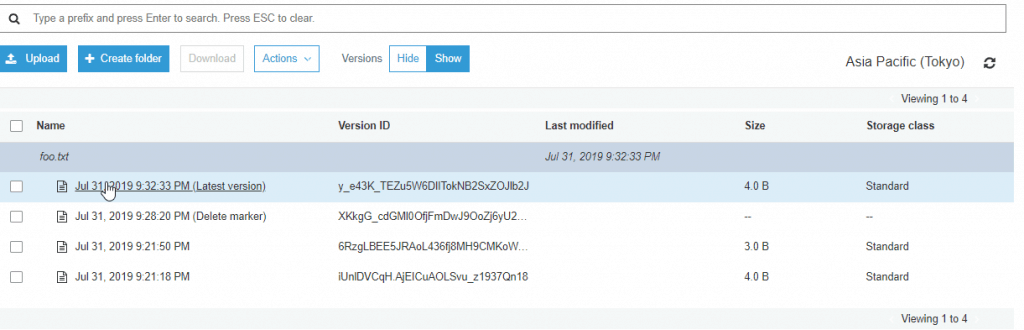
6. Select Show Versions on the uploaded object.
You will now see two different versions of the object with different Version IDs and possibly different sizes. Note that when you select Show Version, the Amazon S3 URL now includes the version ID in the query string after the object name.
EXERCISE 4: Delete an Object and Then Restore It
In this exercise, you will delete an object in your Amazon S3 bucket and then restore it.
Delete an Object
Open the bucket containing the text file for which you now have two versions.
- Select Hide Versions.
- Select Actions ➝ Delete, and then select Delete to verify.
- Your object will now be deleted, and you can no longer see the object.
- Select Show Versions.
Both versions of the object now show their version IDs.

Restore an Object
Open your bucket.
- Select Show Versions.
- Select the oldest version and download the object. Note that the filename is simply foo.txt with no version indicator.
- Select Hide Versions, upload foo.txt to the same bucket.
- The file foo.txt should re-appear, select Show Version.
EXERCISE 5: Lifecycle Management
In this exercise, you will explore the various options for lifecycle management.
- Select your bucket in the Amazon S3 console.
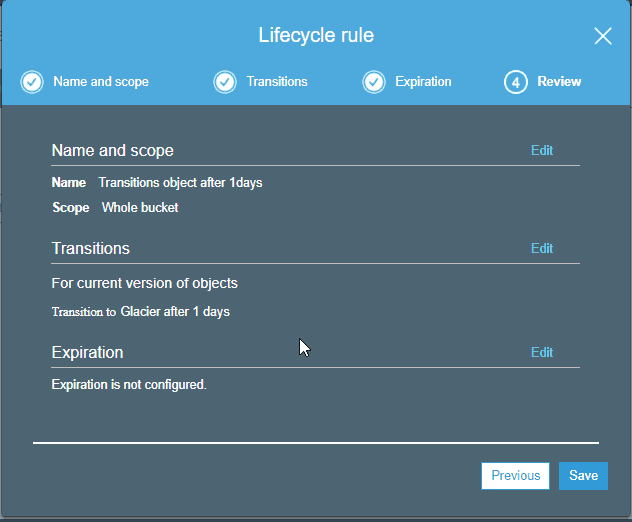
- Under Management ➝ Lifecycle, add a Lifecycle Rule.
- Explore the various options to add lifecycle rules to objects in this bucket. It is recommended that you do not implement any of these options, as you may incur additional costs. After you have finished, click the Cancel button.
My example: transitions object to GLACIER storage class after 1days.
EXERCISE 6: Enable Static Hosting on Your Bucket
In this exercise, you will enable static hosting on your newly created bucket.
1. Select your bucket in the Amazon S3 console.
2. In the Properties section, select Static Website Hosting.
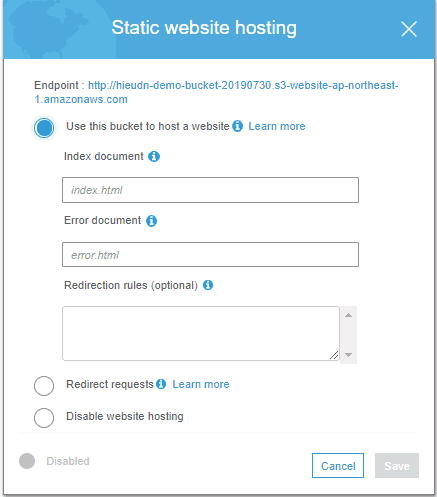
For the index document name, enter index.txt, and for the error document name, enter error.txt.
3. Use a text editor to create two text files and save them as index.txt and error.txt.
In the index.txt file, write the phrase “Hello World,” and in the error.txt file, write the phrase “Error Page.” Save both text files and upload them to your bucket.
4. Copy the Endpoint: link under Static Website Hosting and paste it in a browser window or tab. You should now see the phrase “Hello World” displayed.

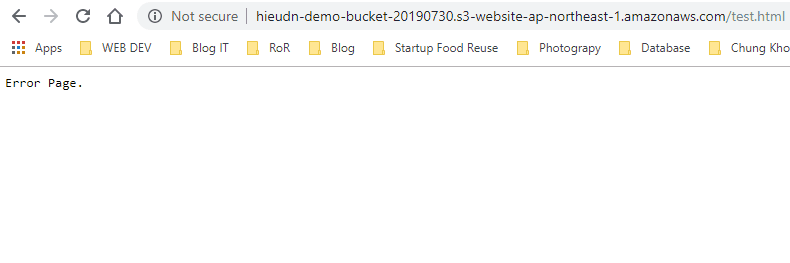
5. In the address bar in your browser, try adding a forward slash followed by a made-up filename (for example, /test.html). You should now see the phrase “Error Page” displayed.
Finally is important, to clean up, delete all of the objects in your bucket and then delete the bucket itself. AWS Certified Solutions Architect Exercises- part 1 Amazon S3 and Amazon Glacier Storage. Thank you for reading the DevopsRoles page!

Thanks bro!
Good Job