In this article, I will guide Ansible tutorial beginners. How to create ansible playbook? Ansible the essential for DevOps Roles.
- What is Ansible
- Ansible best practices
The environment for my system as below
[root@DevopsRoles ~]# ansible --version
ansible 2.6.2
[root@DevopsRoles ~]# python --version
Python 2.7.5
Server01: Control Machine
- VM01: DevopsRoles (Installed Ansible)
- IP: 192.168.1.112
Server02: Target
- VM02: a web server
- IP: 192.168.1.113
Table of Contents
What is Ansible
Introduction to Infrastructure as Code by Ansible.
“Ansible is the simplest way to automate apps and IT infrastructure. Application Deployment + Configuration Management + Continuous Delivery”
Here’s a beginner-friendly Ansible tutorial to get you started:
Ansible tutorial best practices
Installation of Ansible
Guide install Ansible on Centos/Ubuntu/Redora
Step by step for Ansible
Create the folder for Ansible
[root@DevopsRoles ~]# mkdir ansible
[root@DevopsRoles ~]# mkdir ansible/{inventory,group_vars,files,templates}
Create files for Ansible
[root@DevopsRoles ~]# pwd
/root
[root@DevopsRoles ~]# touch ansible/inventory/hosts
[root@DevopsRoles ~]# touch ansible/group_vars/webserver.yml
[root@DevopsRoles ~]# touch ansible/files/file_webserver
[root@DevopsRoles ~]# touch ansible/templates/template_webserver.j2
[root@DevopsRoles ~]# touch ansible/test_ansible.yml
[root@DevopsRoles ~]# touch ansible/main.yml
Ansible structure folder and file as below
ansible/
├── files
│   └── file_webserver
├── group_vars
│   └── webserver.yml
├── inventory
│   └── hosts
├── main.yml
├── templates
│   └── template_webserver.j2
├── test_ansible.retry
└── test_ansible.yml
To create ssh-keygen from VM01 DevopsRoles communication to VM02 webserver do not enter the password.
[root@DevopsRoles ~]# ssh-keygen -t rsa
[root@DevopsRoles ~]# ssh-copy-id root@192.168.1.113
The terminal output as below
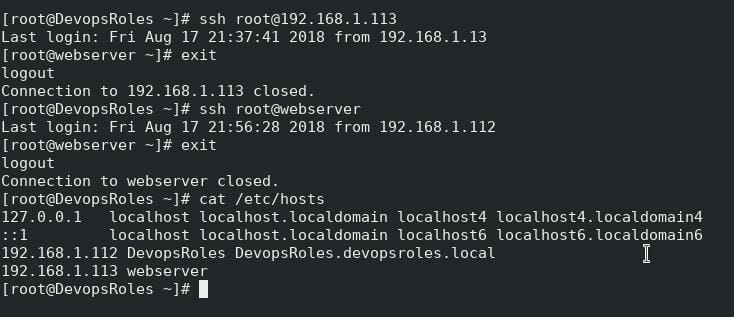
I’m running Ansible playbook as root, I guess you understand. Please be careful.
In this inventory file, we have a host named 192.168.1.113 in the group “[webserver]” (VM02).
[webserver]
192.168.1.113
In this command, checking for communication use the ping module ansible.
[root@controller ansible] ansible all -i inventory/hosts -m ping
The terminal output as below
[root@DevopsRoles ansible]# ansible all -i inventory/hosts -m ping
192.168.1.113 | SUCCESS => {
"changed": false,
"ping": "pong"
}
Create Ansible playbook
To create a webserver.yml file.
[root@DevopsRoles ansible]# cat group_vars/webserver.yml
---
message: "Hello Ansible !"
Info:
   huu:
     age: 29
   songoku:
     age: 100
   laika:
     age: 30
This file describes group variables. To create a test_ansible.yml file
[root@DevopsRoles ansible]# cat test_ansible.yml
---
- hosts: webserver
  user: root
  tasks:
    - name: output message.
      debug: msg="{{ message }}"

    - name: output info
      debug: msg="We want {{ item.value.age }} {{ item.key }} !"
      with_dict: "{{ Info }}"
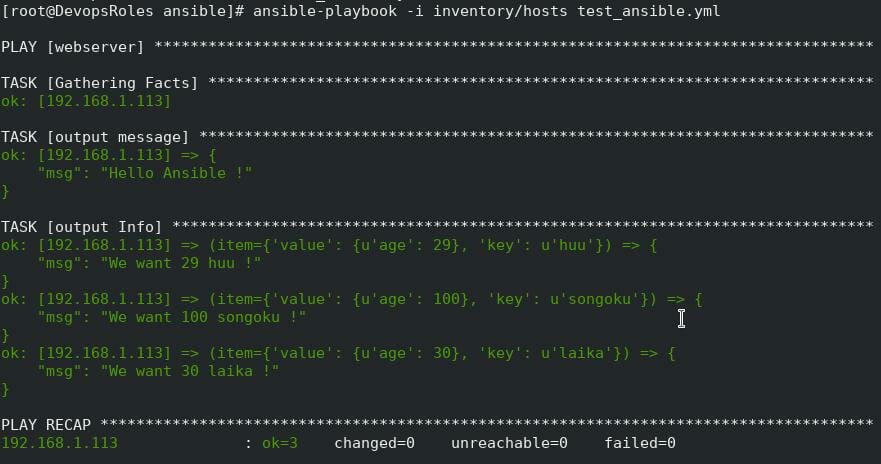
Run ansible-playbook
[root@DevopsRoles ansible]# ansible-playbook -i inventory/hosts test_ansible.yml
The terminal output as below
Example Ansible playbook roles
Ansible structure folder and file as below
ansible/
├─inventory/
│ └─hosts
├─group_vars/
│ └─webserver.yml
├─files/
│ └─file_webserver
├─templates/
│ └─template_webserver.j2
├─roles/
│ ├─role-common/
│ │ └─tasks/
│ │  └─main.yml
│ └─role-web/
│   └─tasks/
│   └─main.yml
├─test.yml
├─main.yml
└─master.yml
Creating the folder and file for ansible-playbook roles
[root@DevopsRoles ansible]# pwd
/root/ansible
[root@DevopsRoles ansible]# touch master.yml
[root@DevopsRoles ansible]# mkdir roles
[root@DevopsRoles ansible]# mkdir roles/{role-common,role-web}
[root@DevopsRoles ansible]# mkdir roles/role-common/tasks
[root@DevopsRoles ansible]# mkdir roles/role-web/tasks
[root@DevopsRoles ansible]# touch roles/role-common/tasks/main.yml
[root@DevopsRoles ansible]# touch roles/role-web/tasks/main.yml
Package operation can be done with the Yum module etc. It is an image as below.
- name: install packages from yum
  yum: name={{ item }} state=latest
  with_items:
    - nginx
In the above code, “Nginx” is installed”, but if “state=absent” it will be a code indicating that it is not installed.
You can set up CRON job using the CRON module.
- name: register cron job
  cron: name="check ping" day="*/2" hour="12" minute="0" job="ping -c 3 192.168.1.113"
Of course, you can create directories and place files in Ansible. Directory creation is done with the file module.
- name: create directories
  file: path={{ item.path }} owner={{ item.owner }} group={{ item.group }} mode=0{{ item.mode }} state=directory
  with_items:
    - { "path":"/opt/ansible", "owner":"root", "group":"root", "mode":"755" }
    - { "path":"/opt/data", "owner":"root", "group":"root", "mode":"755" }
Copy Static file using copy module ansible
- name: copy files
  copy: src=./files/file_webserver dest=/opt/ansible/file_webserver owner=root group=root mode=0755
To copy the Dynamic file for Ansible
- name: copy template files
  template: src=./templates/template_webserver.j2 dest=/opt/ansible/template_webserver owner=root group=root mode=0755
I have written in jinja2 file format.
cat templates/template_webserver.j2
#This is a jinja template file.
{{ message }}
#jinja template can extract variables. like, ...
{% for key,value in Info.iteritems() %}
I am {{ value.age }} {{ key }} !
{% endfor %}
In the jinja template, you can also use variables in almost the same way as in Playbook.
I can also iterate with for statement like with_dict, but here you can use it without putting the item.
The final, all the contents so far.
[root@DevopsRoles ansible]# cat main.yml
The content main.yml file as below
- hosts: webserver
  user: root
  tasks:
    - name: install packages from yum
      yum: name={{ item }} state=latest
      with_items:
        - nginx

- name: register cron job
      cron: name="check ping" day="*/2" hour="12" minute="0" job="ping -c 3 192.168.1.113"

    - name: create directories
      file: path={{ item.path }} owner={{ item.owner }} group={{ item.group }} mode=0{{ item.mode }} state=directory
      with_items:
        - { "path":"/opt/ansible", "owner":"root", "group":"root", "mode":"755" }
        - { "path":"/opt/data", "owner":"root", "group":"root", "mode":"755" }

    - name: copy files
      copy: src=./files/file_webserver dest=/opt/ansible/file_webserver owner=root group=root mode=0755

    - name: copy template files
      template: src=./templates/template_webserver.j2 dest=/opt/ansible/template_webserver owner=root group=root mode=0755
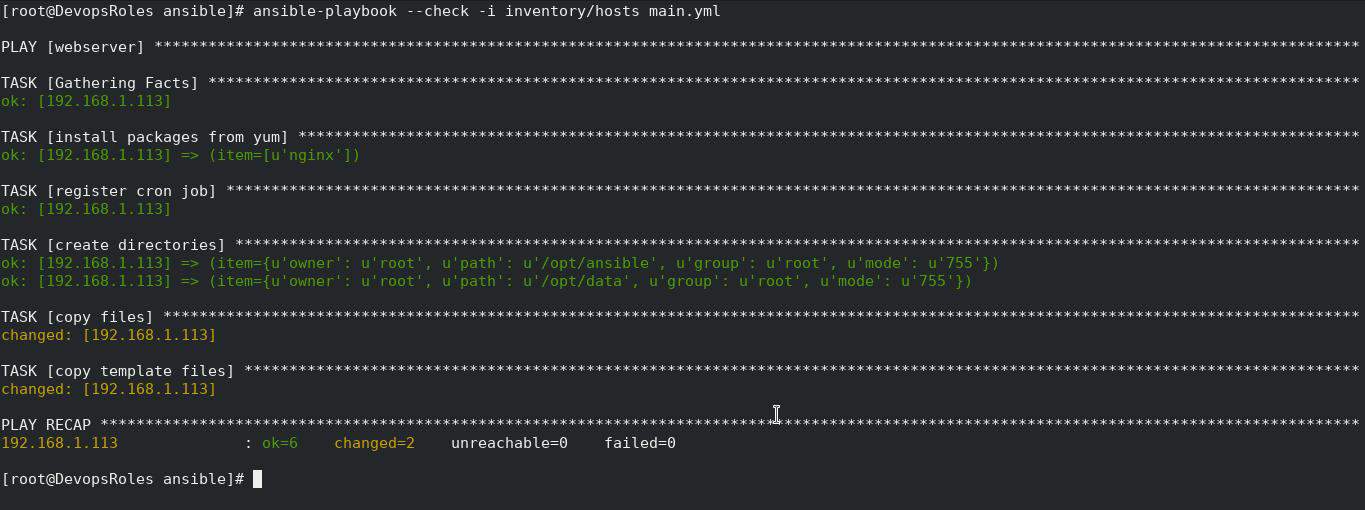
Check Mode is a mode that does not actually change, you can check which part will be changed when you run Playbook. Generally, it is called Dry run mode for Ansible. If you give –check as an option, it works in Check Mode.
[root@DevopsRoles ansible]# ansible-playbook --check -i inventory/hosts main.yml
The screen output terminal:
Let’s use the -v option to see it in more detail.
[root@DevopsRoles ansible]# ansible-playbook --check -i inventory/hosts main.yml -v
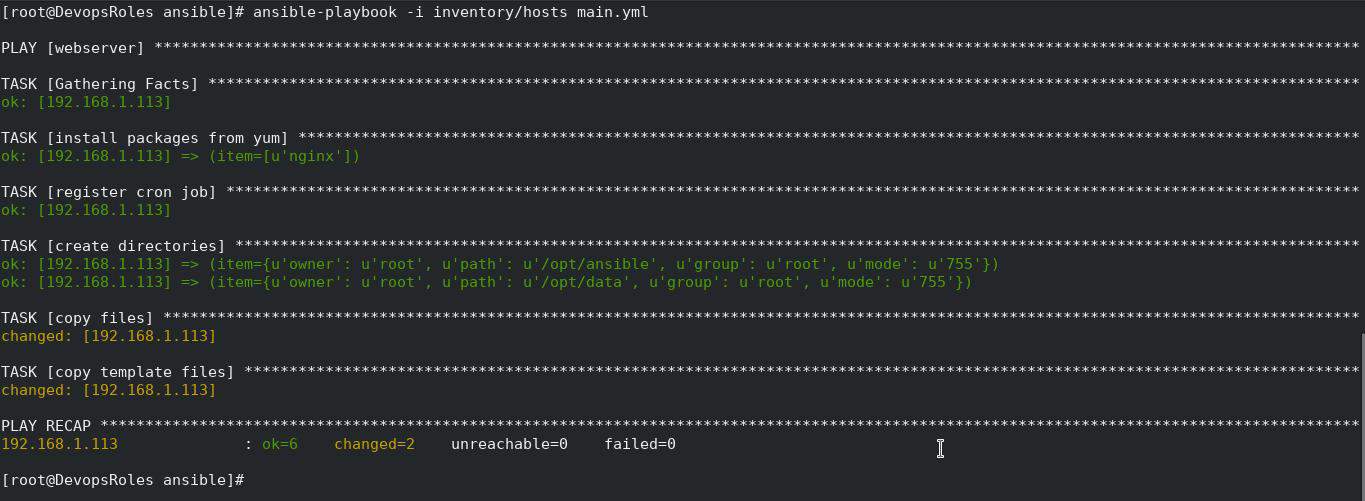
Run Ansible Playbook.
[root@controller ansible]# ansible-playbook -i inventory/hosts main.yml
The screen output terminal:
Using Ansible role
The tasks are described collectively in one YAML file so far, but this does not work well when creating similar hosts.
Let’s cut out some of the tasks as roles and try to make them into parts.
[root@DevopsRoles ansible]# cat master.yml
The content master.yml file as below
- hosts: webserver
  user: root
  tasks:
    - name: register cron job
      cron: name="check ping" day="*/2" hour="12" minute="0" job="ping -c 3 192.168.1.113"

  roles:
    - role-common
    - role-web
[root@DevopsRoles ansible]# cat roles/role-common/tasks/main.yml
The content main.yml file for role-common as below
- name: install packages from yum
  yum: name={{ item }} state=latest
  with_items:
    - nginx

- name: create directories
  file: path={{ item.path }} owner={{ item.owner }} group={{ item.group }} mode=0{{ item.mode }} state=directory
  with_items:
    - { "path":"/opt/ansible", "owner":"root", "group":"root", "mode":"755" }

- name: copy files
  copy: src=./files/file_webserver dest=/opt/ansible/file_webserver owner=root group=root mode=0755
[root@DevopsRoles ansible]# cat roles/role-web/tasks/main.yml
The content main.yml for role-web as below
- name: install packages from yum
  yum: name={{ item }} state=latest
  with_items:
   - nginx

- name: create directories
  file: path={{ item.path }} owner={{ item.owner }} group={{ item.group }} mode=0{{ item.mode }} state=directory
  with_items:
    - { "path":"/opt/data", "owner":"root", "group":"root", "mode":"755" }

- name: copy template files
  template: src=./templates/template_webserver.j2 dest=/opt/ansible/template_webserver owner=root group=root mode=0755
Do not say that handling with_items is not good just because I just cut out (lol)
The role called by roles is searched under the name under the roles directory, and main.yml directly under tasks is executed.
You can use dependencies etc to have a dependency on the role, but we will not handle it this time.
Let’s do it.
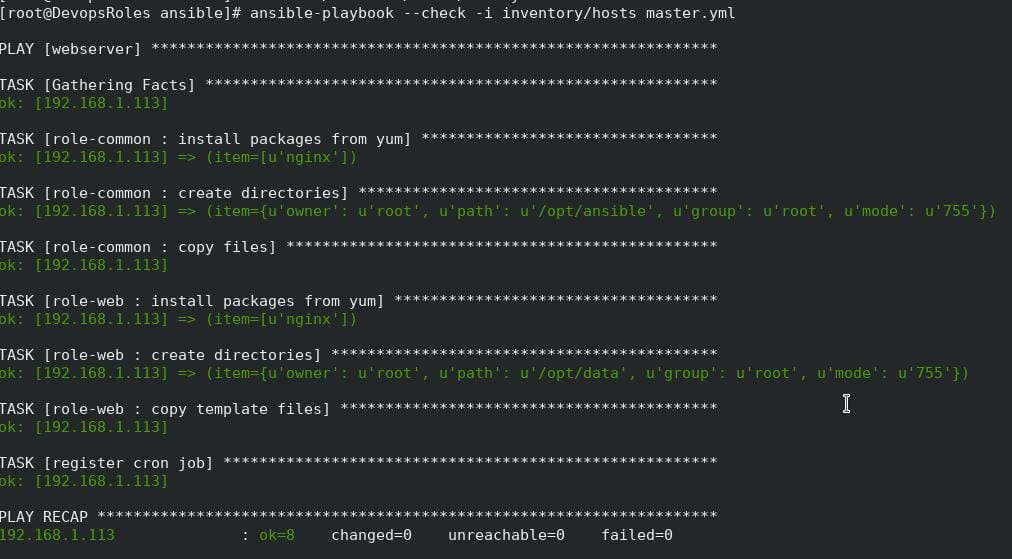
[root@DevopsRoles ansible]# ansible-playbook --check -i inventory/hosts master.yml
The screen output terminal:
Run ansible-playbook
[root@DevopsRoles ansible]# ansible-playbook -i inventory/hosts master.yml
Conclusion
This tutorial provides a basic introduction to get you started with the Ansible tutorial. As you gain more experience, you can explore advanced topics like inventory management, playbook organization, and integration with other tools and systems.
Through the article, you can use Ansible tutorial beginners as above. I hope will this your helpful. For more details refer to Ansible tutorial.