Table of Contents
Introduction
In this tutorial, How to Deploy a self-hosted Docker registry with self-signed certificates. How to access it from a remote machine.
To deploy a self-hosted Docker registry, you can use the official Docker Registry image.
Here’s a step-by-step Deploy a self-hosted Docker registry guide to help you.
Prepare your directories
I will create them on my user home directory, but you can place them in any directory.
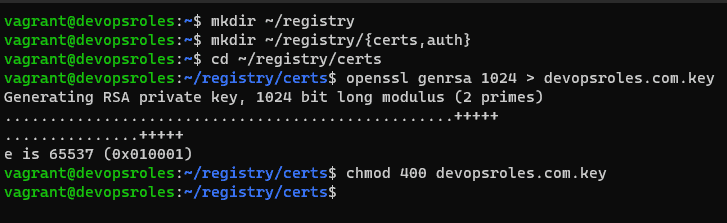
mkdir ~/registryCreate subdirectories in the registry directory.
mkdir ~/registry/{certs,auth}Go into the certs directory.
cd ~/registry/certsCreate a private key
openssl genrsa 1024 > devopsroles.com.key
chmod 400 devopsroles.com.key
The output terminal is as below:
Create a docker_register.cnf file with the content below:
nano docker_register.cnfIn that file, paste the following contents.
[req]

default_bits  = 2048

distinguished_name = req_distinguished_name

req_extensions = req_ext

x509_extensions = v3_req

prompt = no

[req_distinguished_name]

countryName = XX

stateOrProvinceName = N/A

localityName = N/A

organizationName = Self-signed certificate

commonName = 120.0.0.1: Self-signed certificate

[req_ext]

subjectAltName = @alt_names

[v3_req]

subjectAltName = @alt_names

[alt_names]


IP.1 = 192.168.3.7
Note: Make sure to change IP.1 to match the IP address of your hosting server.
Save and close the file.
Generate the key with:
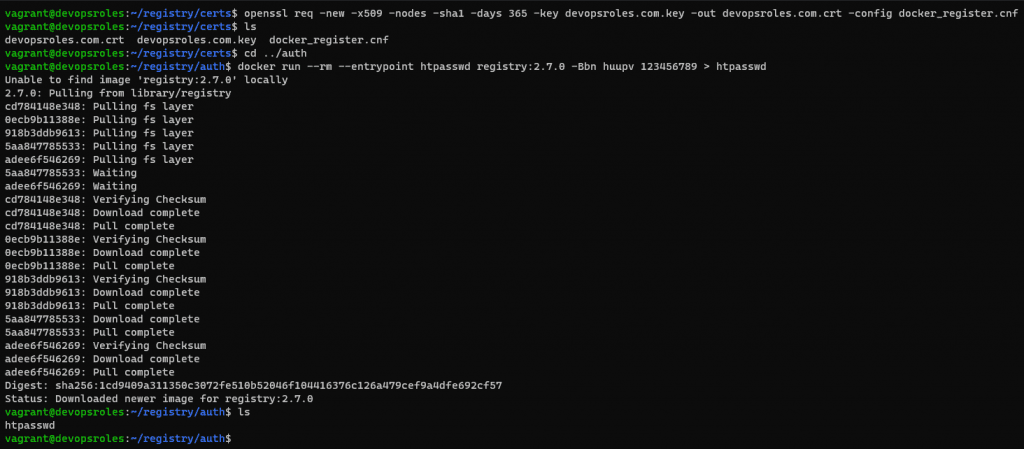
openssl req -new -x509 -nodes -sha1 -days 365 -key devopsroles.com.key -out devopsroles.com.crt -config docker_register.cnfGo into auth directory.
cd ../authGenerate an htpasswd file
docker run --rm --entrypoint htpasswd registry:2.7.0 -Bbn USERNAME PASSWORD > htpasswdWhere USERNAME is a unique username and PASSWORD is a unique/strong password.
The output terminal is the picture below:
Now, Deploy a self-hosted Docker registry
Change back to the base registry directory.
cd ~/registryDeploy the registry container with the command below:
docker run -d \

--restart=always \

--name registry \

-v `pwd`/auth:/auth \

-v `pwd`/certs:/certs \

-v `pwd`/certs:/certs \

-e REGISTRY_AUTH=htpasswd \

-e REGISTRY_AUTH_HTPASSWD_REALM="Registry Realm" \

-e REGISTRY_AUTH_HTPASSWD_PATH=/auth/htpasswd \

-e REGISTRY_HTTP_ADDR=0.0.0.0:443 \

-e REGISTRY_HTTP_TLS_CERTIFICATE=/certs/devopsroles.com.crt \

-e REGISTRY_HTTP_TLS_KEY=/certs/devopsroles.com.key \

-p 443:443 \

registry:2.7.0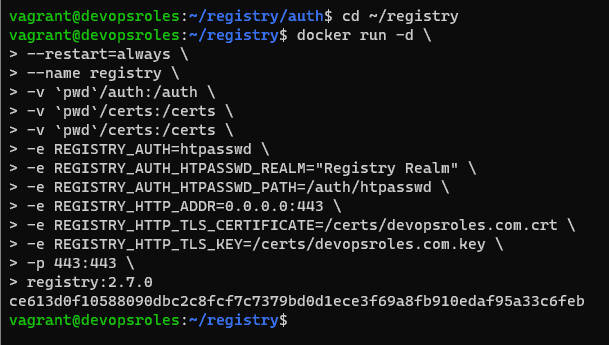
Now, you can access it from the local machine. however, you want to access it from a remote system. we need to add a ca.crt file. you need the copy the contents of the ~/registry/certs/devopsroles.com.crt file.
Login into your second machine
Create folder
sudo mkdir -p /etc/docker/certs.d/SERVER:443where SERVER is the IP address of the machine hosting the registry.
Create the new file with:
sudo nano /etc/docker/certs.d/SERVER:443/ca.crtpaste the contents from devopsroles.com.crt ( from the hosting server) save and close the file.
How to do login into the new registry
From the second machine.
docker login -u USER -p https://SERVER:443Where USER is the user you added when you generated the htpasswd file above.
Conclusion
You have successfully deployed a self-hosted Docker registry. You can now use it to store and share your Docker images within your network. I hope will this your helpful. Thank you for reading the DevopsRoles page!