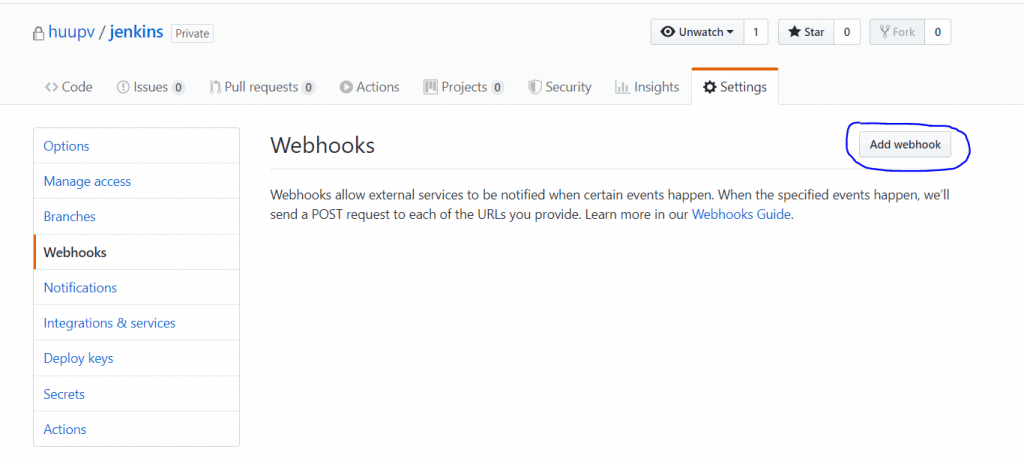
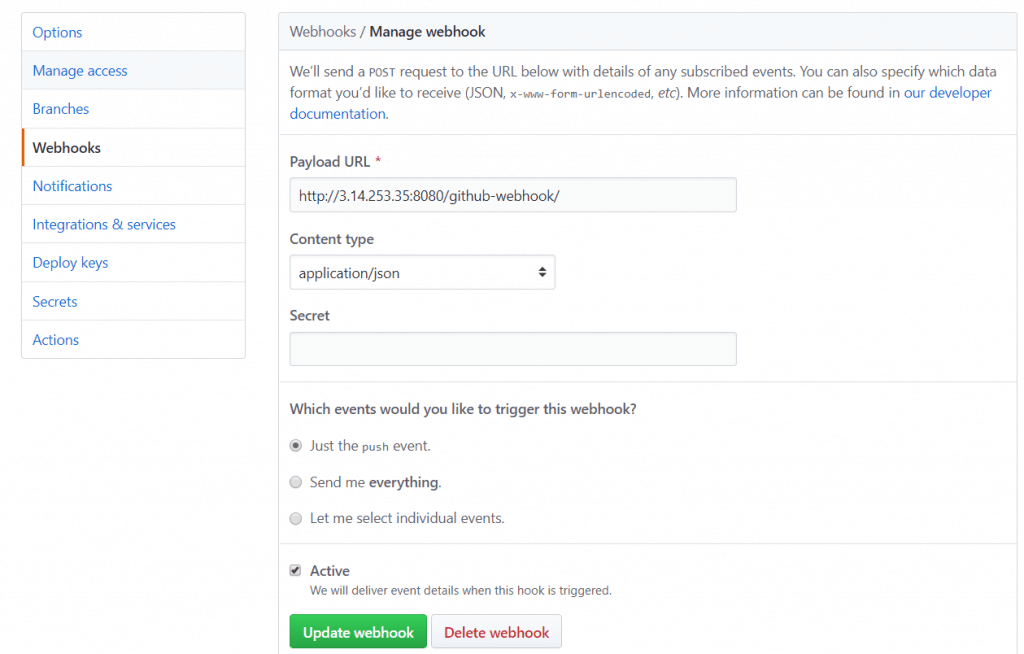
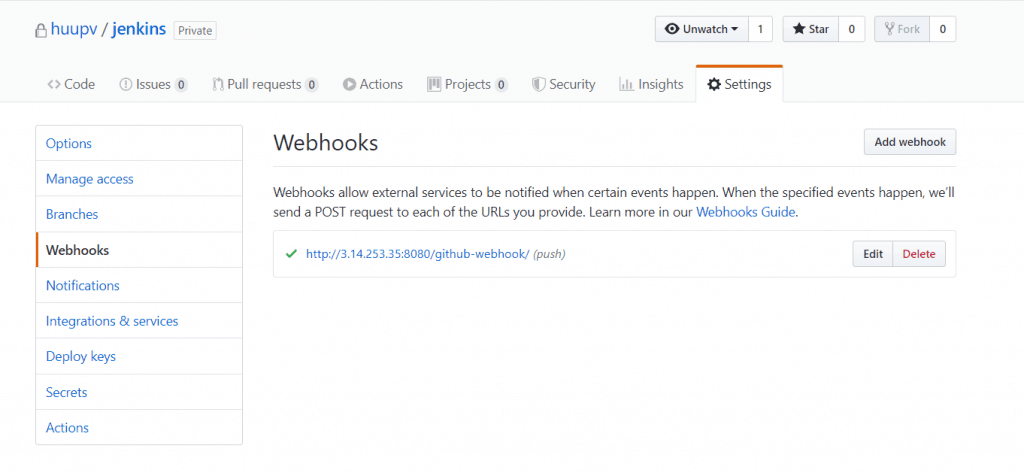
Introduction
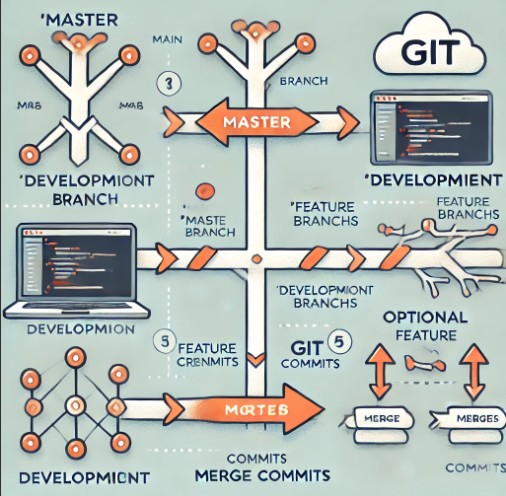
Merging Feature Branches in Git, allowing developers to integrate changes from one branch into another. This process is essential for maintaining a clean and organized codebase, especially in collaborative projects where multiple developers work on different features simultaneously. In this guide, we will walk you through the step-by-step process of merging the feature/xxx_2020 branch into the develop/xxx branch. We will cover everything from setting up your working environment to resolving conflicts, ensuring that your merge is smooth and error-free. Whether you’re new to Git or looking to refine your merging skills, this guide has you covered.
Merging Feature Branches in Git From feature/xxx_2020 to develop/xxx
Step 1: Create a Working Directory
Before starting the merge process, it’s essential to create a separate working directory to prevent any unintended changes in your current workspace.
$ mkdir ${Working directory}
$ cd ${Working directory}
Step 2: Clone the Git Repository
Next, clone the Git repository to your local machine to ensure that you have the latest code base.
$ git clone https://domain.com/XXX/xxx.git
$ cd xxx
Step 3: Check the Remote and Fetch the Data
To ensure you are working with the most up-to-date branches, check the remote repository and fetch the latest data.
$ git remote show origin
$ git fetch origin
Step 4: Checkout the Merge Source Branch
Now, switch to the source branch feature/xxx_2020 that you plan to merge from.
$ git checkout feature/xxx_2020Step 5: Perform a Fast-Forward Merge on the Source Branch
To ensure the source branch is up-to-date with its remote counterpart, perform a fast-forward merge.
$ git merge --ff origin/feature/xxx_2020Step 6: Checkout the Merge Destination Branch
After updating the source branch, switch to the destination branch develop/xxx.
$ git checkout develop/xxxStep 7: Perform a Fast-Forward Merge on the Destination Branch
Update the destination branch by performing a fast-forward merge to ensure it is current.
$ git merge --ff origin/develop/xxxStep 8: Merge the Source Branch into the Destination Branch
Now, merge the feature/xxx_2020 branch into develop/xxx. Use the --no-commit and --no-ff options to ensure that you have control over the commit process and can handle any conflicts that arise.
$ git merge --no-commit --no-ff feature/xxx_2020Step 9: Check Git Status for Conflicts
Before finalizing the merge, check the status of your Git repository to identify any conflicts that need to be resolved.
$ git statusStep 10: Resolve Merge Conflicts (If Any)
If there are conflicts, you’ll need to manually resolve them. Open the conflicted files, edit them as necessary, and then mark them as resolved.
Step 11: Commit the Merge with Conflict Resolution
Once all conflicts have been resolved, commit the merge with a detailed message describing the conflicts and how they were resolved.
$ git commit -F- <<EOM
>Merge branch 'feature/xxx_2020' into 'develop/xxx'
>Auto-merging src/main/java/H6789.java
>CONFLICT (content): Merge conflict in src/main/java/F6789.java
>Auto-merging src/main/etc/Test_message.properties
>EOM
Merge conflict resolution FAQs
What should I do if I encounter a merge conflict?
If you encounter a merge conflict, carefully review the conflicting files, resolve the conflicts, and then commit the changes. Use Git’s conflict markers (<<<<<<<, =======, >>>>>>>) to identify the differences between the branches.
Why should I use --no-commit and --no-ff during a merge?
Using --no-commit and --no-ff gives you more control over the merge process. It allows you to review the changes before finalizing the merge and ensures that a merge commit is created even if the merge could be resolved as a fast-forward.
How can I avoid merge conflicts?
To minimize the chances of conflicts, regularly pull the latest changes from the remote repository into your local branches and communicate with your team to coordinate when and how merges are performed.
Conclusion
Merging branches in Git is a critical skill for developers, particularly when working on collaborative projects. By following the steps outlined in this guide, you can successfully merge the feature/xxx_2020 branch into the develop/xxx branch, resolve any conflicts, and maintain a clean and functional codebase. Thank you for reading the DevopsRoles page!