To install Kubernetes on Ubuntu, you can use the kubeadm tool, which simplifies the process of setting up a cluster. Here’s a step-by-step guide on how to install Kubernetes on Ubuntu.
Table of Contents
Kubernetes Requirements
- Master Node.
- Worker Node 1.
- The host OS is Ubuntu Server.
1. Update Ubuntu Server
It is always an updated system package. use the command line below:
$ sudo apt update2. Install Docker on Ubuntu Server
$ sudo apt install curl -y
$ curl -fsSL https://get.docker.com -o get-docker.sh
$ sh get-docker.sh
$ sudo usermod -aG docker $USER
$ docker --version
Repeat on all other nodes.
3.How to install Kubernetes on Ubuntu server.
Use the command line to install K8s as below.
$ sudo apt-get install -y apt-transport-https ca-certificates curl
$ sudo curl -fsSLo /usr/share/keyrings/kubernetes-archive-keyring.gpg https://packages.cloud.google.com/apt/doc/apt-key.gpg
Repeat for each server node.
4. Add software repositories
k8s are not included in the default repositories. Use the command line below:
$ echo "deb [signed-by=/usr/share/keyrings/kubernetes-archive-keyring.gpg] https://apt.kubernetes.io/ kubernetes-xenial main" | sudo tee /etc/apt/sources.list.d/kubernetes.list
$ sudo apt-get update
Repeat for each server node.
5. Install the tool for Kubernetes
A tool that helps to initialize a cluster using Kubernetes Admin or Kubeadm. Kubelet is the worker package, which runs on all nodes and starts containers. Use the command line below
$ sudo apt-get install -y kubeadm kubelet kubectl
$ sudo apt-mark hold kubelet kubeadm kubectl
Repeat for each server node.
6. Disabling swap memory on each server
$ sudo swapoff -a7. Setting a unique hostname for each server node.
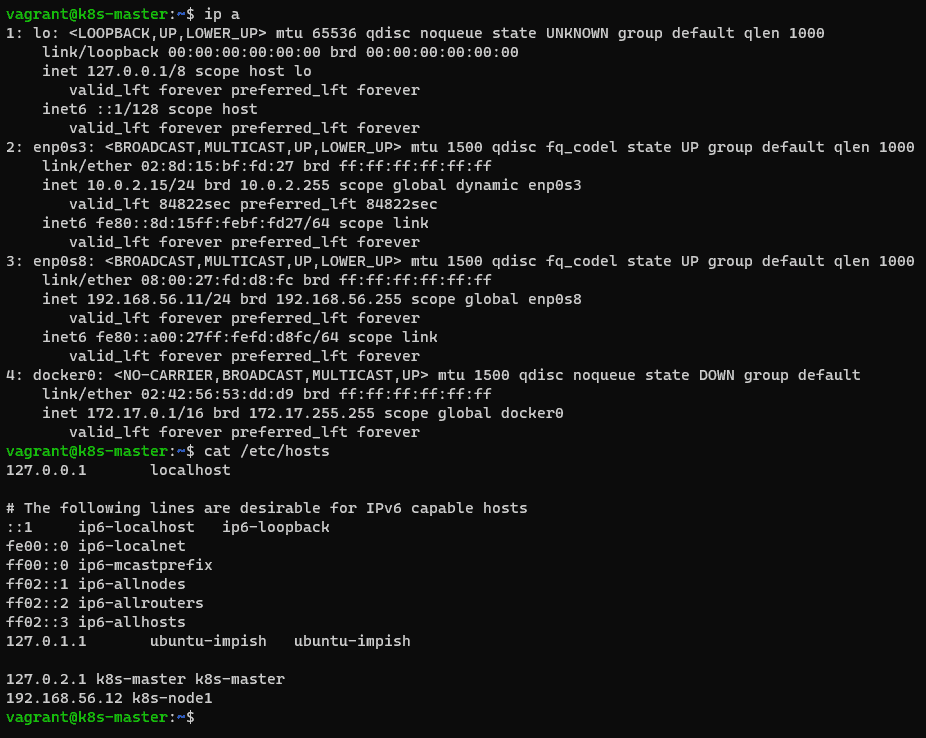
Decide which server to set as the primary node.
$ sudo hostnamectl set-hostname k8s-masterNext, Set a worker node hostname
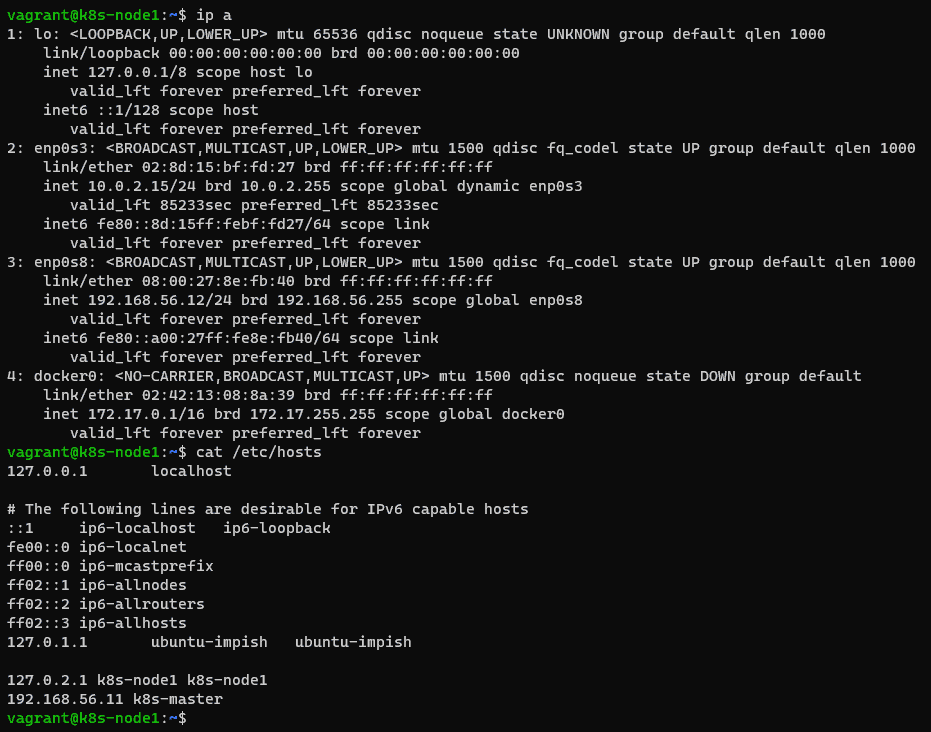
$ sudo hostnamectl set-hostname k8s-node1If you add a worker node, set a unique hostname on each one.
8. Initialize Kubernetes on the master node
On the master node, Run the command below:
$ sudo kubeadm init --apiserver-advertise-address=192.168.56.11 --pod-network-cidr=10.100.0.0/16The output terminal is as below:
vagrant@k8s-master:~$ sudo kubeadm init --apiserver-advertise-address=192.168.56.11 --pod-network-cidr=10.100.0.0/16
[init] Using Kubernetes version: v1.24.2
[preflight] Running pre-flight checks
        [WARNING SystemVerification]: missing optional cgroups: blkio
[preflight] Pulling images required for setting up a Kubernetes cluster
[preflight] This might take a minute or two, depending on the speed of your internet connection
[preflight] You can also perform this action in beforehand using 'kubeadm config images pull'
[certs] Using certificateDir folder "/etc/kubernetes/pki"
[certs] Generating "ca" certificate and key
[certs] Generating "apiserver" certificate and key
[certs] apiserver serving cert is signed for DNS names [k8s-master kubernetes kubernetes.default kubernetes.default.svc kubernetes.default.svc.cluster.local] and IPs [10.96.0.1 192.168.56.11]
[certs] Generating "apiserver-kubelet-client" certificate and key
[certs] Generating "front-proxy-ca" certificate and key
[certs] Generating "front-proxy-client" certificate and key
[certs] Generating "etcd/ca" certificate and key
[certs] Generating "etcd/server" certificate and key
[certs] etcd/server serving cert is signed for DNS names [k8s-master localhost] and IPs [192.168.56.11 127.0.0.1 ::1]
[certs] Generating "etcd/peer" certificate and key
[certs] etcd/peer serving cert is signed for DNS names [k8s-master localhost] and IPs [192.168.56.11 127.0.0.1 ::1]
[certs] Generating "etcd/healthcheck-client" certificate and key
[certs] Generating "apiserver-etcd-client" certificate and key
[certs] Generating "sa" key and public key
[kubeconfig] Using kubeconfig folder "/etc/kubernetes"
[kubeconfig] Writing "admin.conf" kubeconfig file
[kubeconfig] Writing "kubelet.conf" kubeconfig file
[kubeconfig] Writing "controller-manager.conf" kubeconfig file
[kubeconfig] Writing "scheduler.conf" kubeconfig file
[kubelet-start] Writing kubelet environment file with flags to file "/var/lib/kubelet/kubeadm-flags.env"
[kubelet-start] Writing kubelet configuration to file "/var/lib/kubelet/config.yaml"
[kubelet-start] Starting the kubelet
[control-plane] Using manifest folder "/etc/kubernetes/manifests"
[control-plane] Creating static Pod manifest for "kube-apiserver"
[control-plane] Creating static Pod manifest for "kube-controller-manager"
[control-plane] Creating static Pod manifest for "kube-scheduler"
[etcd] Creating static Pod manifest for local etcd in "/etc/kubernetes/manifests"
[wait-control-plane] Waiting for the kubelet to boot up the control plane as static Pods from directory "/etc/kubernetes/manifests". This can take up to 4m0s
[apiclient] All control plane components are healthy after 4.501962 seconds
[upload-config] Storing the configuration used in ConfigMap "kubeadm-config" in the "kube-system" Namespace
[kubelet] Creating a ConfigMap "kubelet-config" in namespace kube-system with the configuration for the kubelets in the cluster
[upload-certs] Skipping phase. Please see --upload-certs
[mark-control-plane] Marking the node k8s-master as control-plane by adding the labels: [node-role.kubernetes.io/control-plane node.kubernetes.io/exclude-from-external-load-balancers]
[mark-control-plane] Marking the node k8s-master as control-plane by adding the taints [node-role.kubernetes.io/master:NoSchedule node-role.kubernetes.io/control-plane:NoSchedule]
[bootstrap-token] Using token: 8ke6fa.3c5ll272057418qj
[bootstrap-token] Configuring bootstrap tokens, cluster-info ConfigMap, RBAC Roles
[bootstrap-token] Configured RBAC rules to allow Node Bootstrap tokens to get nodes
[bootstrap-token] Configured RBAC rules to allow Node Bootstrap tokens to post CSRs in order for nodes to get long term certificate credentials
[bootstrap-token] Configured RBAC rules to allow the csrapprover controller automatically approve CSRs from a Node Bootstrap Token
[bootstrap-token] Configured RBAC rules to allow certificate rotation for all node client certificates in the cluster
[bootstrap-token] Creating the "cluster-info" ConfigMap in the "kube-public" namespace
[kubelet-finalize] Updating "/etc/kubernetes/kubelet.conf" to point to a rotatable kubelet client certificate and key
[addons] Applied essential addon: CoreDNS
[addons] Applied essential addon: kube-proxy

Your Kubernetes control-plane has initialized successfully!

To start using your cluster, you need to run the following as a regular user:

  mkdir -p $HOME/.kube
  sudo cp -i /etc/kubernetes/admin.conf $HOME/.kube/config
  sudo chown $(id -u):$(id -g) $HOME/.kube/config

Alternatively, if you are the root user, you can run:

  export KUBECONFIG=/etc/kubernetes/admin.conf

You should now deploy a pod network to the cluster.
Run "kubectl apply -f [podnetwork].yaml" with one of the options listed at:
  https://kubernetes.io/docs/concepts/cluster-administration/addons/

Then you can join any number of worker nodes by running the following on each as root:

kubeadm join 192.168.56.11:6443 --token 8ke6fa.3c5ll272057418qj \
        --discovery-token-ca-cert-hash sha256:4e69979a597f673781606eb7ab6bed5ccb741f46756b17f196b9cd76d3b51053
This is used to join the worker nodes to the cluster. We will create a directory for the cluster.
$ mkdir -p $HOME/.kube
$ sudo cp -i /etc/kubernetes/admin.conf $HOME/.kube/config
$ sudo chown $(id -u):$(id -g) $HOME/.kube/config
9. Deploy the pod network to the cluster.
A pod network allows communication between different nodes in the cluster. For example, Use the flannel virtual network. Use the command line below
$ sudo kubectl apply -f https://raw.githubusercontent.com/coreos/flannel/master/Documentation/kube-flannel.ymlVerify working and communicating
# kubectl get all -A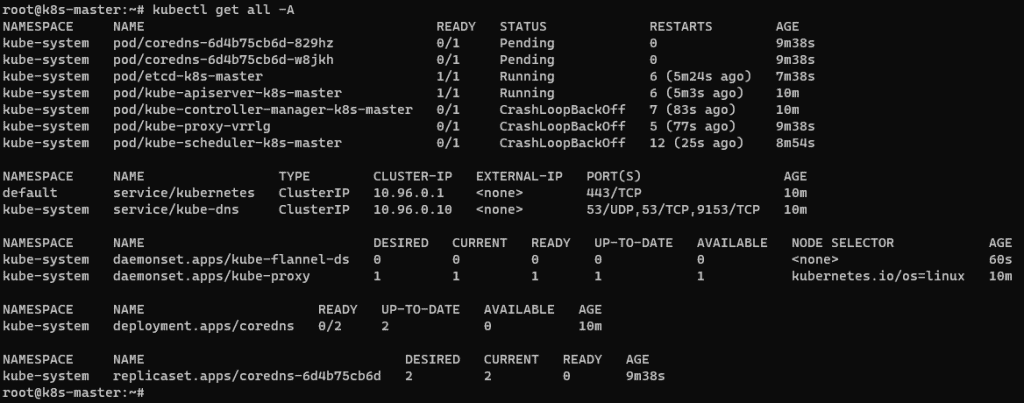
Join the worker node to Cluster.
The syntax:
kubeadm join --token <token> <control-plane-host>:<control-plane-port> --discovery-token-ca-cert-hash sha256:<hash>Use kubeadm join command on each worker node to join it to the cluster.
$ sudo kubeadm join 192.168.56.11:6443 --token 8ke6fa.3c5ll272057418qj \
        --discovery-token-ca-cert-hash \
sha256:4e69979a597f673781606eb7ab6bed5ccb741f46756b17f196b9cd76d3b5105
Waiting minutes, You can check the status of the nodes. Switch to the Master node and run the command line as below:
kubectl get nodesConclusion
You have successfully installed Kubernetes on Ubuntu. I hope this guide proves to be helpful for you in navigating the installation process. Thank you for choosing to read the DevopsRoles page! For more detailed instructions on how to install Kubernetes on Ubuntu, please refer to our comprehensive guide on installing Kubernetes on Ubuntu.