Table of Contents
#Introduction
In this tutorial, How to Install Kubernetes Cluster with KubeKey. I will deploy a Kubernetes Cluster using KubeKey Quickstart.
You can use KubeKey to spin up a Kubernetes deployment for development/testing purposes. As Kubernetes is the de-facto standard in container orchestration.
Requirements install Kubernetes Cluster with KubeKey
- Running instance of Ubuntu Server.
- A user with sudo privileges.
Install Docker
First, You need to install Docker on the Ubuntu server. Refer to How to install docker on Ubuntu Server.
How to Install KubeKey
You need to download KubeKey and make it executable as the command below:
sudo apt-get install conntrack -y
curl -sfL https://get-kk.kubesphere.io | VERSION=v1.2.1 sh -
chmod u+x kk
The output terminal is the picture below:
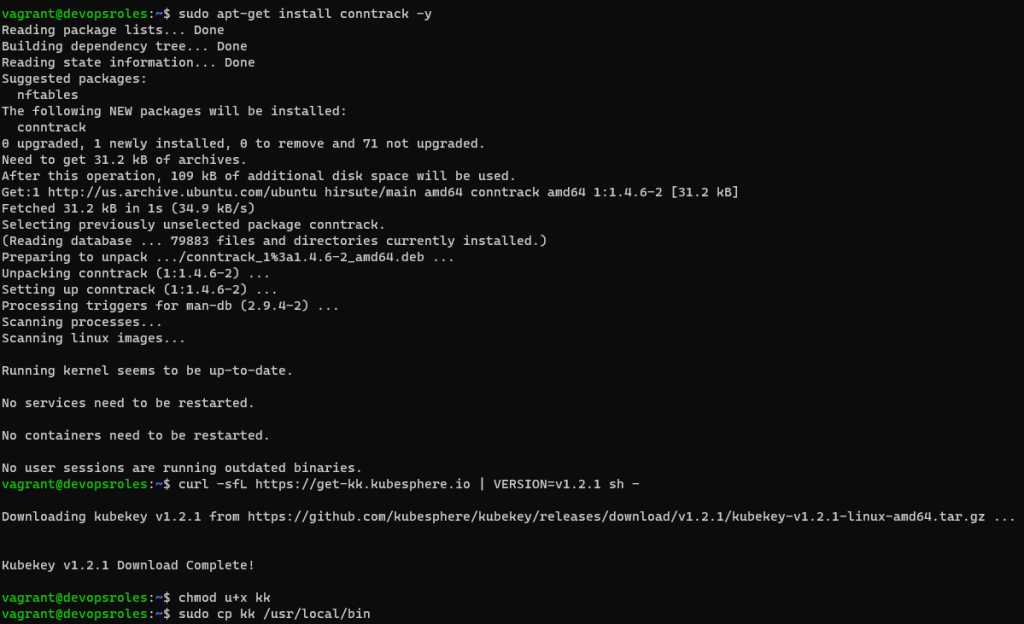
Make the kk executable to run from any directory by copying the file to /user/local/bin directory with the command below:
sudo cp kk /usr/local/binVerify the install it
kk -hThe output terminal is as below:
vagrant@devopsroles:~$ kk -h
Deploy a Kubernetes or KubeSphere cluster efficiently, flexibly and easily. There are three scenarios to use KubeKey.
1. Install Kubernetes only
2. Install Kubernetes and KubeSphere together in one command
3. Install Kubernetes first, then deploy KubeSphere on it using https://github.com/kubesphere/ks-installer

Usage:
  kk [command]

Available Commands:
  add         Add nodes to kubernetes cluster
  certs       cluster certs
  completion  Generate shell completion scripts
  create      Create a cluster or a cluster configuration file
  delete      Delete nodes or cluster
  help        Help about any command
  init        Initializes the installation environment
  upgrade     Upgrade your cluster smoothly to a newer version with this command
  version     print the client version information

Flags:
      --debug        Print detailed information (default true)
  -h, --help         help for kk
      --in-cluster   Running inside the cluster

Use "kk [command] --help" for more information about a command.
Deploy the Cluster
You need to deploy the cluster with the command below:
sudo kk create clusterThis process will take some time.
The output terminal is as below:
vagrant@devopsroles:~$ sudo kk create cluster
+-------------+------+------+---------+----------+-------+-------+-----------+----------+------------+-------------+------------------+--------------+
| name        | sudo | curl | openssl | ebtables | socat | ipset | conntrack | docker   | nfs client | ceph client | glusterfs client | time         |
+-------------+------+------+---------+----------+-------+-------+-----------+----------+------------+-------------+------------------+--------------+
| devopsroles | y    | y    | y       | y        |       |       | y         | 20.10.12 |            |             |                  | UTC 14:06:10 |
+-------------+------+------+---------+----------+-------+-------+-----------+----------+------------+-------------+------------------+--------------+

This is a simple check of your environment.
Before installation, you should ensure that your machines meet all requirements specified at
https://github.com/kubesphere/kubekey#requirements-and-recommendations

Continue this installation? [yes/no]: yes
INFO[14:06:20 UTC] Downloading Installation Files
INFO[14:06:20 UTC] Downloading kubeadm ...
INFO[14:06:24 UTC] Downloading kubelet ...
INFO[14:06:32 UTC] Downloading kubectl ...
INFO[14:06:36 UTC] Downloading helm ...
INFO[14:06:38 UTC] Downloading kubecni ...
INFO[14:06:43 UTC] Downloading etcd ...
INFO[14:06:48 UTC] Downloading docker ...
INFO[14:06:52 UTC] Downloading crictl ...
INFO[14:06:55 UTC] Configuring operating system ...
[devopsroles 10.0.2.15] MSG:
net.ipv4.ip_forward = 1
net.bridge.bridge-nf-call-arptables = 1
net.bridge.bridge-nf-call-ip6tables = 1
net.bridge.bridge-nf-call-iptables = 1
net.ipv4.ip_local_reserved_ports = 30000-32767
vm.max_map_count = 262144
vm.swappiness = 1
fs.inotify.max_user_instances = 524288
no crontab for root
INFO[14:06:56 UTC] Get cluster status
INFO[14:06:56 UTC] Installing Container Runtime ...
INFO[14:06:56 UTC] Start to download images on all nodes
[devopsroles] Downloading image: kubesphere/pause:3.4.1
[devopsroles] Downloading image: kubesphere/kube-apiserver:v1.21.5
[devopsroles] Downloading image: kubesphere/kube-controller-manager:v1.21.5
[devopsroles] Downloading image: kubesphere/kube-scheduler:v1.21.5
[devopsroles] Downloading image: kubesphere/kube-proxy:v1.21.5
[devopsroles] Downloading image: coredns/coredns:1.8.0
[devopsroles] Downloading image: kubesphere/k8s-dns-node-cache:1.15.12
[devopsroles] Downloading image: calico/kube-controllers:v3.20.0
[devopsroles] Downloading image: calico/cni:v3.20.0
[devopsroles] Downloading image: calico/node:v3.20.0
[devopsroles] Downloading image: calico/pod2daemon-flexvol:v3.20.0
INFO[14:08:42 UTC] Getting etcd status
[devopsroles 10.0.2.15] MSG:
Configuration file will be created
INFO[14:08:42 UTC] Generating etcd certs
INFO[14:08:43 UTC] Synchronizing etcd certs
INFO[14:08:43 UTC] Creating etcd service
Push /home/vagrant/kubekey/v1.21.5/amd64/etcd-v3.4.13-linux-amd64.tar.gz to 10.0.2.15:/tmp/kubekey/etcd-v3.4.13-linux-amd64.tar.gz   Done
INFO[14:08:43 UTC] Starting etcd cluster
INFO[14:08:44 UTC] Refreshing etcd configuration
[devopsroles 10.0.2.15] MSG:
Created symlink /etc/systemd/system/multi-user.target.wants/etcd.service → /etc/systemd/system/etcd.service.
INFO[14:08:47 UTC] Backup etcd data regularly
INFO[14:08:54 UTC] Installing kube binaries
Push /home/vagrant/kubekey/v1.21.5/amd64/kubeadm to 10.0.2.15:/tmp/kubekey/kubeadm   Done
Push /home/vagrant/kubekey/v1.21.5/amd64/kubelet to 10.0.2.15:/tmp/kubekey/kubelet   Done
Push /home/vagrant/kubekey/v1.21.5/amd64/kubectl to 10.0.2.15:/tmp/kubekey/kubectl   Done
Push /home/vagrant/kubekey/v1.21.5/amd64/helm to 10.0.2.15:/tmp/kubekey/helm   Done
Push /home/vagrant/kubekey/v1.21.5/amd64/cni-plugins-linux-amd64-v0.9.1.tgz to 10.0.2.15:/tmp/kubekey/cni-plugins-linux-amd64-v0.9.1.tgz   Done
INFO[14:09:01 UTC] Initializing kubernetes cluster
[devopsroles 10.0.2.15] MSG:
W0323 14:09:02.442567    4631 utils.go:69] The recommended value for "clusterDNS" in "KubeletConfiguration" is: [10.233.0.10]; the provided value is: [169.254.25.10]
[init] Using Kubernetes version: v1.21.5
[preflight] Running pre-flight checks
        [WARNING IsDockerSystemdCheck]: detected "cgroupfs" as the Docker cgroup driver. The recommended driver is "systemd". Please follow the guide at https://kubernetes.io/docs/setup/cri/
        [WARNING FileExisting-socat]: socat not found in system path
[preflight] Pulling images required for setting up a Kubernetes cluster
[preflight] This might take a minute or two, depending on the speed of your internet connection
[preflight] You can also perform this action in beforehand using 'kubeadm config images pull'
[certs] Using certificateDir folder "/etc/kubernetes/pki"
[certs] Generating "ca" certificate and key
[certs] Generating "apiserver" certificate and key
[certs] apiserver serving cert is signed for DNS names [devopsroles devopsroles.cluster.local kubernetes kubernetes.default kubernetes.default.svc kubernetes.default.svc.cluster.local lb.kubesphere.local localhost] and IPs [10.233.0.1 10.0.2.15 127.0.0.1]
[certs] Generating "apiserver-kubelet-client" certificate and key
[certs] Generating "front-proxy-ca" certificate and key
[certs] Generating "front-proxy-client" certificate and key
[certs] External etcd mode: Skipping etcd/ca certificate authority generation
[certs] External etcd mode: Skipping etcd/server certificate generation
[certs] External etcd mode: Skipping etcd/peer certificate generation
[certs] External etcd mode: Skipping etcd/healthcheck-client certificate generation
[certs] External etcd mode: Skipping apiserver-etcd-client certificate generation
[certs] Generating "sa" key and public key
[kubeconfig] Using kubeconfig folder "/etc/kubernetes"
[kubeconfig] Writing "admin.conf" kubeconfig file
[kubeconfig] Writing "kubelet.conf" kubeconfig file
[kubeconfig] Writing "controller-manager.conf" kubeconfig file
[kubeconfig] Writing "scheduler.conf" kubeconfig file
[kubelet-start] Writing kubelet environment file with flags to file "/var/lib/kubelet/kubeadm-flags.env"
[kubelet-start] Writing kubelet configuration to file "/var/lib/kubelet/config.yaml"
[kubelet-start] Starting the kubelet
[control-plane] Using manifest folder "/etc/kubernetes/manifests"
[control-plane] Creating static Pod manifest for "kube-apiserver"
[control-plane] Creating static Pod manifest for "kube-controller-manager"
[control-plane] Creating static Pod manifest for "kube-scheduler"
[wait-control-plane] Waiting for the kubelet to boot up the control plane as static Pods from directory "/etc/kubernetes/manifests". This can take up to 4m0s
[apiclient] All control plane components are healthy after 7.502071 seconds
[upload-config] Storing the configuration used in ConfigMap "kubeadm-config" in the "kube-system" Namespace
[kubelet] Creating a ConfigMap "kubelet-config-1.21" in namespace kube-system with the configuration for the kubelets in the cluster
[upload-certs] Skipping phase. Please see --upload-certs
[mark-control-plane] Marking the node devopsroles as control-plane by adding the labels: [node-role.kubernetes.io/master(deprecated) node-role.kubernetes.io/control-plane node.kubernetes.io/exclude-from-external-load-balancers]
[mark-control-plane] Marking the node devopsroles as control-plane by adding the taints [node-role.kubernetes.io/master:NoSchedule]
[bootstrap-token] Using token: w6uaty.abpybmw8jhw1tdlg
[bootstrap-token] Configuring bootstrap tokens, cluster-info ConfigMap, RBAC Roles
[bootstrap-token] configured RBAC rules to allow Node Bootstrap tokens to get nodes
[bootstrap-token] configured RBAC rules to allow Node Bootstrap tokens to post CSRs in order for nodes to get long term certificate credentials
[bootstrap-token] configured RBAC rules to allow the csrapprover controller automatically approve CSRs from a Node Bootstrap Token
[bootstrap-token] configured RBAC rules to allow certificate rotation for all node client certificates in the cluster
[bootstrap-token] Creating the "cluster-info" ConfigMap in the "kube-public" namespace
[kubelet-finalize] Updating "/etc/kubernetes/kubelet.conf" to point to a rotatable kubelet client certificate and key
[addons] Applied essential addon: CoreDNS
[addons] Applied essential addon: kube-proxy

Your Kubernetes control-plane has initialized successfully!

To start using your cluster, you need to run the following as a regular user:

  mkdir -p $HOME/.kube
  sudo cp -i /etc/kubernetes/admin.conf $HOME/.kube/config
  sudo chown $(id -u):$(id -g) $HOME/.kube/config

Alternatively, if you are the root user, you can run:

  export KUBECONFIG=/etc/kubernetes/admin.conf

You should now deploy a pod network to the cluster.
Run "kubectl apply -f [podnetwork].yaml" with one of the options listed at:
  https://kubernetes.io/docs/concepts/cluster-administration/addons/

You can now join any number of control-plane nodes by copying certificate authorities
and service account keys on each node and then running the following as root:

  kubeadm join lb.kubesphere.local:6443 --token w6uaty.abpybmw8jhw1tdlg \
        --discovery-token-ca-cert-hash sha256:98d31447eb6457d74c0d13088aceed7ae8dd1fd0b8e98cb1a15683fcbb5ef4d5 \
        --control-plane

Then you can join any number of worker nodes by running the following on each as root:

kubeadm join lb.kubesphere.local:6443 --token w6uaty.abpybmw8jhw1tdlg \
        --discovery-token-ca-cert-hash sha256:98d31447eb6457d74c0d13088aceed7ae8dd1fd0b8e98cb1a15683fcbb5ef4d5
[devopsroles 10.0.2.15] MSG:
node/devopsroles untainted
[devopsroles 10.0.2.15] MSG:
node/devopsroles labeled
[devopsroles 10.0.2.15] MSG:
service "kube-dns" deleted
[devopsroles 10.0.2.15] MSG:
service/coredns created
Warning: resource clusterroles/system:coredns is missing the kubectl.kubernetes.io/last-applied-configuration annotation which is required by kubectl apply. kubectl apply should only be used on resources created declaratively by either kubectl create --save-config or kubectl apply. The missing annotation will be patched automatically.
clusterrole.rbac.authorization.k8s.io/system:coredns configured
[devopsroles 10.0.2.15] MSG:
serviceaccount/nodelocaldns created
daemonset.apps/nodelocaldns created
[devopsroles 10.0.2.15] MSG:
configmap/nodelocaldns created
INFO[14:09:34 UTC] Get cluster status
INFO[14:09:35 UTC] Joining nodes to cluster
INFO[14:09:35 UTC] Deploying network plugin ...
[devopsroles 10.0.2.15] MSG:
configmap/calico-config created
customresourcedefinition.apiextensions.k8s.io/bgpconfigurations.crd.projectcalico.org created
customresourcedefinition.apiextensions.k8s.io/bgppeers.crd.projectcalico.org created
customresourcedefinition.apiextensions.k8s.io/blockaffinities.crd.projectcalico.org created
customresourcedefinition.apiextensions.k8s.io/clusterinformations.crd.projectcalico.org created
customresourcedefinition.apiextensions.k8s.io/felixconfigurations.crd.projectcalico.org created
customresourcedefinition.apiextensions.k8s.io/globalnetworkpolicies.crd.projectcalico.org created
customresourcedefinition.apiextensions.k8s.io/globalnetworksets.crd.projectcalico.org created
customresourcedefinition.apiextensions.k8s.io/hostendpoints.crd.projectcalico.org created
customresourcedefinition.apiextensions.k8s.io/ipamblocks.crd.projectcalico.org created
customresourcedefinition.apiextensions.k8s.io/ipamconfigs.crd.projectcalico.org created
customresourcedefinition.apiextensions.k8s.io/ipamhandles.crd.projectcalico.org created
customresourcedefinition.apiextensions.k8s.io/ippools.crd.projectcalico.org created
customresourcedefinition.apiextensions.k8s.io/kubecontrollersconfigurations.crd.projectcalico.org created
customresourcedefinition.apiextensions.k8s.io/networkpolicies.crd.projectcalico.org created
customresourcedefinition.apiextensions.k8s.io/networksets.crd.projectcalico.org created
clusterrole.rbac.authorization.k8s.io/calico-kube-controllers created
clusterrolebinding.rbac.authorization.k8s.io/calico-kube-controllers created
clusterrole.rbac.authorization.k8s.io/calico-node created
clusterrolebinding.rbac.authorization.k8s.io/calico-node created
daemonset.apps/calico-node created
serviceaccount/calico-node created
deployment.apps/calico-kube-controllers created
serviceaccount/calico-kube-controllers created
Warning: policy/v1beta1 PodDisruptionBudget is deprecated in v1.21+, unavailable in v1.25+; use policy/v1 PodDisruptionBudget
poddisruptionbudget.policy/calico-kube-controllers created
INFO[14:09:36 UTC] Congratulations! Installation is successful.
To verify Kubectl has been installed with the command below:
kubectl --helpThe output terminal is as below:
vagrant@devopsroles:~$ kubectl --help
kubectl controls the Kubernetes cluster manager.

 Find more information at: https://kubernetes.io/docs/reference/kubectl/overview/

Basic Commands (Beginner):
  create        Create a resource from a file or from stdin.
  expose        Take a replication controller, service, deployment or pod and expose it as a new Kubernetes Service
  run           Run a particular image on the cluster
  set           Set specific features on objects

Basic Commands (Intermediate):
  explain       Documentation of resources
  get           Display one or many resources
  edit          Edit a resource on the server
  delete        Delete resources by filenames, stdin, resources and names, or by resources and label selector

Deploy Commands:
  rollout       Manage the rollout of a resource
  scale         Set a new size for a Deployment, ReplicaSet or Replication Controller
  autoscale     Auto-scale a Deployment, ReplicaSet, StatefulSet, or ReplicationController

Cluster Management Commands:
  certificate   Modify certificate resources.
  cluster-info  Display cluster info
  top           Display Resource (CPU/Memory) usage.
  cordon        Mark node as unschedulable
  uncordon      Mark node as schedulable
  drain         Drain node in preparation for maintenance
  taint         Update the taints on one or more nodes

Troubleshooting and Debugging Commands:
  describe      Show details of a specific resource or group of resources
  logs          Print the logs for a container in a pod
  attach        Attach to a running container
  exec          Execute a command in a container
  port-forward  Forward one or more local ports to a pod
  proxy         Run a proxy to the Kubernetes API server
  cp            Copy files and directories to and from containers.
  auth          Inspect authorization
  debug         Create debugging sessions for troubleshooting workloads and nodes

Advanced Commands:
  diff          Diff live version against would-be applied version
  apply         Apply a configuration to a resource by filename or stdin
  patch         Update field(s) of a resource
  replace       Replace a resource by filename or stdin
  wait          Experimental: Wait for a specific condition on one or many resources.
  kustomize     Build a kustomization target from a directory or URL.

Settings Commands:
  label         Update the labels on a resource
  annotate      Update the annotations on a resource
  completion    Output shell completion code for the specified shell (bash or zsh)

Other Commands:
  api-resources Print the supported API resources on the server
  api-versions  Print the supported API versions on the server, in the form of "group/version"
  config        Modify kubeconfig files
  plugin        Provides utilities for interacting with plugins.
  version       Print the client and server version information

Usage:
  kubectl [flags] [options]

Use "kubectl <command> --help" for more information about a given command.
Use "kubectl options" for a list of global command-line options (applies to all commands).
Deploy the Kubernetes Dashboard
Deploy the Kubernetes Dashboard with the command:
sudo kubectl apply -f https://raw.githubusercontent.com/kubernetes/dashboard/v2.0.0/aio/deploy/recommended.yaml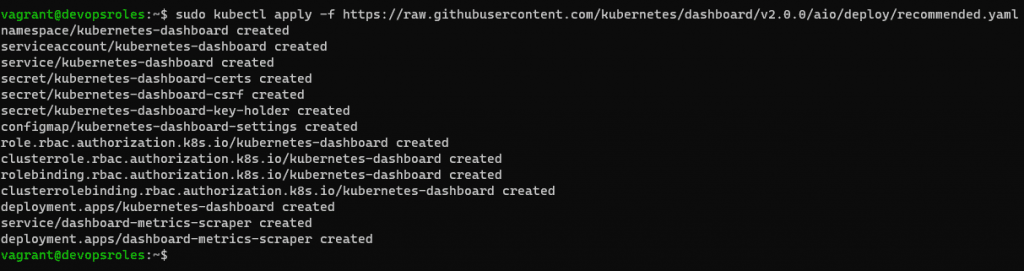
You need to deploy the dashboard, How to determine the IP address of the cluster uses the command below:
sudo kubectl get svc -n kubernetes-dashboardThe output terminal is as below:
vagrant@devopsroles:~$ sudo kubectl get svc -n kubernetes-dashboard
NAME                        TYPE        CLUSTER-IP      EXTERNAL-IP   PORT(S)    AGE
dashboard-metrics-scraper   ClusterIP   10.233.19.190   <none>        8000/TCP   64s
kubernetes-dashboard        ClusterIP   10.233.23.203   <none>        443/TCP    64s
You might want to expose the dashboard via NodePort instead of ClusterIP
sudo kubectl edit svc kubernetes-dashboard -o yaml -n kubernetes-dashboardThis will open the configure file in vi editors.
Before:
type: ClusterIP
After change it
type: NodePort
Next, you must run the kubectl proxy command as below:
sudo kubectl proxyWhile the proxy is running, open a web browser and point it to the IP address and port number listed in the results from the sudo kubectl get svc -n kubernetes-dashboard command.
vagrant@devopsroles:~$ sudo kubectl get svc -n kubernetes-dashboard
NAME                        TYPE        CLUSTER-IP      EXTERNAL-IP   PORT(S)         AGE
dashboard-metrics-scraper   ClusterIP   10.233.19.190   <none>        8000/TCP        47h
kubernetes-dashboard        NodePort    10.233.23.203   <none>        443:32469/TCP   47h
Open a web browser:
https://192.168.3.7:32469/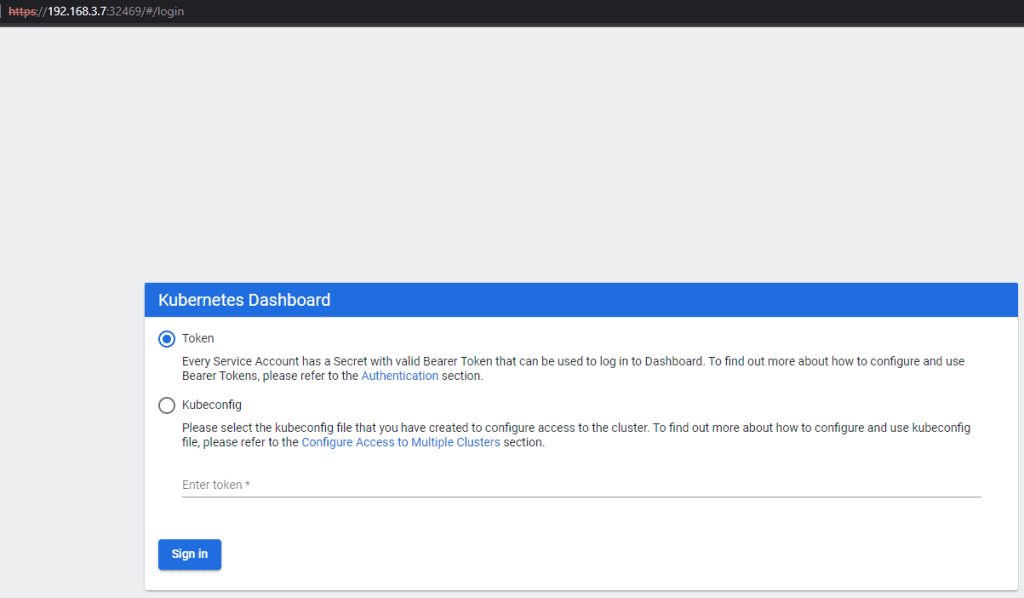
To log in to the dashboard. You need to create a ServiceAccount object and a ClusterRoleBinding object. Create the account with the name admin-user in the namespace kubernetes-dashboard
cat <<EOF | sudo kubectl apply -f -
apiVersion: v1
kind: ServiceAccount
metadata:
  name: admin-user
  namespace: kubernetes-dashboard
EOF
Create a ClusterRoleBinding object.
cat <<EOF | sudo kubectl apply -f -
apiVersion: rbac.authorization.k8s.io/v1
kind: ClusterRoleBinding
metadata:
  name: admin-user
roleRef:
  apiGroup: rbac.authorization.k8s.io
  kind: ClusterRole
  name: cluster-admin
subjects:
- kind: ServiceAccount
  name: admin-user
  namespace: kubernetes-dashboard
EOF
To retrieve that token with the command below:
sudo kubectl -n kubernetes-dashboard describe secret $(kubectl -n kubernetes-dashboard get secret | grep admin-user | awk '{print $1}')Expected output:

The result,
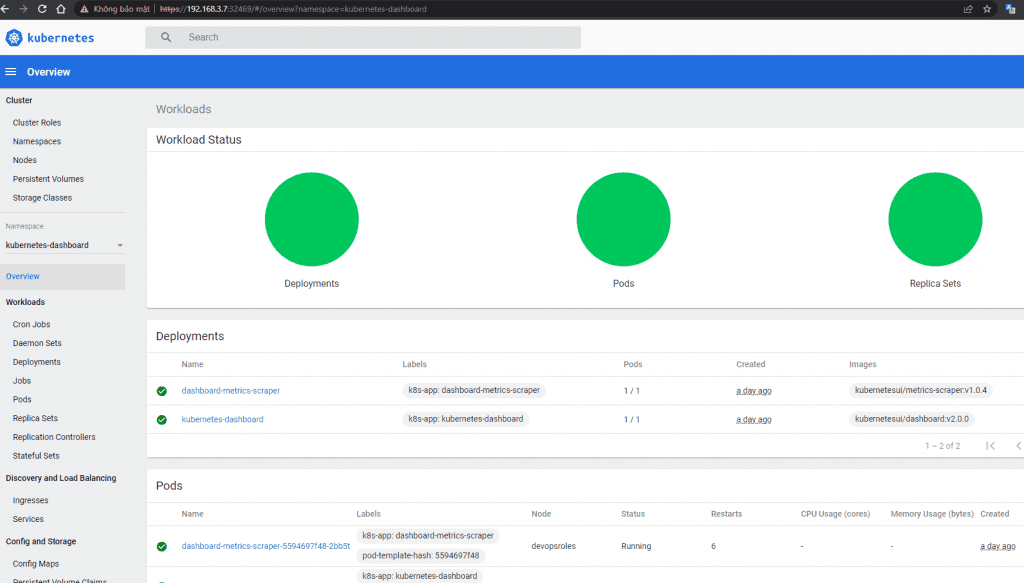
This isn’t production-ready, but it’s a great way to get up to speed with Kubernetes and even develop for the platform.
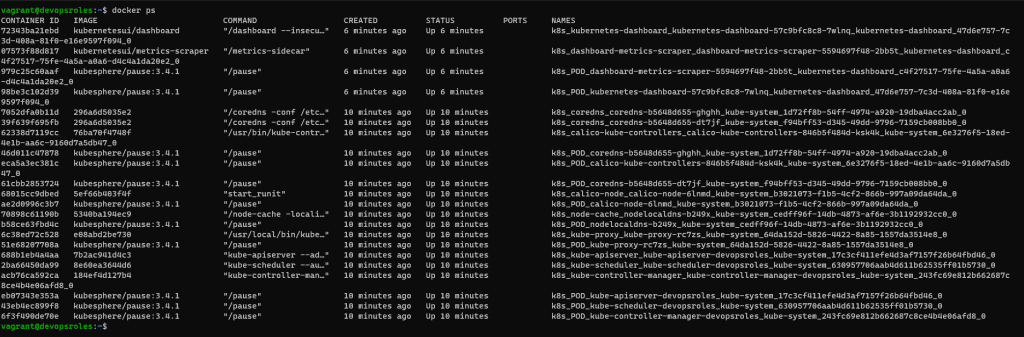
The result is Docker Kubernetes containers running Ubuntu Server. Install Kubernetes Cluster with KubeKey
Conclusions
You have to Install Kubernetes Cluster with KubeKey. I hope will this your helpful. Thank you for reading the DevopsRoles page!