Introduction
In the world of containerization, Docker has long been a go-to solution for developers and system administrators. However, as containerization technology has evolved, many are exploring alternative tools like Podman. If you’re a Windows user who has been relying on Docker Desktop for your container management needs, you may be wondering: What benefits does Podman offer, and is it worth switching?
In this article, we’ll take an in-depth look at switching from Docker Desktop to Podman Desktop on Windows, highlighting key reasons why you might consider making the switch, as well as the benefits that come with it.
Why Switch from Docker Desktop to Podman Desktop on Windows?
1. No Daemon Required: A Key Security Benefit
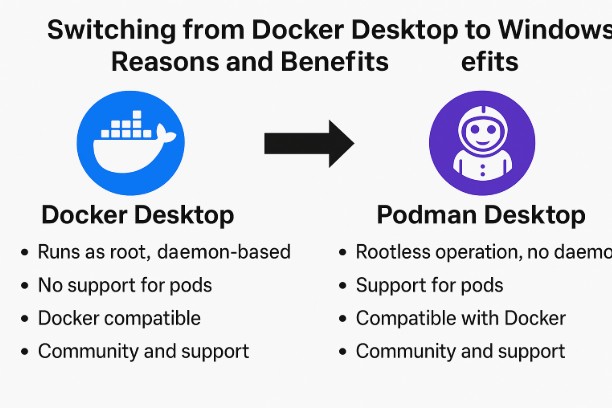
Docker Desktop operates with a central daemon process that runs as a root process in the background, which can be a security risk. In contrast, Podman is a daemon-less container engine, meaning it doesn’t require a root process to manage containers. This adds an additional layer of security, making Podman a more secure choice, especially for environments where minimal attack surfaces are a priority.
Key Security Advantages:
- No Root Daemon: Eliminates the risk of a single process with elevated privileges running continuously.
- Improved Isolation: Each container runs in its own process, improving separation between containers and the system.
- Rootless Containers: Podman allows users to run containers without requiring root access, which is ideal for non-root user environments.
2. Podman Supports Pod Architecture
One of the distinguishing features of Podman is its pod architecture, which enables users to group multiple containers together in a pod. This can be particularly useful when managing microservices or complex applications that require multiple containers to communicate with each other.
With Docker, the concept of pods is not native and typically requires more complex management with Docker Compose or Swarm. Podman simplifies this process and provides a more integrated experience.
3. Compatibility with Docker CLI
Podman is designed to be a drop-in replacement for Docker, meaning it supports Docker’s command-line interface (CLI). This allows Docker users to easily switch to Podman without needing to learn a completely new set of commands.
For example:
docker run -d -p 80:80 nginxCan be directly replaced with:
podman run -d -p 80:80 nginx
This seamless compatibility reduces the learning curve significantly for Docker users transitioning to Podman.
4. Lower Resource Usage
Docker Desktop, particularly on Windows, can be quite resource-intensive. It requires a virtual machine (VM) running Linux under the hood, which can consume a significant amount of CPU, RAM, and storage. Podman, on the other hand, does not require a VM and is lightweight, which can lead to improved performance, especially on systems with limited resources.
5. Better Integration with Systemd (Linux users)
Although this is less relevant for Windows users, Podman integrates better with systemd. For users who also work in Linux environments, Podman provides more native support for managing containers as systemd services, making it easier to run containers in the background and start them automatically when the system boots.
6. Open-Source and Community-Driven
Podman is part of the Red Hat family and is fully open-source, with an active and growing community of contributors. This means that users can expect regular updates, security patches, and contributions from both individuals and organizations. Unlike Docker, which is now owned by Mirantis, Podman offers a fully community-driven alternative with a transparent development process.
Benefits of Switching to Podman Desktop on Windows
1. Security and Isolation
As mentioned, the security benefits of Podman are substantial. With rootless containers, it minimizes potential risks and vulnerabilities, especially when running containers in non-privileged environments. This makes Podman a compelling choice for users who prioritize security in production and development settings.
2. No Virtual Machine Overhead
On Windows, Docker Desktop relies on a VM (usually via WSL2) to run Linux containers, which adds a layer of complexity and resource consumption. Podman eliminates the need for a VM, running directly on the Windows host through WSL (Windows Subsystem for Linux) or using Windows containers without the overhead.
3. Container Management with Pods
Podman’s pod concept allows developers to group containers together, simplifying management, especially for microservices-based applications. You can treat containers within a pod as a unit, which is especially useful for orchestrating groups of tightly coupled services that need to share networking namespaces.
4. Simple Installation and Setup
Setting up Podman on Windows is relatively straightforward. With the help of WSL2, users can get started with Podman without worrying about complex VM configurations. The installation process is simple and well-documented, making it a great option for developers looking for a hassle-free container management tool.
5. Fewer System Requirements
If you have a limited system configuration or work with lower-end hardware, Podman is an excellent choice. It is far less resource-intensive than Docker Desktop, especially since it does not require a full VM.
6. Docker-Style Experience
With full compatibility with Docker commands, Podman allows users to work in an environment that feels very similar to Docker. Developers familiar with Docker will feel at home when switching to Podman, without needing to adjust their workflow significantly.
How to Switch from Docker Desktop to Podman Desktop on Windows
Switching from Docker to Podman on Windows can be done quickly with a few steps:
Step 1: Install WSL2 (Windows Subsystem for Linux)
Podman relies on WSL2 for running Linux containers on Windows, so the first step is to ensure that WSL2 is installed on your system.
- Open PowerShell as an Administrator and run the following command:
wsl --install- This will install the WSL2 feature, and the required Linux kernel.
- After installation, set the default version of WSL to 2:
wsl --set-default-version 2
Step 2: Install Podman on WSL2
- Open a WSL2 terminal and update the system:
sudo apt-get update && sudo apt-get upgrade
- Install Podman:
sudo apt-get -y install podman
Step 3: Verify Podman Installation
After installation, you can verify Podman is installed by running:
podman --version
Step 4: Run Your First Container with Podman
Try running a container to verify everything is working:
podman run -d -p 8080:80 nginx
If the container starts successfully, you’ve made the switch to Podman!
FAQ: Frequently Asked Questions
1. Is Podman completely compatible with Docker?
Yes, Podman is designed to be fully compatible with Docker commands, making it easy for Docker users to switch over without significant adjustments. However, there may be some differences in advanced features and performance.
2. Can Podman be used on Windows?
Yes, Podman can be used on Windows via WSL2. This allows you to run Linux containers on Windows without requiring a virtual machine.
3. Do I need to uninstall Docker to use Podman?
No, you can run Docker and Podman side by side on your system. However, if you want to switch entirely to Podman, you can uninstall Docker Desktop to free up resources.
4. Can I use Podman for production workloads?
Yes, Podman is production-ready and can be used in production environments. It is a robust container engine with enterprise support and community-driven development.

Conclusion
Switching from Docker Desktop to Podman Desktop on Windows offers several key advantages, including enhanced security, improved resource management, and a seamless transition for Docker users. With its rootless container support, pod architecture, and lightweight design, Podman provides a compelling alternative to Docker, especially for those looking to optimize their container management process.
Whether you’re a developer, system administrator, or security-conscious user, Podman offers the flexibility and efficiency you’re looking for in a containerization solution. By making the switch today, you can take advantage of its powerful features and join the growing community of users who are opting for this next-generation container engine. Thank you for reading the DevopsRoles page!