In this article, we’ll learn about Amazon Elastic Compute Cloud (Amazon EC2) and Amazon Elastic Block Store (Amazon EBS). Now, let’s go to AWS Certified Solutions Architect Exercises.
Table of Contents
AWS Certified Solutions Architect Exercises
1. Today tasks
- Launch and Connect to a Linux Instance
- Launch a Windows Instance with Bootstrapping
- Launch a Spot Instance
- Access Metadata
- Create an Amazon EBS Volume and Show That It Remains After the Instance Is Terminated
- Take a Snapshot and Restore
2. Before you begin
- Puttygen.exe: Tool creating a .ppk file from a .pem file
- Command-line tool to SSH into the Linux instance.
3. Let do it
EXERCISE 1: Launch and Connect to a Linux Instance
In this exercise, you will launch a new Linux instance, log in with SSH, and install any security updates.
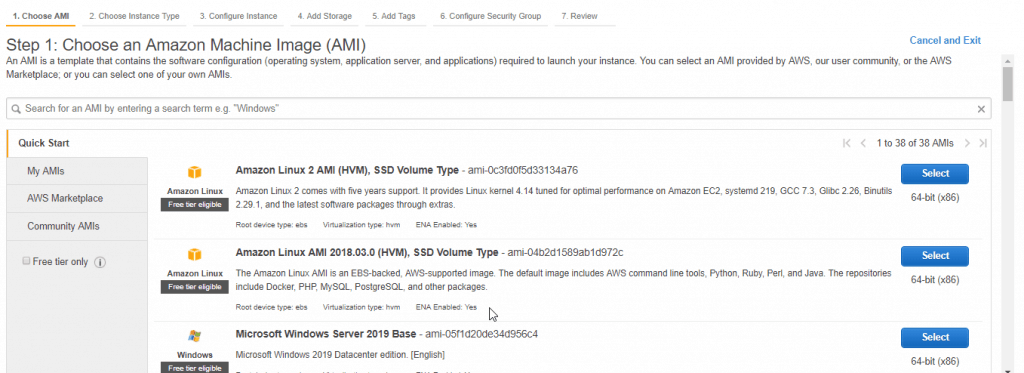
1. Launch an instance in the Amazon EC2 console.
2. Choose the Amazon Linux 2 AMI (HVM), SSD Volume Type – ami-0c3fd0f5d33134a76.
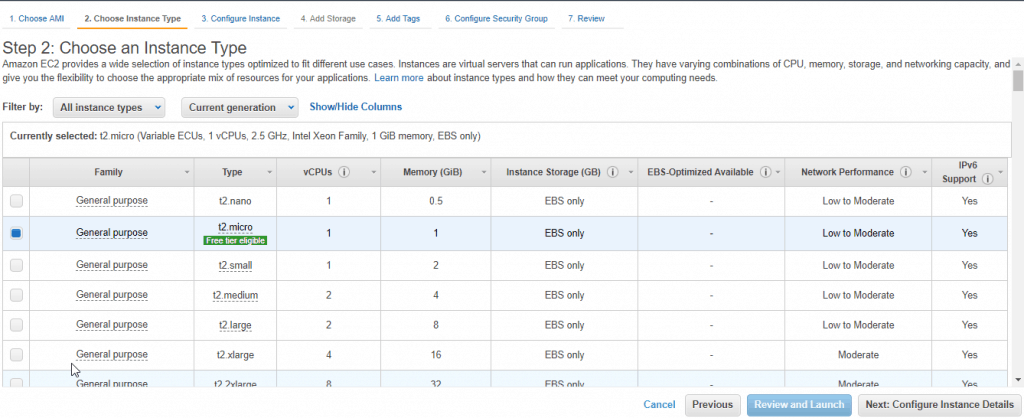
3. Choose the t2.micro instance type.
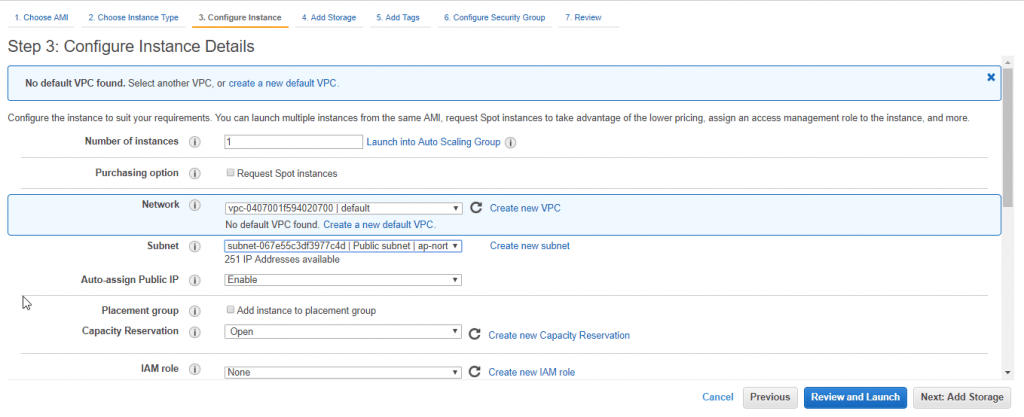
4. Configure Instance Details as below
- Network: Launch the instance in the default VPC.
- Subnet: Select a default subnet
- Auto-assign Public IP: Enable.
5. Add Storage setting default, click 「Next: Add tags」button, next screen, you click 「Add tag」button to add a tag to the instance
Example: add a tag with Key is Name, the value of Key: ec2-demo.
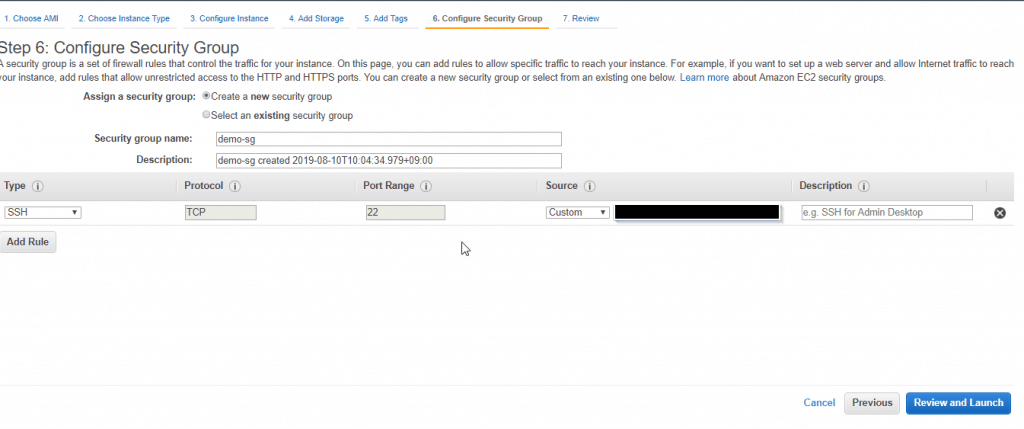
6. Create a new security group called demo-sg.
7. Add a rule to demo-sg :
7.1. Allowing SSH access from the IP address of your computer with: Source is My IP(to secure this way is recommended)
7.2. Allowing all IP access with Source is Custom, CidrIP:0.0.0.0/0.
8. Review and Launch the instance.
9. When prompted for a key pair, choose a key pair you already have or create a new one and download the private portion. Amazon generates a keyname.pem file, and you will need a keyname.ppk file to connect to the instance via SSH. Puttygen.exe is one utility that will create a .ppk file from a .pem file.
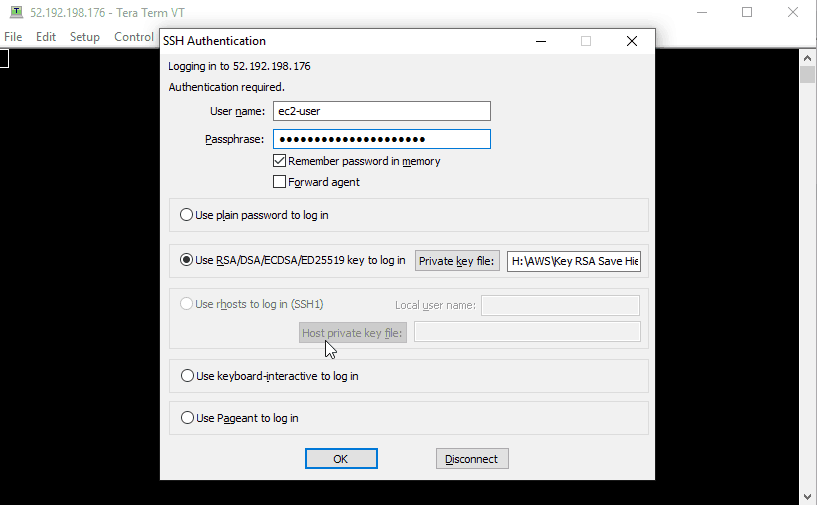
10. SSH into the instance using the IPv4 public IP address,
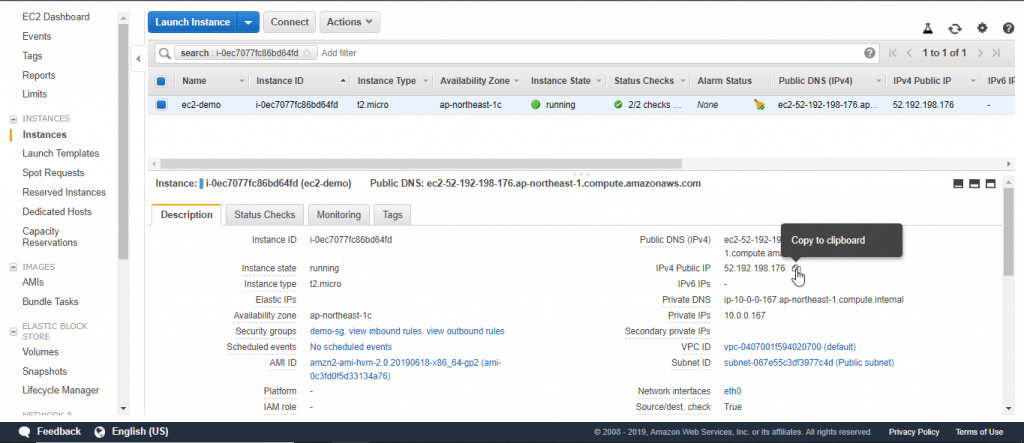
To SSH to EC2 created, you able to use tools such as Terraterm
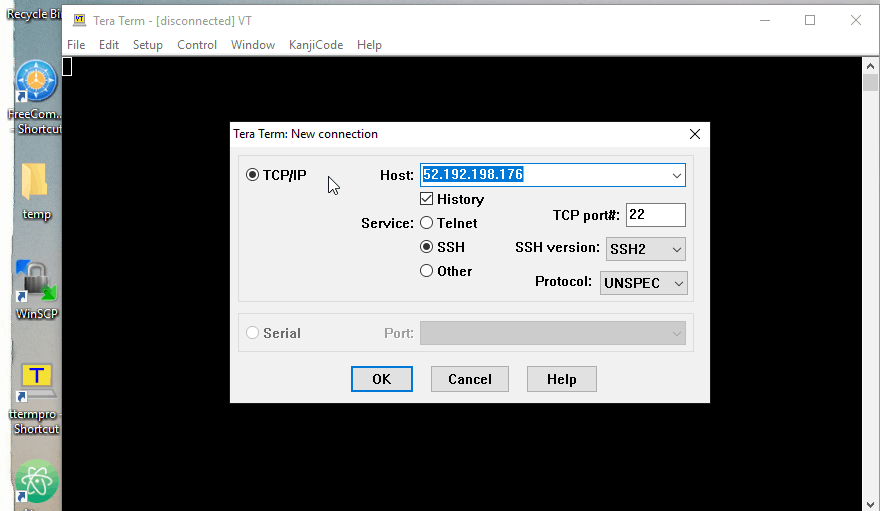
and the user name ec2-user, and the keyname.ppk file created at step 9.
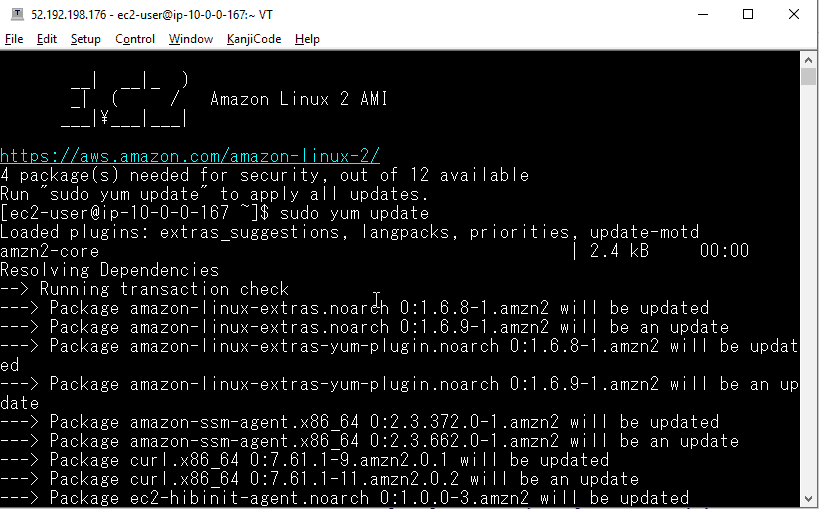
11. From the command-line prompt, run
sudo yum update
12. Close the SSH window and terminate the instance.
EXERCISE 2: Launch a Windows Instance with Bootstrapping
In this exercise, you will launch a Windows instance and specify a very simple bootstrap script. You will then confirm that the bootstrap script was executed on the instance.
1. Launch an instance in the Amazon EC2 console.
2. Choose the Microsoft Windows Server 2019 Base AMI.
3. Choose the t2.micro instance type.
4. Launch the instance in either the default VPC and default subnet, Auto-assign Public IP: Enable.
5. In the Advanced Details section, enter the following text as UserData:
<script>
md c:\temp
</script>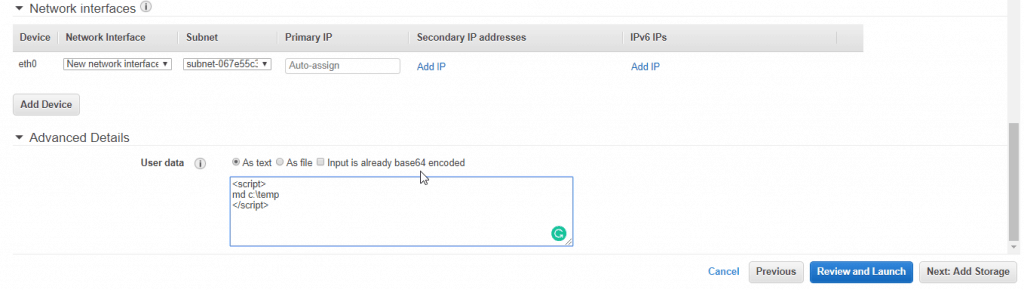
6. Add a tag to the instance of Key: Name, Value: EC2-Demo2
7. Use the demo-sg security group from Exercise 1.
8. Launch the instance.
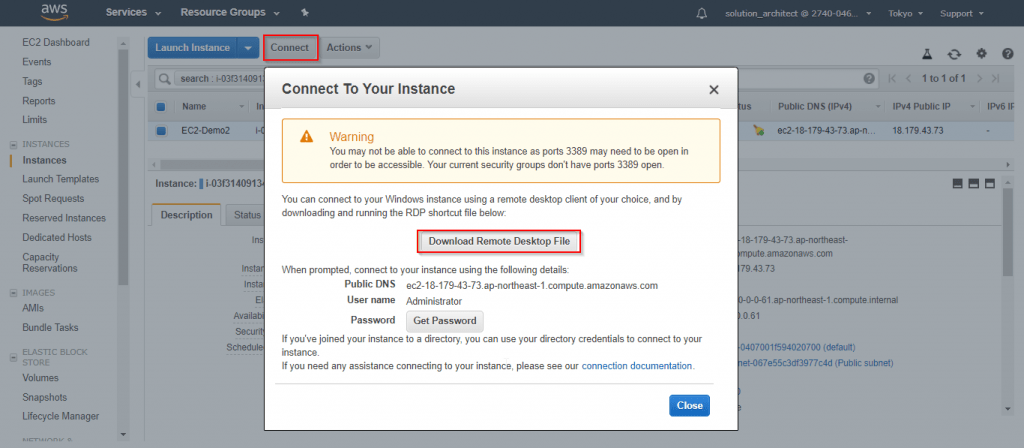
9. Use the key pair from Exercise 1.
10. On the Connect to Your Instance screen, decrypt the administrator password and then download the RDP file to attempt to connect to the instance. Your attempt should fail because the demo-sg security group does not allow RDP access.
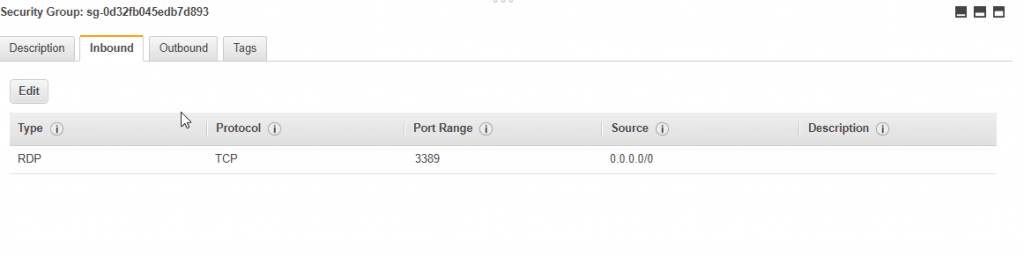
11. Open the demo-sg security group and add a rule that allows RDP access from your IP address.
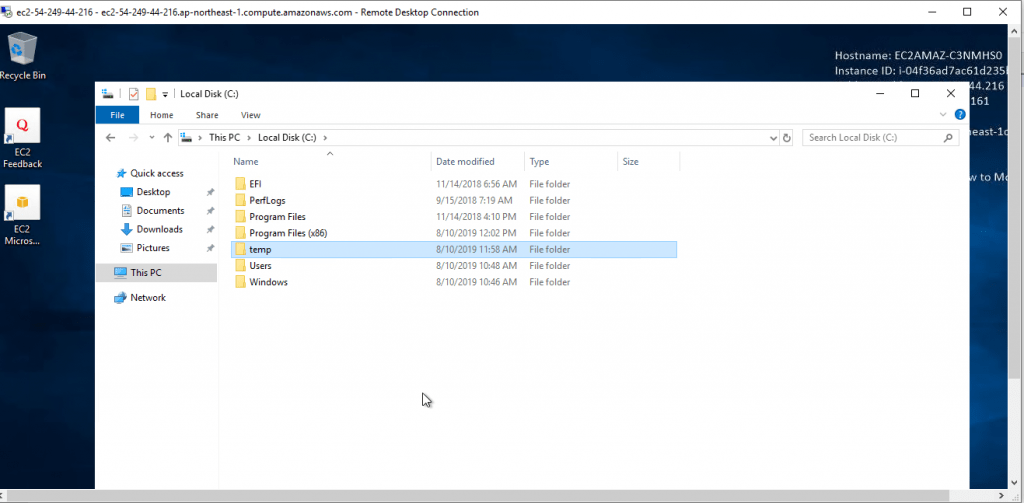
12. Attempt to access the instance via RDP again.
13. Once the RDP session is connected, open Windows Explorer and confirm that the c:\temp folder has been created.
14. End the RDP session and terminate the instance.
EXERCISE 3: Launch a Spot Instance
In this exercise, you will create a Spot Instance.
1. Launch an instance in the Amazon EC2 console.
2. Choose the Amazon Linux AMI.
3. Choose the instance type.
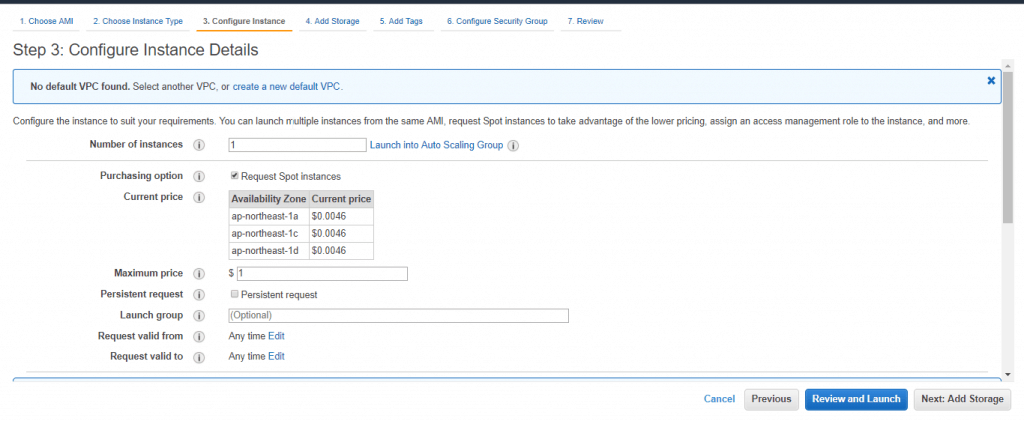
4. On the Configure Instance page, request a Spot Instance.
5. Launch the instance in either the default VPC and default subnet, Auto-assign Public IP: Enable.
6. Request a Spot Instance and enter a bid a few cents above the recorded Spot price.
7. Finish launching the instance.
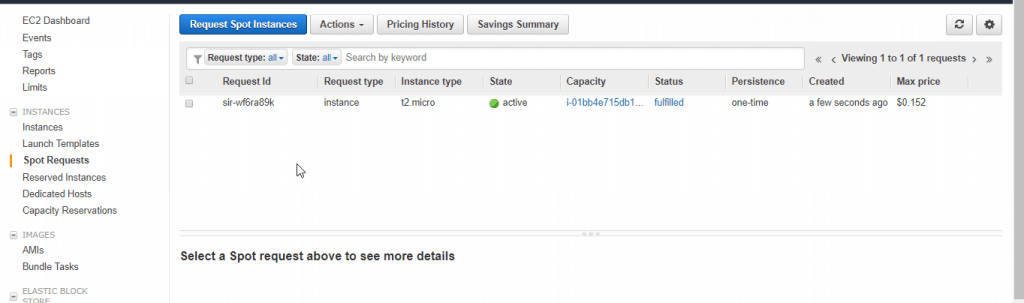
8. Go to the Spot Request page. Watch your request.
9. Find the instance on the Instances page of the Amazon EC2 console.
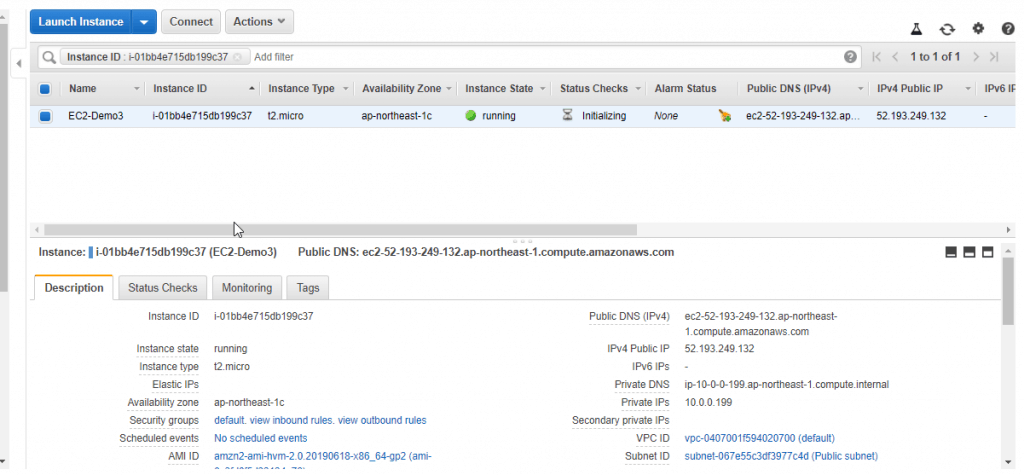
10. Once the instance is running, terminate it.
EXERCISE 4: Access Metadata
In this exercise, you will access the instance metadata from the OS.
1. Execute steps as in EXERCISE 1.
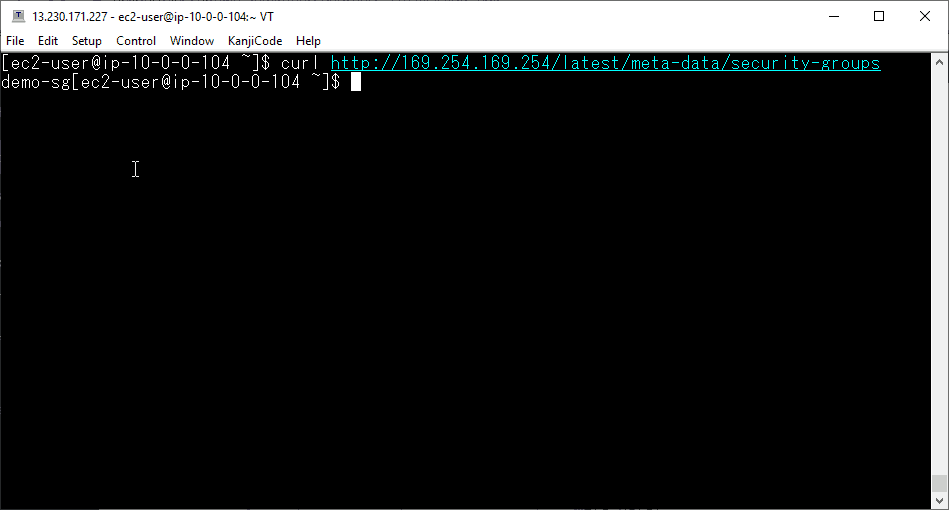
2. At the Linux command prompt, retrieve a list of the available metadata by typing:curl http://169.254.169.254/latest/meta-data/

3. To see a value, add the name to the end of the URL. For example, to see the security groups, type: curl http://169.254.169.254/latest/meta-data/security-groups
4. Close the SSH window and terminate the instance.
EXERCISE 5: Create an Amazon EBS Volume and Show That It Remains After the Instance Is Terminated
In this exercise, you will see how an Amazon EBS volume persists beyond the life of an instance.
1. Execute steps as in EXERCISE 1.
2. However, in step 5 「Add Storage 」, add a second Amazon EBS volume of size 50 GB. Note that the Root Volume is set to Delete on Termination.
3. Launch the instance, has two Amazon EBS volumes on the Amazon EBS console, Name them both 「EC2-Demo5」.
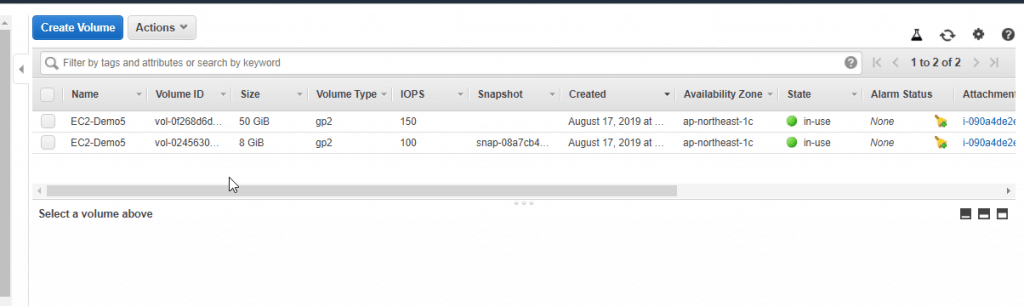
4. Terminate the instance.
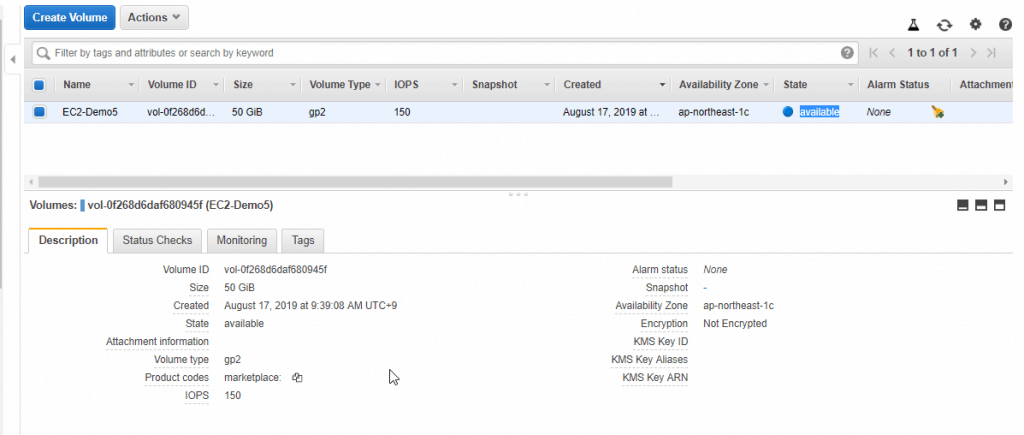
5. Check that the boot drive is destroyed, but the additional Amazon EBS volume remains and now says Available. Do not delete the Available volume.
EXERCISE 6: Take a Snapshot and Restore
This exercise guides you through taking a snapshot and restoring it in three different ways.
1. Find the volume you created in Exercise 5 in the Amazon EBS Menu.
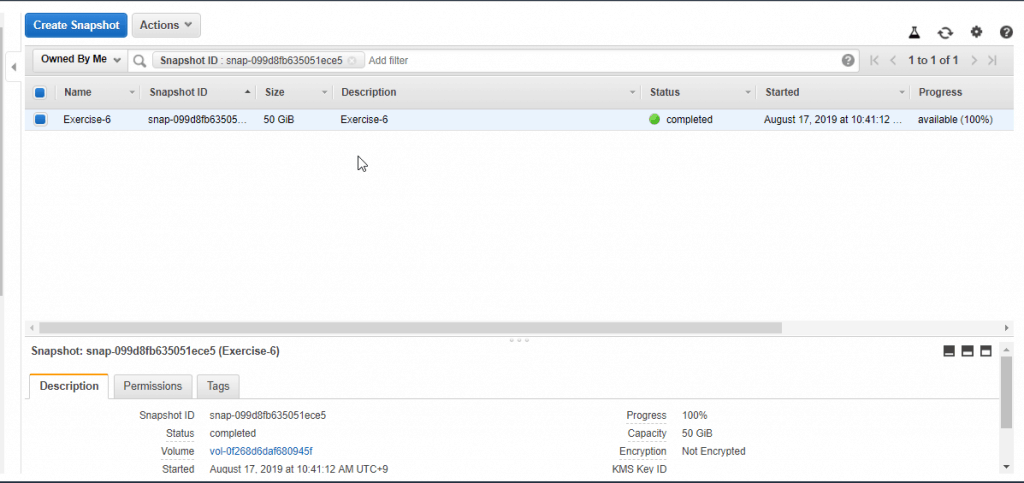
2. Take a snapshot of that volume. Tag with Name the snapshot Exercise-6, wait for the snapshot to be completed.
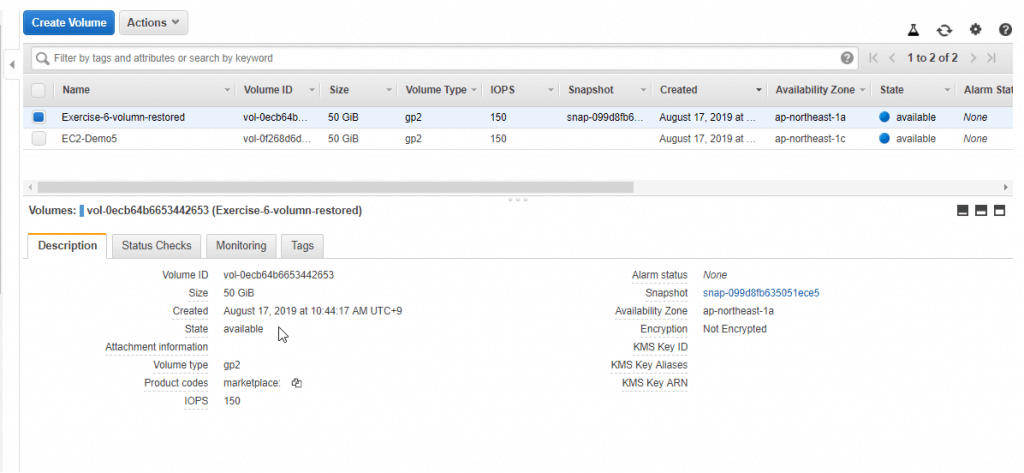
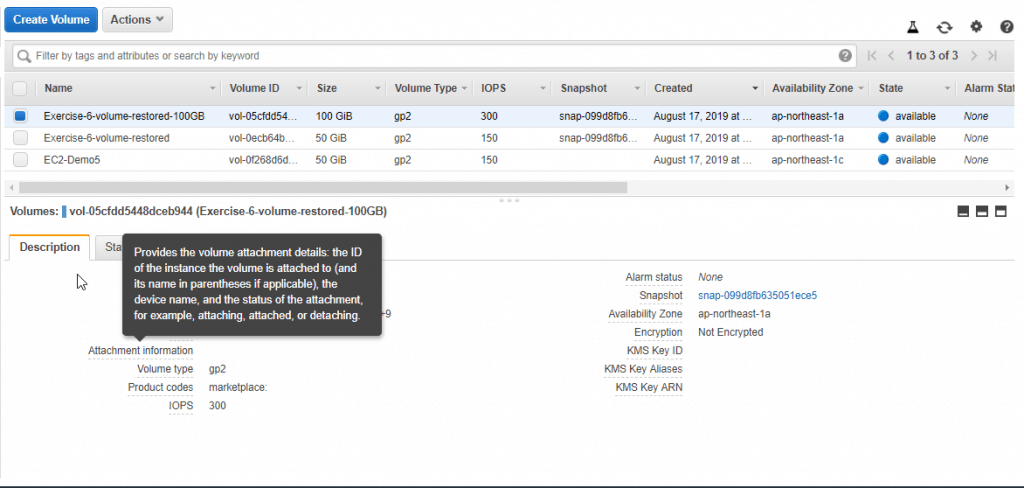
3. Method 1 to restore EBS volume: On the Snapshot console, choose the new snapshot created at step2 and select Create Volume, create the volume with all the defaults, tag with Name is 「Exercise-6-volumn-restored」
4. Method 2 to restore EBS volume: Locate the snapshot again, choose to Create Volume, setting the size of the new volume to 100 GB (restoring the snapshot to a new, larger volume is how you address the problem of increasing the size of an existing volume). Tag with Name is 「Exercise-6-volume-restored-100GB」
5. Method 3 to restore EBS volume: Locate the snapshot again and choose Copy. Copy the snapshot to another region.
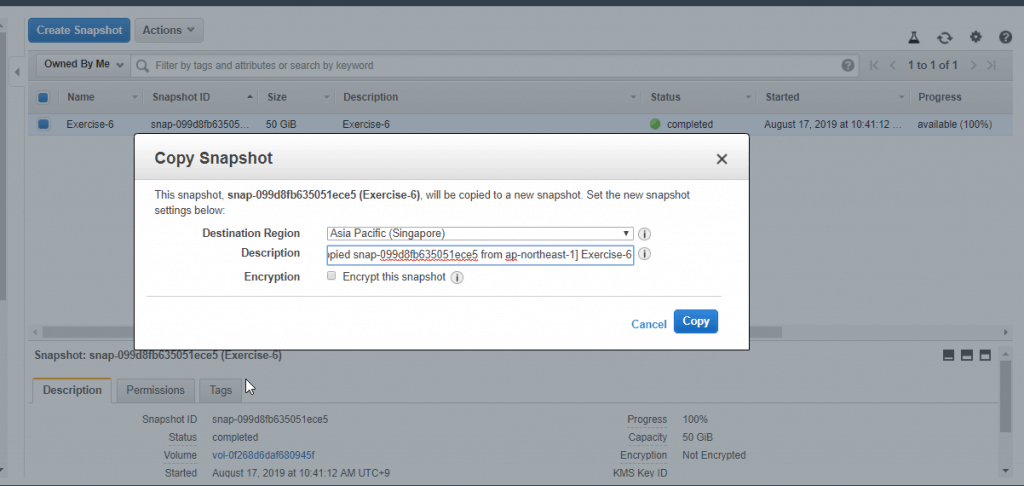
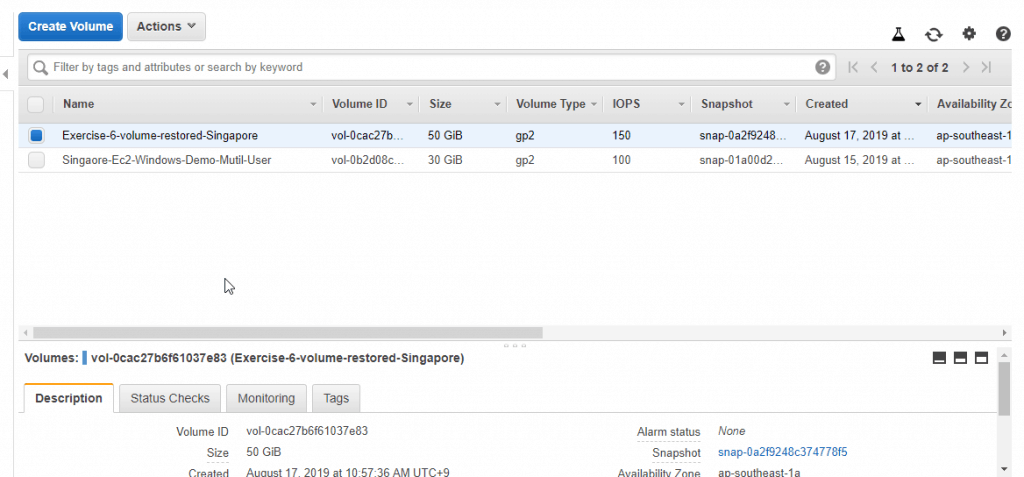
Go to the other region and wait for the snapshot to become available. Create a volume from the snapshot in the new region.
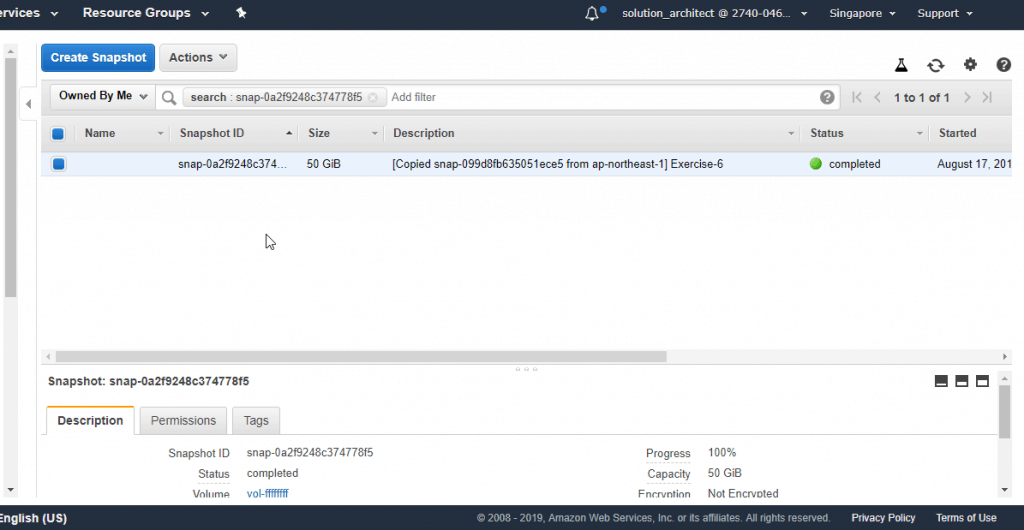
This is how you share an Amazon EBS volume between regions; that is, by taking a snapshot and copying the snapshot.
5. Delete all four volumes.
AWS Certified Solutions Architect Exercises- part 2 Amazon EC2 and Amazon EBS. I hope will this your helpful. Thank you for reading the DevopsRoles page!