Introduction: If you want to deploy OpenClaw with Docker in 2026, you are in exactly the right place.
Trust me, I have been there. You stare at a terminal screen for hours.
You fight dependency hell, version conflicts, and broken Python environments. It is exhausting.
That is exactly why I stopped doing bare-metal installations years ago.
Today, containerization is the only sane way to manage modern web applications and AI tools.
In this guide, I will show you my exact, battle-tested process.
We are going to skip the fluff. We will get your server up, secured, and running flawlessly.
Table of Contents
- 1 Why You Should Deploy OpenClaw with Docker
- 2 Prerequisites to Deploy OpenClaw with Docker
- 3 Step 1: Preparing Your Server Environment
- 4 Step 2: Installing the Docker Engine
- 5 Step 3: Creating the Deployment Directory
- 6 Step 4: Crafting the Compose File to Deploy OpenClaw with Docker
- 7 Step 5: Managing Environment Variables
- 8 Step 6: Executing the Command to Deploy OpenClaw with Docker
- 9 Step 7: Adding a Reverse Proxy for HTTPS (Crucial)
- 10 Troubleshooting When You Deploy OpenClaw with Docker
- 11 FAQ: Deploy OpenClaw with Docker
Why You Should Deploy OpenClaw with Docker
Let me share a quick war story from a few years back.
I tried setting up a similar application directly on an Ubuntu VPS.
Three days later, my system libraries were completely corrupted. I had to nuke the server and start over.
When you choose to deploy OpenClaw with Docker, you eliminate this risk entirely.
Containers isolate the application. They package the code, runtime, and system tools together.
It works on my machine. It works on your machine. It works everywhere.
Need to migrate to a new server? Just copy your configuration files and spin it up.
It really is that simple. So, why does this matter for your specific project?
Because your time is incredibly valuable. You should be using the tool, not fixing the tool.
Prerequisites to Deploy OpenClaw with Docker
Before we touch a single line of code, let’s get our house in order.
You cannot build a skyscraper on a weak foundation.
Here is exactly what you need to successfully execute this tutorial.
- A Linux Server: Ubuntu 24.04 LTS or Debian 12 is highly recommended.
- Root Access: Or a user with active sudo privileges.
- Domain Name: Pointed at your server’s IP address (A Record).
- Basic Terminal Skills: You need to know how to copy, paste, and edit files.
For your server, a machine with at least 4GB of RAM and 2 CPU cores is the sweet spot.
If you skimp on RAM, the installation might fail silently. Do not cheap out here.
Let’s move on to the actual setup.
Step 1: Preparing Your Server Environment
First, log into your server via SSH.
We need to make sure every existing package is completely up to date.
Run the following command to refresh your package indexes.
sudo apt update && sudo apt upgrade -y
Wait for the process to finish. It might take a minute or two.
Once updated, it is good practice to install a few essential utilities.
Things like curl, git, and nano are indispensable for managing servers.
sudo apt install curl git nano software-properties-common -y
Your server is now primed and ready for the engine.
Step 2: Installing the Docker Engine
You cannot deploy OpenClaw with Docker without the engine itself.
Do not use the default Ubuntu repositories for this step.
They are almost always outdated. We want the official, latest release.
Check the official Docker documentation if you want the long version.
Otherwise, simply execute this official installation script.
curl -fsSL https://get.docker.com -o get-docker.sh
sudo sh get-docker.sh
This script handles everything. It adds the GPG keys and sets up the repository.
Next, we need to ensure the service is enabled to start on boot.
sudo systemctl enable docker
sudo systemctl start docker
Verify the installation by checking the installed version.
docker --version
If you see a version number, you are good to go.
Step 3: Creating the Deployment Directory
Organization is critical when managing multiple containers.
I always create a dedicated directory for each specific application.
Let’s create a folder specifically for this deployment.
mkdir -p ~/openclaw-deployment
cd ~/openclaw-deployment
This folder will house our configuration files and persistent data volumes.
Keeping everything in one place makes backups incredibly straightforward.
You just tarball the directory and ship it to offsite storage.
Step 4: Crafting the Compose File to Deploy OpenClaw with Docker
This is the magic file. The blueprint for our entire stack.
We are going to use Docker Compose to define our services, networks, and volumes.
Open your favorite text editor. I prefer nano for quick edits.
nano docker-compose.yml
Now, carefully paste the following configuration into the file.
Pay strict attention to the indentation. YAML files are notoriously picky about spaces.
version: '3.8'

services:
  openclaw-app:
    image: openclaw/core:latest
    container_name: openclaw_main
    restart: unless-stopped
    ports:
      - "8080:8080"
    environment:
      - NODE_ENV=production
      - DATABASE_URL=postgres://dbuser:dbpass@postgres:5432/openclawdb
      - SECRET_KEY=${APP_SECRET}
    volumes:
      - openclaw_data:/app/data
    depends_on:
      - postgres

  postgres:
    image: postgres:15-alpine
    container_name: openclaw_db
    restart: unless-stopped
    environment:
      - POSTGRES_USER=dbuser
      - POSTGRES_PASSWORD=dbpass
      - POSTGRES_DB=openclawdb
    volumes:
      - pg_data:/var/lib/postgresql/data

volumes:
  openclaw_data:
  pg_data:
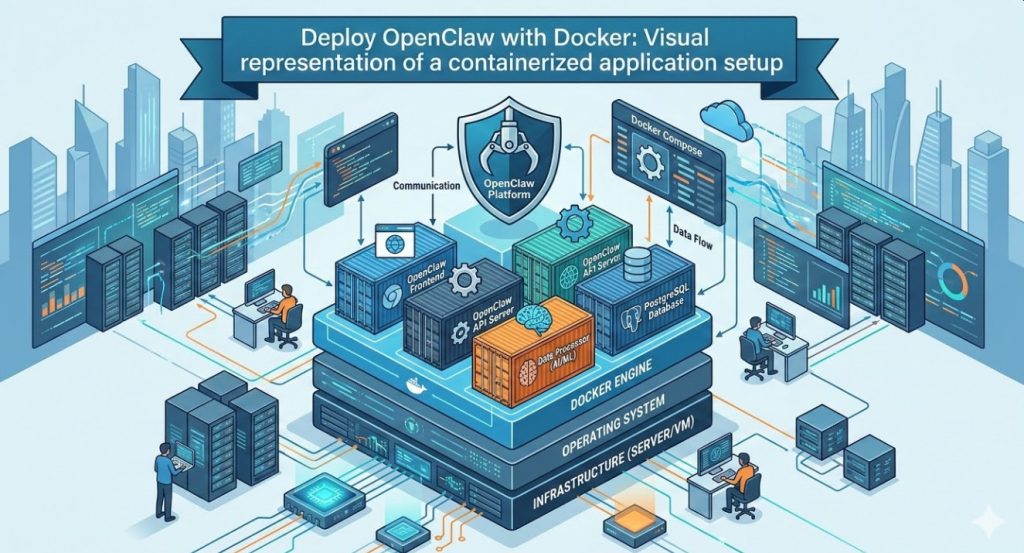
Let’s break down exactly what is happening here.
We are defining two separate services: the main application and a PostgreSQL database.
The depends_on directive ensures the database boots up before the app.
We are also mapping port 8080 from the container to port 8080 on your host machine.
Save the file and exit the editor (Ctrl+X, then Y, then Enter).
Step 5: Managing Environment Variables
You should never hardcode sensitive secrets directly into your configuration files.
That is a massive security vulnerability. Hackers scan GitHub for these mistakes daily.
Instead, we use a dedicated `.env` file to manage secrets.
Create the file in the same directory as your compose file.
nano .env
Add your secure environment variables here.
APP_SECRET=generate_a_very_long_random_string_here_2026
Docker Compose will automatically read this file when spinning up the stack.
This keeps your primary configuration clean and secure.
Make sure to restrict permissions on this file so other users cannot read it.
Step 6: Executing the Command to Deploy OpenClaw with Docker
The moment of truth has arrived.
We are finally ready to deploy OpenClaw with Docker and bring the stack online.
Run the following command to pull the images and start the containers in the background.
docker compose up -d
The -d flag stands for “detached mode”.
This means the containers will continue to run even after you close your SSH session.
You will see Docker pulling the necessary image layers from the registry.
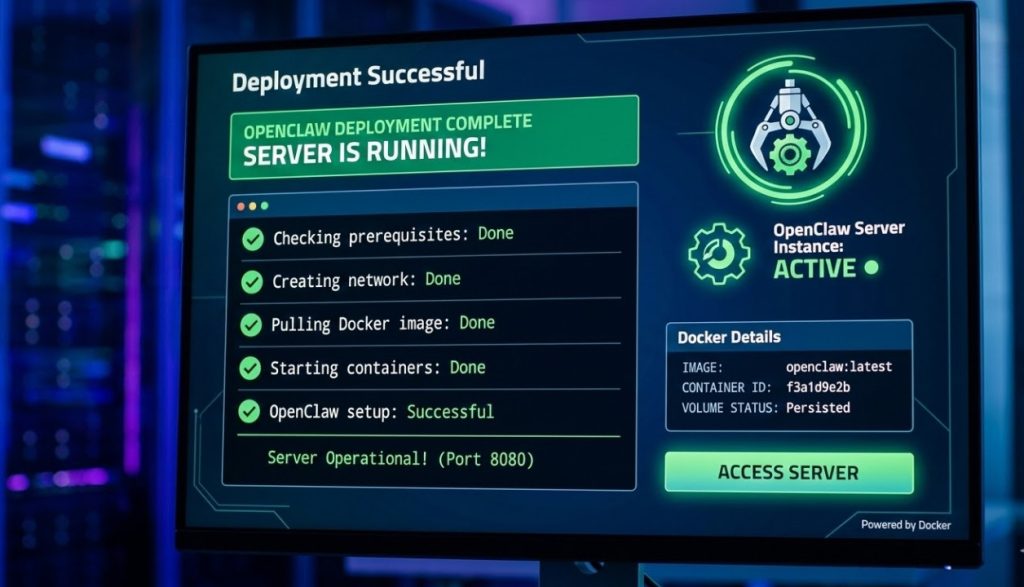
Once it finishes, check the status of your newly created containers.
docker compose ps
Both containers should show a status of “Up”.
If they do, congratulations! You have successfully deployed the application.
You can now access it by navigating to http://YOUR_SERVER_IP:8080 in your browser.
Step 7: Adding a Reverse Proxy for HTTPS (Crucial)
Stop right there. Do not share that IP address with anyone yet.
Running web applications over plain HTTP in 2026 is completely unacceptable.
You absolutely must secure your traffic with an SSL certificate.
I highly recommend using Nginx Proxy Manager or Traefik.
For a detailed guide on setting up routing, see our post on [Internal Link: Securing Docker Containers with Nginx].
A reverse proxy sits in front of your containers and handles the SSL encryption.
It acts as a traffic cop, directing visitors to the correct internal port.
You can get a free, auto-renewing SSL certificate from Let’s Encrypt.
Never skip this step if your application handles any sensitive data or passwords.
Troubleshooting When You Deploy OpenClaw with Docker
Sometimes, things just do not go according to plan.
Here are the most common issues I see when people try to deploy OpenClaw with Docker.
Issue 1: Container Keeps Restarting
If your container is stuck in a crash loop, you need to check the logs.
Run this command to see what the application is complaining about.
docker compose logs -f openclaw-app
Usually, this points to a bad database connection string or a missing environment variable.
Issue 2: Port Already in Use
If Docker throws a “bind: address already in use” error, port 8080 is taken.
Another service on your host machine is squatting on that port.
Simply edit your `docker-compose.yml` and change the mapping (e.g., `”8081:8080″`).
Issue 3: Out of Memory Kills
If the process randomly dies without an error log, your server likely ran out of RAM.
Check your system’s memory usage using the `htop` command.
You may need to upgrade your VPS tier or configure a swap file.
For more obscure errors, always consult the recent community discussions and updates.
FAQ: Deploy OpenClaw with Docker
- Is Docker safe for production environments?
Yes, absolutely. Most of the modern internet runs on containerized infrastructure. It provides excellent isolation. - How do I update the application later?
Simply run `docker compose pull` followed by `docker compose up -d`. Docker will recreate the container with the latest image. - Will I lose my data when updating?
No. Because we mapped external volumes (`openclaw_data` and `pg_data`), your databases and files persist across container rebuilds. - Can I run this on a Raspberry Pi?
Yes, provided the developers have released an ARM64-compatible image. Check their Docker Hub repository first.
Conclusion: You did it. You pushed through the technical jargon and built something solid.
When you take the time to deploy OpenClaw with Docker properly, you save yourself endless future headaches.
You now have an isolated, scalable, and easily maintainable stack.
Remember to keep your host OS updated and back up those mounted volume directories regularly.
Got questions or hit a weird error? Drop a comment below, and let’s figure it out together. Thank you for reading the DevopsRoles page!