In modern cloud development, speed and reliability are paramount. Manually deploying serverless functions is a recipe for inconsistency and human error. This is where a robust CI/CD pipeline becomes essential. By integrating AWS Lambda GitHub Actions, you can create a seamless, automated workflow that builds, tests, and deploys your serverless code every time you push to your repository. This guide will walk you through every step of building a production-ready serverless deployment pipeline, transforming your development process from a manual chore into an automated, efficient system.
Table of Contents
- 1 Why Automate Lambda Deployments with GitHub Actions?
- 2 Prerequisites for Integrating AWS Lambda GitHub Actions
- 3 Step-by-Step Guide to Automating Your AWS Lambda GitHub Actions Pipeline
- 4 Deep Dive into the GitHub Actions Workflow
- 5 Best Practices and Advanced Techniques
- 6 Frequently Asked Questions
- 7 Conclusion
Why Automate Lambda Deployments with GitHub Actions?
Before diving into the technical details, let’s understand the value proposition. Automating your Lambda deployments isn’t just a “nice-to-have”; it’s a cornerstone of modern DevOps and Site Reliability Engineering (SRE) practices.
- Consistency: Automation eliminates the “it worked on my machine” problem. Every deployment follows the exact same process, reducing environment-specific bugs.
- Speed & Agility: Push a commit and watch it go live in minutes. This rapid feedback loop allows your team to iterate faster and deliver value to users more quickly.
- Reduced Risk: Manual processes are prone to error. An automated pipeline can include testing and validation steps, catching bugs before they ever reach production.
- Developer Focus: By abstracting away the complexities of deployment, developers can focus on what they do best: writing code. The CI/CD for Lambda becomes a transparent part of the development lifecycle.
Prerequisites for Integrating AWS Lambda GitHub Actions
To follow this guide, you’ll need a few things set up. Ensure you have the following before you begin:
- An AWS Account: You’ll need an active AWS account with permissions to create IAM roles and Lambda functions.
- A GitHub Account: Your code will be hosted on GitHub, and we’ll use GitHub Actions for our automation.
- A Lambda Function: Have a simple Lambda function ready. We’ll provide an example below. If you’re new, you can create one in the AWS console to start.
- Basic Git Knowledge: You should be comfortable with basic Git commands like
git clone,git add,git commit, andgit push.
Step-by-Step Guide to Automating Your AWS Lambda GitHub Actions Pipeline
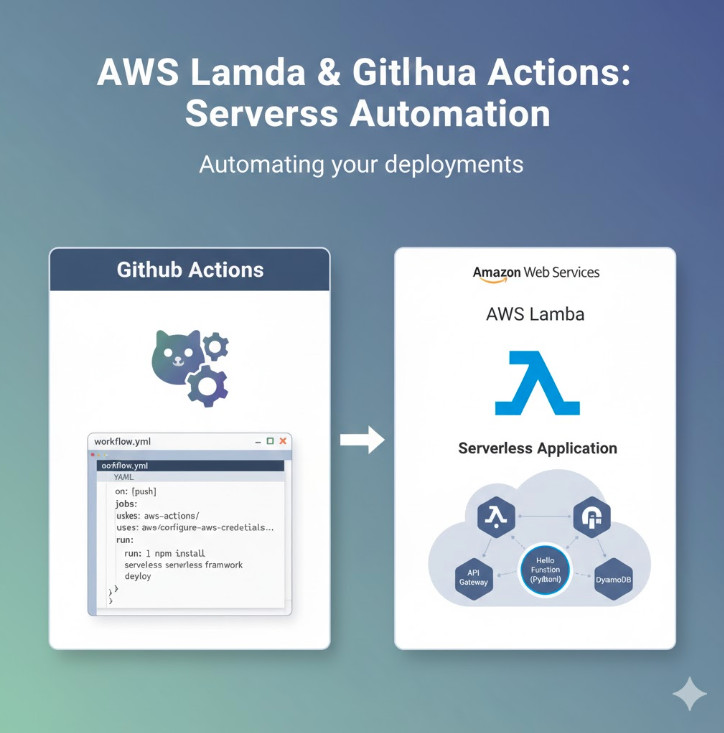
Let’s build our automated deployment pipeline from the ground up. We will use the modern, secure approach of OpenID Connect (OIDC) to grant GitHub Actions access to AWS, avoiding the need for long-lived static access keys.
Step 1: Setting Up Your Lambda Function Code
First, let’s create a simple Node.js Lambda function. Create a new directory for your project and add the following files.
Directory Structure:
my-lambda-project/
├── .github/
│   └── workflows/
│       └── deploy.yml
├── index.js
└── package.json
index.js:
exports.handler = async (event) => {
    console.log("Event: ", event);
    const response = {
        statusCode: 200,
        body: JSON.stringify('Hello from Lambda deployed via GitHub Actions!'),
    };
    return response;
};
package.json:
{
  "name": "my-lambda-project",
  "version": "1.0.0",
  "description": "A simple Lambda function",
  "main": "index.js",
  "scripts": {
    "test": "echo \"Error: no test specified\" && exit 1"
  },
  "author": "",
  "license": "ISC",
  "dependencies": {}
}
Initialize a Git repository in this directory and push it to a new repository on GitHub.
Step 2: Configuring IAM Roles for Secure Access (OIDC)
This is the most critical step for security. We will configure an IAM OIDC identity provider that allows GitHub Actions to assume a role in your AWS account temporarily.
A. Create the OIDC Identity Provider in AWS IAM
- Navigate to the IAM service in your AWS Console.
- In the left pane, click on Identity providers and then Add provider.
- Select OpenID Connect.
- For the Provider URL, enter
https://token.actions.githubusercontent.com. - Click Get thumbprint to verify the server certificate.
- For the Audience, enter
sts.amazonaws.com. - Click Add provider.
B. Create the IAM Role for GitHub Actions
- In IAM, go to Roles and click Create role.
- For the trusted entity type, select Web identity.
- Choose the identity provider you just created (
token.actions.githubusercontent.com). - Select
sts.amazonaws.comfor the Audience. - Optionally, you can restrict this role to a specific GitHub repository. Add a condition:
- Token component:
sub(subject) - Operator:
String like - Value:
repo:YOUR_GITHUB_USERNAME/YOUR_REPO_NAME:*(e.g.,repo:my-org/my-lambda-project:*)
- Token component:
- Click Next.
- On the permissions page, create a new policy. Click Create policy, switch to the JSON editor, and paste the following. This policy grants the minimum required permissions to update a Lambda function’s code. Replace
YOUR_FUNCTION_NAMEand the AWS account details.
{
    "Version": "2012-10-17",
    "Statement": [
        {
            "Sid": "AllowLambdaCodeUpdate",
            "Effect": "Allow",
            "Action": "lambda:UpdateFunctionCode",
            "Resource": "arn:aws:lambda:us-east-1:123456789012:function:YOUR_FUNCTION_NAME"
        }
    ]
}
- Name the policy (e.g.,
GitHubActionsLambdaDeployPolicy) and attach it to your role. - Finally, give your role a name (e.g.,
GitHubActionsLambdaDeployRole) and create it. - Once created, copy the ARN of this role. You’ll need it in the next step.
Step 3: Storing AWS Credentials Securely in GitHub
We need to provide the Role ARN to our GitHub workflow. The best practice is to use GitHub’s encrypted secrets.
- Go to your repository on GitHub and click on Settings > Secrets and variables > Actions.
- Click New repository secret.
- Name the secret
AWS_ROLE_TO_ASSUME. - Paste the IAM Role ARN you copied in the previous step into the Value field.
- Click Add secret.
Step 4: Crafting the GitHub Actions Workflow File
Now, we’ll create the YAML file that defines our CI/CD pipeline. Create the file .github/workflows/deploy.yml in your project.
name: Deploy Lambda Function

# Trigger the workflow on pushes to the main branch
on:
  push:
    branches:
      - main

jobs:
  deploy:
    runs-on: ubuntu-latest

    # These permissions are needed to authenticate with AWS via OIDC
    permissions:
      id-token: write
      contents: read

    steps:
      - name: Checkout repository
        uses: actions/checkout@v4

      - name: Configure AWS Credentials
        uses: aws-actions/configure-aws-credentials@v4
        with:
          role-to-assume: ${{ secrets.AWS_ROLE_TO_ASSUME }}
          aws-region: us-east-1 # Change to your desired AWS region

      - name: Setup Node.js
        uses: actions/setup-node@v4
        with:
          node-version: '18'

      - name: Install dependencies
        run: npm install

      - name: Create ZIP deployment package
        run: zip -r deployment-package.zip . -x ".git/*" ".github/*"

      - name: Deploy to AWS Lambda
        run: |
          aws lambda update-function-code \
            --function-name YOUR_FUNCTION_NAME \
            --zip-file fileb://deployment-package.zip
Make sure to replace YOUR_FUNCTION_NAME with the actual name of your Lambda function in AWS and update the aws-region if necessary.
Deep Dive into the GitHub Actions Workflow
Let’s break down the key sections of our deploy.yml file to understand how this serverless deployment pipeline works.
Triggering the Workflow
The on key defines what events trigger the workflow. Here, we’ve configured it to run automatically whenever code is pushed to the main branch.
on:
  push:
    branches:
      - main
Configuring AWS Credentials
This is the heart of our secure connection. The aws-actions/configure-aws-credentials action is the official action from AWS for this purpose. It handles the OIDC handshake behind the scenes. It requests a JSON Web Token (JWT) from GitHub, presents it to AWS, and uses the role specified in our AWS_ROLE_TO_ASSUME secret to get temporary credentials. These credentials are then available to subsequent steps in the job.
- name: Configure AWS Credentials
  uses: aws-actions/configure-aws-credentials@v4
  with:
    role-to-assume: ${{ secrets.AWS_ROLE_TO_ASSUME }}
    aws-region: us-east-1
Building and Packaging the Lambda Function
AWS Lambda requires a ZIP file for deployment. These steps ensure our code and its dependencies are properly packaged.
- Install dependencies: The
npm installcommand reads yourpackage.jsonfile and installs the required libraries into thenode_modulesdirectory. - Create ZIP package: The
zipcommand creates an archive nameddeployment-package.zip. We exclude the.gitand.githubdirectories as they are not needed by the Lambda runtime.
- name: Install dependencies
  run: npm install

- name: Create ZIP deployment package
  run: zip -r deployment-package.zip . -x ".git/*" ".github/*"
Deploying the Function to AWS Lambda
The final step uses the AWS Command Line Interface (CLI), which is pre-installed on GitHub’s runners. The aws lambda update-function-code command takes our newly created ZIP file and updates the code of the specified Lambda function.
- name: Deploy to AWS Lambda
  run: |
    aws lambda update-function-code \
      --function-name YOUR_FUNCTION_NAME \
      --zip-file fileb://deployment-package.zip
Commit and push this workflow file to your GitHub repository. The action will run automatically, and you should see your Lambda function’s code updated in the AWS console!
Best Practices and Advanced Techniques
Our current setup is great, but in a real-world scenario, you’ll want more sophistication.
- Managing Environments: Use different branches (e.g.,
develop,staging,main) to deploy to different AWS accounts or environments. You can create separate workflows or use conditional logic within a single workflow based on the branch name (if: github.ref == 'refs/heads/main'). - Testing: Add a dedicated step in your workflow to run unit or integration tests before deploying. If the tests fail, the workflow stops, preventing a bad deployment.
- name: Run unit tests
run: npm test - Frameworks: For complex applications, consider using a serverless framework like AWS SAM or the Serverless Framework. They simplify resource definition (IAM roles, API Gateways, etc.) and have better deployment tooling that can be easily integrated into GitHub Actions.
Frequently Asked Questions
- Q: Is using GitHub Actions for AWS deployments free?
- A: GitHub provides a generous free tier for public repositories and a significant number of free minutes per month for private repositories. For most small to medium-sized projects, this is more than enough. Heavy usage might require a paid plan.
- Q: Why use OIDC instead of storing AWS access keys in GitHub Secrets?
- A: Security. Long-lived access keys are a major security risk. If compromised, they provide permanent access to your AWS account. OIDC uses short-lived tokens that are automatically generated for each workflow run, significantly reducing the attack surface. It’s the modern best practice.
- Q: Can I use this workflow to deploy other AWS services?
- A: Absolutely! The core concept of authenticating with
aws-actions/configure-aws-credentialsis universal. You just need to change the final `run` steps to use the appropriate AWS CLI commands for other services like S3, ECS, or CloudFormation.
Conclusion
You have successfully built a robust, secure, and automated CI/CD pipeline. By leveraging the power of an AWS Lambda GitHub Actions integration, you’ve removed manual steps, increased deployment velocity, and improved the overall stability of your serverless application. This foundation allows you to add more complex steps like automated testing, multi-environment deployments, and security scanning, enabling your team to build and innovate with confidence. Adopting this workflow is a significant step toward maturing your DevOps practices for serverless development. Thank you for reading the DevopsRoles page!