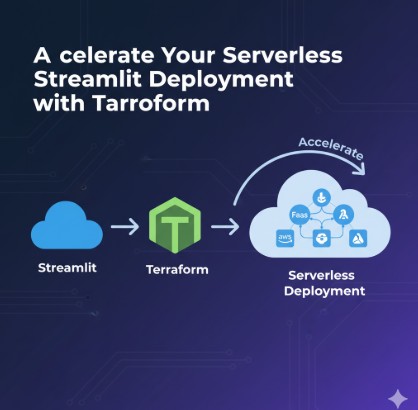
In the world of data science and machine learning, rapidly developing interactive web applications is crucial for showcasing models, visualizing data, and building internal tools. Streamlit has emerged as a powerful, user-friendly framework that empowers developers and data scientists to create beautiful, performant data apps with pure Python code. However, taking these applications from local development to a scalable, cost-efficient production environment often presents a significant challenge, especially when aiming for a serverless Streamlit deployment.
Traditional deployment methods can involve manual server provisioning, complex dependency management, and a constant struggle with scalability and maintenance. This article will guide you through an automated, repeatable, and robust approach to achieving a serverless Streamlit deployment using Terraform. By combining the agility of Streamlit with the infrastructure-as-code (IaC) prowess of Terraform, you’ll learn how to build a scalable, cost-effective, and reproducible deployment pipeline, freeing you to focus on developing your innovative data applications rather than managing underlying infrastructure.
Table of Contents
- 1 Understanding Streamlit and Serverless Architectures
- 2 Challenges in Traditional Streamlit Deployment
- 3 Terraform: The Infrastructure as Code Solution
- 4 Designing Your Serverless Streamlit Architecture with Terraform
- 5 Step-by-Step: Accelerating Your Serverless Streamlit Deployment with Terraform on AWS
- 6 Frequently Asked Questions
- 6.1 Q1: Why not use Streamlit Cloud for serverless deployment?
- 6.2 Q2: Can I use this approach for other web frameworks or Python apps?
- 6.3 Q3: How do I handle stateful Streamlit apps in a serverless environment?
- 6.4 Q4: What are the cost implications of Streamlit on AWS Fargate?
- 6.5 Q5: Is Terraform suitable for small Streamlit projects?
- 7 Conclusion
Understanding Streamlit and Serverless Architectures
Before diving into the mechanics of automation, let’s establish a clear understanding of the core technologies involved: Streamlit and serverless computing.
What is Streamlit?
Streamlit is an open-source Python library that transforms data scripts into interactive web applications in minutes. It simplifies the web development process for Pythonistas by allowing them to create custom user interfaces with minimal code, without needing extensive knowledge of front-end frameworks like React or Angular.
- Simplicity: Write Python scripts, and Streamlit handles the UI generation.
- Interactivity: Widgets like sliders, buttons, text inputs are easily integrated.
- Data-centric: Optimized for displaying and interacting with data, perfect for machine learning models and data visualizations.
- Rapid Prototyping: Speeds up the iteration cycle for data applications.
The Appeal of Serverless
Serverless computing is an execution model where the cloud provider dynamically manages the allocation and provisioning of servers. You, as the developer, write and deploy your code, and the cloud provider handles all the underlying infrastructure concerns like scaling, patching, and maintenance. This model offers several compelling advantages:
- No Server Management: Eliminate the operational overhead of provisioning, maintaining, and updating servers.
- Automatic Scaling: Resources automatically scale up or down based on demand, ensuring your application handles traffic spikes without manual intervention.
- Pay-per-Execution: You only pay for the compute time and resources your application consumes, leading to significant cost savings, especially for applications with intermittent usage.
- High Availability: Serverless platforms are designed for high availability and fault tolerance, distributing your application across multiple availability zones.
- Faster Time-to-Market: Developers can focus more on code and less on infrastructure, accelerating the deployment process.
While often associated with function-as-a-service (FaaS) platforms like AWS Lambda, the serverless paradigm extends to container-based services such as AWS Fargate or Google Cloud Run, which are excellent candidates for containerized Streamlit applications. Deploying Streamlit in a serverless manner allows your data applications to be highly available, scalable, and cost-efficient, adapting seamlessly to varying user loads.
Challenges in Traditional Streamlit Deployment
Even with Streamlit’s simplicity, traditional deployment can quickly become complex, hindering the benefits of rapid application development.
Manual Configuration Headaches
Deploying a Streamlit application typically involves setting up a server, installing Python, managing dependencies, configuring web servers (like Nginx or Gunicorn), and ensuring proper networking and security. This manual process is:
- Time-Consuming: Each environment (development, staging, production) requires repetitive setup.
- Prone to Errors: Human error can lead to misconfigurations, security vulnerabilities, or application downtime.
- Inconsistent: Subtle differences between environments can cause the “it works on my machine” syndrome.
Lack of Reproducibility and Version Control
Without a defined process, infrastructure changes are often undocumented or managed through ad-hoc scripts. This leads to:
- Configuration Drift: Environments diverge over time, making debugging and maintenance difficult.
- Poor Auditability: It’s hard to track who made what infrastructure changes and why.
- Difficulty in Rollbacks: Reverting to a previous, stable infrastructure state becomes a guessing game.
Scaling and Maintenance Overhead
Once deployed, managing the operational aspects of a Streamlit app on traditional servers adds further burden:
- Scaling Challenges: Manually adding or removing server instances, configuring load balancers, and adjusting network settings to match demand is complex and slow.
- Patching and Updates: Keeping operating systems, libraries, and security patches up-to-date requires constant attention.
- Resource Utilization: Under-provisioning leads to performance issues, while over-provisioning wastes resources and money.
Terraform: The Infrastructure as Code Solution
This is where Infrastructure as Code (IaC) tools like Terraform become indispensable. Terraform addresses these deployment challenges head-on by enabling you to define your cloud infrastructure in a declarative language.
What is Terraform?
Terraform, developed by HashiCorp, is an open-source IaC tool that allows you to define and provision cloud and on-premise resources using human-readable configuration files. It supports a vast ecosystem of providers for various cloud platforms (AWS, Azure, GCP, etc.), SaaS offerings, and custom services.
- Declarative Language: You describe the desired state of your infrastructure, and Terraform figures out how to achieve it.
- Providers: Connect to various cloud services (e.g.,
aws,google,azurerm) to manage their resources. - Resources: Individual components of your infrastructure (e.g., a virtual machine, a database, a network).
- State File: Terraform maintains a state file that maps your configuration to the real-world resources it manages. This allows it to understand what changes need to be made.
For more detailed information, refer to the Terraform Official Documentation.
Benefits for Serverless Streamlit Deployment
Leveraging Terraform for your serverless Streamlit deployment offers numerous advantages:
- Automation and Consistency: Automate the provisioning of all necessary cloud resources, ensuring consistent deployments across environments.
- Reproducibility: Infrastructure becomes code, meaning you can recreate your entire environment from scratch with a single command.
- Version Control: Store your infrastructure definitions in a version control system (like Git), enabling change tracking, collaboration, and easy rollbacks.
- Cost Optimization: Define resources precisely, avoid over-provisioning, and easily manage serverless resources that scale down to zero when not in use.
- Security Best Practices: Embed security configurations directly into your code, ensuring compliance and reducing the risk of misconfigurations.
- Reduced Manual Effort: Developers and DevOps teams spend less time on manual configuration and more time on value-added tasks.
Designing Your Serverless Streamlit Architecture with Terraform
A robust serverless architecture for Streamlit needs several components to ensure scalability, security, and accessibility. We’ll focus on AWS as a primary example, as its services like Fargate are well-suited for containerized applications.
Choosing a Serverless Platform for Streamlit
While AWS Lambda is a serverless function service, Streamlit applications typically require a persistent process and more memory than a standard Lambda function provides, making direct deployment challenging. Instead, container-based serverless options are preferred:
- AWS Fargate (with ECS): A serverless compute engine for containers that works with Amazon Elastic Container Service (ECS). Fargate abstracts away the need to provision, configure, or scale clusters of virtual machines. You simply define your application’s resource requirements, and Fargate runs it. This is an excellent choice for Streamlit.
- Google Cloud Run: A fully managed platform for running containerized applications. It automatically scales your container up and down, even to zero, based on traffic.
- Azure Container Apps: A fully managed serverless container service that supports microservices and containerized applications.
For the remainder of this guide, we’ll use AWS Fargate as our target serverless environment due to its maturity and robust ecosystem, making it a powerful choice for a serverless Streamlit deployment.
Key Components for Deployment on AWS Fargate
A typical serverless Streamlit deployment on AWS using Fargate will involve:
- AWS ECR (Elastic Container Registry): A fully managed Docker container registry that makes it easy to store, manage, and deploy Docker images. Your Streamlit app’s Docker image will reside here.
- AWS ECS (Elastic Container Service): A highly scalable, high-performance container orchestration service that supports Docker containers. We’ll use it with Fargate launch type.
- AWS VPC (Virtual Private Cloud): Your isolated network in the AWS cloud, containing subnets, route tables, and network gateways.
- Security Groups: Act as virtual firewalls to control inbound and outbound traffic to your ECS tasks.
- Application Load Balancer (ALB): Distributes incoming application traffic across multiple targets, such as your ECS tasks. It also handles SSL termination and routing.
- AWS Route 53 (Optional): For managing your custom domain names and pointing them to your ALB.
- AWS Certificate Manager (ACM) (Optional): For provisioning SSL/TLS certificates for HTTPS.
Architecture Sketch:
User -> Route 53 (Optional) -> ALB -> VPC (Public/Private Subnets) -> Security Group -> ECS Fargate Task (Running Streamlit Container from ECR)
Step-by-Step: Accelerating Your Serverless Streamlit Deployment with Terraform on AWS
Let’s walk through the process of setting up your serverless Streamlit deployment using Terraform on AWS.
Prerequisites
- An AWS Account with sufficient permissions.
- AWS CLI installed and configured with your credentials.
- Docker installed on your local machine.
- Terraform installed on your local machine.
Step 1: Streamlit Application Containerization
First, you need to containerize your Streamlit application using Docker. Create a simple Streamlit app (e.g., app.py) and a Dockerfile in your project root.
app.py:
import streamlit as st

st.set_page_config(page_title="My Serverless Streamlit App")
st.title("Hello from Serverless Streamlit!")
st.write("This application is deployed on AWS Fargate using Terraform.")

name = st.text_input("What's your name?")
if name:
    st.write(f"Nice to meet you, {name}!")

st.sidebar.header("About")
st.sidebar.info("This is a simple demo app.")
requirements.txt:
streamlit==1.x.x # Use a specific version
Dockerfile:
# Use an official Python runtime as a parent image
FROM python:3.9-slim-buster

# Set the working directory in the container
WORKDIR /app

# Copy the current directory contents into the container at /app
COPY requirements.txt ./
COPY app.py ./

# Install any needed packages specified in requirements.txt
RUN pip install --no-cache-dir -r requirements.txt

# Make port 8501 available to the world outside this container
EXPOSE 8501

# Run app.py when the container launches
ENTRYPOINT ["streamlit", "run", "app.py", "--server.port=8501", "--server.enableCORS=false", "--server.enableXsrfProtection=false"]
Note: --server.enableCORS=false and --server.enableXsrfProtection=false are often needed when Streamlit is behind a load balancer to prevent connection issues. Adjust as per your security requirements.
Step 2: Initialize Terraform Project
Create a directory for your Terraform configuration (e.g., terraform-streamlit). Inside this directory, create the following files:
main.tf: Defines AWS resources.variables.tf: Declares input variables.outputs.tf: Specifies output values.
main.tf (initial provider configuration):
variable "region" {
  description = "AWS region"
  type        = string
  default     = "us-east-1" # Or your preferred region
}

variable "project_name" {
  description = "Name of the project for resource tagging"
  type        = string
  default     = "streamlit-fargate-app"
}

variable "vpc_cidr_block" {
  description = "CIDR block for the VPC"
  type        = string
  default     = "10.0.0.0/16"
}

variable "public_subnet_cidrs" {
  description = "List of CIDR blocks for public subnets"
  type        = list(string)
  default     = ["10.0.1.0/24", "10.0.2.0/24"] # Adjust based on your region's AZs
}

variable "container_port" {
  description = "Port on which the Streamlit container listens"
  type        = number
  default     = 8501
}
outputs.tf (initially empty, will be populated later):
/* No outputs defined yet */
Initialize your Terraform project:
terraform init
Step 3: Define AWS ECR Repository
Add the ECR repository definition to your main.tf. This is where your Docker image will be pushed.
resource "aws_ecr_repository" "streamlit_repo" {
  name                 = "${var.project_name}-repo"
  image_tag_mutability = "MUTABLE"

  image_scanning_configuration {
    scan_on_push = true
  }

  tags = {
    Project = var.project_name
  }
}

output "ecr_repository_url" {
  description = "URL of the ECR repository"
  value       = aws_ecr_repository.streamlit_repo.repository_url
}
Step 4: Build and Push Docker Image
Before deploying with Terraform, you need to build your Docker image and push it to the ECR repository created in Step 3. You’ll need the ECR repository URL from Terraform’s output.
# After `terraform apply`, get the ECR URL:
terraform output ecr_repository_url

# Example shell commands (replace with your ECR URL and desired tag):
# Login to ECR
aws ecr get-login-password --region us-east-1 | docker login --username AWS --password-stdin .dkr.ecr.us-east-1.amazonaws.com

# Build the Docker image
docker build -t ${var.project_name} .

# Tag the image
docker tag ${var.project_name}:latest .dkr.ecr.us-east-1.amazonaws.com/${var.project_name}-repo:latest

# Push the image to ECR
docker push .dkr.ecr.us-east-1.amazonaws.com/${var.project_name}-repo:latest
Step 5: Provision AWS ECS Cluster and Fargate Service
This is the core of your serverless Streamlit deployment. We’ll define the VPC, subnets, security groups, ECS cluster, task definition, and service, along with an Application Load Balancer.
Continue adding to your main.tf:
# --- Networking (VPC, Subnets, Internet Gateway) ---
resource "aws_vpc" "main" {
  cidr_block = var.vpc_cidr_block
  enable_dns_hostnames = true
  enable_dns_support   = true

  tags = {
    Name    = "${var.project_name}-vpc"
    Project = var.project_name
  }
}

resource "aws_internet_gateway" "gw" {
  vpc_id = aws_vpc.main.id

  tags = {
    Name    = "${var.project_name}-igw"
    Project = var.project_name
  }
}

resource "aws_subnet" "public" {
  count             = length(var.public_subnet_cidrs)
  vpc_id            = aws_vpc.main.id
  cidr_block        = var.public_subnet_cidrs[count.index]
  availability_zone = data.aws_availability_zones.available.names[count.index] # Dynamically get AZs
  map_public_ip_on_launch = true # Fargate needs public IPs in public subnets for external connectivity

  tags = {
    Name    = "${var.project_name}-public-subnet-${count.index}"
    Project = var.project_name
  }
}

data "aws_availability_zones" "available" {
  state = "available"
}

resource "aws_route_table" "public" {
  vpc_id = aws_vpc.main.id

  route {
    cidr_block = "0.0.0.0/0"
    gateway_id = aws_internet_gateway.gw.id
  }

  tags = {
    Name    = "${var.project_name}-public-rt"
    Project = var.project_name
  }
}

resource "aws_route_table_association" "public" {
  count          = length(aws_subnet.public)
  subnet_id      = aws_subnet.public[count.index].id
  route_table_id = aws_route_table.public.id
}

# --- Security Groups ---
resource "aws_security_group" "alb" {
  vpc_id      = aws_vpc.main.id
  name        = "${var.project_name}-alb-sg"
  description = "Allow HTTP/HTTPS access to ALB"

  ingress {
    from_port   = 80
    to_port     = 80
    protocol    = "tcp"
    cidr_blocks = ["0.0.0.0/0"]
  }

  ingress {
    from_port   = 443
    to_port     = 443
    protocol    = "tcp"
    cidr_blocks = ["0.0.0.0/0"]
  }

  egress {
    from_port   = 0
    to_port     = 0
    protocol    = "-1"
    cidr_blocks = ["0.0.0.0/0"]
  }

  tags = {
    Project = var.project_name
  }
}

resource "aws_security_group" "ecs_task" {
  vpc_id      = aws_vpc.main.id
  name        = "${var.project_name}-ecs-task-sg"
  description = "Allow inbound access from ALB to ECS tasks"

  ingress {
    from_port       = var.container_port
    to_port         = var.container_port
    protocol        = "tcp"
    security_groups = [aws_security_group.alb.id]
  }

  egress {
    from_port   = 0
    to_port     = 0
    protocol    = "-1"
    cidr_blocks = ["0.0.0.0/0"]
  }

  tags = {
    Project = var.project_name
  }
}

# --- ECS Cluster ---
resource "aws_ecs_cluster" "streamlit_cluster" {
  name = "${var.project_name}-cluster"

  tags = {
    Project = var.project_name
  }
}

# --- IAM Roles for ECS Task Execution ---
resource "aws_iam_role" "ecs_task_execution_role" {
  name = "${var.project_name}-ecs-task-execution-role"

  assume_role_policy = jsonencode({
    Version = "2012-10-17"
    Statement = [
      {
        Action = "sts:AssumeRole"
        Effect = "Allow"
        Principal = {
          Service = "ecs-tasks.amazonaws.com"
        }
      },
    ]
  })

  tags = {
    Project = var.project_name
  }
}

resource "aws_iam_role_policy_attachment" "ecs_task_execution_policy" {
  role       = aws_iam_role.ecs_task_execution_role.name
  policy_arn = "arn:aws:iam::aws:policy/service-role/AmazonECSTaskExecutionRolePolicy"
}

# --- ECS Task Definition ---
resource "aws_ecs_task_definition" "streamlit_task" {
  family                   = "${var.project_name}-task"
  requires_compatibilities = ["FARGATE"]
  network_mode             = "awsvpc"
  cpu                      = "256" # Adjust CPU and memory as needed for your app
  memory                   = "512"
  execution_role_arn       = aws_iam_role.ecs_task_execution_role.arn

  container_definitions = jsonencode([
    {
      name        = var.project_name
      image       = "${aws_ecr_repository.streamlit_repo.repository_url}:latest" # Ensure image is pushed to ECR
      cpu         = 256
      memory      = 512
      essential   = true
      portMappings = [
        {
          containerPort = var.container_port
          hostPort      = var.container_port
          protocol      = "tcp"
        }
      ]
      logConfiguration = {
        logDriver = "awslogs"
        options = {
          "awslogs-group"         = aws_cloudwatch_log_group.streamlit_log_group.name
          "awslogs-region"        = var.region
          "awslogs-stream-prefix" = "ecs"
        }
      }
    }
  ])

  tags = {
    Project = var.project_name
  }
}

# --- CloudWatch Log Group for ECS Tasks ---
resource "aws_cloudwatch_log_group" "streamlit_log_group" {
  name              = "/ecs/${var.project_name}"
  retention_in_days = 7 # Adjust log retention as needed

  tags = {
    Project = var.project_name
  }
}

# --- Application Load Balancer (ALB) ---
resource "aws_lb" "streamlit_alb" {
  name               = "${var.project_name}-alb"
  internal           = false
  load_balancer_type = "application"
  security_groups    = [aws_security_group.alb.id]
  subnets            = aws_subnet.public.*.id # Use all public subnets

  tags = {
    Project = var.project_name
  }
}

resource "aws_lb_target_group" "streamlit_tg" {
  name        = "${var.project_name}-tg"
  port        = var.container_port
  protocol    = "HTTP"
  vpc_id      = aws_vpc.main.id
  target_type = "ip" # Fargate uses ENIs (IPs) as targets

  health_check {
    path                = "/" # Streamlit's default health check path
    protocol            = "HTTP"
    matcher             = "200-399"
    interval            = 30
    timeout             = 5
    healthy_threshold   = 2
    unhealthy_threshold = 2
  }

  tags = {
    Project = var.project_name
  }
}

resource "aws_lb_listener" "http" {
  load_balancer_arn = aws_lb.streamlit_alb.arn
  port              = 80
  protocol          = "HTTP"

  default_action {
    type             = "forward"
    target_group_arn = aws_lb_target_group.streamlit_tg.arn
  }
}

# --- ECS Service ---
resource "aws_ecs_service" "streamlit_service" {
  name            = "${var.project_name}-service"
  cluster         = aws_ecs_cluster.streamlit_cluster.id
  task_definition = aws_ecs_task_definition.streamlit_task.arn
  desired_count   = 1 # Start with 1 instance, can be scaled with auto-scaling

  launch_type = "FARGATE"

  network_configuration {
    subnets         = aws_subnet.public.*.id
    security_groups = [aws_security_group.ecs_task.id]
    assign_public_ip = true # Required for Fargate tasks in public subnets to reach ECR, etc.
  }

  load_balancer {
    target_group_arn = aws_lb_target_group.streamlit_tg.arn
    container_name   = var.project_name
    container_port   = var.container_port
  }

  lifecycle {
    ignore_changes = [desired_count] # Prevents Terraform from changing desired_count if auto-scaling is enabled later
  }

  tags = {
    Project = var.project_name
  }

  depends_on = [
    aws_lb_listener.http
  ]
}

# Output the ALB DNS name
output "streamlit_app_url" {
  description = "The URL of the deployed Streamlit application"
  value       = aws_lb.streamlit_alb.dns_name
}
Remember to update variables.tf with required variables (like project_name, vpc_cidr_block, public_subnet_cidrs, container_port) if not already done. The outputs.tf will now have the streamlit_app_url.
Step 6: Deploy and Access
Navigate to your Terraform project directory and run the following commands:
# Review the plan to see what resources will be created
terraform plan

# Apply the changes to create the infrastructure
terraform apply --auto-approve

# Get the URL of your deployed Streamlit application
terraform output streamlit_app_url
Once terraform apply completes successfully, you will get an ALB DNS name. Paste this URL into your browser, and you should see your Streamlit application running!
Advanced Considerations
Custom Domains and HTTPS
For a production serverless Streamlit deployment, you’ll want a custom domain and HTTPS. This involves:
- AWS Certificate Manager (ACM): Request and provision an SSL/TLS certificate.
- AWS Route 53: Create a DNS A record (or CNAME) pointing your domain to the ALB.
- ALB Listener: Add an HTTPS listener (port 443) to your ALB, attaching the ACM certificate and forwarding traffic to your target group.
CI/CD Integration
Automate the build, push, and deployment process with CI/CD tools like GitHub Actions, GitLab CI, or AWS CodePipeline/CodeBuild. This ensures that every code change triggers an automated infrastructure update and application redeployment.
A typical CI/CD pipeline would:
- On code push to main branch:
- Build Docker image.
- Push image to ECR.
- Run
terraform init,terraform plan,terraform applyto update the ECS service with the new image tag.
Logging and Monitoring
Ensure your ECS tasks are configured to send logs to AWS CloudWatch Logs (as shown in the task definition). You can then use CloudWatch Alarms and Dashboards for monitoring your application’s health and performance.
Terraform State Management
For collaborative projects and production environments, it’s crucial to store your Terraform state file remotely. Amazon S3 is a common choice for this, coupled with DynamoDB for state locking to prevent concurrent modifications.
Add this to your main.tf:
terraform {
  backend "s3" {
    bucket         = "your-terraform-state-bucket" # Replace with your S3 bucket name
    key            = "streamlit-fargate/terraform.tfstate"
    region         = "us-east-1"
    encrypt        = true
    dynamodb_table = "your-terraform-state-lock-table" # Replace with your DynamoDB table name
  }
}
You would need to manually create the S3 bucket and DynamoDB table before initializing Terraform with this backend configuration.
Frequently Asked Questions
Q1: Why not use Streamlit Cloud for serverless deployment?
Streamlit Cloud offers the simplest way to deploy Streamlit apps, often with a few clicks or GitHub integration. It’s a fantastic option for quick prototypes, personal projects, and even some production use cases where its features meet your needs. However, using Terraform for a serverless Streamlit deployment on a cloud provider like AWS gives you:
- Full control: Over the underlying infrastructure, networking, security, and resource allocation.
- Customization: Ability to integrate with a broader AWS ecosystem (databases, queues, machine learning services) that might be specific to your architecture.
- Cost Optimization: Fine-tuned control over resource sizing and auto-scaling rules can sometimes lead to more optimized costs for specific traffic patterns.
- IaC Benefits: All the advantages of version-controlled, auditable, and repeatable infrastructure.
The choice depends on your project’s complexity, governance requirements, and existing cloud strategy.
Q2: Can I use this approach for other web frameworks or Python apps?
Absolutely! The approach demonstrated here for containerizing a Streamlit app and deploying it on AWS Fargate with Terraform is highly generic. Any web application or Python service that can be containerized with Docker can leverage this identical pattern for a scalable, serverless deployment. You would simply swap out the Streamlit specific code and port for your application’s requirements.
Q3: How do I handle stateful Streamlit apps in a serverless environment?
Serverless environments are inherently stateless. For Streamlit applications requiring persistence (e.g., storing user sessions, uploaded files, or complex model outputs), you must integrate with external state management services:
- Databases: Use managed databases like AWS RDS (PostgreSQL, MySQL), DynamoDB, or ElastiCache (Redis) for session management or persistent data storage.
- Object Storage: For file uploads or large data blobs, AWS S3 is an excellent choice.
- External Cache: Use Redis (via AWS ElastiCache) for caching intermediate results or session data.
Terraform can be used to provision and configure these external state services alongside your Streamlit deployment.
Q4: What are the cost implications of Streamlit on AWS Fargate?
AWS Fargate is a pay-per-use service, meaning you are billed for the amount of vCPU and memory resources consumed by your application while it’s running. Costs are generally competitive, especially for applications with variable or intermittent traffic, as Fargate scales down when not in use. Factors influencing cost include:
- CPU and Memory: The amount of resources allocated to each task.
- Number of Tasks: How many instances of your Streamlit app are running.
- Data Transfer: Ingress and egress data transfer costs.
- Other AWS Services: Costs for ALB, ECR, CloudWatch, etc.
Compared to running a dedicated EC2 instance 24/7, Fargate can be significantly more cost-effective if your application experiences idle periods. For very high, consistent traffic, dedicated EC2 instances might sometimes offer better price performance, but at the cost of operational overhead.
Q5: Is Terraform suitable for small Streamlit projects?
For a single, small Streamlit app that you just want to get online quickly and don’t foresee much growth or infrastructure complexity, the initial learning curve and setup time for Terraform might seem like overkill. In such cases, Streamlit Cloud or manual deployment to a simple VM could be faster. However, if you anticipate:
- Future expansion or additional services.
- Multiple environments (dev, staging, prod).
- Collaboration with other developers.
- The need for robust CI/CD pipelines.
- Any form of compliance or auditing requirements.
Then, even for a “small” project, investing in Terraform from the start pays dividends in the long run by providing a solid foundation for scalable, maintainable, and cost-efficient infrastructure.
Conclusion
Deploying Streamlit applications in a scalable, reliable, and cost-effective manner is a common challenge for data practitioners and developers. By embracing the power of Infrastructure as Code with Terraform, you can significantly accelerate your serverless Streamlit deployment process, transforming a manual, error-prone endeavor into an automated, version-controlled pipeline.
This comprehensive guide has walked you through containerizing your Streamlit application, defining your AWS infrastructure using Terraform, and orchestrating its deployment on AWS Fargate. You now possess the knowledge to build a robust foundation for your data applications, ensuring they can handle varying loads, remain highly available, and adhere to modern DevOps principles. Embracing this automated approach will not only streamline your current projects but also empower you to manage increasingly complex cloud architectures with confidence and efficiency. Invest in IaC; it’s the future of cloud resource management.
Thank you for reading the DevopsRoles page!